Importing Demo
We are providing you two methods for importing demo contents: Automatic and Manual. You can follow either one of these methods.
Notice: please make sure that all theme required plugins are installed and activated.
There are 2 ways to import:
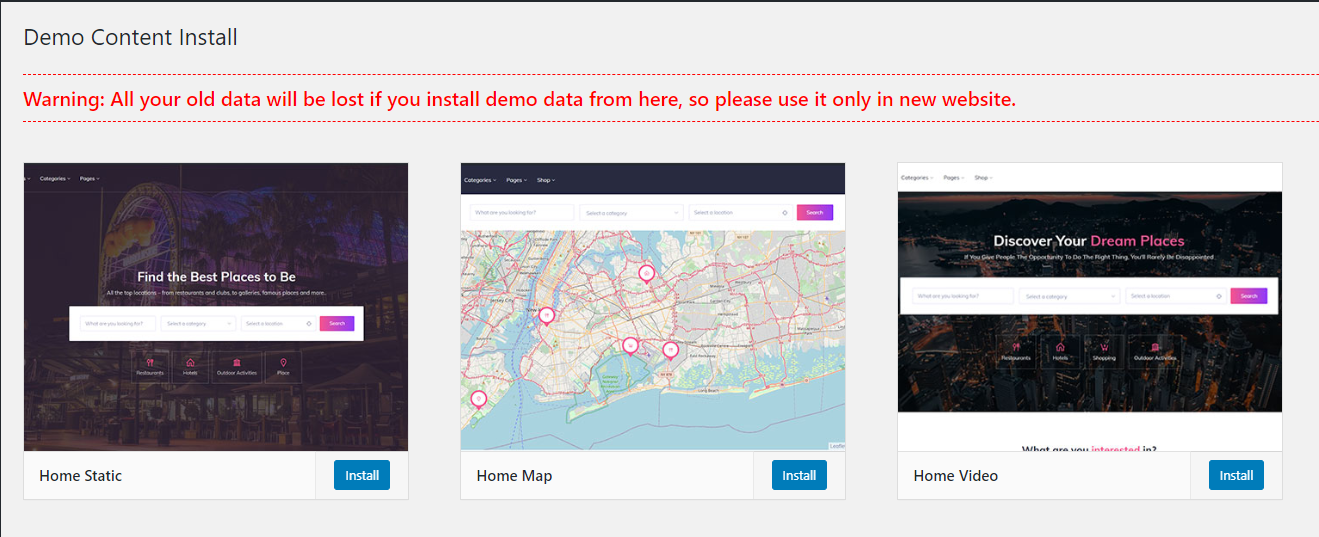
 On this page, click on the Install button for installing the demo.

- One-Click Import(Recommended)
- Import Manual
One-Click Import
This method will remove all your existing data, so use this method only on the fresh website. This procedure will be faster because you just have to do one click and then everything will happen automatically. If you want an exact clone of the demo website without doing any manual configuration after importing data then this method is appropriate for you. ** Note: Before proceeding, please remember that when you are done with the demo import, all existing settings and contents will be removed and replaced by the demo contents. So it is highly recommended that you should only do this on a fresh site. ** First please make sure that Direo Parent Theme is activated on your site, then navigate to Tools -> Demo Content Install. Or alternatively, navigate to Plugins -> WpWax Demo Importer -> Install Demo Contents. On this page, click on the Install button for installing the demo.

It will take some time for importing the demo contents.
After importing demo data, please update your permalink. To update permalink, navigate to Settings -> Permalink and then click on the Save Settings button. If you face any issue in the demo installation process, please try import manualImport Manual
- First, install and activate plugin One Click Demo Import. Here's the plugin link: https://wordpress.org/plugins/one-click-demo-import/
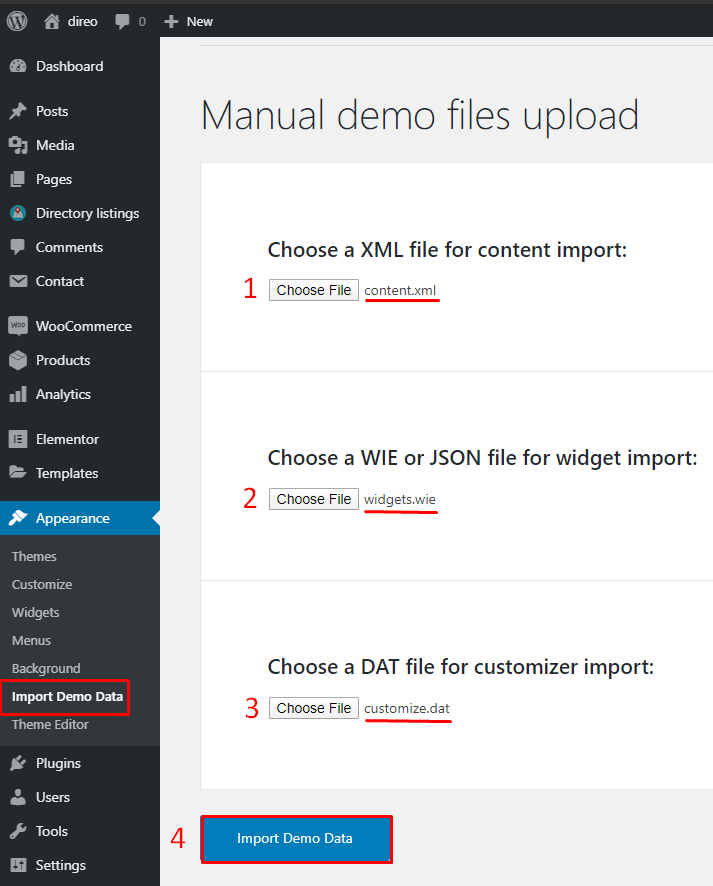
- From the Admin menu, navigate to Appearance -> Import Demo Data. then download the .zip file from here(files) and extract it
- On this page, you have to choose 3 files content.xml, widgets.wie, customize.dat, from the extracted folder, then hit the 'Import Demo Data' button.

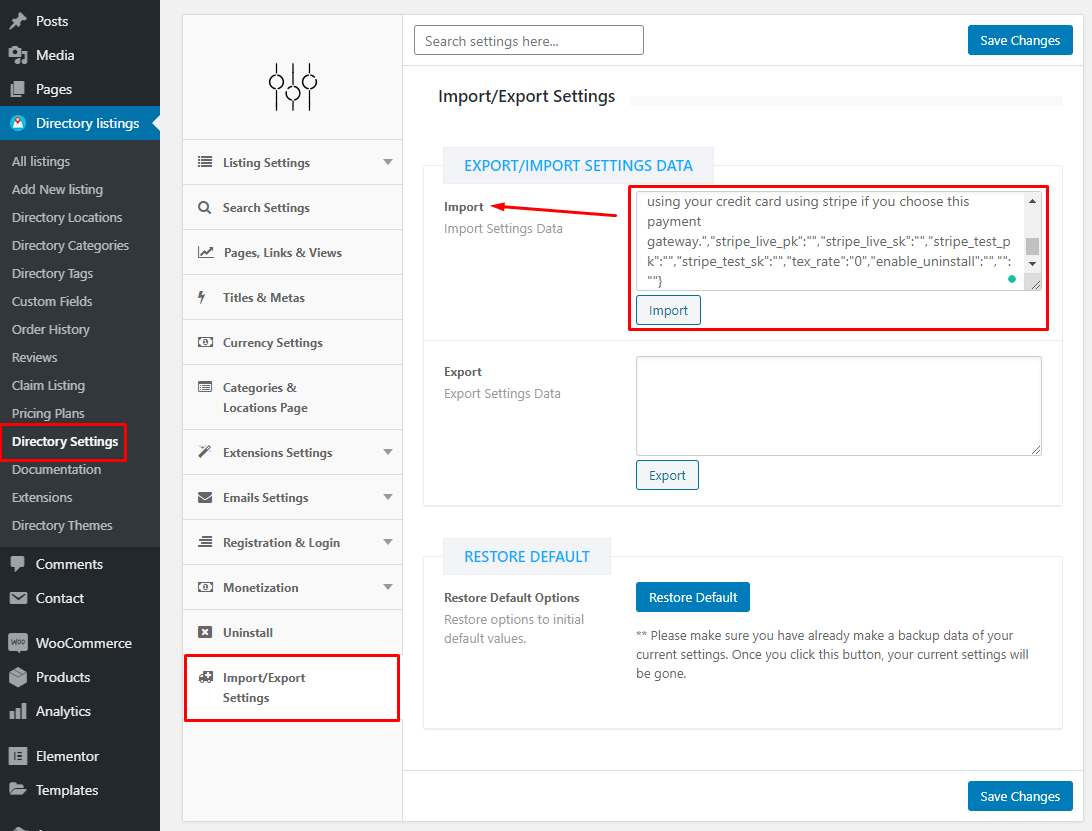
- After importing demo data, download this .zip file and extract it, then copy the file codes and paste it from Directorist Settings >> Import/Export Settings in Import field then hit the Import button.

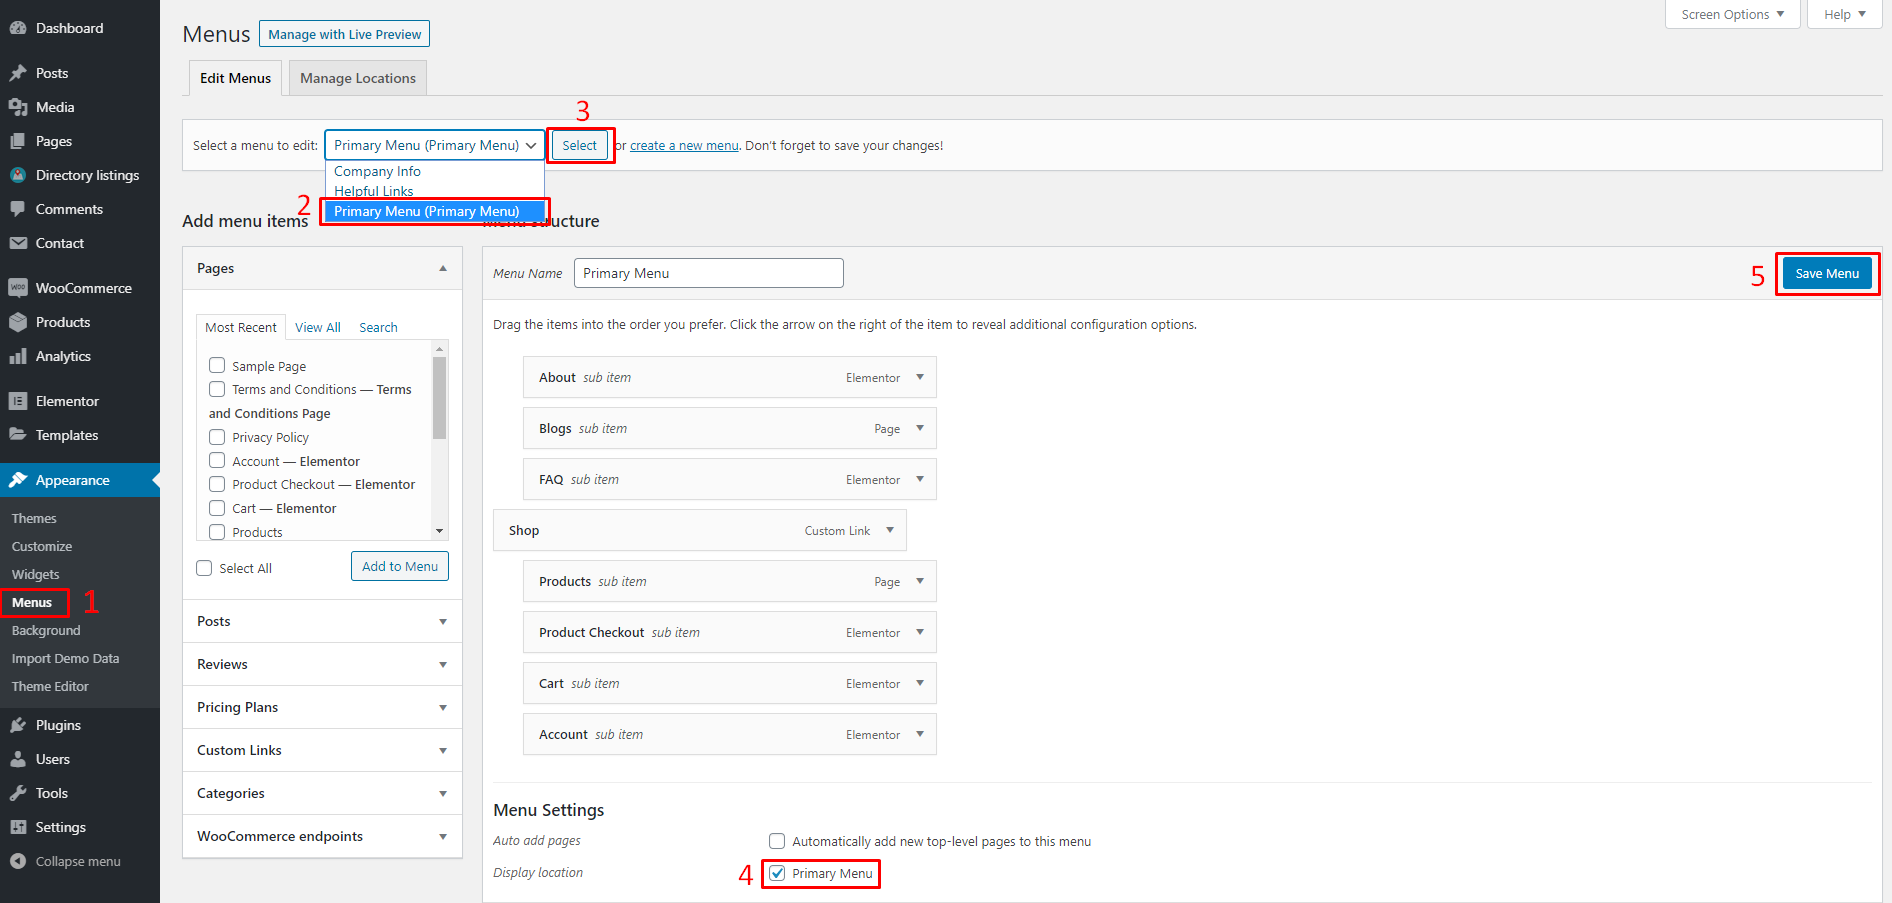
- After import please update your permalink. To update permalink, navigate to Settings -> Permalink and set Post name then click on Save Settings button. Then Set your Primary menu from Appearance >> Menus.

Last Updated: June 2nd, 2020
