Installation
First of all, you will need a working WordPress installation. To install WordPress CMS, please
see the WordPress Codex. If you are new to WordPress these links can help later on the road:
 Once the theme is successfully installed on your WordPress, you can "Activate" it via the
installation page.
Once the theme is successfully installed on your WordPress, you can "Activate" it via the
installation page.
 This notice warns you about 7 plugins that are required and recommended to be installed along with the theme. Click on Begin installing plugins to install/activate the plugins one by one.
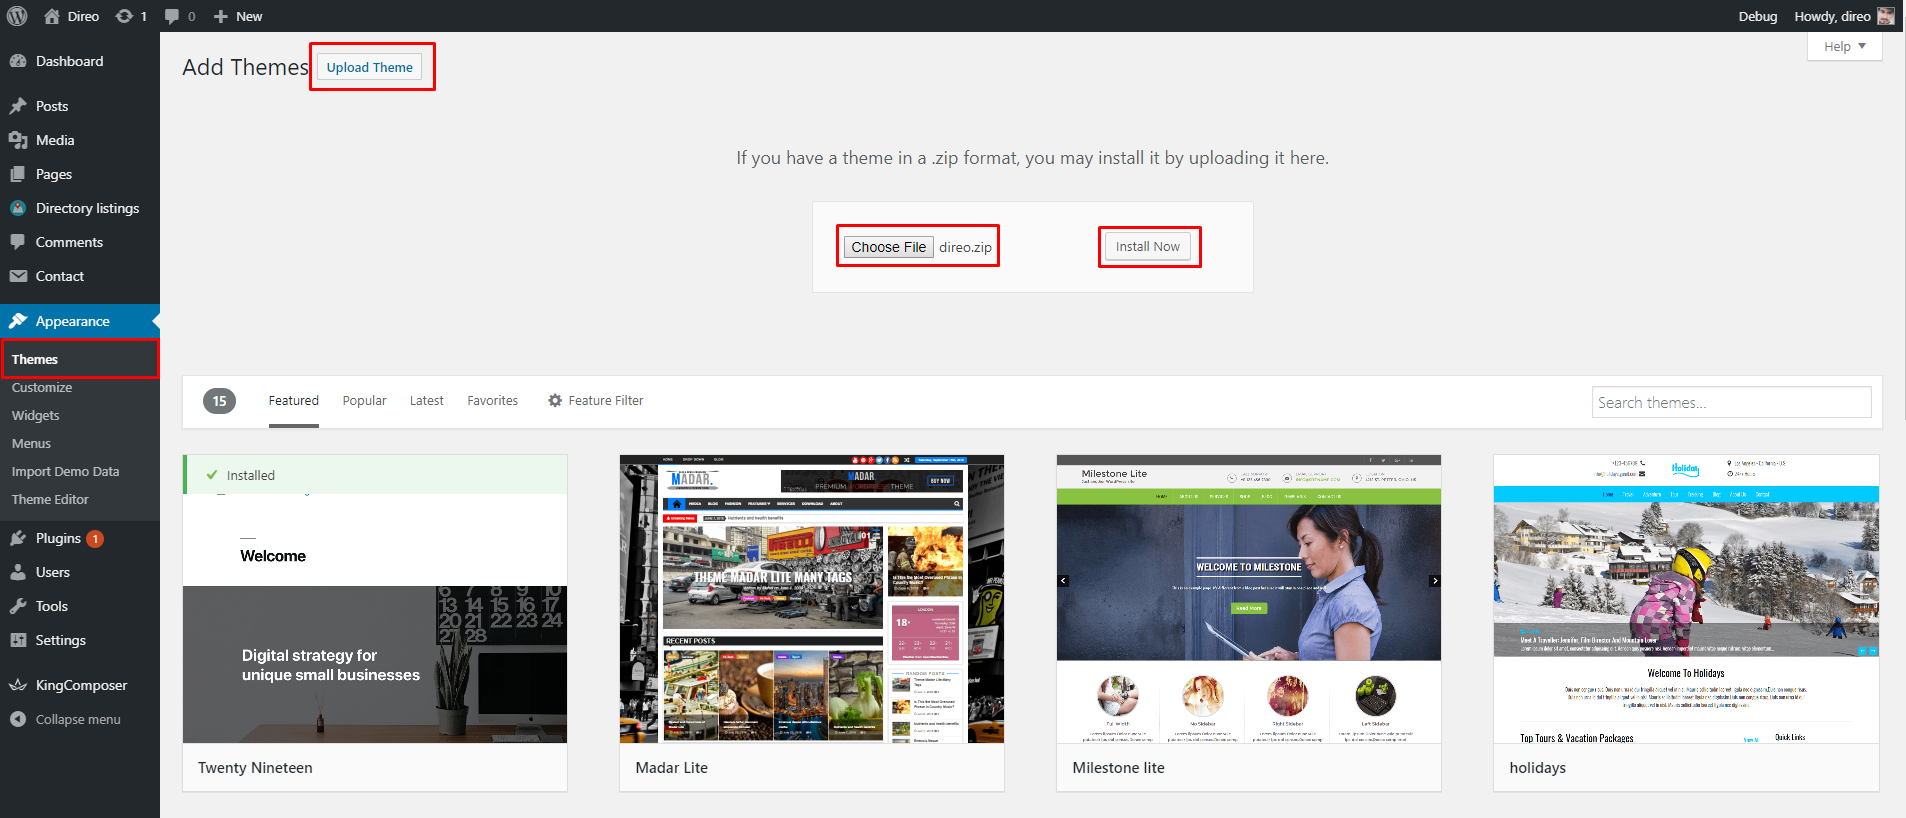
Theme Installation via WordPress
This installation is the easiest and recommended way to install the dList theme. Follow these steps below: When you download the zip file at first unzip it to show all content. In this theme following items are Included.- dlist.zip
- dlist-child.zip
Once the theme is successfully installed on your WordPress, you can "Activate" it via the
installation page.
Theme Installation via FTP
If you want to upload the dList theme through FTP client then Follow these steps below:-
- Step 1 - Log in to your hosting server via FTP client (like FileZilla)
- Step 2 - Navigate to the folder /wp-content/themes
- Step 3 - Upload "dlist.zip" extracted content
- Step 4 - Log in to your WordPress Installation
- Step 5 - Navigate to Appearance > Themes
- Step 6 - Find the dList theme and activate it
Installing Required/Recommended Plugins
After you have activated dList, you will see a notice at the top of the screen.This notice warns you about 7 plugins that are required and recommended to be installed along with the theme. Click on Begin installing plugins to install/activate the plugins one by one.
- Directorist – Business Directory Plugin (required)
- dList Extension (required)
- dList Core (required)
- Kirki (required)
- Elementor(required)
- Contact Form 7 (optional)
- WpWax Demo Importer (optional)
Video Overview:
Last Updated: June 1st, 2020