Directorist supports most of the popular gateways including Bank Transfer, PayPal, and Stripe
Bank Transfer
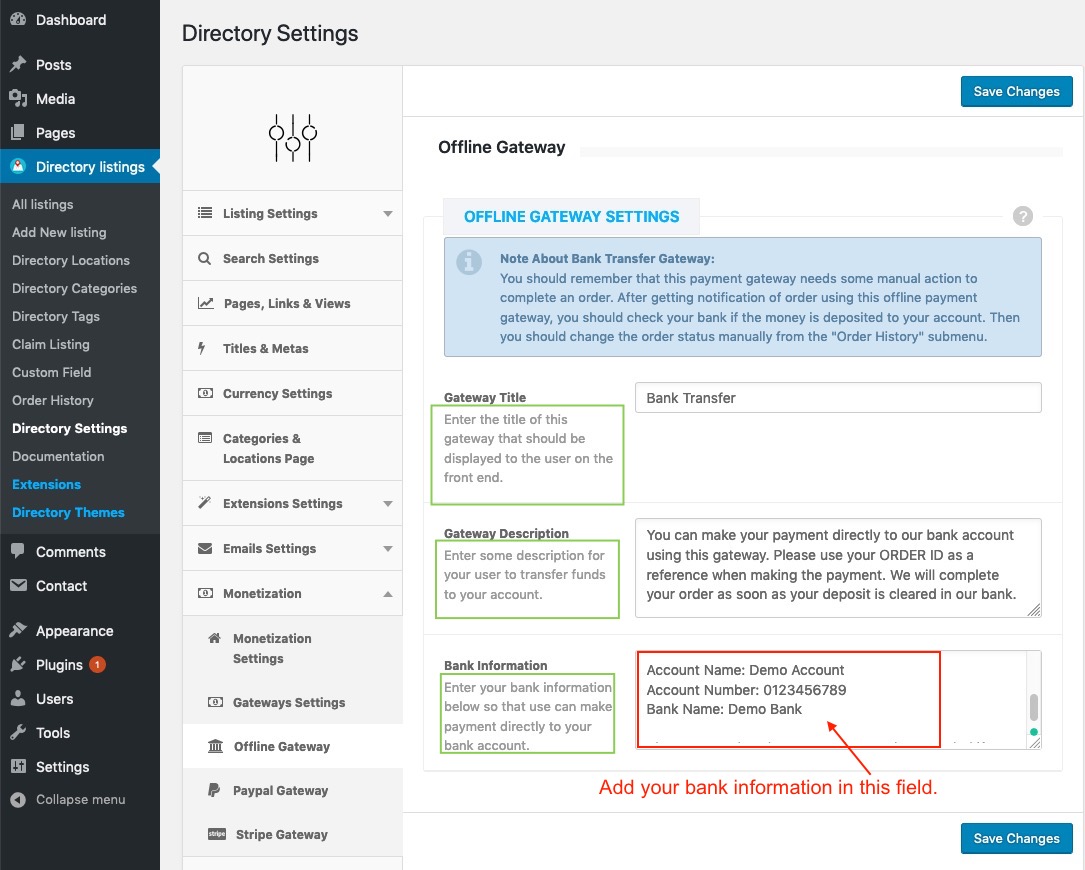
In the gateway settings page ( Dashboard > Directorist Listings > Directorist Settings > Monetization > Gateway Settings), if you choose to use the offline gateway which is available for free with Directorist, you need to add your bank information so to that user can pay you properly.
Visit Dashboard > Directorist Listings > Directorist Settings > Monetization > Offline Gateway settings page and add your bank info in the Bank Information field. After updating your bank information, do not forget to save all changes.
Offline Gateway (Bank Transfer)Setup
PayPal
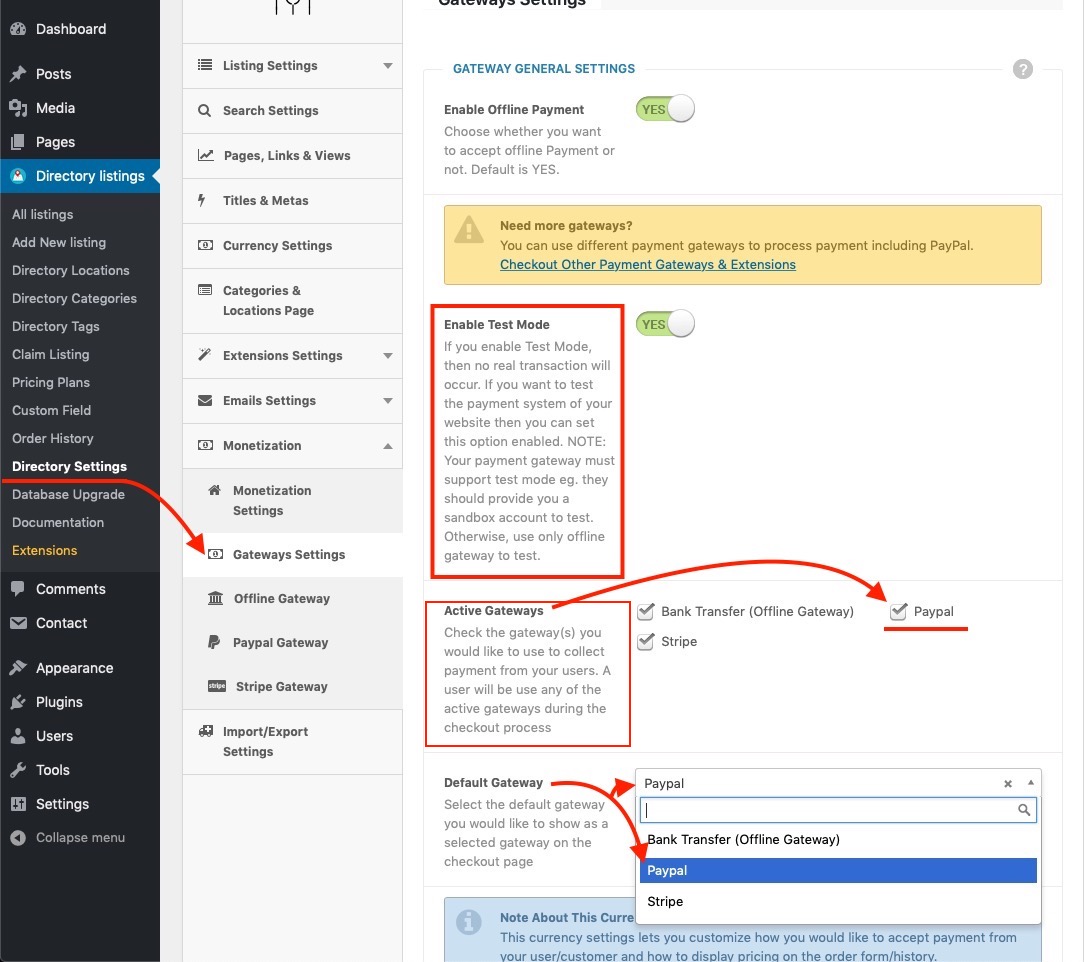
Go to the Gateway Settings Tab and Configure the following settings:
Active Gateways: Active gateways will be displayed in the checkout page. Check the PayPal Gateway in this field. Your users now will be able to pay using the PayPal Gateway.
Default Gateway: You can show PayPal as the default gateway in the checkout page. The default gateway will be selected by default. Select the PayPal Gateway in the Default Gateway Dropdown and save the changes. See the screenshots below.
Enabled Test Mode(OPTIONAL): If you want to test the integration of your gateway, then set the "Enable Test Mode" to "Yes". No live transaction will occur if the test mode is enabled.
You must disable the test mode to collect payment from users on a live site by setting the "Enable Test Mode" option to "No".
Configuring Gateway and Setting PayPal Gateway as Default Gateway
Next, go to the PayPal Gateway Tab and set your PayPal business email and customize the Title and description of the gateway. The title and description of the gateway will be displayed in the checkout page. See the screenshots below.
Configuring PayPal Gateway
Stripe
go to the Gateway Settings Tab and Configure the following settings:
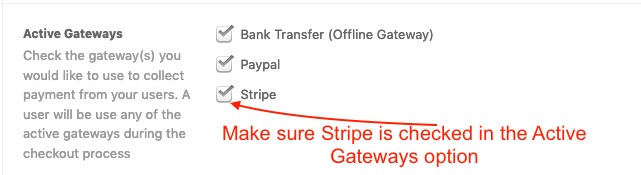
Active Gateways: Active gateways will be displayed in the checkout page. Check the Stripe Gateway in this field. Your users now will be able to pay using the Stripe Gateway.
Adding Stripe in the active gateways list
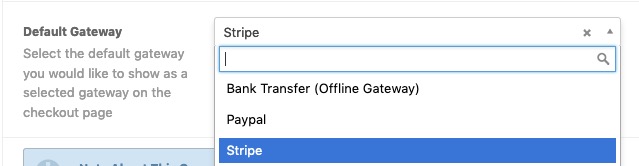
Default Gateway: You can show Stripe as the default gateway in the checkout page. The default gateway will be selected by default. Select the Stripe Gateway in the Default Gateway Dropdown and save the changes. See the screenshots below.
Setting Stripe as the default gateway
Enabled Test Mode(OPTIONAL): If you want to test the integration of your gateway, then set the "Enable Test Mode" to "Yes". No live transaction will occur if the test mode is enabled.
You must disable the test mode to collect payment from users on a live site by setting the "Enable Test Mode" option to "No".
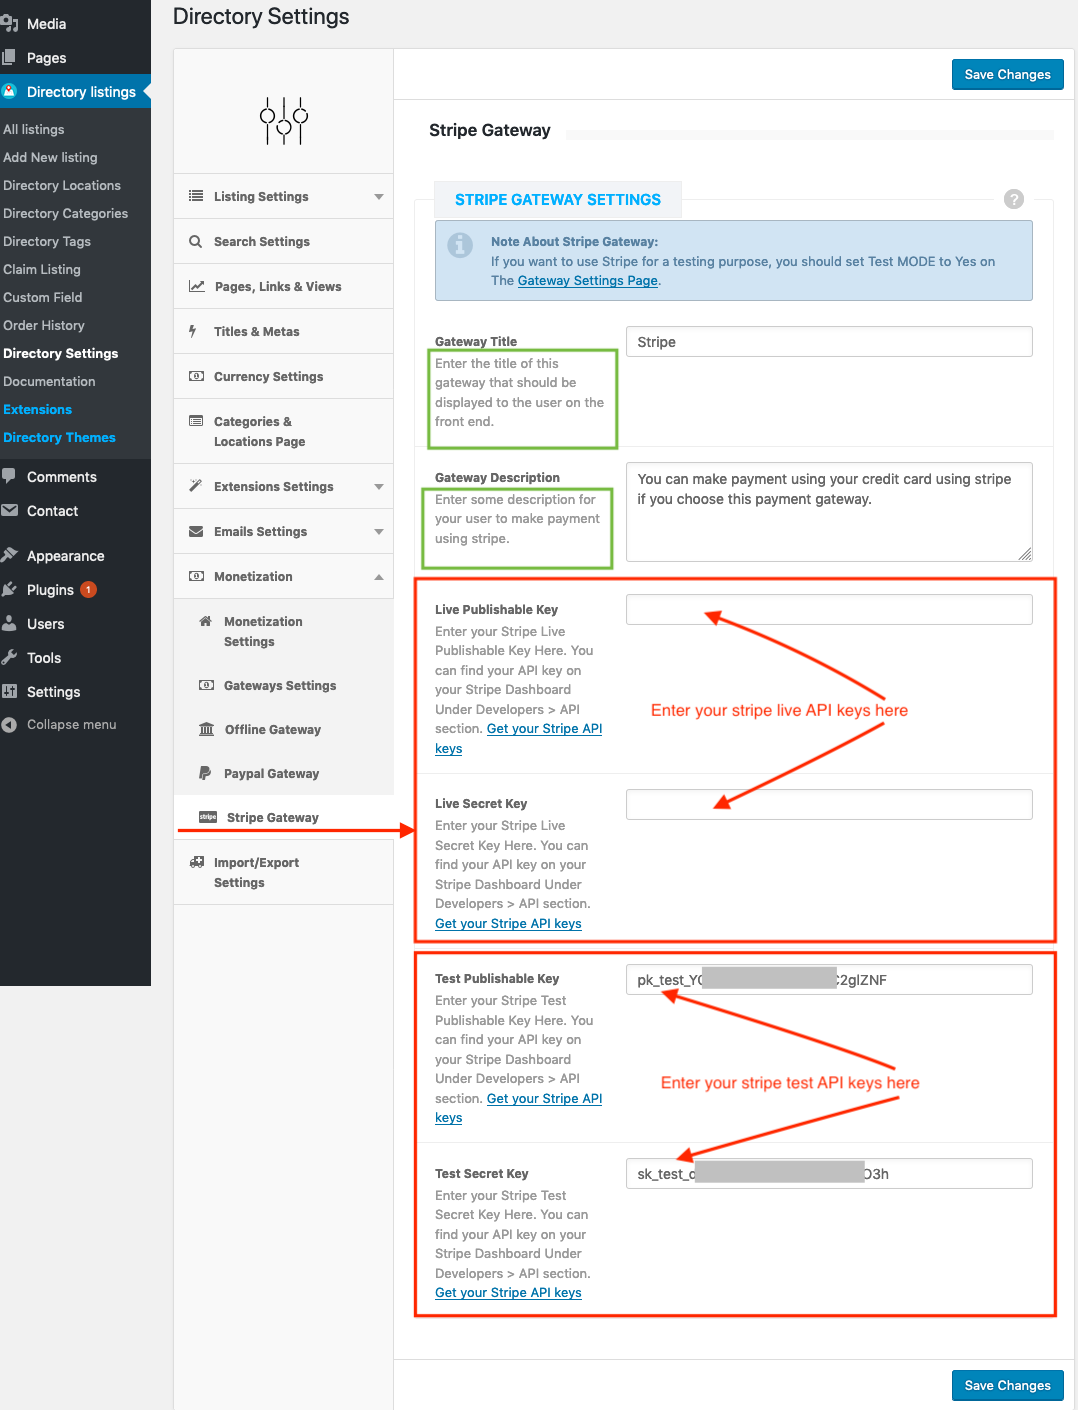
Visit Directorist Listings > Directorist Settings > Monetization > Stripe Gateway page to customize stripe gateway settings.
Directorist Stripe Gateway Settings
Customize the Title and description of the gateway. The title and description of the gateway will be displayed in the checkout page.
Gettings Stripe APIs keys
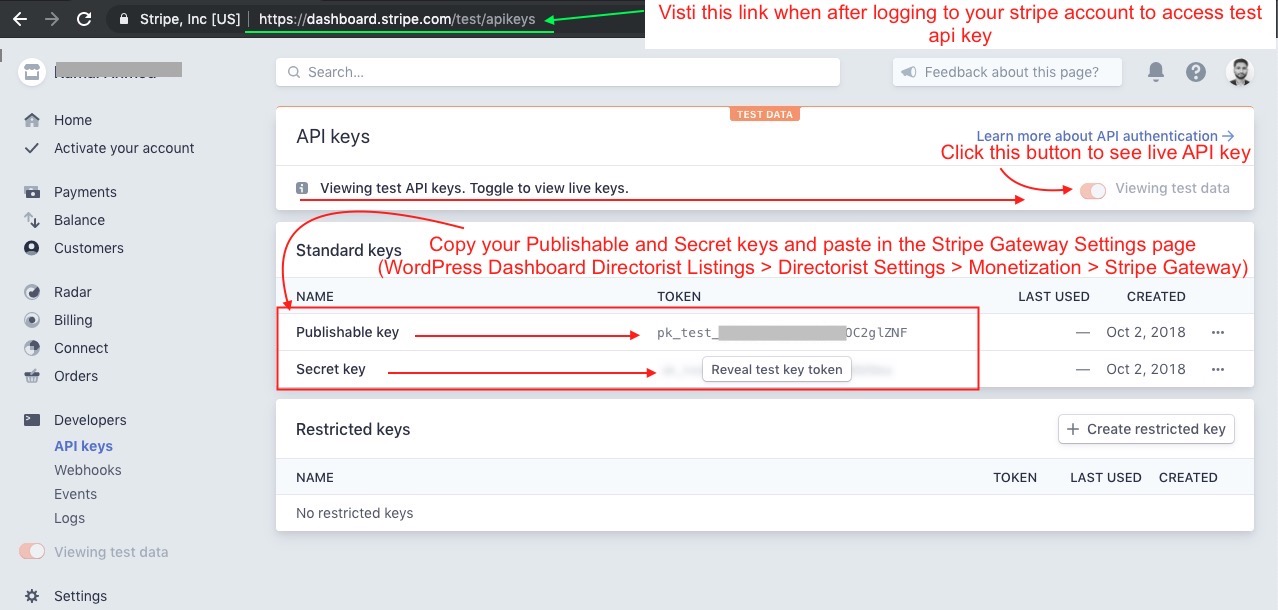
Go to https://dashboard.stripe.com/test/apikeys to get your stripe API keys and then enter into the Live and Test API fields as shown in the screenshot. In the screenshot, we have only used test API keys to test the payment integration. However, you must use Live API keys for live transactions. And do not forget to turn the test mode off in the directorist gateway settings page.
Getting Stripe API keys
Payment Gateway Currency
Gateway currency is only reflects during checkout and payment receipt page.
Setting reference Directory Settings >> Monetization >> Gateways Settings
Currency Name: Enter the Name of the currency that will be displayed in the checkout page. For example USD or GBP etc.
Thousand Separator: Enter the currency thousand separator. Eg. , (comma) or . (dot) etc.
Decimal Separator: Enter the currency decimal separator. Eg. “.” or “,”. Default is “.”
Currency Position: Select the position where you would like to show the currency symbol.Available Options: Before amount | After amount. Default is before amount. Eg. $5