How to Restrict Access to Directory Listings
Tired of giving away your valuable directory listings for free? If everyone can access your content without limits, you’re missing out on a powerful way to increase revenue and create a sense of exclusivity.
Therefore, restricting access to your directory listings is essential for maximizing the value of your content. By controlling who can view your listings, you can offer premium access to paying users, protect sensitive information, and create a sense of exclusivity.
In this guide, we’ll show you how to implement strategies to restrict access to your directory listings. Whether it’s through membership plans, password protection, or other tools, you’ll learn step-by-step how to safeguard your content and elevate your directory website’s potential.
So, without further ado, let’s dig deeper.
How You Can Restrict Access to Directory Listings
Restricting access to directory listings in WordPress using a content restriction plugin involves a few steps. Here’s how you can do it.
Step 1: Install & activate Directorist
Navigate to the WP Admin Dashboard > Plugins > Add New > Search for the keyword ‘Directorist’ > Hit the “Install Now” button.
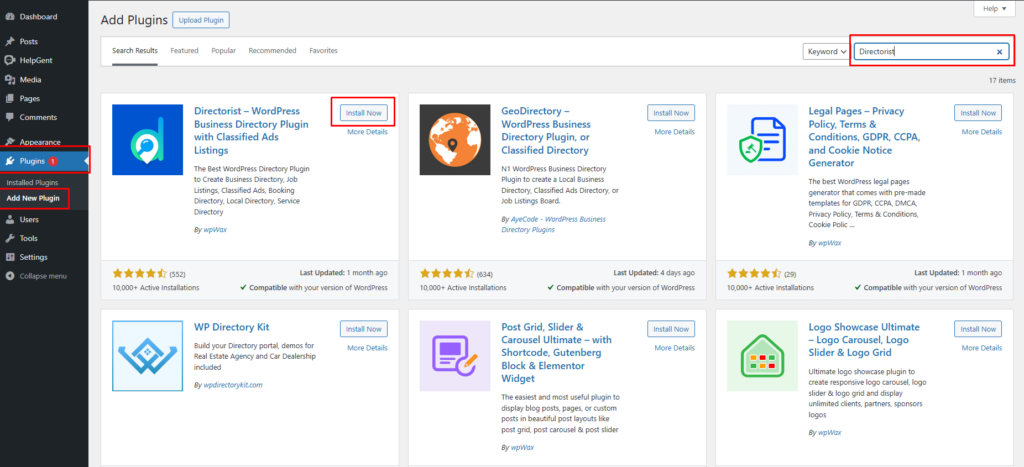
Next, activate and configure the setup wizard for a fresh start. For optimal configuration, we recommend visiting the Directorist official documentation to tailor the settings to your needs.
Step 2: Choose a Content Restriction plugin
Select a content restriction plugin that fits your needs. Some free options include:
- All-in-One Content Restriction by Pluginly
- Restrict
These plugins allow you to restrict access to specific content based on user roles, membership levels, or subscription plans. Here we will use the All-in-One Content Restriction Plugin.
Step 3: Install and activate the plugin
- Go to Plugins > Add New in your WordPress dashboard.
- Search for the chosen content restriction plugin and click Install Now.
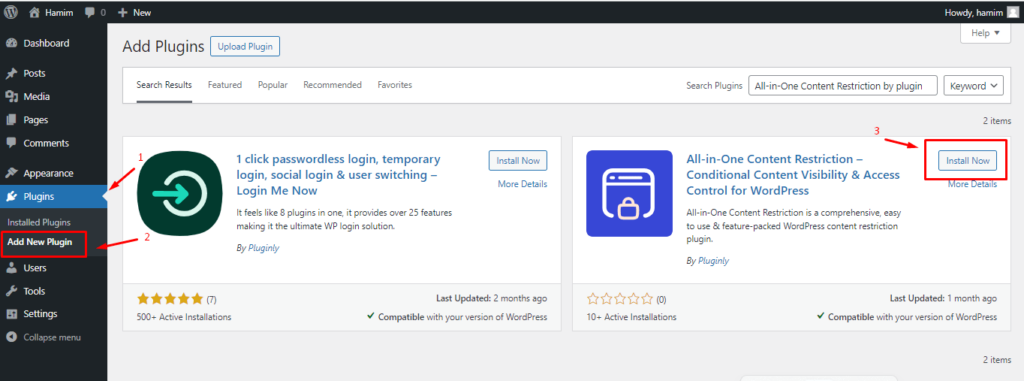
- Once installed, click Activate.
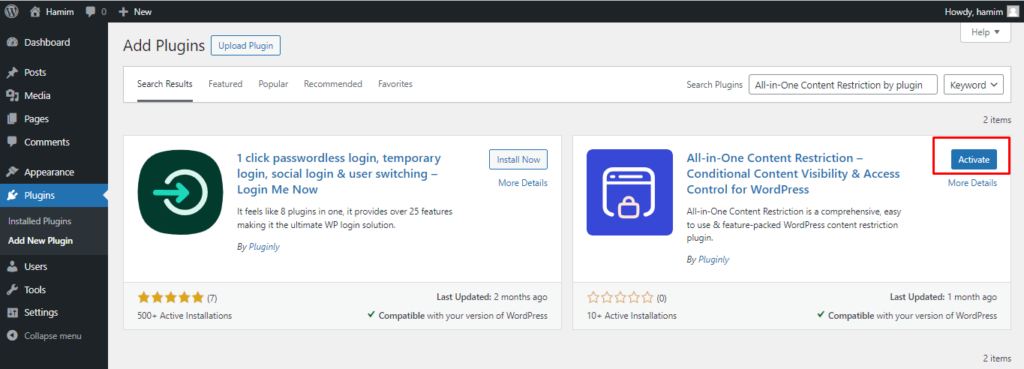
Step 4: Restrict access to directory listings
The plugin comes with options to create rules like, “Who can see the content?”, “What content will be unlocked?”, and “How should the content be protected?”
- Who can see the content?
To do this, navigate to the Content Restriction Plugin dashboard > Create Rule
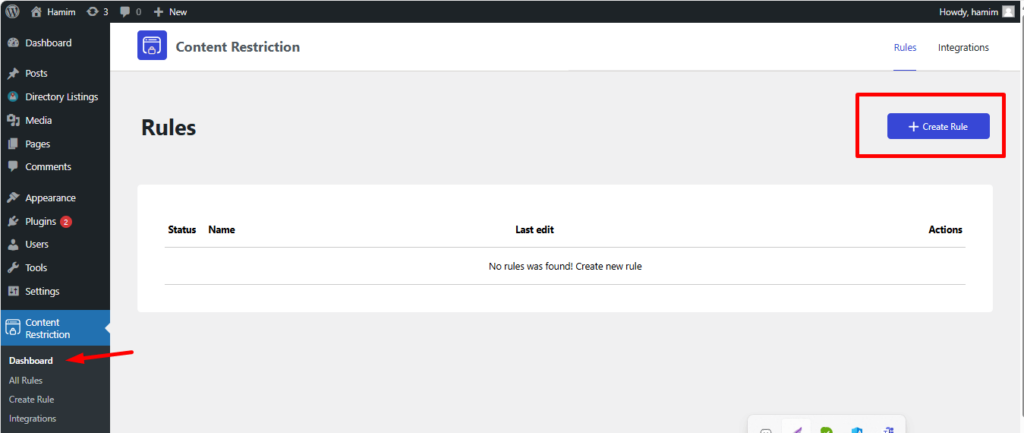
Once you hit the button “Create Rule“, you will see something like this.
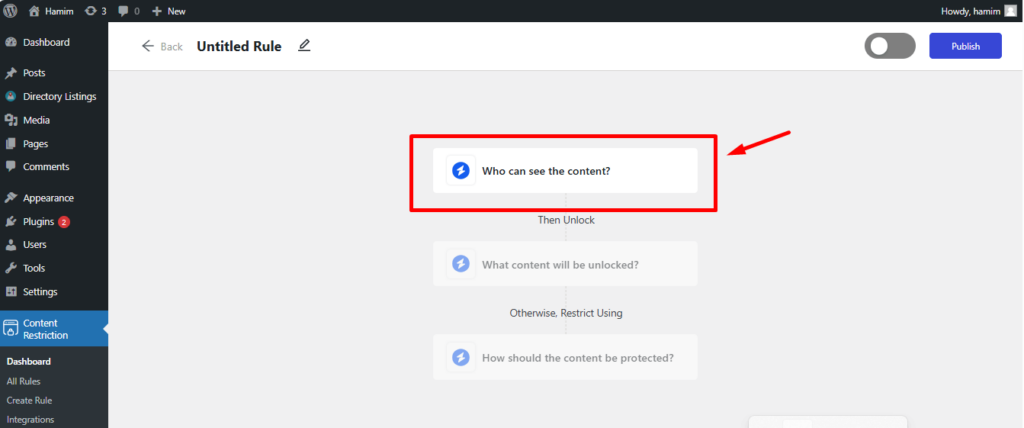
Now, click on “Who can see the content” and the following popup will appear on your screen.
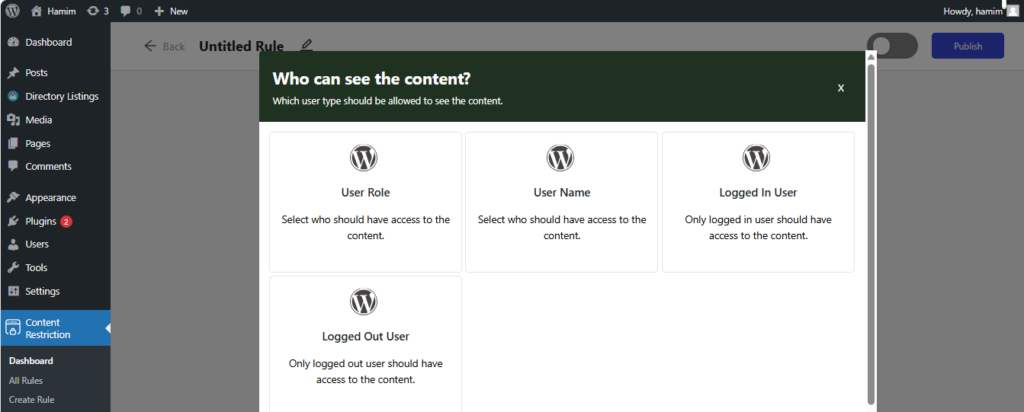
Now, you can set who can see your content or directory listings on your directory website.
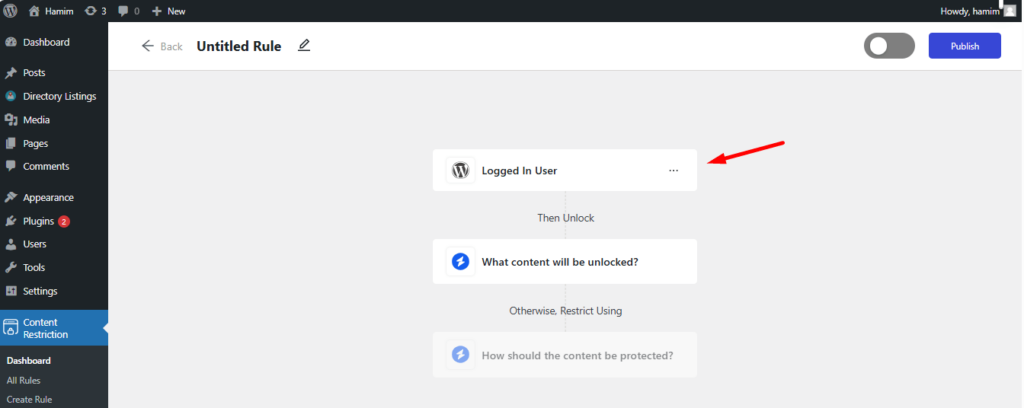
- What content will be unlocked?
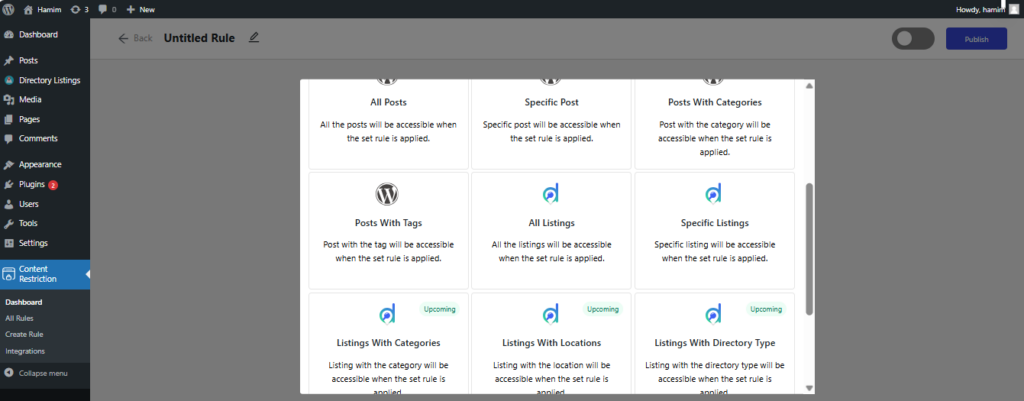
To unlock content or any specific directory listing/s, click on “What content will be unlocked”
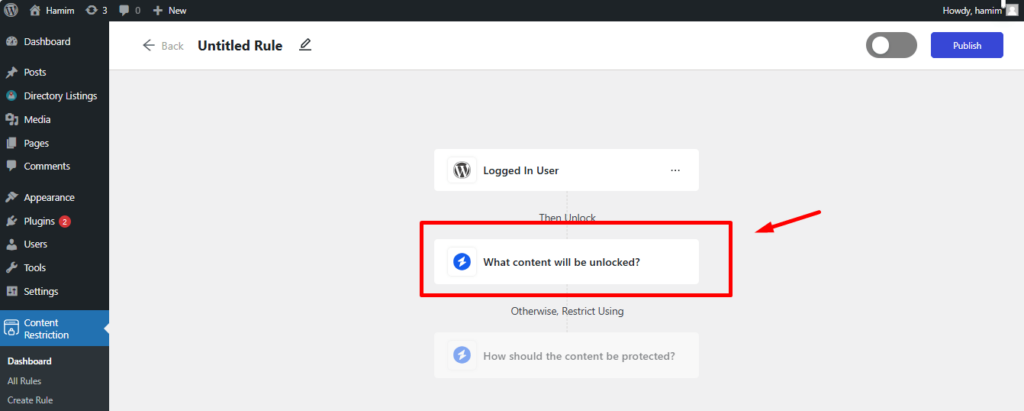
Here, you can set what content/listings will be unlocked.
Once, you have selected the specific listings, hit the ‘Publish‘ button.
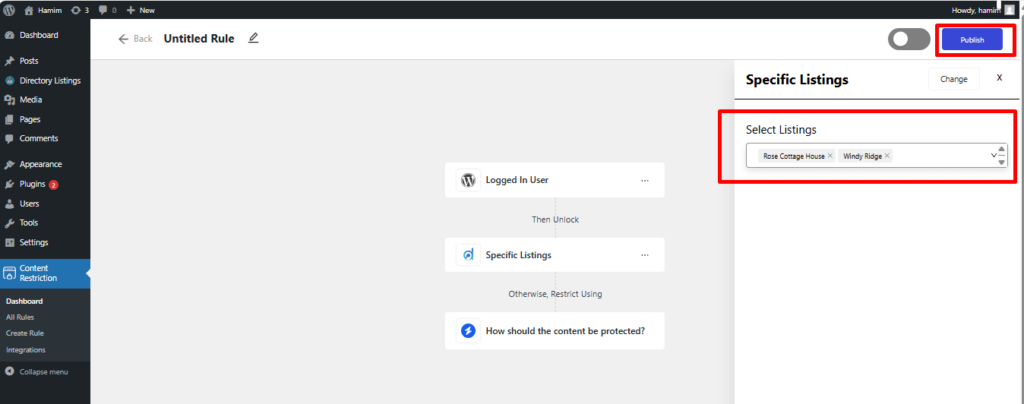
- How should the content be protected?
To protect your content, click on “How should the content be protected” and see the screen like this
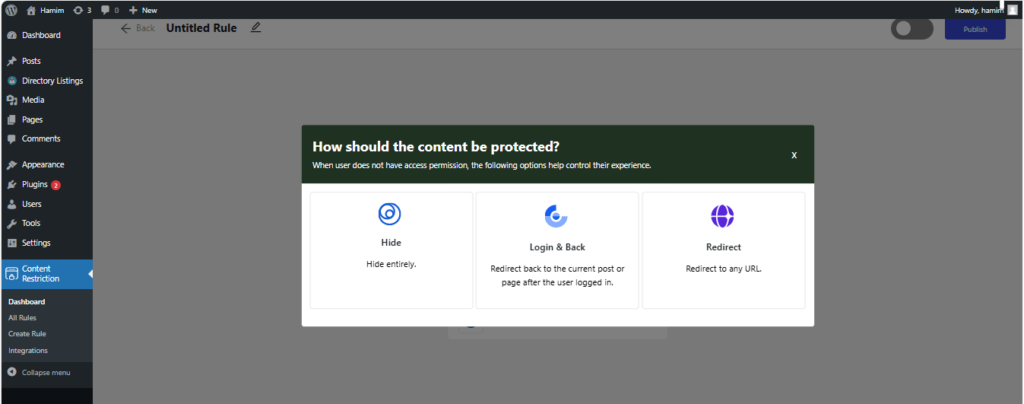
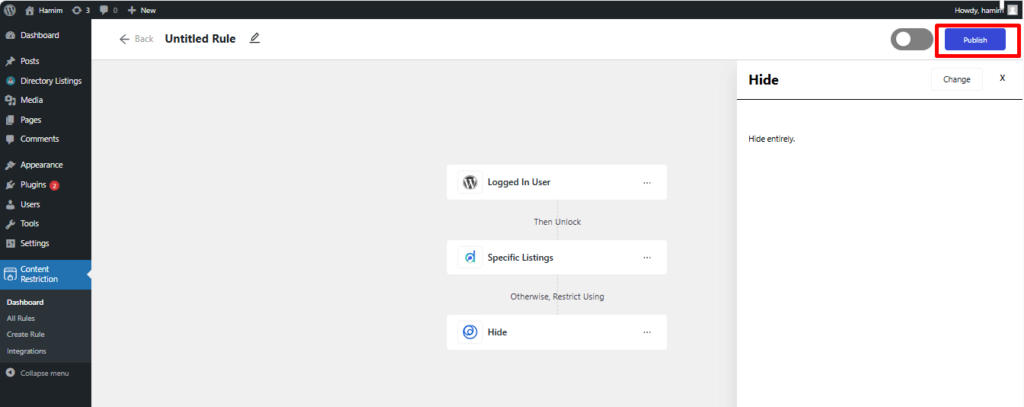
For example, you hit the ‘Hide‘ button to control user experience. You will get the following screen and most interestingly, you can change the option by just hitting the ‘Change‘ button if necessary.
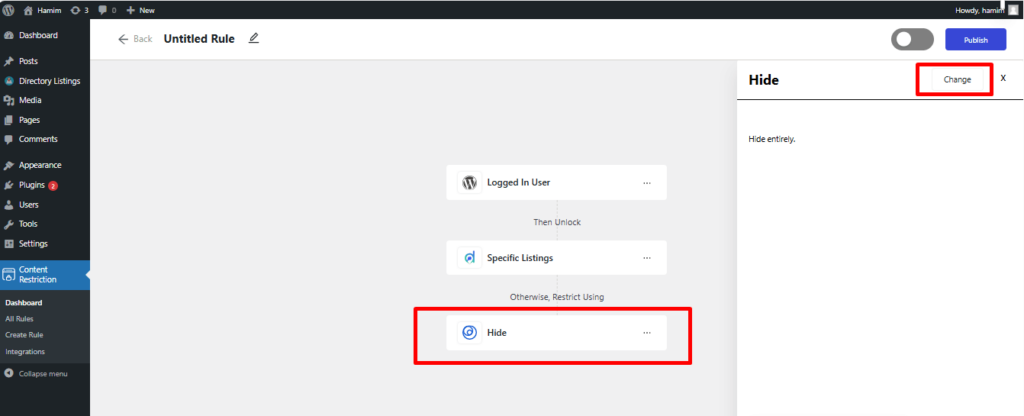
Once everything is set, feel free to click on the ‘Publish‘ button.
Final Thoughts
Restricting access to directory listings is essential for maintaining control over content, enhancing user experience, and safeguarding privacy. Implementing restrictions not only helps protect sensitive information but also enables directory owners to create tiered access models that cater to different user segments or membership levels.
By using tools like a content restriction plugin, password protection, or user roles, you can effectively manage who sees specific listings. Each method offers distinct benefits, allowing you to customize access based on business goals, audience needs, and the nature of the directory.
Ultimately, restricting access to directory listings contributes to a well-structured, secure, and engaging platform that can drive better engagement and monetization opportunities.


Leave a Reply
You must be logged in to post a comment.