Required Plugins
- Directorist
- WooCommerce
Installation
- Navigate to WordPress Admin Dashboard → Directory Listings → Themes & Extensions and connect your directorist.com account. You need to log in using your directorist.com account email and password to manage your extensions and themes.
- Click on the "Install" button to install the extension.
Settings
Marketplace extension settings are located in Directory Listings → Settings → Extensions
- Commission rate: You can set the admin commission rate. For example, suppose you have set the commission rate to 10%, and a digital product worth $100 gets sold. The listing owner will get $90 and a $10 commission will be credited to the admin.
- Minimum payout amount: You can choose a minimum payout amount to hold author funds until their total payout amount matches or exceeds the amount you’ve set. For example, if you have set the minimum payment amount as $50, the author will have to wait to request a payout until their earnings reach $50.
Configuration
The Digital Marketplace extension restricts the file upload field and ties it to the WooCommerce checkout to turn listings into downloadable digital products.
Step 1: Add Listing Form
Therefore, to configure the extension, navigate to Directory Listings → Directory Builder → Add Listing Form → Form Fields → Custom Fields
And drag the File Upload custom field to the “Active Fields” section.
Notice a new option, “Digital Download” has been added to the field.
Enabling it will reveal 4 new options related to the marketplace.
- Tiers: It enables you to offer multiple product or service options to your customers, each with appropriate pricing.
- Extra: Option to add unlimited extra paid services to the download.
- Hourly: Ability to check if the service/payment is hourly.
- Quantity: Option to set the number of items the user tends to purchase.
Step 2: Single Listing
To display the new “Marketplace Section” on the single listing page, you must add the section to the single listing page. You can add it either as a single listing page content or as a sidebar widget.
Single Listing Page Content:
To add it to the single listing page content, navigate to Directory Listings → Directory Builder → Single Page Layout → Contents → Other Fields
Sidebar Widget:
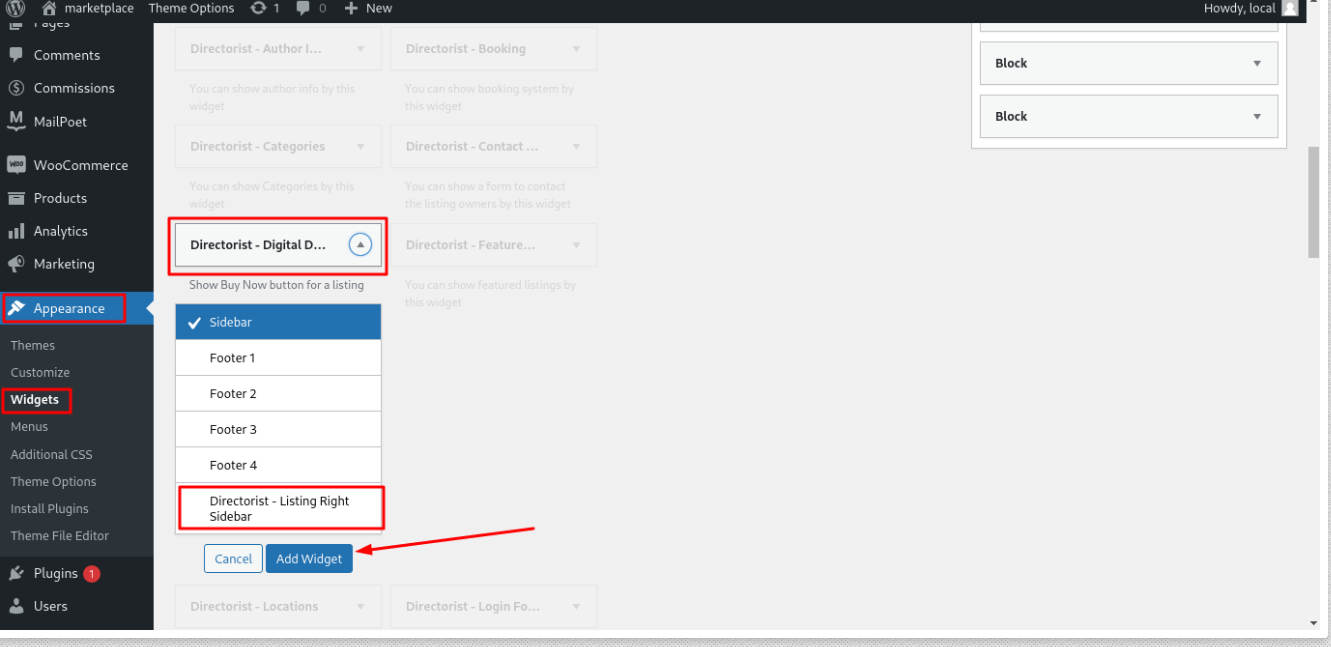
To add it as a sidebar widget, go to Appearance → Widgets
Then add the Directorist- Digital Downloads widget
Creating a Digital Download File:
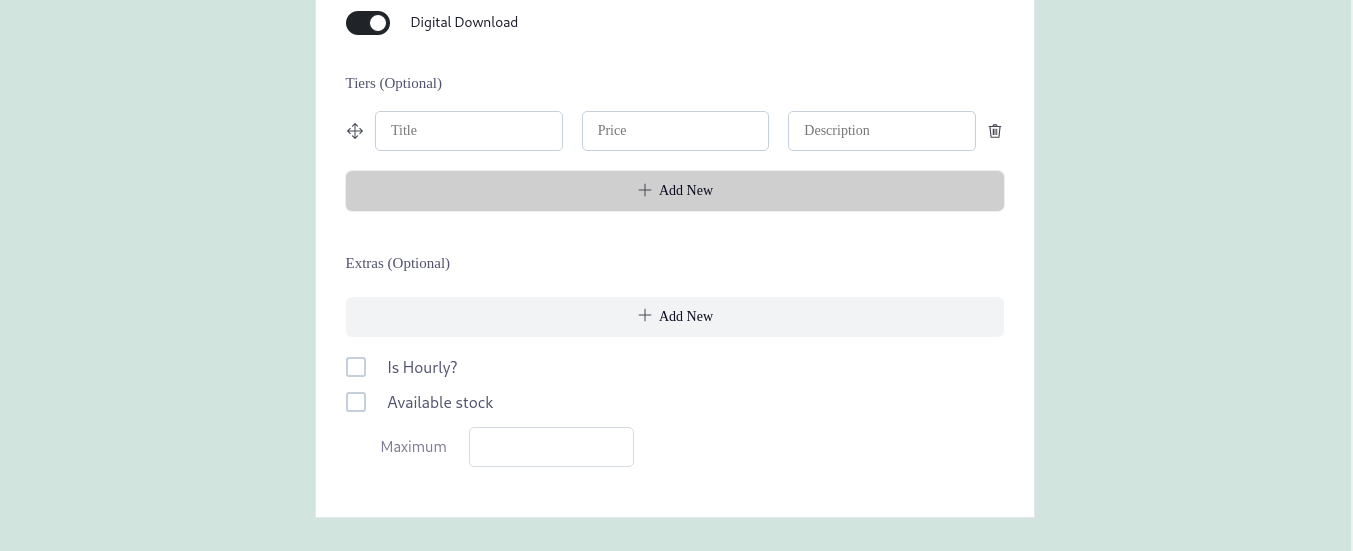
In the “Add listing form” at the “File upload field” users will have an extra toggle bar named “Digital Download”.

This option contains 4 fields.
- Tier: Users can add as many tiers as they want in their listings. In each tier, they have to input the title, price, and description.
- Extras: Users can add as many extras as they want. In each extra, they can input the title, price, and description.
- Is Hourly: This option will let users set the price hourly. If this option is checked, the price will be shown per hour.
- Availability Stock: Users can also set the available stock for their listing tier.
Buying a Digital Download File:
The end users will be able to buy the uploaded file from a listing.

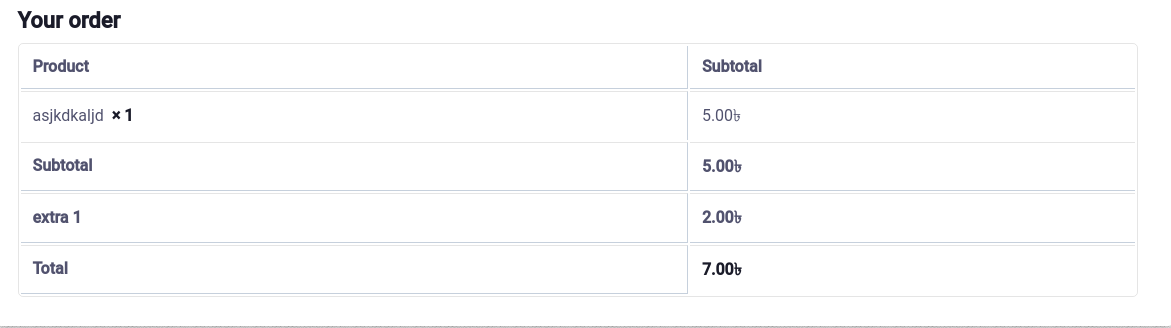
End users/Buyers can choose any tier that the vendors provided. The price will be set according to the tier. If no tier is created by the listing owner, then the listing price from the price field will be set there. Moreover, users can also choose extra and quantity.
Checkout:
After clicking the “Buy Now” button, users will be redirected to the checkout page of Woocommerce. Their users have to provide the Billing Details and will be able to see the order Details.
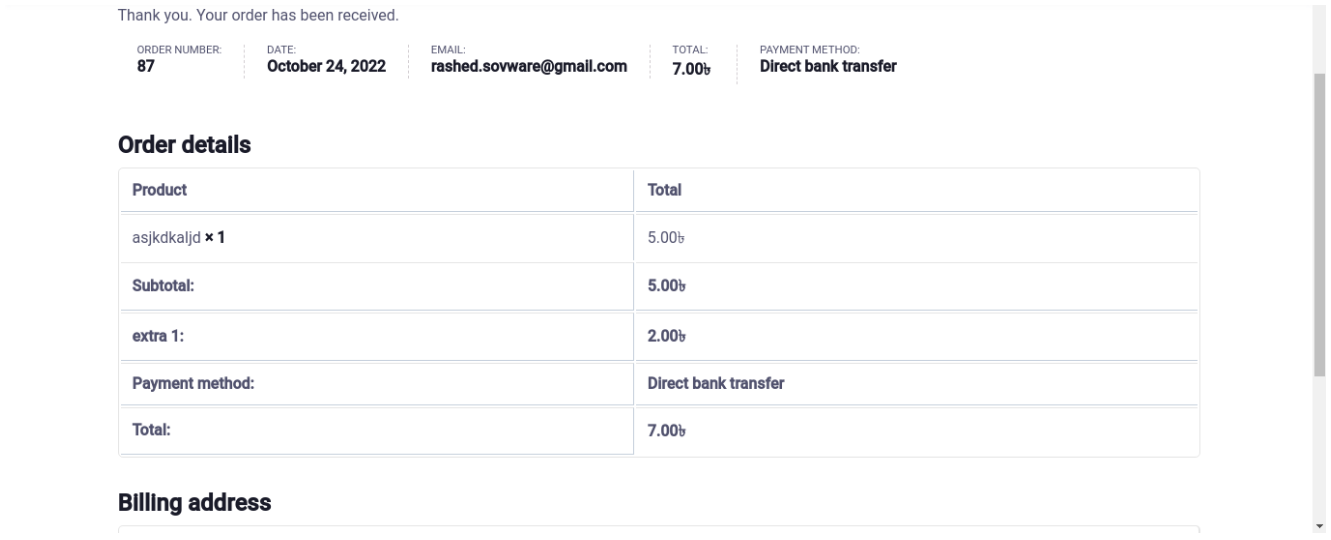
Then after placing the order users will be redirected to the order confirmation page, where users will be able to see the Order details and Billing address details.
Order process:
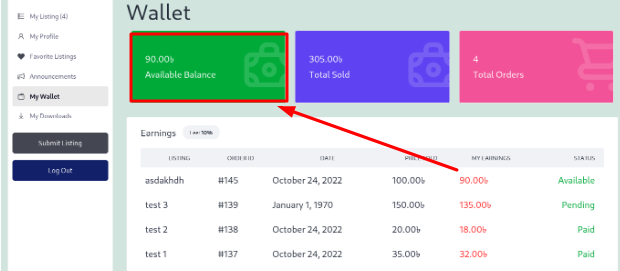
After an order is placed by the end users the listing owners will receive the earnings and moderate it from the User dashboard> Wallet

At the first part of the My Wallet, the Authors/Vendors will see their Available balance, Total sold, Total Order and Earnings.
You can see that the earning status is pending/paid/Available. Let us give a short brief on that.
- Available: When an order is placed by the End users/Buyers, the earning status will be Available.
- Pending: When a placed order is completed by the Admin from Woocommerce> Orders, the earning status will be Pending.
- Paid: When a payout request is marked as paid by the admin, the status will be Paid.
To complete the order, the admin has to navigate to Woocommerce> Order
Then if the order is received properly by the admin then he/she will make the order complete.
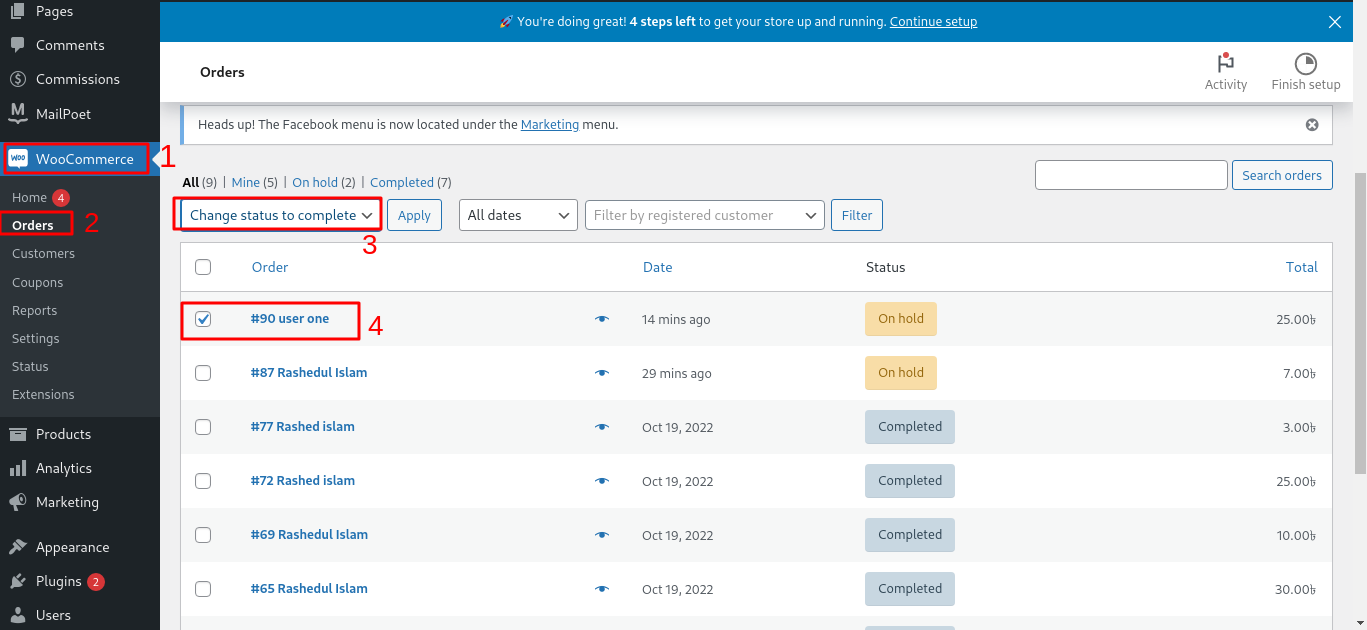
After the order is being completed by the admin, the vendors will be able to see their available balance and the Earning status will be changed from Pending to Available.
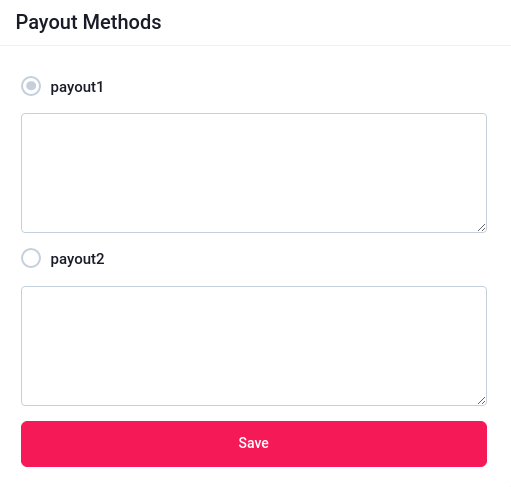
Payout Methods:
After an order is completed by the admin then the listing owner/vendor can ask for a payout from the Admin according to the payout methods which are determined by the Admin.
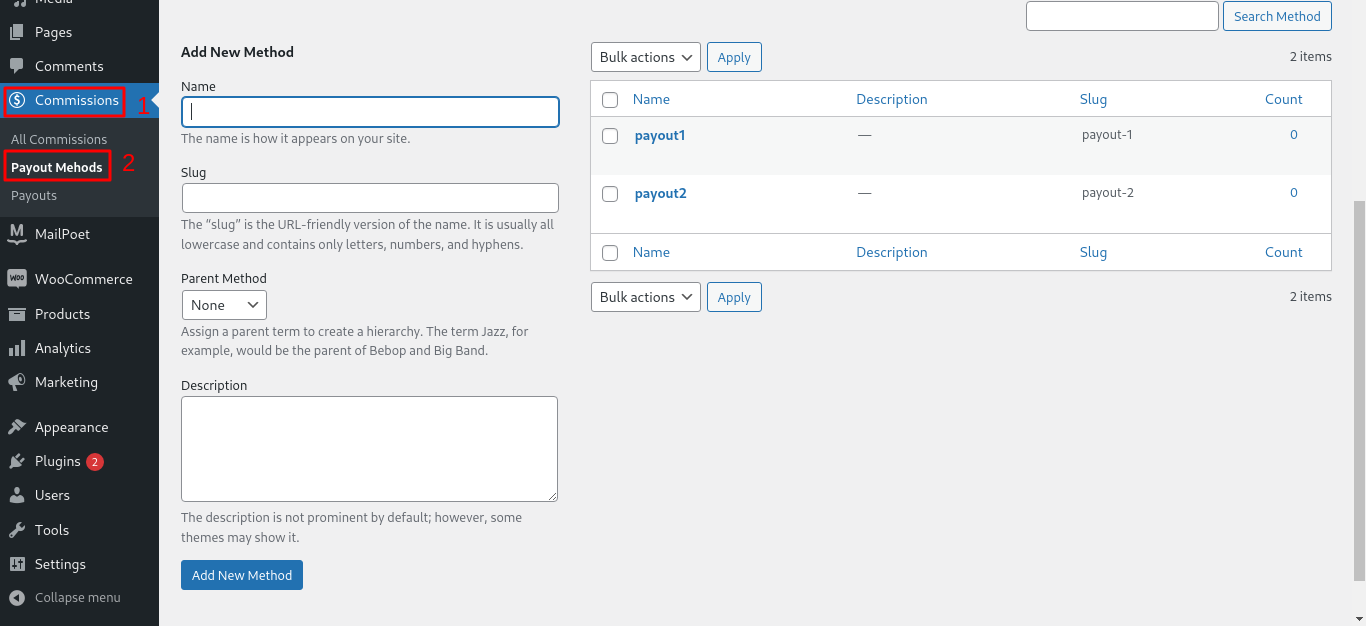
The admin can create the payout methods from Commission> Payout Methods
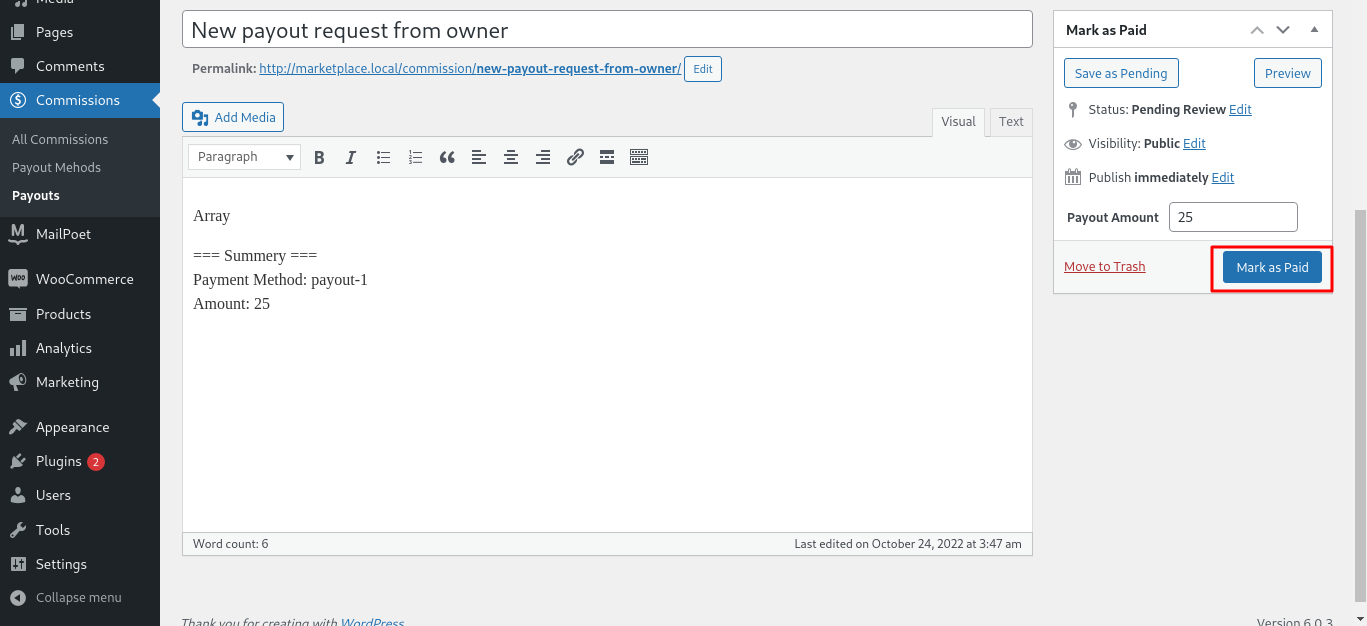
After the listing owner/vendors ask for a payout with one of the payout methods, the Admin will receive the payout request in the Commission > Payouts

You can see that the payout status is pending. The admin will make the payment to the listing owner and will edit the payout to change the payout status.
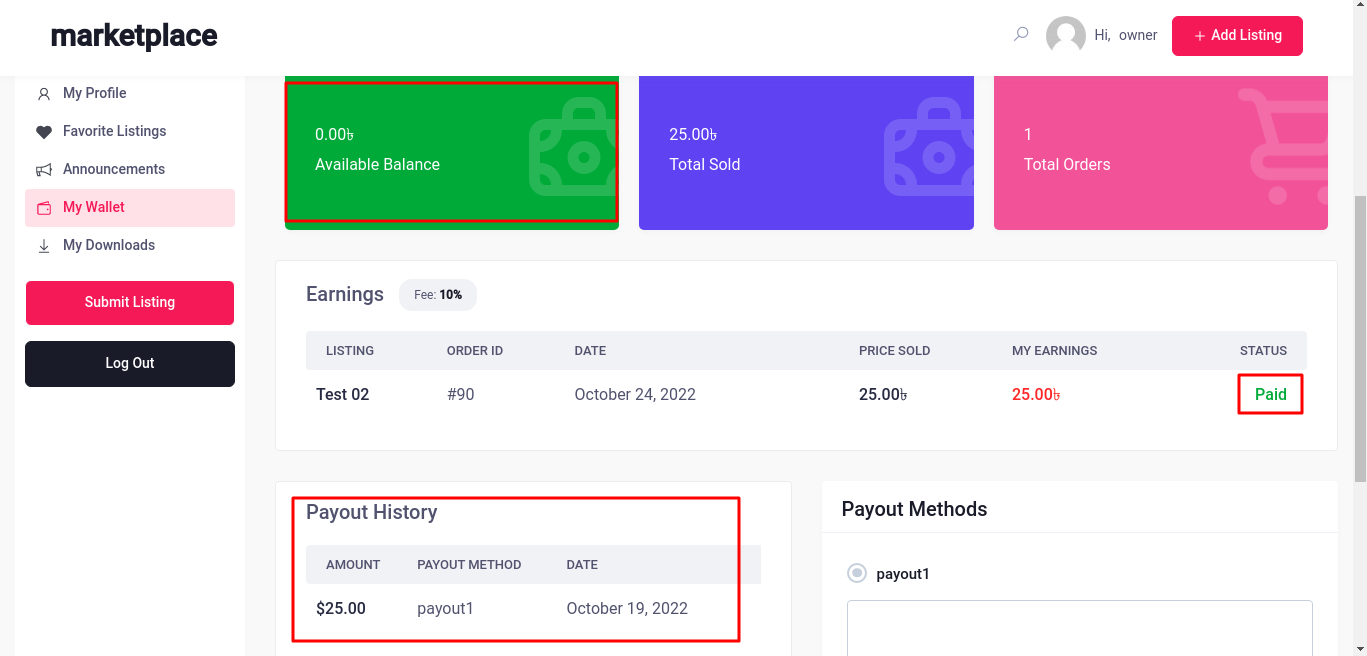
After the payout is marked as paid, the listing owner/vendor will see 3 changes in the User dashboard> Wallets.
- As the payout is paid, so the earning status will be changed from Available to Paid.
- The payout price will be deducted from the available balance because the payout is paid so there will be no available balance in the wallet.
- The listing owner will be able to see the payout history.
End Users/Buyers:
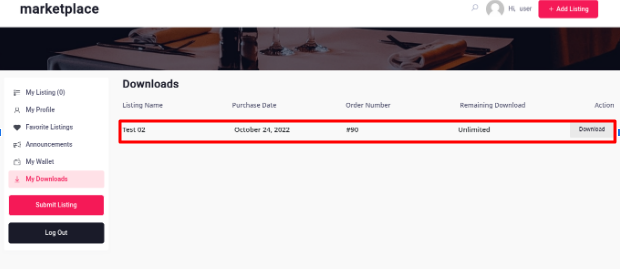
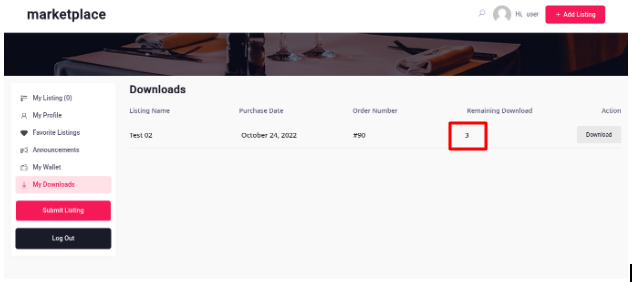
The end users will be able to download the files from the User Dashboard> My downloads.
Before the order is completed by the Admin, the end users will not see anything in User Dashboard> My Downloads

After the order is completed, the end users will be able to see the download option in their My Downloads from where they can download the files by clicking the Download button.
Admin can set the download limit from by editing the Order(Woocommerce>Order).
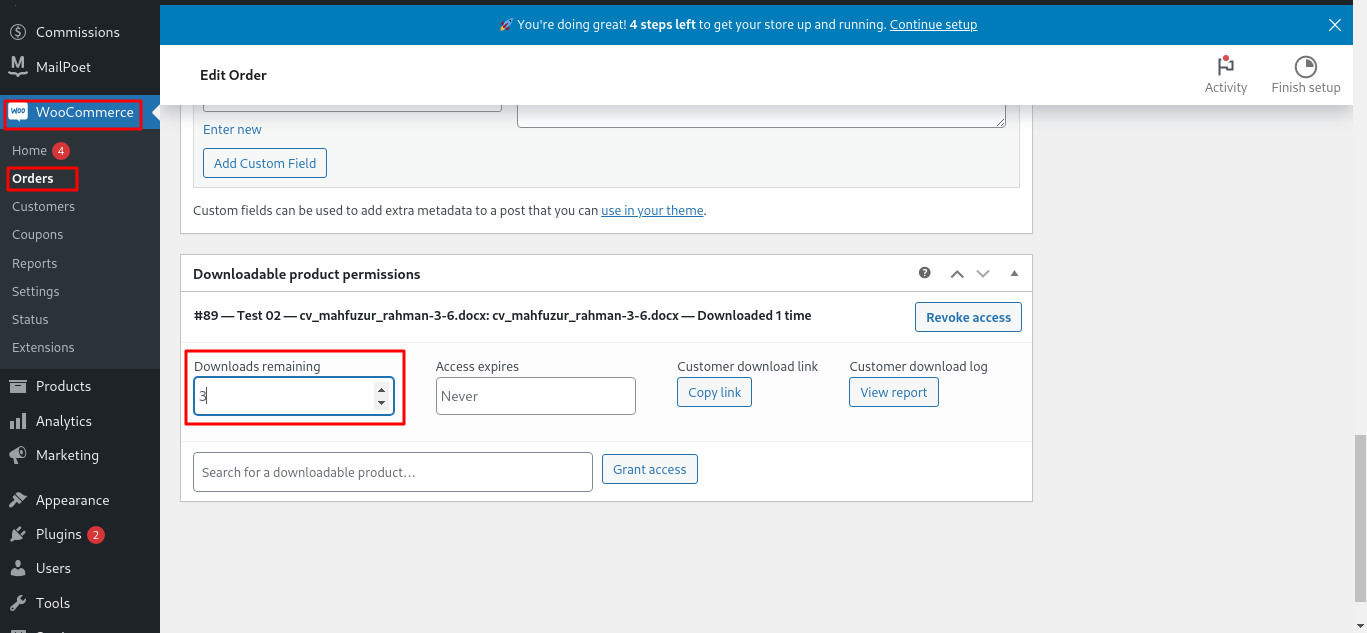
As a result, the end users will be able to download the files that specified number of times.
Commission:
Admin can collect the commissions from each order. The commission amount will be set in the Settings which has been shown earlier in an settings section. After making the order complete from the Woocommerce> Order, the commission will be listed in the Wp Dashboard> Commissions> All commissions
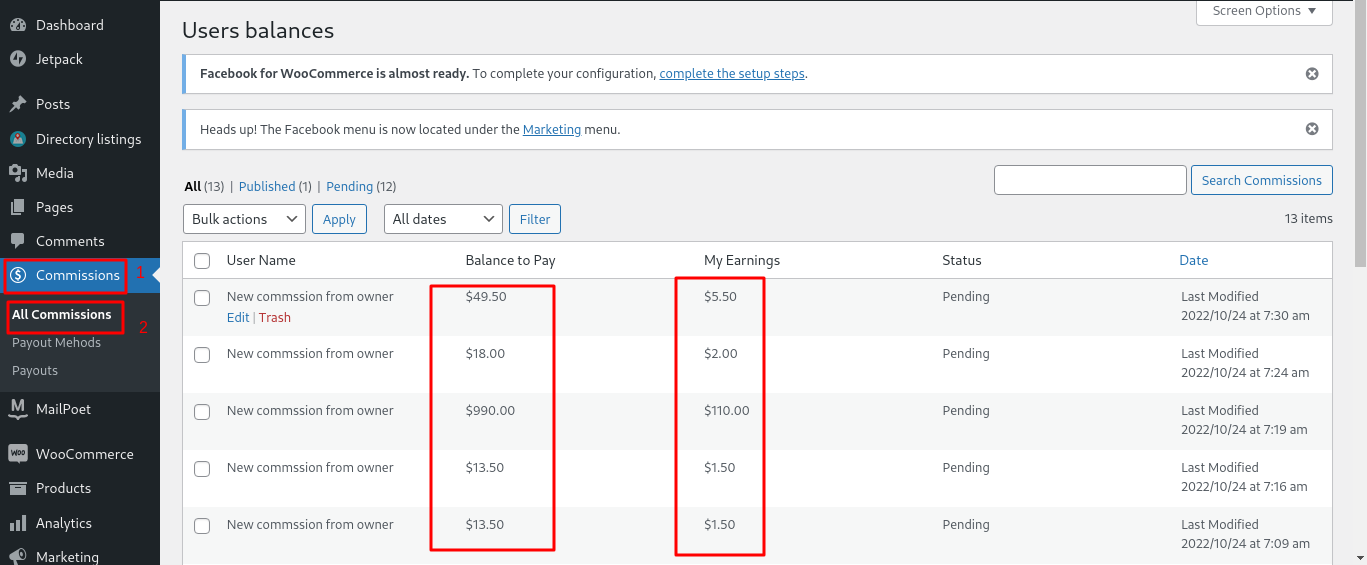
Admin can check the amount of Balance to pay and Earning for each order.
Last Updated: October 27th, 2022