• Why Directorist
    • All Features
    • Solutions
    • Customer Showcase
    • Testimonials
  • Extensions
  • Themes
  • App
  • Resources
    • Documentations
    • Support Center
    • Contact Us
    • Roadmap
    • Beta
    • About Us
    • Team
  • Pricing
  • Blog
Sing In

Extensions

Installation

  • Installation
  • Activate/Renew License

Pricing Plans

  • Configuring Checkout Pages
  • Managing Orders
  • What are the differences between different listing plans?
  • Switching Plan
  • Submitting listings using a free package/plan
  • Listing Renew with Plan
  • Create a Plan
  • Display Plans
  • Directorist Pricing Plan Overview Video
  • Step By Step Guide

WooCommerce Pricing Plans

  • Creating Plans
  • Displaying Plans
  • Managing Orders
  • Video Walkthrough
  • Create WooCommerce Subscription
  • Step By Step Guide

Claim Listing

  • Overview
  • Initial Configuration
  • Permalinks & Default Pages
  • Monetization & Gateways
  • Setting up a price or plan
  • Display of Claim Listing
  • Moderating Claims
  • Notification Settings

PayPal Payment Gateway

  • PayPal Payment Gateway
  • Recurring Plan/Package

Stripe Payment Gateway

  • Stripe Payment Gateway

Business Hours

  • Business Hours

Listings Slider & Carousel Listing

  • Listings Slider & Carousel

FAQs

  • Listing FAQs

Image Gallery

  • Image Gallery

Google ReCAPTCHA

  • Google ReCAPTCHA

Social Login

  • Overview
  • Configure Google Client
  • Configure Facebook APP ID

Post Your Need

  • Overview
  • Shortcodes

Listings with Map

  • Overview
  • Configure

Directorist Booking

  • Installation
  • Configure
  • Service Booking
  • Rental System (Coming Soon)
  • Event Booking
  • Booking Payment Service (Coming Soon)
  • Split Payment System (Commission and Wallet)

Directorist Live Chat

  • Install and Configure

Rank Featured Listings

  • How To Use Rank Feature Listing – A step by step guide

Mark as Sold

  • Configuration
  • Installation and License Activation
  • Mark as Sold
  • Mark as Negotiating

Directorist Coupon

  • Installation and Activation
  • Create a Coupon
  • Publish a Coupon

Oxygen Builder

  • Getting Started
  • All Listings Page
  • Single Details
  • Single Taxonomy
  • All Taxonomies

BuddyBoss Integration

  • Overview
  • Installation and Configuration
  • Add Listings
  • Add Listings to Groups
  • How to use BB Message with Directorist

BuddyPress Integration

  • Overview
  • Installation and Configuration
  • Add Listings
  • Add Listings to Groups
  • How to use the BuddyPress Private Messaging in Directorist

Directorist - GamiPress Integration

  • How to earn points with GamiPress in Directorist
  • How to redeem points

Directorist WPML – Translation Guide

  • Directory Type Translation
  • Listings Translation
  • String Translation
  • Admin Text Translation
  • Directorist Pages Translation
How to use BB Message with Directorist

Directorist-BuddyBoss Integration brings BB Messaging within the All Listing card and Single Listings page. Now, users can easily message the listings owner from the listing card or the single listing page.

To use the feature, you must enable the Private Messaging component in BuddyBoss → Components → Private Messaging

Then, go to Directory Listings → Directory Builder → All Listing Layout → add the "BuddyBoss Message" element in the footer likewise the image below, and click update.

This will add a button on the listing card.

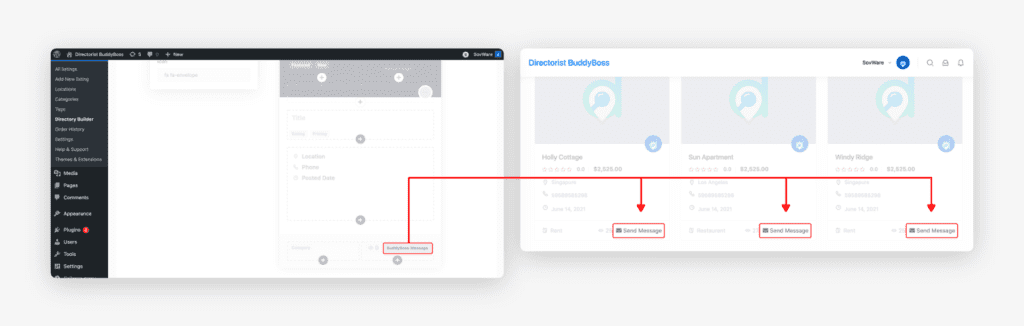
To change the text and icon of the button, hover over the BuddyBoss Message element click on the settings icon. Do not forget to update after making changes.

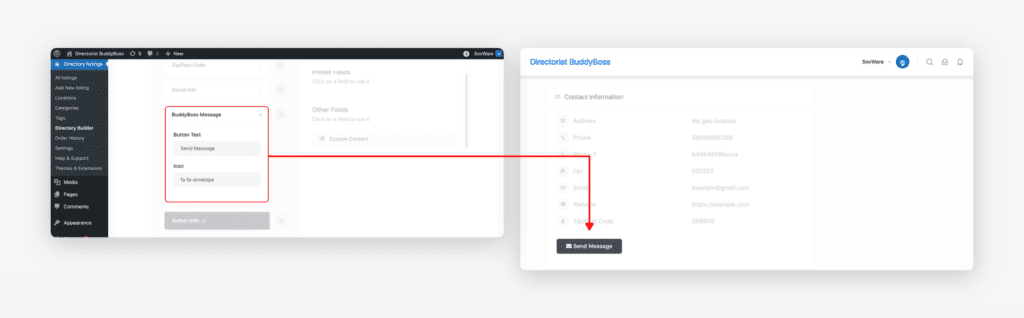
Displaying the message button on the single listing page

To add the message button on the single listing page go to Directory Listings → Directory Builder → Single Page Layout → Contents → drag the "BuddyBoss Message" element from the Other Fields section to the Active Fields section likewise the image below and click update.

To change the Button text and the icon click on the arrow down icon next to the field title.

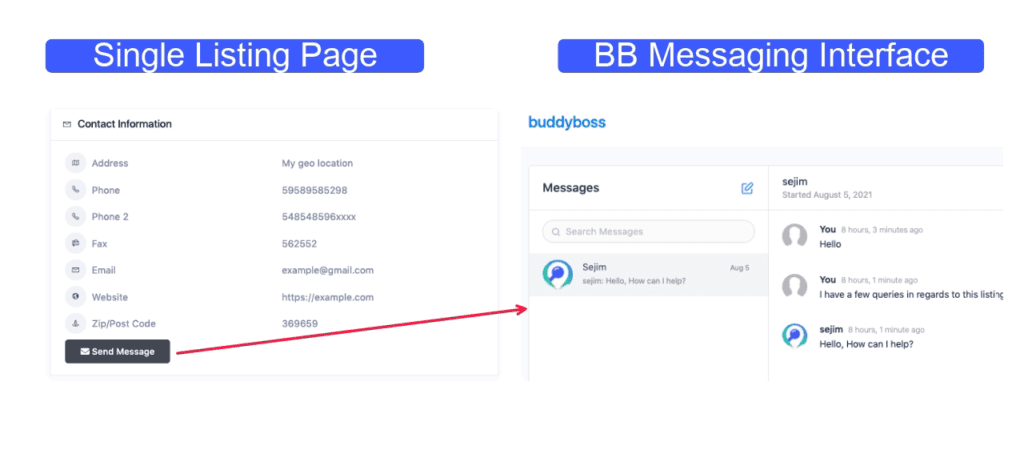
After adding the field, a new button will be added on the single listing page that will take the user to the messaging interface.

Last Updated: August 6th, 2021

Related Article

  • Add Listings to Groups
  • Add Listings
  • Installation and Configuration

© 2022 All rights reserved