PayPal Payment Gateway
Configuring the checkout pages
After installing the extension, you need to make sure you have all checkout related pages are set properly in the directory settings. If you have not set all checkout related pages, please set them following the guide mention here. Please continue reading this documentation after making sure checkout pages are set.Configuring the gateway
First, you need to make sure monetization active on your site. You can activate monetization from Directorist Listings > Directorist Settings > Monetization Settings and set Enable Monetization Feature to Yes.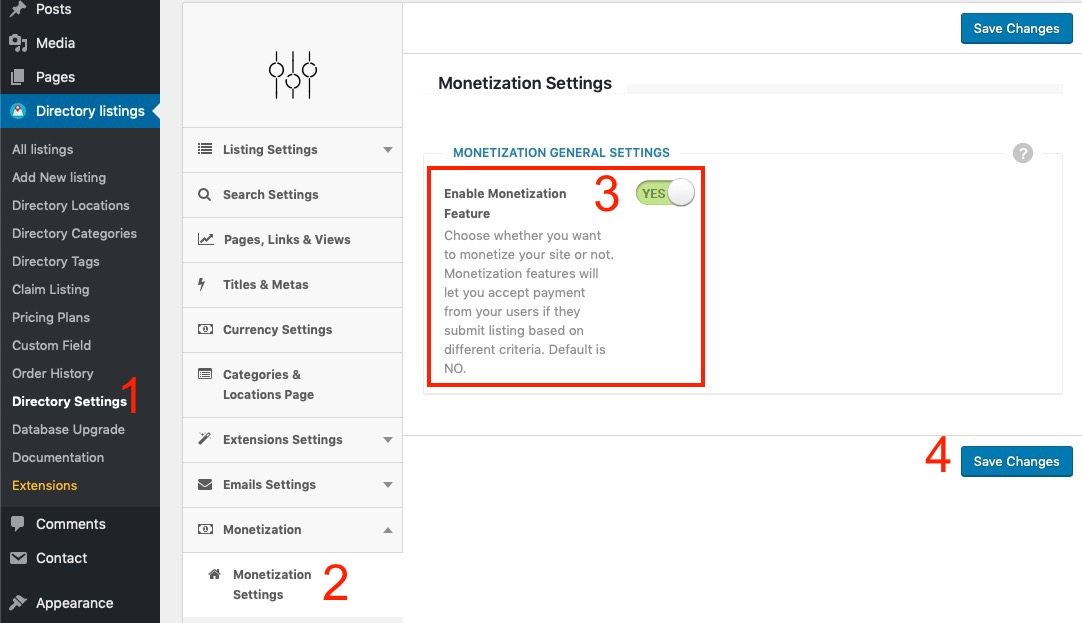
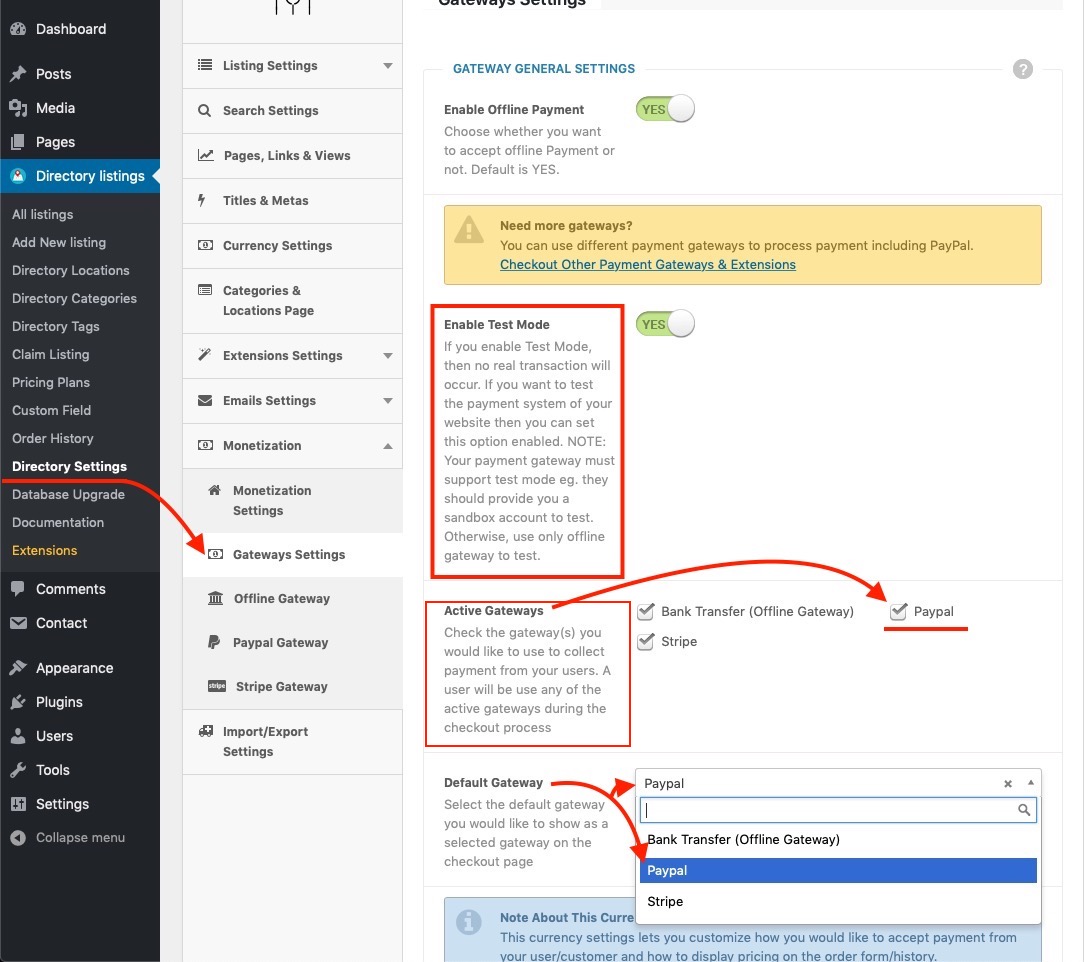
- Active Gateways: Active gateways will be displayed in the checkout page. Check the PayPal Gateway in this field. Your users now will be able to pay using the PayPal Gateway.
- Default Gateway: You can show PayPal as the default gateway in the checkout page. The default gateway will be selected by default. Select the PayPal Gateway in the Default Gateway Dropdown and save the changes. See the screenshots below.
- Enabled Test Mode(OPTIONAL): If you want to test the integration of your gateway, then set the "Enable Test Mode" to "Yes". No live transaction will occur if the test mode is enabled. You must disable the test mode to collect payment from users on a live site by setting the "Enable Test Mode" option to "No".


Managing Orders
Once you have configured your gateway, the next step is to manage orders. You will receive orders from your users when they purchase a premium feature of a listing or submit a listing using a pricing plan (requires Directorist Pricing Plans/Directorist WooCommerce Pricing Plans add-on). To know a detailed guide on how to manage orders in directorist, please check out this guide.Video Walkthrough
If you rather prefer a video guide then check out our video walkthrough of Directorist PayPal Gateway below.Last Updated: January 25th, 2024