Extensions
Installation
Pricing Plans
WooCommerce Pricing Plans
Claim Listing
PayPal Payment Gateway
Stripe Payment Gateway
Business Hours
Listings Slider & Carousel Listing
FAQs
Image Gallery
Google ReCAPTCHA
Social Login
Post Your Need
Directorist Booking
Directorist Live Chat
Compare Listing
Directorist Coupon
Oxygen Builder
BuddyBoss Integration
BuddyPress Integration
Directorist - GamiPress Integration
Directorist WPML – Translation Guide
Directorist Job Manager
Directorist Marketplace
Directorist Ads Manager
Directorist Multi Directory Linking
Authorize.net Payment Gateway
Directorist Helpgent Integration
Directorist Mailchimp Integration
Universal Search
Advanced Review
Settings
Step - 1:
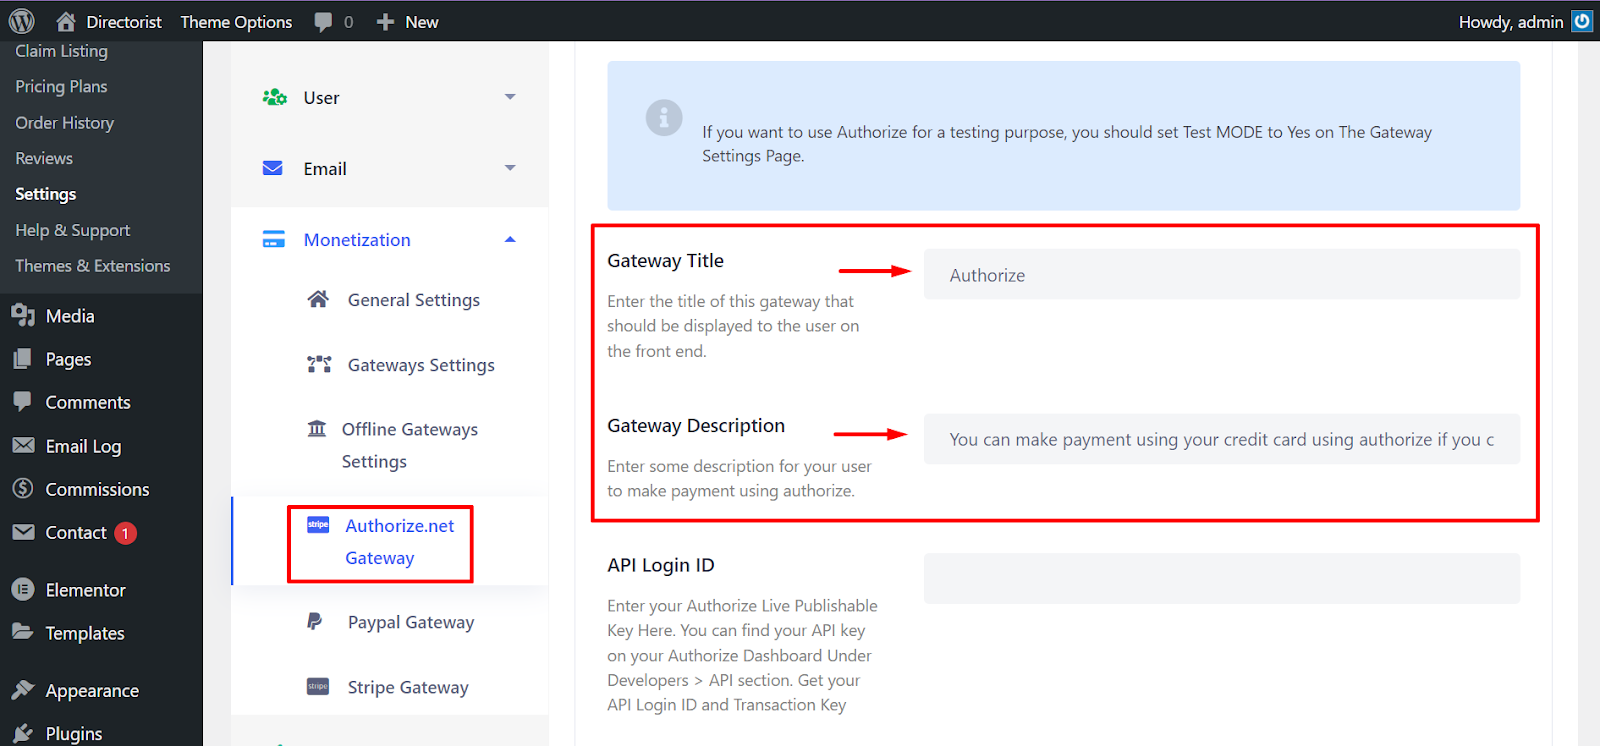
After successfully activation, Navigate to this Directory Listings > Settings > Monetization > Authorize.net Gateway. Now, need to set up an Authorize.net account with the below information.

Step - 2:
Next, there is the option to Modify the Gateway ‘Title’ & ‘Description’.
Step - 3:
If anyone wants to use Authorize.net for testing purposes, then need to enable the ‘Test MODE’ on the Gateway Settings Page.

Last Updated: September 29th, 2023