Overview
The Business Hours extension ensures your customers know when your services are available. It supports both 12-hour and 24-hour formats, handles overnight shifts, and shows real-time “Open Now”/“Closed Now” badges.
This is ideal for businesses operating with specific schedules, such as hospitals, tourism services, retail shops, and appointment-based operations.
Key Features
- Define opening and closing times for each day, with support for both 12-hour and 24-hour formats.
- Mark listings as open 24/7 or set specific daily hours directly from the admin interface.
- Overnight shifts (e.g., 10:00 PM Monday – 6:00 AM Tuesday) remain under the start day while clearly showing the closing day.
- Display live badges like "Open Now" or "Closed Now" to keep customers informed.
- Show countdowns like “Opens in 1 day” for businesses with limited weekly hours to keep visitors engaged.
- Show or hide business hours per listing and place them on listing pages, sidebar widgets, or both.
- Display business hours in your business’s local time zone instead of default site settings.
Installation & Configuration
- Navigate to Directory Listings > Themes & Extensions, locate “Business Hours,” then click Install and Activate.
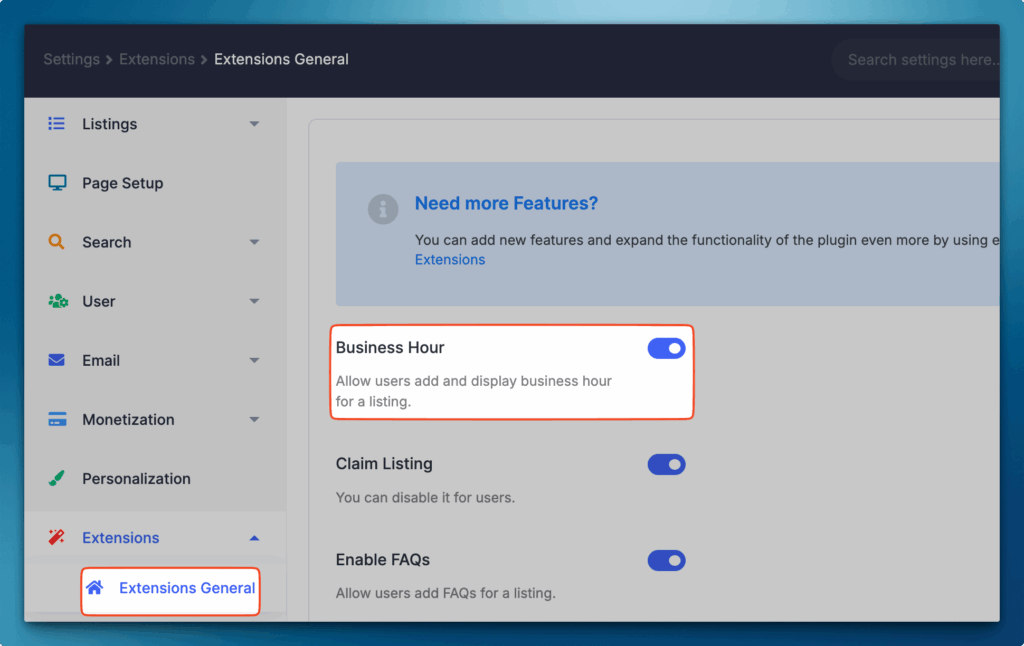
- Go to Directory Listings > Settings > Extensions > Extension General, toggle on Business Hours, and hit Save Changes.
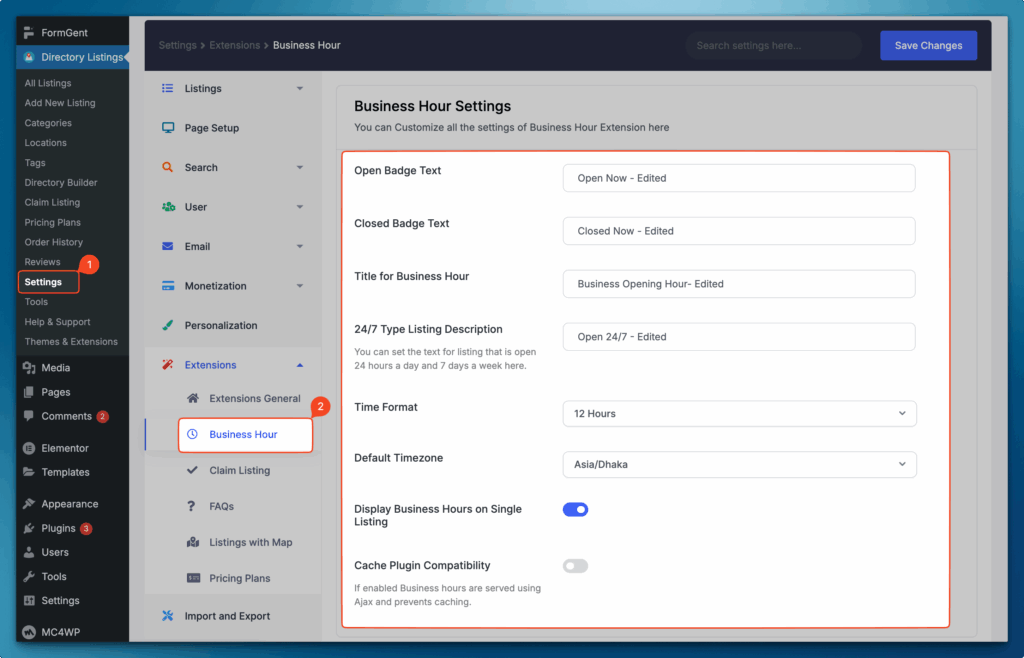
3. Click the newly visible Business Hours. These settings are accessible under Directory Listings > Settings > Extensions > Business Hour and are highly configurable. Below are the Configurable Options.
- Open Badge Text: Text shown when the business is open (e.g., "Open Now"). Customizable.
- Closed Badge Text: Text shown when the business is closed (e.g., "Closed Now"). Customizable.
- Business Hours Title: Label for the business hours section (e.g., "Opening Hours").
- 24/7 Description: Text for always-open businesses (e.g., "Open 24/7").
- Time Format: Choose 12-hour (AM/PM) or 24-hour format.
- Default Timezone: Set the timezone for accurate hours display.
- Show Business Hours: Toggle visibility of hours on individual listings.
- Cache Compatibility: Use AJAX for better performance and avoid caching issues.
- Badge Colors: Customize badge colors for "open" (default: blue) and "closed" (default: black).
Builder Setup
Follow these steps to configure and display the Business Hour feature effectively within your directory builder:
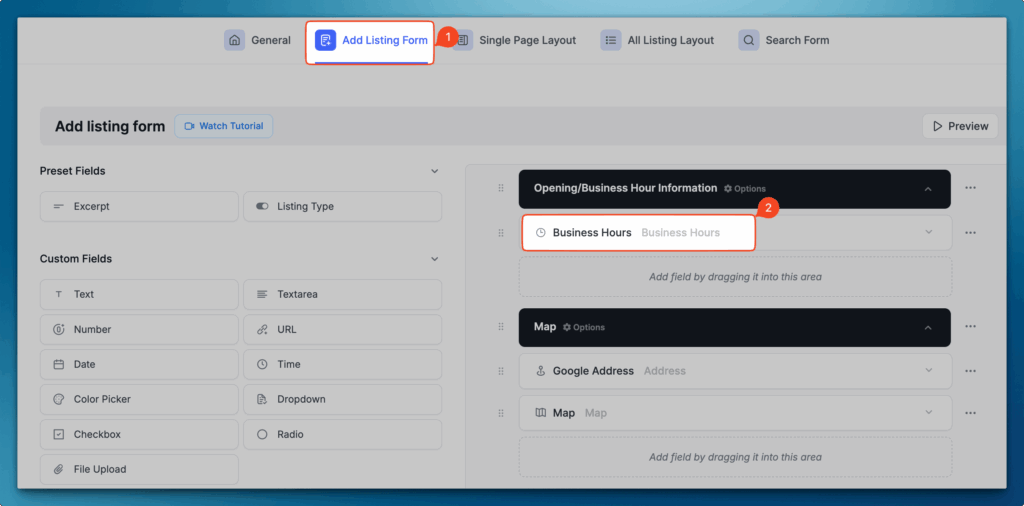
1. Add Business Hour to Add Listing Form
- Navigate to Directory Builder > Add Listing Form.
- Drag and drop the Business Hour field from the preset fields to your preferred position within the form.
- This field will now appear in the Add New Listing form.
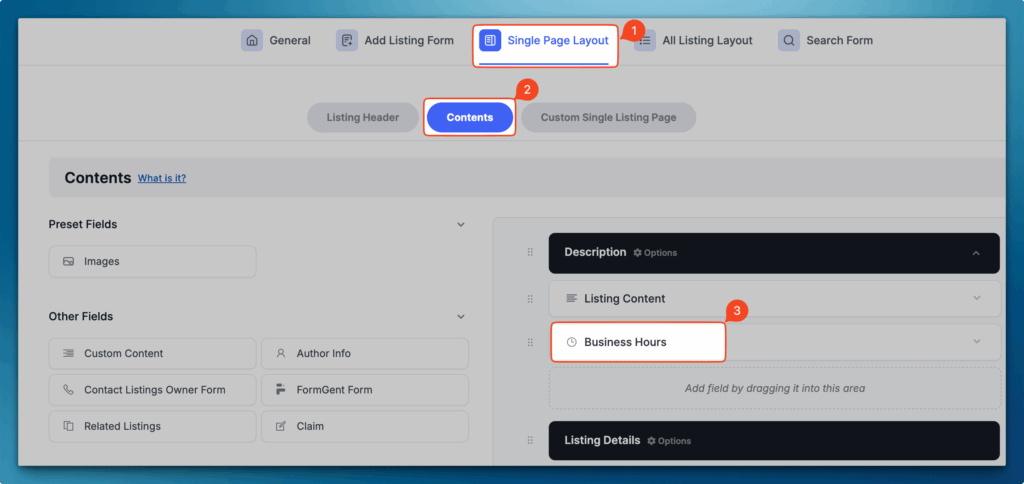
2. Configure Business Hour in Single Page Layout
- Go to Single Page Layout > Contents.
- Drag and drop the Business Hour field into a suitable position on the page.
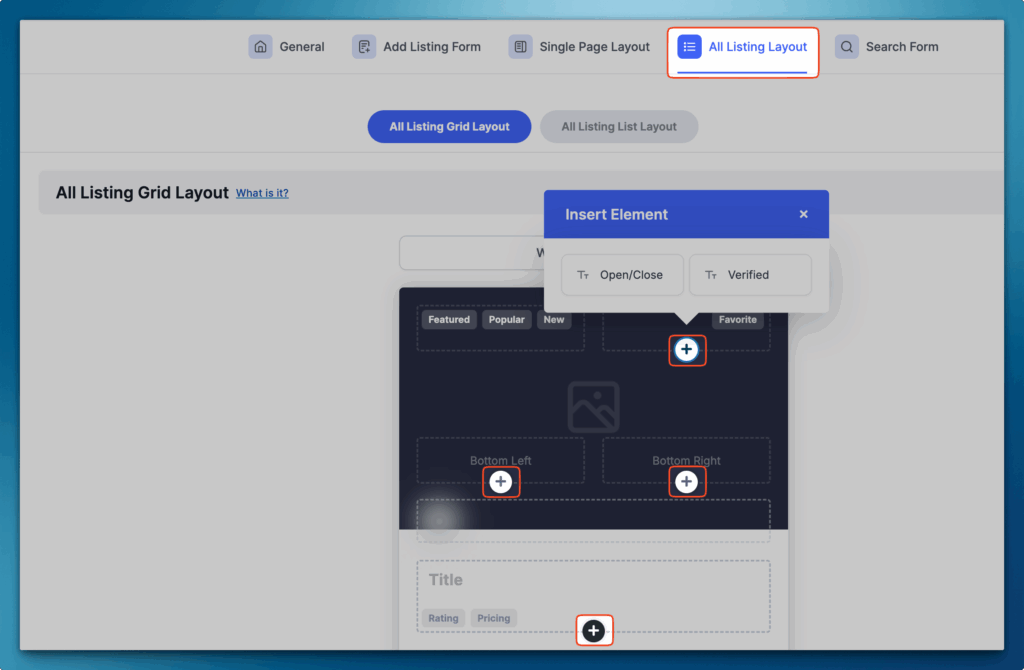
3. Display Open/Close Element in All Listing Layout
- Open All Listing Layout settings.
- Choose where to display the open/close badge.
- Click the + icon, then select the Open/Close element and place it in your chosen position.
4. Integrate Business Hour into Search Form
- Navigate to the Search Form settings to enable filtering for open listings.
- Add the Business Hour field under either the Search Filter or Search Bar, depending on where you want it to appear.
Sidebar setup
The Business Hour widget should automatically appear in the Directorist Right Sidebar upon activation.
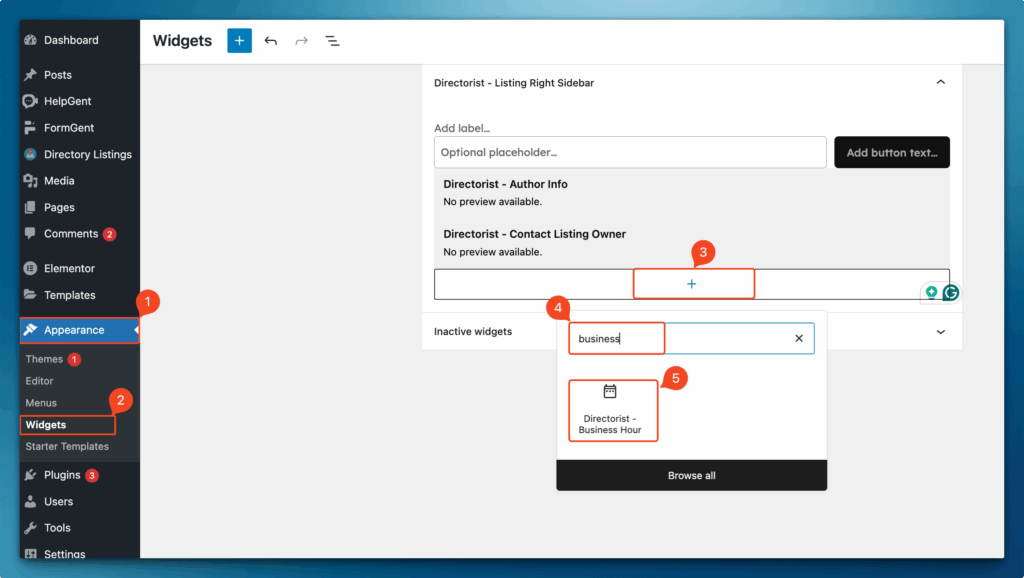
If it does not appear automatically:
- Navigate to Appearance > Widgets.
- Click the + icon in the widget area and search for Business Hour.
- Select the Business Hour widget to add it, then drag and drop it to your preferred position within the Directorist Right Sidebar.
How to Set Up Business Hours
Follow these steps to configure and customize the working hours for your listings.
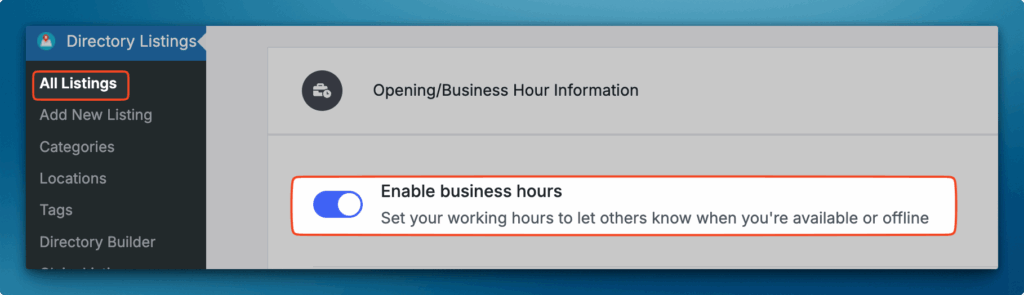
1. Enable Business Hours
- Navigate to Add New Listing and select the listing.
- Enable the Business Hours option to display working hours in your listing.
2. Choose Timing Type
You have two options to configure the business timing:
- 24/7 Service: Perfect for businesses operating 24 hours, 7 days a week.
- Custom Hours: Allows specific time slots for selected hours.
3. Customize Operational Hours
- All Day Operations: Select the All Day option for full-day operations.
- Configure your timezone.
- Multiple Time Slots: Configure multiple opening and closing times for the same day if required.
- Overnight Shift: Configure hours that continue past midnight for night shifts.

Once you have completed the configuration based on your requirements, the business hours will now be displayed on the All Listing page, Single Listing page, and within the Search Menu.
Last Updated: August 21st, 2025