• Why Directorist
    • All Features
    • Solutions
    • Customer Showcase
    • Testimonials
  • Extensions
  • Themes
  • App
  • Resources
    • Documentations
    • Support Center
    • Contact Us
    • Roadmap
    • Beta
    • About Us
    • Team
  • Pricing
  • Blog
Sing In

Extensions

Installation

  • Installation
  • Activate/Renew License

Pricing Plans

  • Configuring Checkout Pages
  • Managing Orders
  • What are the differences between different listing plans?
  • Switching Plan
  • Submitting listings using a free package/plan
  • Listing Renew with Plan
  • Create a Plan
  • Display Plans
  • Directorist Pricing Plan Overview Video
  • Step By Step Guide

WooCommerce Pricing Plans

  • Creating Plans
  • Displaying Plans
  • Managing Orders
  • Video Walkthrough
  • Create WooCommerce Subscription
  • Step By Step Guide

Claim Listing

  • Overview
  • Initial Configuration
  • Permalinks & Default Pages
  • Monetization & Gateways
  • Setting up a price or plan
  • Display of Claim Listing
  • Moderating Claims
  • Notification Settings

PayPal Payment Gateway

  • PayPal Payment Gateway
  • Recurring Plan/Package

Stripe Payment Gateway

  • Stripe Payment Gateway

Business Hours

  • Overview
  • Key Features
  • Installation and Configuration
  • Builder Setup
  • Sidebar setup
  • How It Works

Listings Slider & Carousel Listing

  • Listings Slider & Carousel
  • Detailed Guideline

FAQs

  • Listing FAQs

Image Gallery

  • Overview
  • Installation & Configuration
  • Settings
  • Builder Setup

Google ReCAPTCHA

  • Google ReCAPTCHA

Social Login

  • Overview
  • Configure Google Client
  • Configure Facebook APP ID

Post Your Need

  • Overview
  • Shortcodes

Listings with Map

  • Overview
  • Configure

Directorist Booking

  • Installation
  • Configure
  • Service Booking
  • Rental System
  • Event Booking
  • Booking Payment Service (Coming Soon)
  • Split Payment System (Commission and Wallet)
  • Booking Refund

Directorist Live Chat

  • Install and Configure

Rank Featured Listings

  • How To Use Rank Feature Listing – A step by step guide

Compare Listing

  • Compare Listings Overview

Mark as Sold

  • Configuration
  • Installation and License Activation
  • Mark as Sold
  • Mark as Negotiating

Directorist Coupon

  • Installation and Activation
  • Create a Coupon
  • Publish a Coupon

Oxygen Builder

  • Getting Started
  • All Listings Page
  • Single Details
  • Single Taxonomy
  • All Taxonomies

BuddyBoss Integration

  • Overview
  • Installation and Configuration
  • Add Listings
  • Add Listings to Groups
  • How to use BB Message with Directorist

BuddyPress Integration

  • Overview
  • Installation and Configuration
  • Add Listings
  • Add Listings to Groups
  • How to use the BuddyPress Private Messaging in Directorist

Directorist - GamiPress Integration

  • How to earn points with GamiPress in Directorist
  • How to redeem points

Directorist WPML – Translation Guide

  • Directory Type Translation
  • Listings Translation
  • String Translation
  • Admin Text Translation
  • Directorist Pages Translation

Directorist Job Manager

  • Overview
  • Key Features
  • Installation
  • Builder Setup
  • Page Setup
  • Email template Setup

Directorist Marketplace

  • Directorist Marketplace

Directorist Ads Manager

  • Ads Manager Overview

Directorist Multi Directory Linking

  • Multi Directory Linking

Authorize.net Payment Gateway

  • Overview
  • Installation
  • Configuration
  • Settings

Directorist Helpgent Integration

  • Overview
  • Key Features
  • Installation
  • User Dashboard

Directorist Mailchimp Integration

  • Overview
  • Key Features
  • Installation
  • Configuration
  • Settings
Monetization & Gateways

Monetization

A claim for a listing can be either for free or paid. In order to enable paid listing and pricing plan etc. to work, you need to enable monetization first. Go to Directory Settings > Monetization Settings and Set 'Enable Monetization Feature' to Yes.
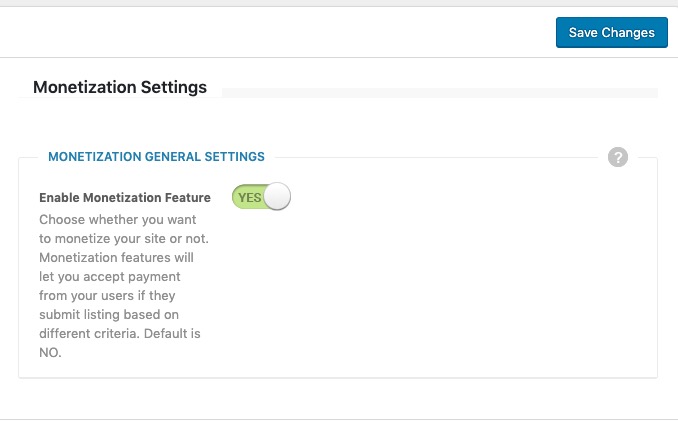
 Enable Monetization Enable Monetization

Gateway Settings

You need to set up at least one gateway to process payments from your user. Directorist Claim listing add-on is compatible with all payment gateways that the Directorist plugin supports. You can process payments using an offline gateway like bank transfer or an online gateway like PayPal* or Stripe*. You can also use multiple payment gateways on your site simultaneously. Go to Directory Settings > Monetization Settings > Gateways Settings and customize the settings according to your need. All settings have detailed descriptions. Please see the screenshot and the description of each gateway settings below. To know the details settings of PayPal and Stripe Gateways, please check out their documentation. (PayPal Documentation & Stripe Documentation)
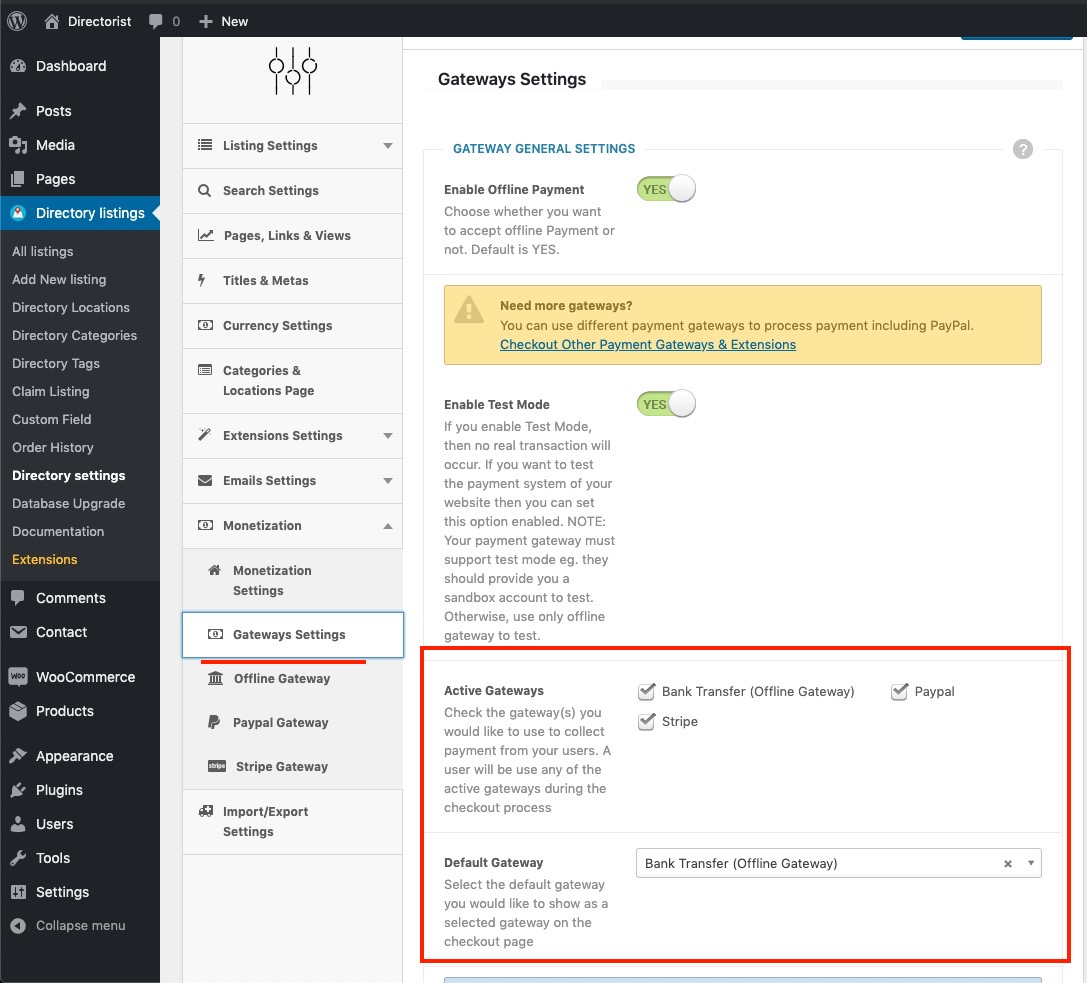
 Gateway Settings Gateway Settings
Enable Offline Payment:
If you want to collect payment offline, you need to set this option to "YES". It is good if you want to collect payment via Bank Transfer or in Cash.
Enable Test Mode
If you want to test your website payment processing system, you should set this option to "YES". While you are in the Test Mode, no live transaction will be made. You must set this option to "NO" on your production/live site to collect payment from your users.
Active Gateways
You can enable one or more gateways to be used during checkout to process the payment. Any gateways you check under this option will be displayed during the checkout so that user can pay you using their preferred gateways. Using multiple gateways is a good idea as it gives your user a lot of flexibility to pay you easily. Check out our all payment gateways here if you are interested.
Default Gateway
If you have multiple gateways enabled under the Active Gateways Settings, the default gateway set in this setting will be selected by default on the checkout page.
Currency Settings
These currency settings let you customize how you would like to accept payment from your user/customer and how to display pricing on the order form/history.
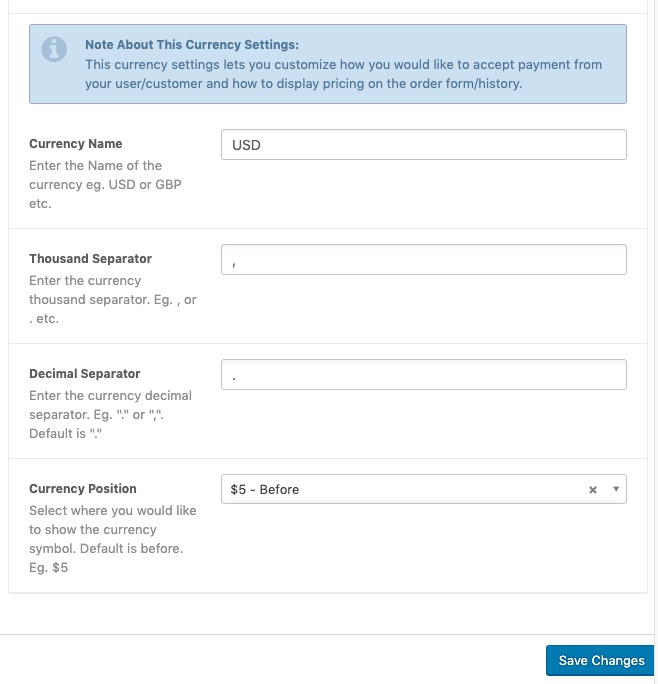
Currency Name
Enter the name of the currency you would like to display with the price and accept the payment from your users in that currency. For example USD or GBP etc. Note: accepting payment in certain currency depends on the type of payment gateway you use. Not all payment gateways support all currency. Check out your payment gateway's documentation to know the full list of currency they support.
Enter a separator for the thousand value of a currency. For example: ,  (a comma) or . (a dot) etc.
Enter the currency decimal separator. Eg. "." or ",". Default is "."
You can show the currency symbol before or after the price. Select where you would like to show the currency symbol. The default is before. Eg. $5
*Depends on additional directorist add-ons like the Directorist PayPal, Directorist Stripe.

Last Updated: March 20th, 2024

Related Article

  • Notification Settings
  • Moderating Claims
  • Display of Claim Listing

© 2025 All rights reserved