• Why Directorist
    • All Features
    • Solutions
    • Customer Showcase
    • Testimonials
  • Extensions
  • Themes
  • App
  • Resources
    • Documentations
    • Support Center
    • Contact Us
    • Roadmap
    • Beta
    • About Us
    • Team
  • Pricing
  • Blog
Sing In

Extensions

Installation

  • Installation
  • Activate/Renew License

Pricing Plans

  • Configuring Checkout Pages
  • Managing Orders
  • What are the differences between different listing plans?
  • Switching Plan
  • Submitting listings using a free package/plan
  • Listing Renew with Plan
  • Create a Plan
  • Display Plans
  • Directorist Pricing Plan Overview Video
  • Step By Step Guide

WooCommerce Pricing Plans

  • Creating Plans
  • Displaying Plans
  • Managing Orders
  • Video Walkthrough
  • Create WooCommerce Subscription
  • Step By Step Guide

Claim Listing

  • Overview
  • Initial Configuration
  • Permalinks & Default Pages
  • Monetization & Gateways
  • Setting up a price or plan
  • Display of Claim Listing
  • Moderating Claims
  • Notification Settings

PayPal Payment Gateway

  • PayPal Payment Gateway
  • Recurring Plan/Package

Stripe Payment Gateway

  • Stripe Payment Gateway

Business Hours

  • Overview
  • Key Features
  • Installation and Configuration
  • Builder Setup
  • Sidebar setup
  • How It Works

Listings Slider & Carousel Listing

  • Listings Slider & Carousel
  • Detailed Guideline

FAQs

  • Listing FAQs

Image Gallery

  • Overview
  • Installation & Configuration
  • Settings
  • Builder Setup

Google ReCAPTCHA

  • Google ReCAPTCHA

Social Login

  • Overview
  • Configure Google Client
  • Configure Facebook APP ID

Post Your Need

  • Overview
  • Shortcodes

Listings with Map

  • Overview
  • Configure

Directorist Booking

  • Installation
  • Configure
  • Service Booking
  • Rental System
  • Event Booking
  • Booking Payment Service (Coming Soon)
  • Split Payment System (Commission and Wallet)
  • Booking Refund

Directorist Live Chat

  • Install and Configure

Rank Featured Listings

  • How To Use Rank Feature Listing – A step by step guide

Compare Listing

  • Compare Listings Overview

Mark as Sold

  • Configuration
  • Installation and License Activation
  • Mark as Sold
  • Mark as Negotiating

Directorist Coupon

  • Installation and Activation
  • Create a Coupon
  • Publish a Coupon

Oxygen Builder

  • Getting Started
  • All Listings Page
  • Single Details
  • Single Taxonomy
  • All Taxonomies

BuddyBoss Integration

  • Overview
  • Installation and Configuration
  • Add Listings
  • Add Listings to Groups
  • How to use BB Message with Directorist

BuddyPress Integration

  • Overview
  • Installation and Configuration
  • Add Listings
  • Add Listings to Groups
  • How to use the BuddyPress Private Messaging in Directorist

Directorist - GamiPress Integration

  • How to earn points with GamiPress in Directorist
  • How to redeem points

Directorist WPML – Translation Guide

  • Directory Type Translation
  • Listings Translation
  • String Translation
  • Admin Text Translation
  • Directorist Pages Translation

Directorist Job Manager

  • Overview
  • Key Features
  • Installation
  • Builder Setup
  • Page Setup
  • Email template Setup

Directorist Marketplace

  • Directorist Marketplace

Directorist Ads Manager

  • Ads Manager Overview

Directorist Multi Directory Linking

  • Multi Directory Linking

Authorize.net Payment Gateway

  • Overview
  • Installation
  • Configuration
  • Settings

Directorist Helpgent Integration

  • Overview
  • Key Features
  • Installation
  • User Dashboard

Directorist Mailchimp Integration

  • Overview
  • Key Features
  • Installation
  • Configuration
  • Settings
Create WooCommerce Subscription

Setup Required Plugins

For getting started with Directorist Woocommerce Subscription Integration you need to install and activate the required plugins to work with the Directorist. These required plugins are as follows,

  • Directorist
  • WooCommerce
  • Directorist WooCommerce Pricing Plan
  • WooCommerce Subscriptions (Live site is required)
  • Any payment gateway that supports WooCommerce Subscription.
  • Setup auto recurring subscription plan according to their official docs

Configuring Subscription Plan

Step-01: An Admin needs to create a simple subscription product as the very first step of Configuring a Subscription plan. Please navigate to Products → Product Type → Simple Subscription

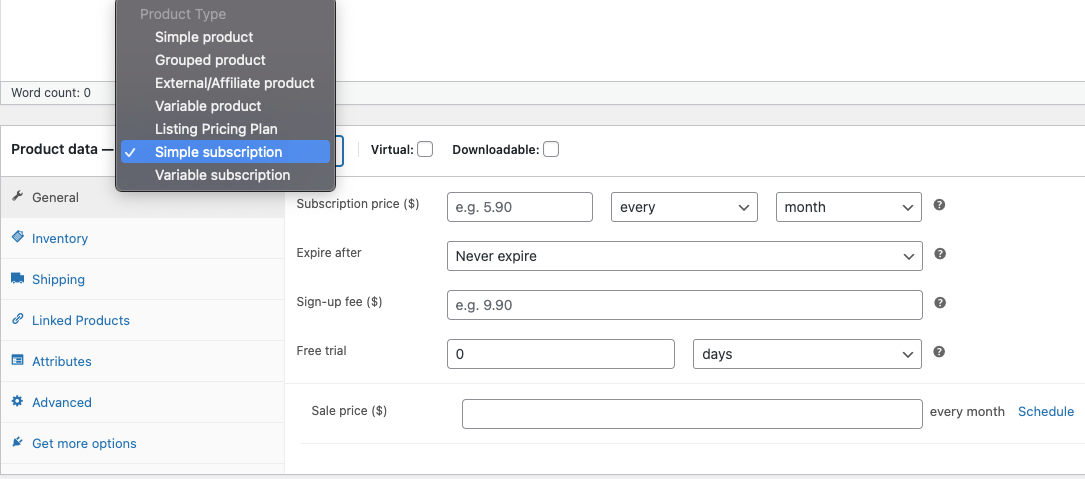
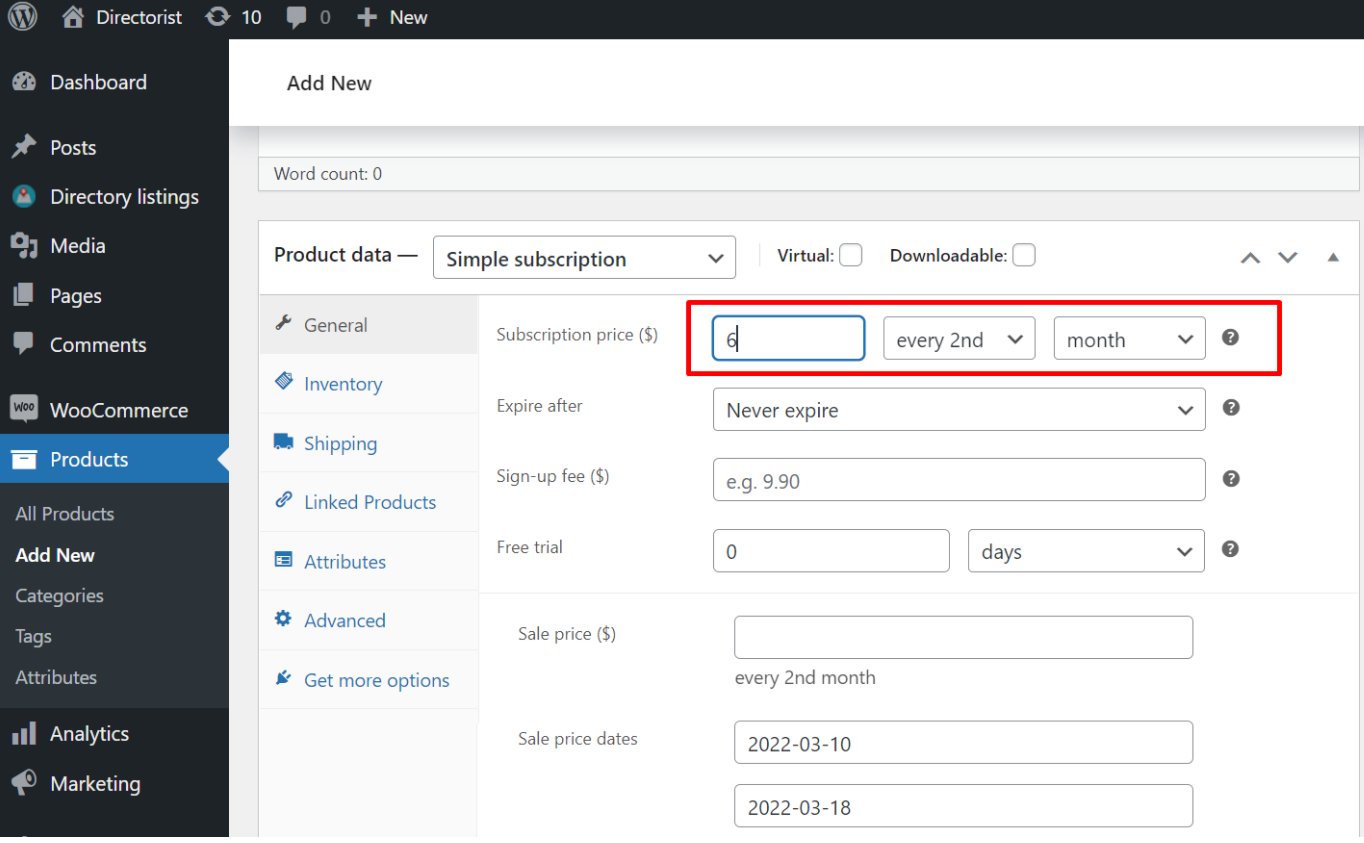
Step-02: After that, set up the price of the product with proper a recurrence period. 

Step-3: Then set up the Expire After value. 

Step-4: Set a signup fee for your product. 

Step-5: Set a value for a free trial in days/weeks/months/year for your product. 

Step-6: Give a discounted price of your product if you want where you can also set the time period of the discounted price. 

Lastly, after configuring the subscription plan accordingly, you can simply publish the plan. 

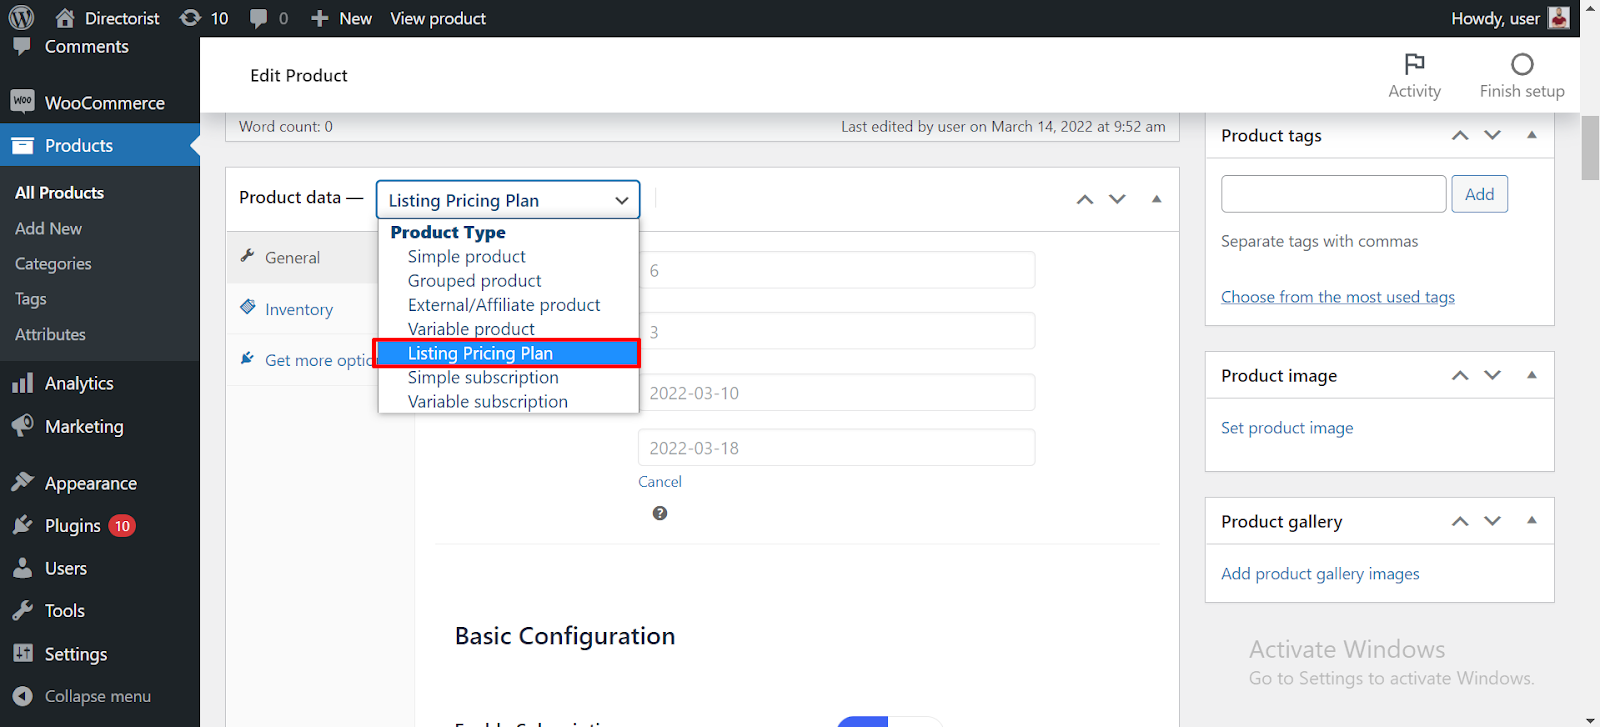
Create a Pricing Plan and tag a subscriptions product

After successfully configuring the subscription plan and publishing it you have to create a Pricing Plan and make the plan as a subscription plan. Consequently, please select the Listing Pricing Plan as a Product type. 

Then in the Basic configuration section, you will see the subscription option at the very first. You must enable this option to make this plan a subscription plan. 

By enabling the subscription option you will be able to see the option to link the subscription product you previously created. Select the subscription product you have just created. 

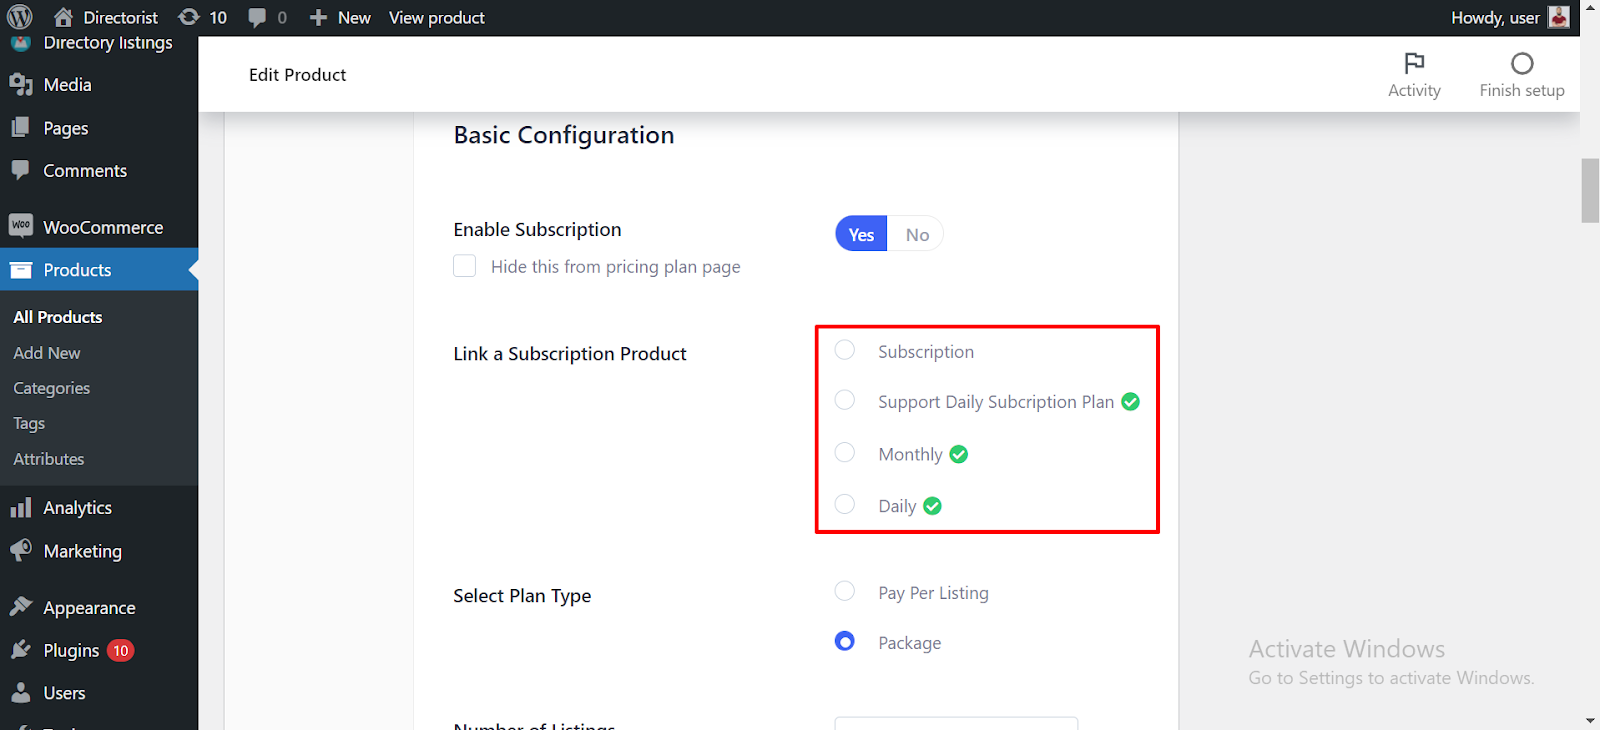
The major point in this part is, you will notice that you are able to select the only subscription plan which you have just created and others can not be selected. When you have created the subscription plan the Listing pricing plan only allows that subscription. As a result, you are unable to select other subscription plans. 

User Guide

Users will navigate to Add listing page for creating a listing and select the plan which has been tagged with the subscription product and continue to add a listing.

Selecting the plan will redirect users to the checkout page where they must complete the checkout process. 

After completing the checkout process users will be able to submit the listings. 

Submitted listing expiration will be the recurrence duration of the subscription product

Suspending a Subscription

Users can suspend the subscription by navigating to Woocommerce → Subscription

Then select the subscription plan which you want to suspend. 

Listing should be expired. If so, you are ready to sell a subscription plan 

Last Updated: March 16th, 2022

Related Article

  • Step By Step Guide
  • Video Walkthrough
  • Managing Orders

© 2025 All rights reserved