 Up to 35% Off!


Add Payment Gateways to Your Directory Website with WordPress
-

- Directorist Tutorials
- 5 mins read
To add payment gateway to website with WordPress and directorist will benefit you in several ways. For example, They save time, improve user experience, make the transactions secure and turn the process into a convenient one and so much more. But adding payments gateways to your directory website may seem a little daunting at first. But if you are using Directorist, the process becomes easier than easy.
Directorist supports four payment gateways – they are Stripe, PayPal, Authorize.net, and offline bank transfer. In today’s article, I will show you how to add these payment gateways to your Directorist powered directory website. Now, let’s begin. But before we move any further…
Benefits of Adding a Payment Gateway to Your Website
If you are adding Payment Gateways, you will be benefitted in different ways. Here are a few possible instances:
Save time & effort

If you are using payment gateways like Stripe, PayPal, and Authorize.net, you are receiving payments online within a 24/7 period which does not require any parties to be physically present in any particular location.
Thus, even if you are asleep, your website will be processing all the payment requests under the hood. This streamlined setup also supports complete merchant management, making it easier to oversee transactions and financial records in one place.
Improves user experience

Oftentimes, a potential buyer may add your directory website’s subscription plan to their cart and save payment information so that they can later return and instantly buy from the cart using the saved transaction data. Definitely, this improves the user experience.
Make the transactions secure

The transactions made via payment gateways are secure due to the data encryption. Meaning, with the payment gateways, your directory website becomes GDPR friendly. It also makes your website compliant with other industry-standard safety, for example, Payment Card Industry Data Security Standard or PCI DSS.
How to Add Payment Gateway to Website Using Directorist?
We assume that you have a Directorist website up and running. If you don’t know how to set up a directory website, follow this tutorial:
Learning Material: How to Create a Directory Website in WordPress for Free
or watch the following video:
Once you have your directorist powered directory website in place, follow these steps:
Step 1: Download & install a payment gateway
As we said, Directorist supports 3 online payment gateways – One is Stripe, another is PayPal and the other is Authorize.net. The setup process is very much similar. In this tutorial, we’ll only show you the Stripe configuration as the process of the rests’ is quite similar. If you still want to learn specifically about the other payment gateways, follow our official documentation. For example, you can follow this link to set up PayPal Payment Gateway.
To get Stripe payment extension, click on the button below:
You will get it in the form of a Zip file. Next, you will need to install it like any other WordPress plugin.
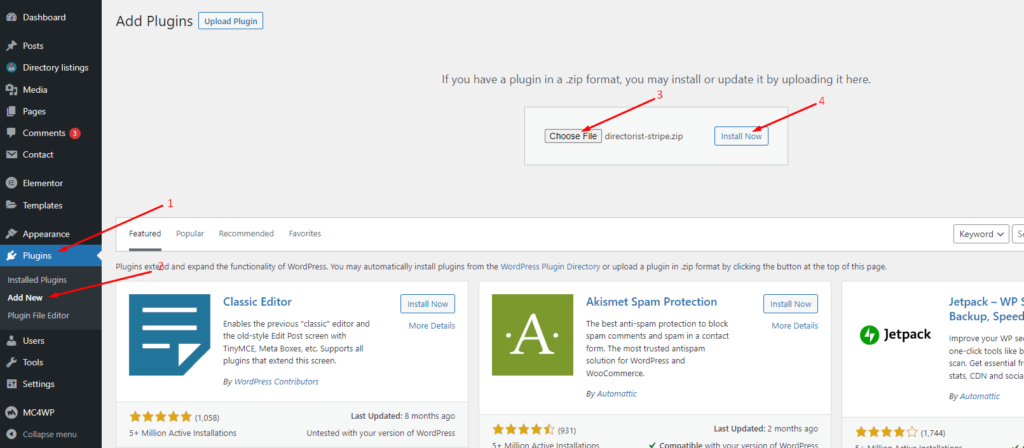
To install the zip file, you need to go to the WP Admin dashboard > Plugins > Add New > Choose File > Install Now.
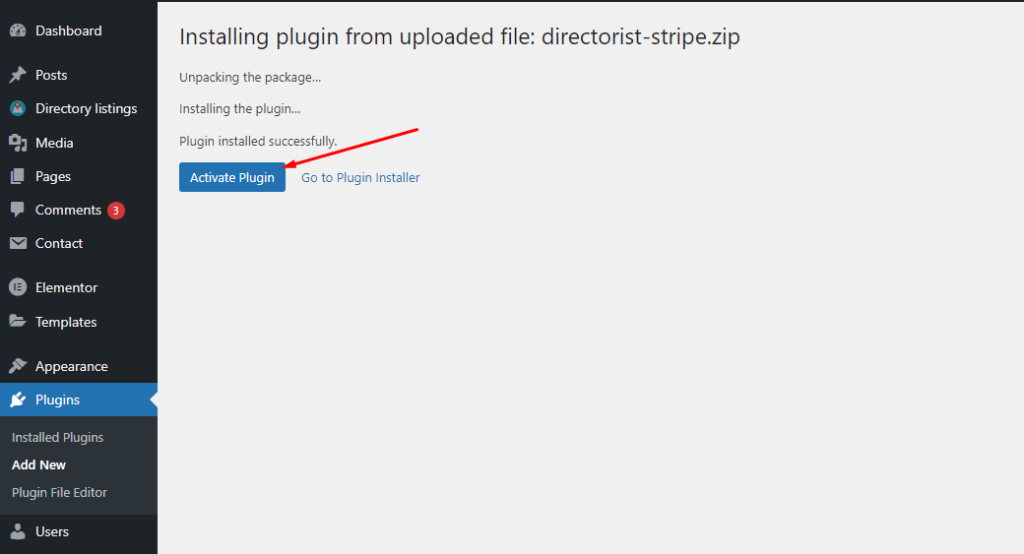
Now activate the plugin by hitting the “Activate Plugin” button.
Step 2: Configure the basic settings
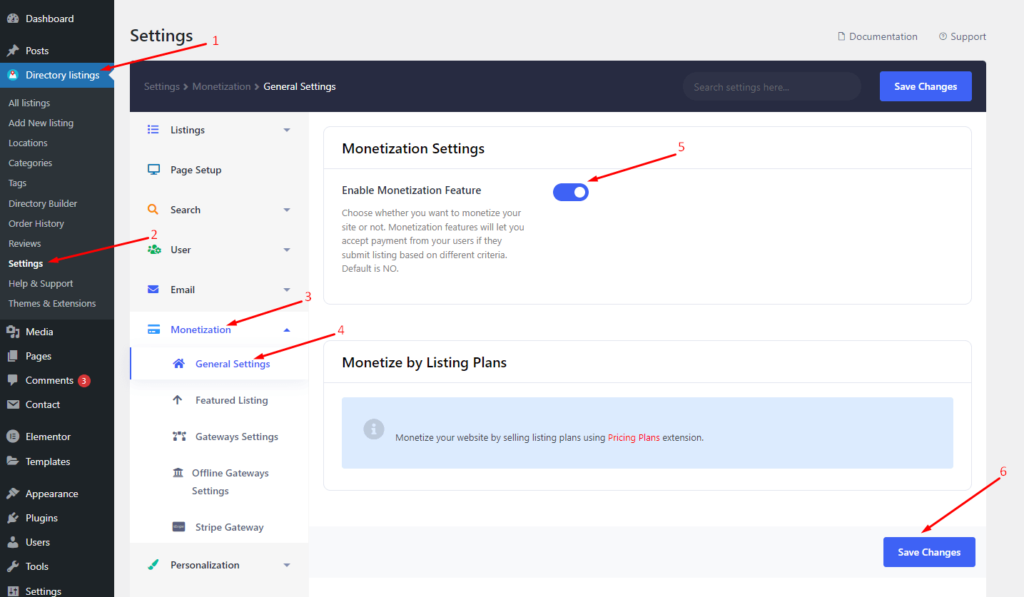
Now, you’ll need to configure some basic settings. First, go to the Directory Listings > Settings > Monetization > General Settings > Toggle on the “Enable Monetization Feature” > Save Changes.
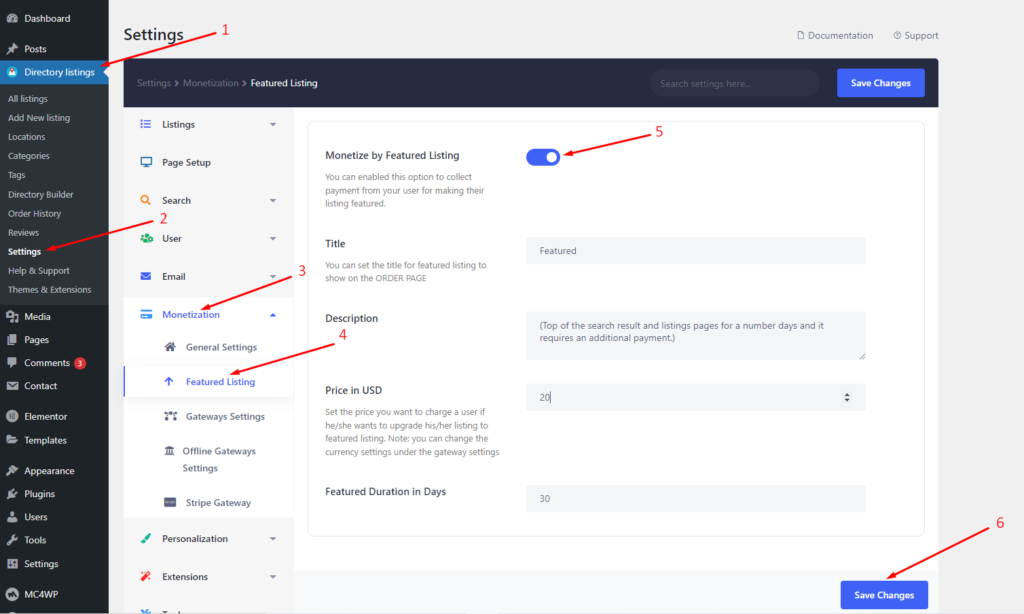
Secondly, go to the Directory Listings > Settings > Monetization > Featured Listing > Toggle on the “Monetization by Featured Listing” > Save Changes.
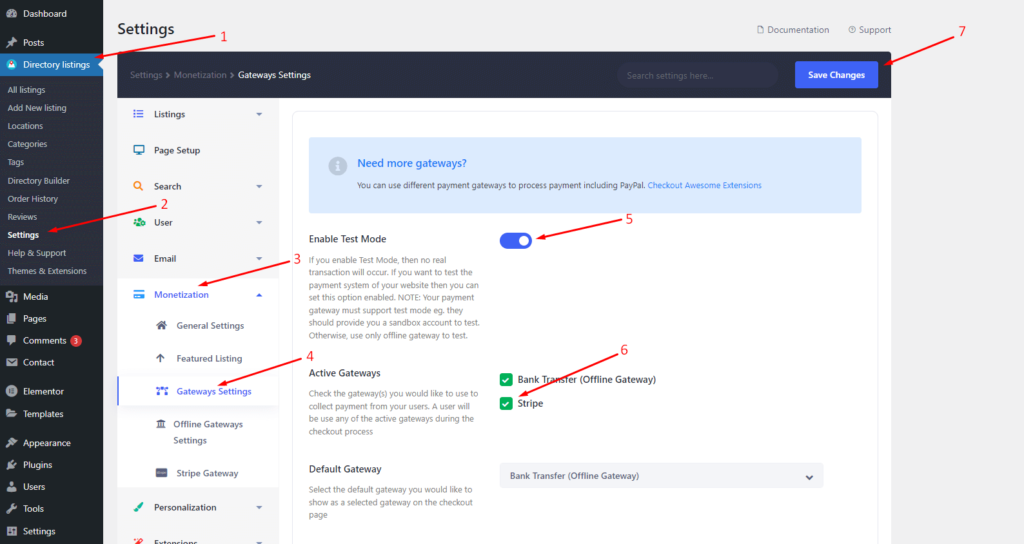
Finally, go to the Directory Listings > Settings > Monetization > Gateway Settings > Toggle on the “Enable Test Mode” > Select the Stripe button.
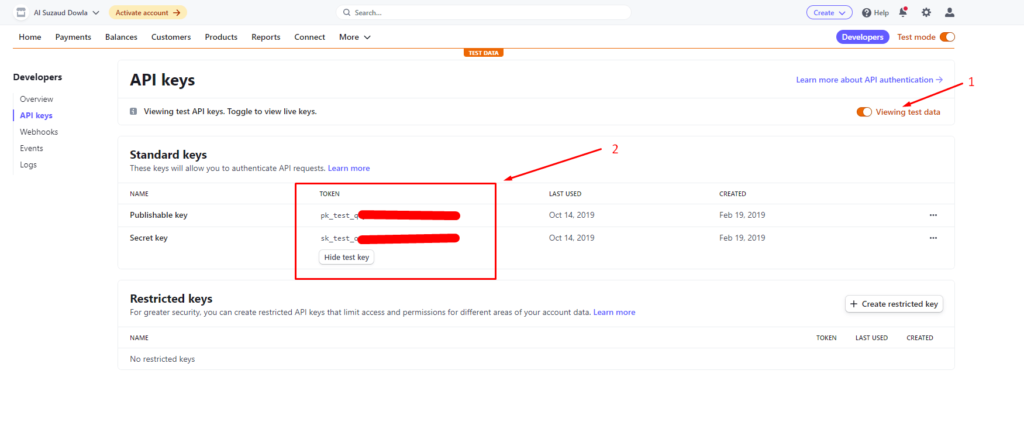
Step 3: Get the API keys from your Stripe Account
We’ll use the test mode instead of the live mode. Now, login to your Stripe account and turn the “Test mode” or “Viewing Test data” on. Next up, you will find the following API keys:
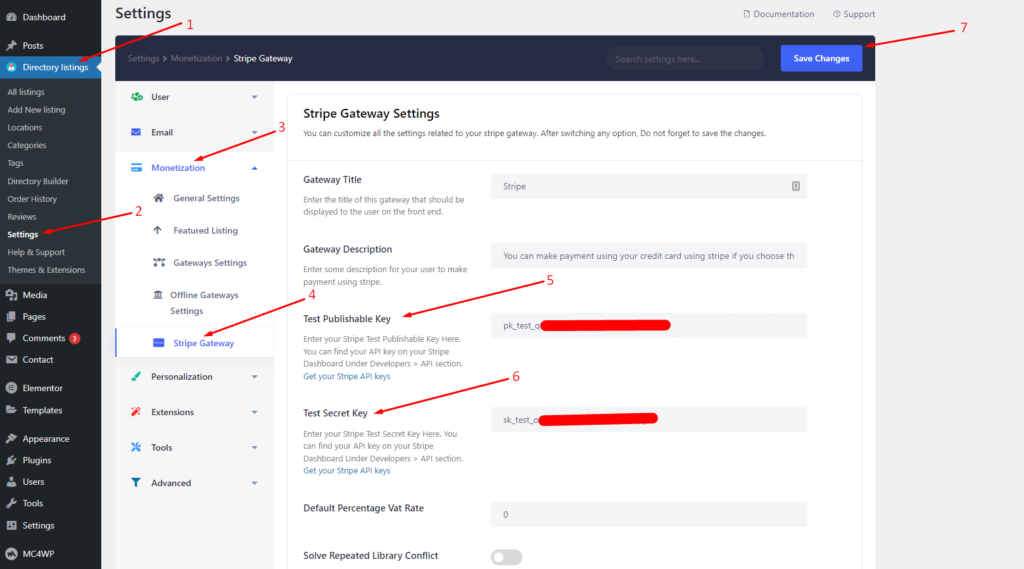
Step 4: Copy & paste the keys in Directorist settings
Now, navigate to the Directory Listings > Settings > Monetization > Stripe Gateway > Paste the “Test Publishable Key” > Paste the “Test Secret Key” > Save Changes.
That’s it! You have successfully done it!
But please note that you will need to paste the live publishable key and secret key to make live transactions.
Let’s see how it works for a listing owner
Assume that user2 is the listing owner of some restaurant listings. He or she wants to promote it as a featured listing.
Firstly, he or she can do it in the following way using the Stripe payment gateway:
As an admin, you can also check whether the order is completed as shown in the video.
Bonus Tips: Adding a Free Payment Gateway in Your Website
Directorist never lets you down. Even if you are looking for a free payment gateway, it got you covered with its offline bank transfer method. Wanna know how to add it? Follow these two steps:
Step 1: Make sure the bank account is selected
To do so, navigate to the WordPress Admin Dashboard > Directory Listings > Settings > Monetization > Gateway Settings > Select “Bank Transfer (Offline Gateway) from the Active Gateways option > Save Changes.
Step 2: Insert your bank account details
To add your bank account details, navigate to the WP Admin Dashboard > Directory Listings > Settings > Monetization > Offline Gateways Settings > Insert your details > Save changes.
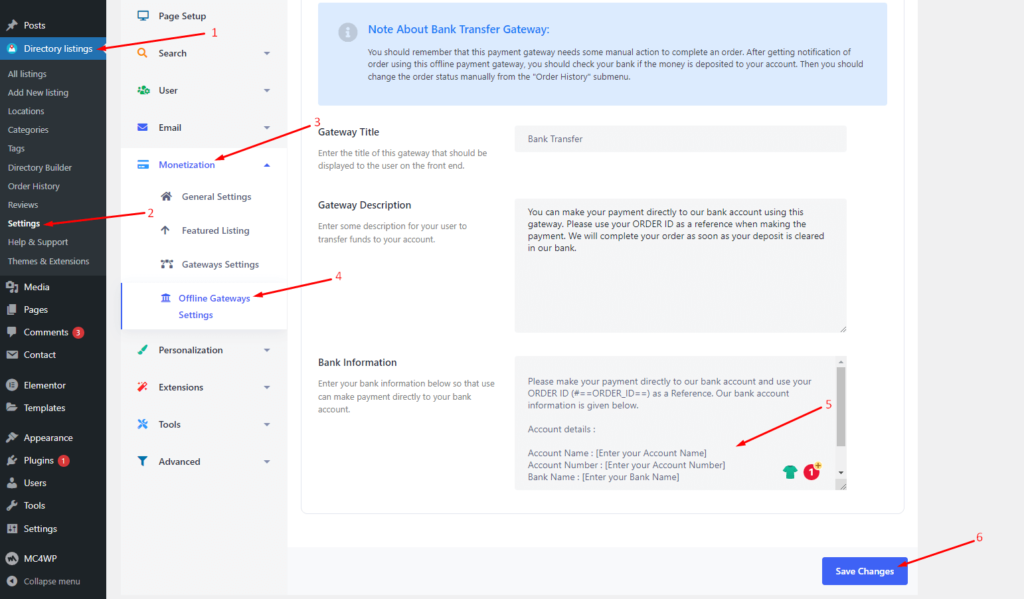
Note about Bank Transfer Gateway:
- You should remember that this payment gateway needs some manual action to complete an order. After getting a notification of an order using this offline payment gateway, you should check your bank if the money is deposited into your account. Then you should change the order status manually from the “Order History” submenu.
Last Hurrah!
If you are using Directorist on your WordPress website, adding payment gateways is this easy. You don’t need to reinvent the wheel hiring a developer with raw code. I hope this tutorial will help you monetize your directory website in the most convenient way.

If you liked our posts, don’t forget to subscribe to our blog so that we can notify you once any post is published. Directorist is now on Facebook, Twitter, and LinkedIn! You can also join the Directorist Community for sharing your thoughts and experiences relating to the directory niche. Come and join us to see what we’re up to.

suzauddowla
Al Suzud Dowla plays the role of a content strategist at Directorist. He is basically a digital marketing expert and a tech enthusiast (by heart) who excels particularly in technical content writing. In his pastimes, he is seen playing Ping Pong, performing Karaoke, reading books, and playing around with JavaScript as well.


Leave a Reply
You must be logged in to post a comment.