

Table of Contents
- 1 What Is a City Directory Website?
- 2 What Do You Need Before Building a City Directory?
- 3 Why Use Directorist to Build a City Directory?
- 4 How to Build a City Directory in WordPress Step by Step
- 4.1 Step 1: Register a Domain Name & Purchase Hosting
- 4.2 Step 2: Install WordPress
- 4.3 Step 3: Install Directorist
- 4.4 Step 4: Choose a Suitable Theme
- 4.5 Step 5: Create Categories, Tags, and Locations
- 4.6 Step 6: Add Your First Listings
- 4.7 Step 7: Enable Frontend Listing Submission
- 4.8 Step 8: Improve Search and Discovery
- 4.9 Step 9: Add Maps to Your Directory
- 4.10 Step 10: Decide How You'll Monetize the Directory
- 4.11 Step 11: Test Everything Before Launch
- 4.12 Step 12: Launch and Grow Your Directory
- 5 How Do You Help Visitors Find Businesses More Easily?
- 6 To Sum Up
How to Build a City Directory in WordPress: A Beginner-Friendly Guide
-

- Tips & Tricks Tutorials
- 8 mins read
Are you planning to build a city directory and looking for an easy and affordable way to get started?
The challenge is that building a directory website from scratch can seem complicated. You might think you need coding skills, a custom-built platform, or a large budget to make it work.
Fortunately, that’s no longer the case.
With WordPress and Directorist, you can create a fully functional city directory website without building everything yourself. You can organize businesses into categories, add locations, enable search filters, display listings on maps, and even allow business owners to submit their own listings.
Whether you want to build a local business directory, a city guide, or a niche directory for a specific industry, WordPress provides the foundation, while Directorist gives you the tools needed to manage and grow your directory.
In this step-by-step guide, you’ll learn how to build a city directory in WordPress, from setting up your website to adding listings, organizing locations, and launching your directory for the public. And, surely we’ll show the monetization method. Let’s get started.
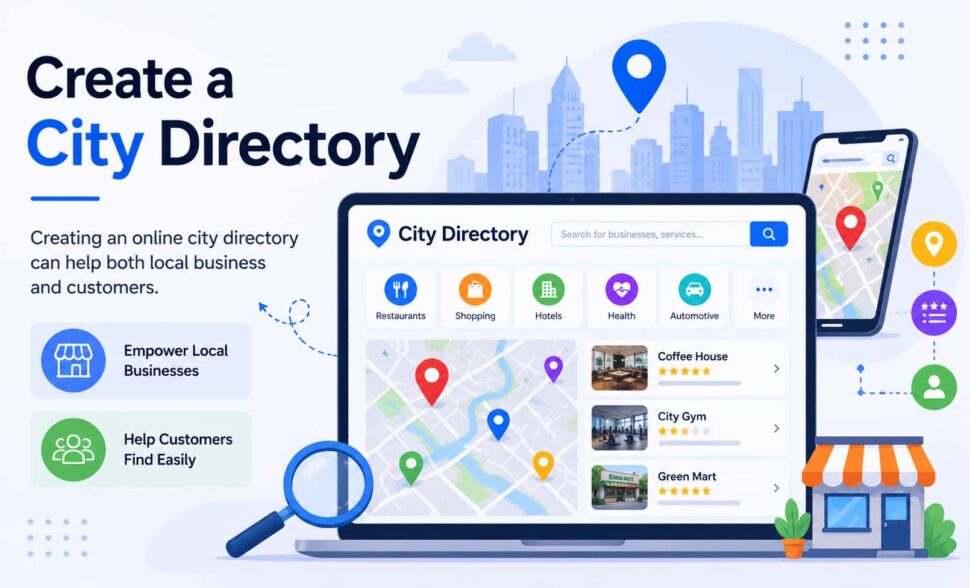
What Is a City Directory Website?
A city directory is a website that organizes local businesses, services, attractions, and places into searchable listings.
For example, a city directory might include:
- Restaurants
- Hotels
- Hospitals and clinics
- Schools
- Shopping centers
- Beauty salons
- Home services
- Tourist attractions
Each business gets its own listing page where visitors can view details such as the address, phone number, business hours, images, and other information.
These websites are useful because people naturally search for businesses based on category and location. Someone looking for a restaurant usually wants restaurants in a specific area—not every restaurant in the country.
That’s why city directories continue to be popular for both visitors and business owners.
What Do You Need Before Building a City Directory?
Before jumping into WordPress, spend a little time planning your directory.
Start by deciding what type of directory you want to create. You can build a general city directory that covers many business types or focus on a specific niche such as restaurants, healthcare providers, or local services.
Next, register a domain name. Ideally, your domain should be short, memorable, and relevant to your city or niche.
You’ll also need WordPress hosting. This is where your website files and directory listings will be stored.
Once your hosting account is ready, install WordPress. Most hosting companies provide a simple installation process that only takes a few minutes.
After WordPress is running, you’re ready to start building your directory.
Why Use Directorist to Build a City Directory?
Directorist is a WordPress directory plugin designed for creating listing websites.
For city directories, it includes features that help organize and manage listings more efficiently. You can create categories and locations, add custom listing information, enable frontend listing submissions, import listings using CSV files, and allow visitors to search through listings using filters.
Directorist also includes ratings and reviews, helping visitors evaluate businesses before contacting them.
Because location is such an important part of a city directory, Directorist offers both Google Maps and OpenStreetMap support. This allows visitors to view businesses on a map and better understand where they’re located.
Perhaps the biggest advantage for beginners is that you don’t have to create the directory structure yourself. WordPress provides the website foundation, while Directorist provides the tools needed to manage listings and directory content.
How to Build a City Directory in WordPress Step by Step
Now let’s move on to the actual setup process.
Step 1: Register a Domain Name & Purchase Hosting
Choose a domain name that people can easily remember. Try to keep it short and relevant to your city or audience. A good domain helps visitors immediately understand the purpose of your website.
Your hosting account stores all of your website content, listings, images, and files.
As a new directory owner, start with a good WordPress hosting plan so that your listings are shows fast as they searched.
You can choose a hosting from our handpicked options – 5+ WordPress Hosting Services for Directory Websites in 2026
After purchasing, get a time to read: WordPress Hosting Guidance for Making Faster & Safer Directory Listing Websites
Most of the hosting provider offer a free domain plan with hosting plan. Check the offer before buying domain independently.
Step 2: Install WordPress
Once hosting is active, install WordPress from your hosting dashboard. Most hosting service providers offer readymade installation without charge.
After installation, log in to your WordPress admin area where you’ll manage your website.
Step 3: Install Directorist

From your WordPress dashboard:
Plugins → Add New → Search for Directorist → Install → Activate
Once activated, Directorist adds the directory functionality needed to build your city directory.
Step 4: Choose a Suitable Theme
Your WordPress theme controls the design of your website.
When selecting a theme, focus on usability rather than fancy effects. Visitors should be able to browse categories, search listings, and navigate the directory without confusion.
To create a city directory, we’ll recommend dList which is perfectly combined with the aforementioned features like browse categories, search listings, and navigate the directory without confusion.
Step 5: Create Categories, Tags, and Locations
This is where your directory begins to take shape.
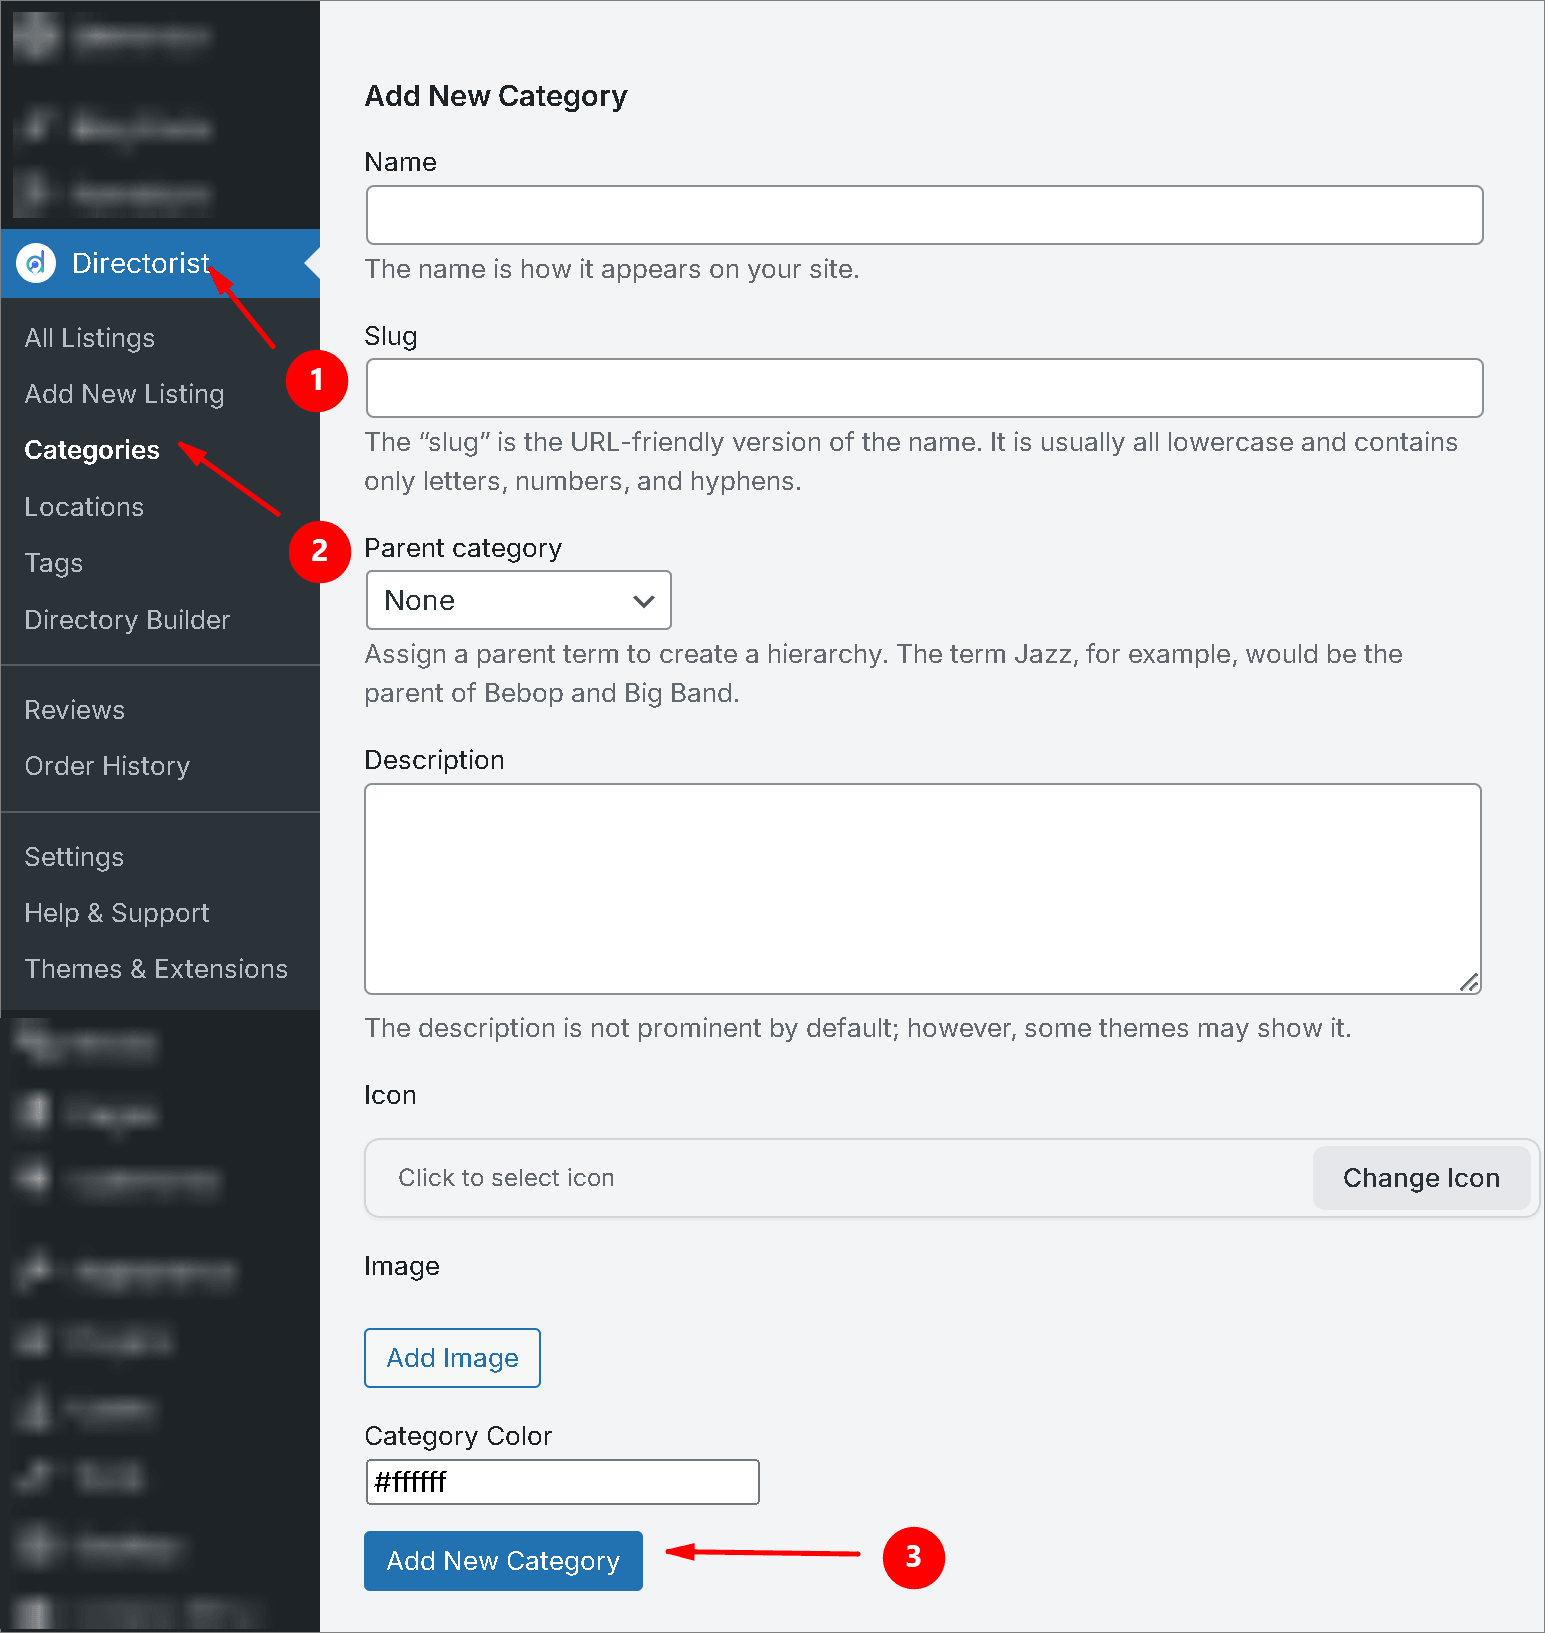
Create Categories
Categories help organize businesses by type. Create Category by following this flow: Directorist > Categories > Add New Category (Fill the fields) > Click “Add New Category”.
After adding a new category, you’ll find it in “Categories” option.
For example:
- Restaurants
- Hotels
- Schools
- Healthcare
- Shopping
- Beauty & Wellness
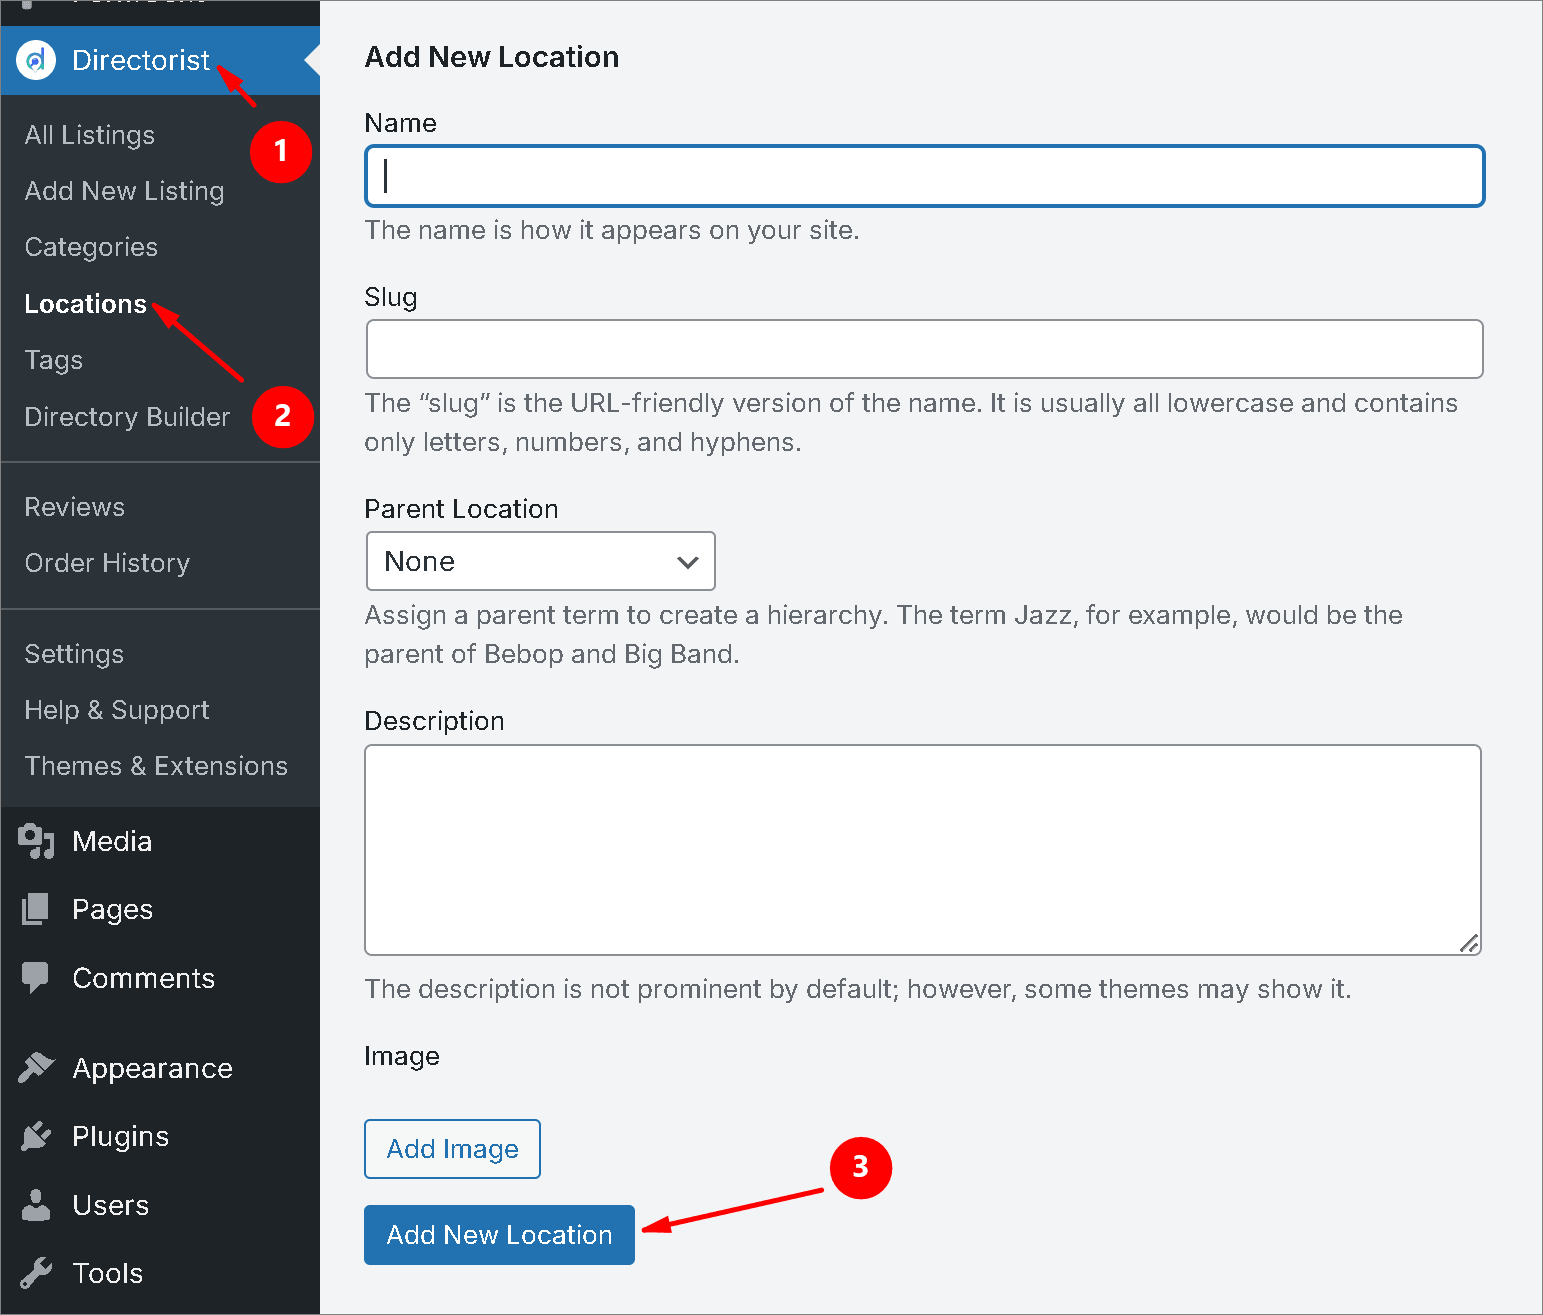
Create Locations
Locations organize businesses geographically. Create locations by following this flow: Directorist > Locations > Add New Location (Fill the fields) > Click “Add New Location”.
For example:
- Downtown
- North District
- South District
- Old Town
- Business Center
Create Tags
You can also use tags to describe additional details about a listing. Create Category by following this flow: Directorist > Tags > Add New Tag (Fill the fields) > Click “Add New Tag”.
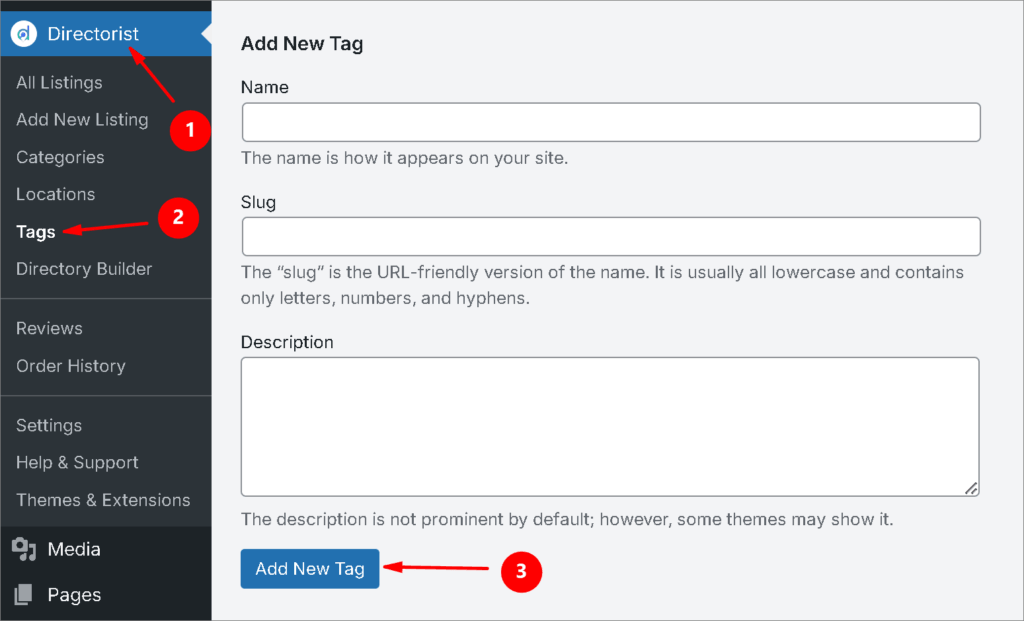
The process of creating categories, Tag, Locations are almost same. In case, you face any trouble, you can learn it from our comprehensive blog – Ultimate Guide to Create a Directory Website
Step 6: Add Your First Listings
Now it’s time to populate your directory.
Each listing should contain useful information such as:
- Business name
- Description
- Address
- Phone number
- Website
- Business hours
- Images
- Category
- Location
Start with a handful of high-quality listings rather than hundreds of incomplete ones.
A smaller directory with accurate information usually provides a better user experience than a large directory filled with missing details.
But manually listing costs time, you can quickly collect authentic data from google maps or rss through a poweful extension called Directorist Listing Importer.
Further, if you have pre collected data, you can add it through csv upload feature. To know more, follow this documentation.
Step 7: Enable Frontend Listing Submission
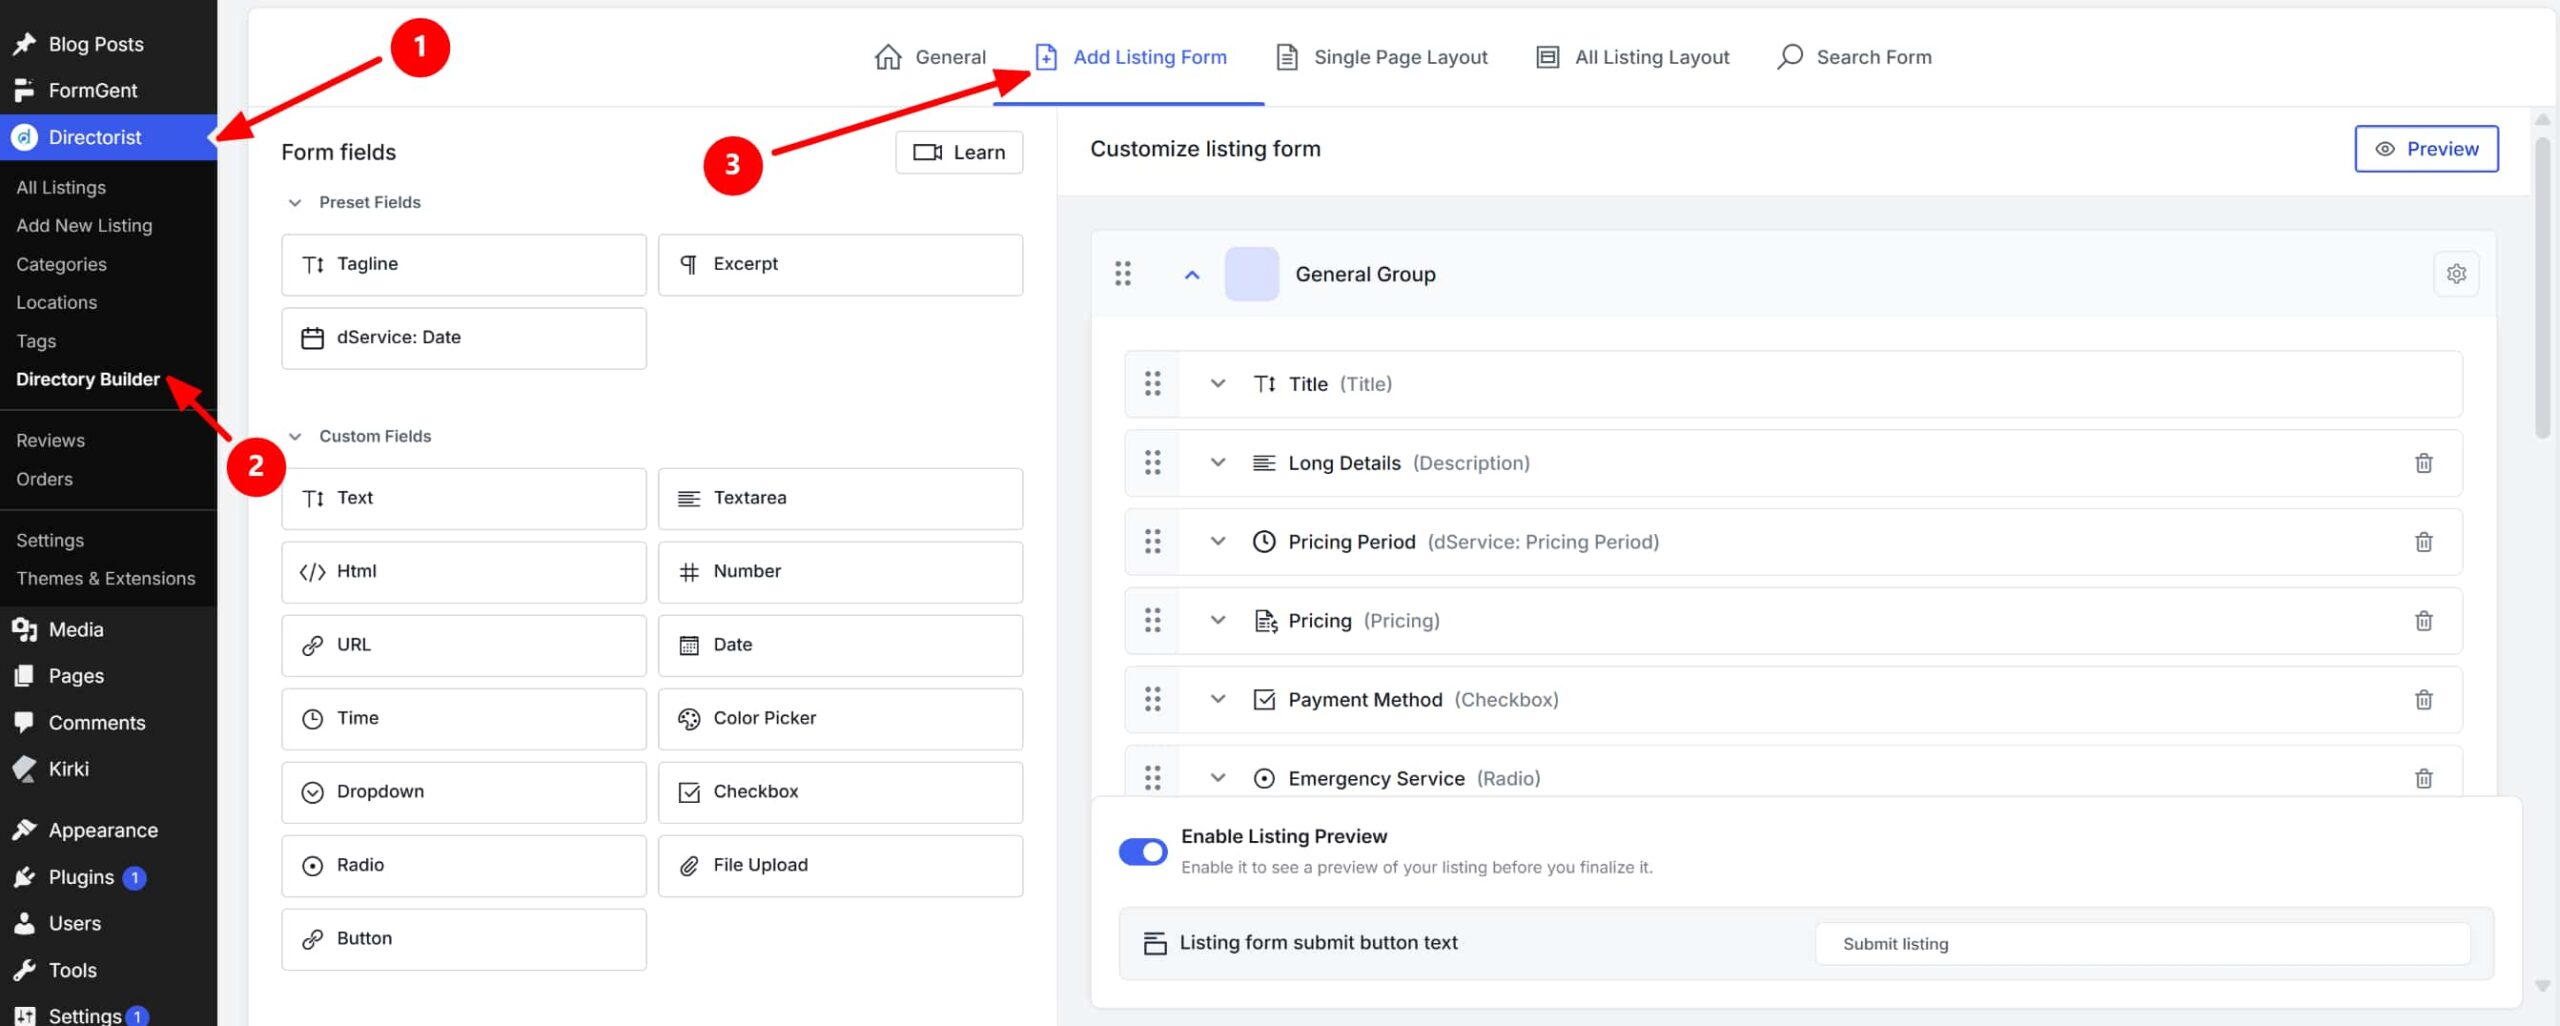
As your directory grows, manually adding every business becomes difficult.
Directorist allows business owners to submit listings themselves through frontend submission forms.
This makes it easier to expand your directory while keeping business information up to date.
Luckily, Directorist comes up with an amazing feature of “Add Listing Form”. It has drag and drop feature which offer you design your listing form with the form fields. Also, the custom fields gives you more customization feature to create the form more personalized so that the business owner never feel board to submit their listings.
Step 8: Improve Search and Discovery
Visitors should be able to find listings quickly.
Directorist includes search functionality that can help visitors browse listings using categories, locations, keywords, and other filters.
The easier it is to find businesses, the more useful your directory becomes.
To make the search system more personalized and accurate, we recommend you to opt in Directorist Universal Search, Directorist AI Search, Directorist Search Alert on your city directory.
Step 9: Add Maps to Your Directory
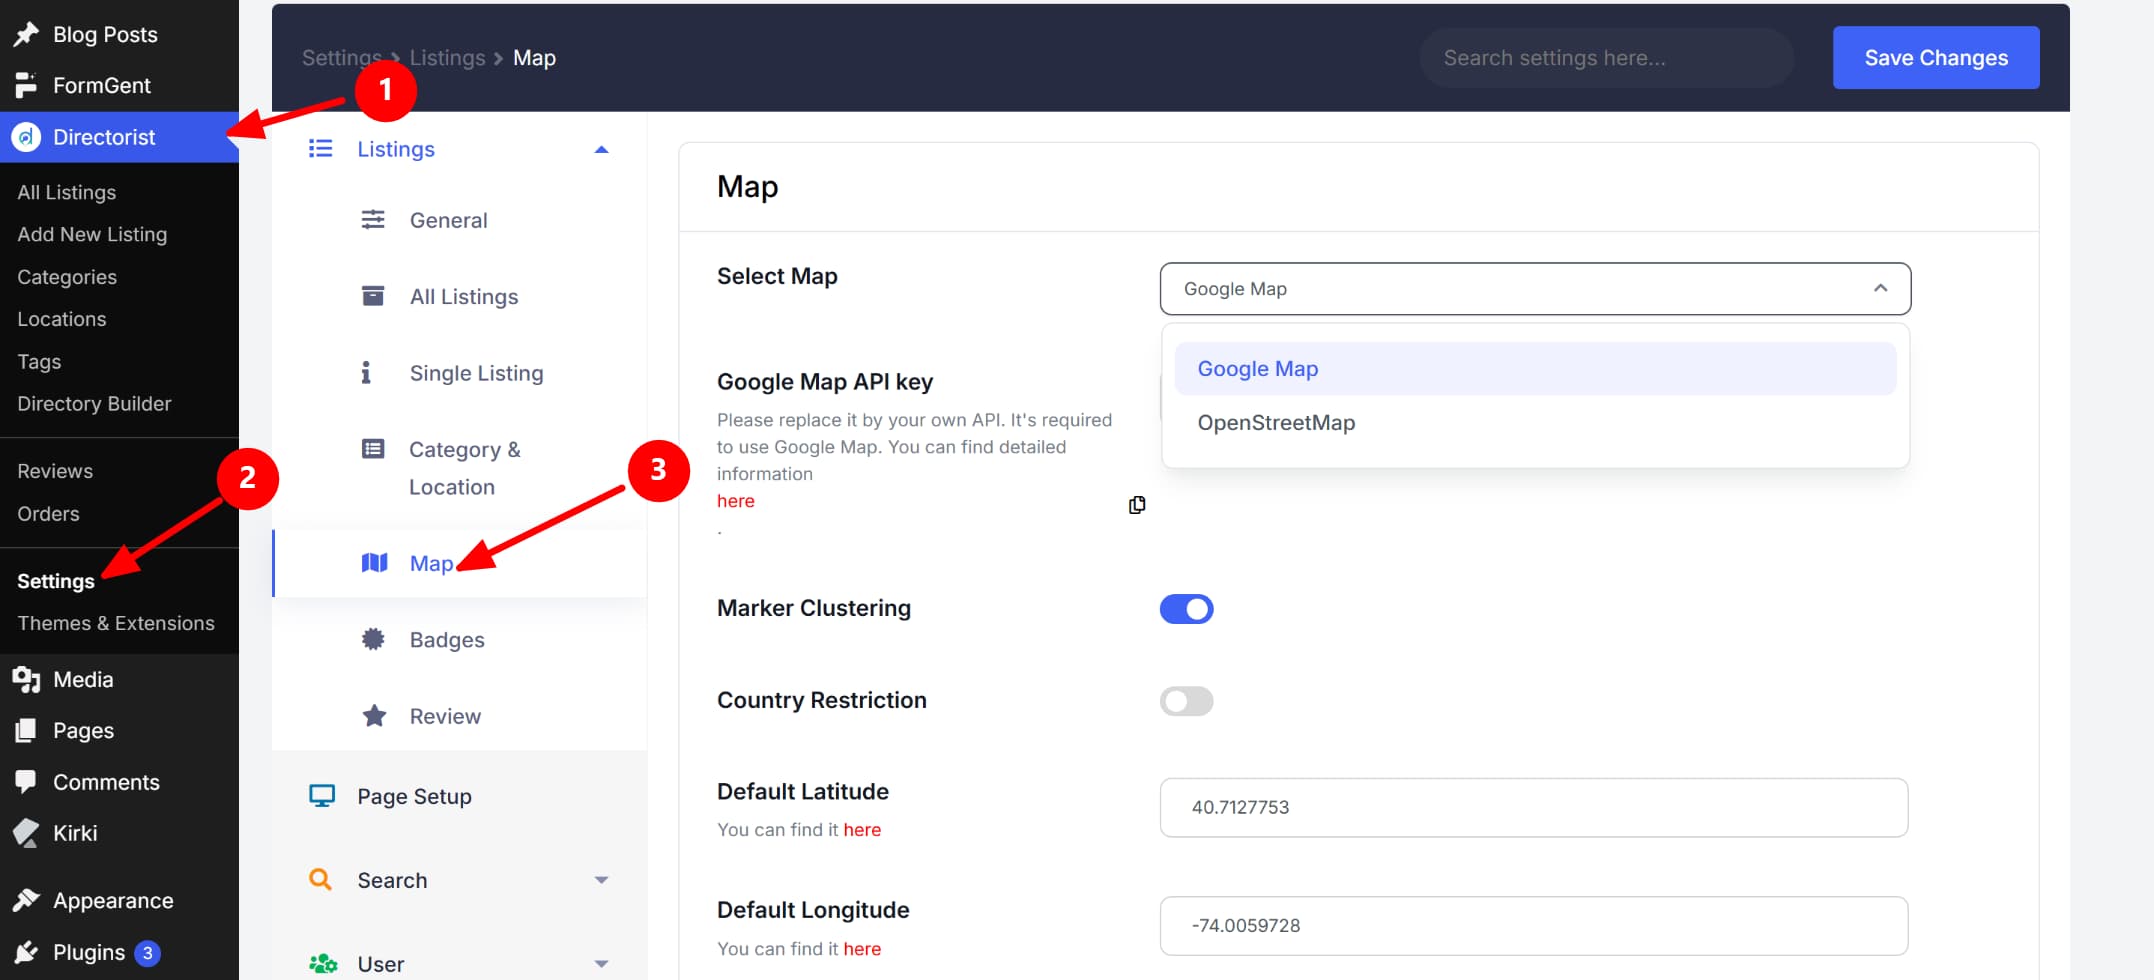
Maps are particularly important for local directories.
Instead of only displaying addresses, you can help visitors visualize where businesses are located.
This is especially useful for restaurants, hotels, healthcare providers, and tourist attractions.
With Directorist, you can avail to popular location app service Google Maps and Open Street.
Step 10: Decide How You’ll Monetize the Directory
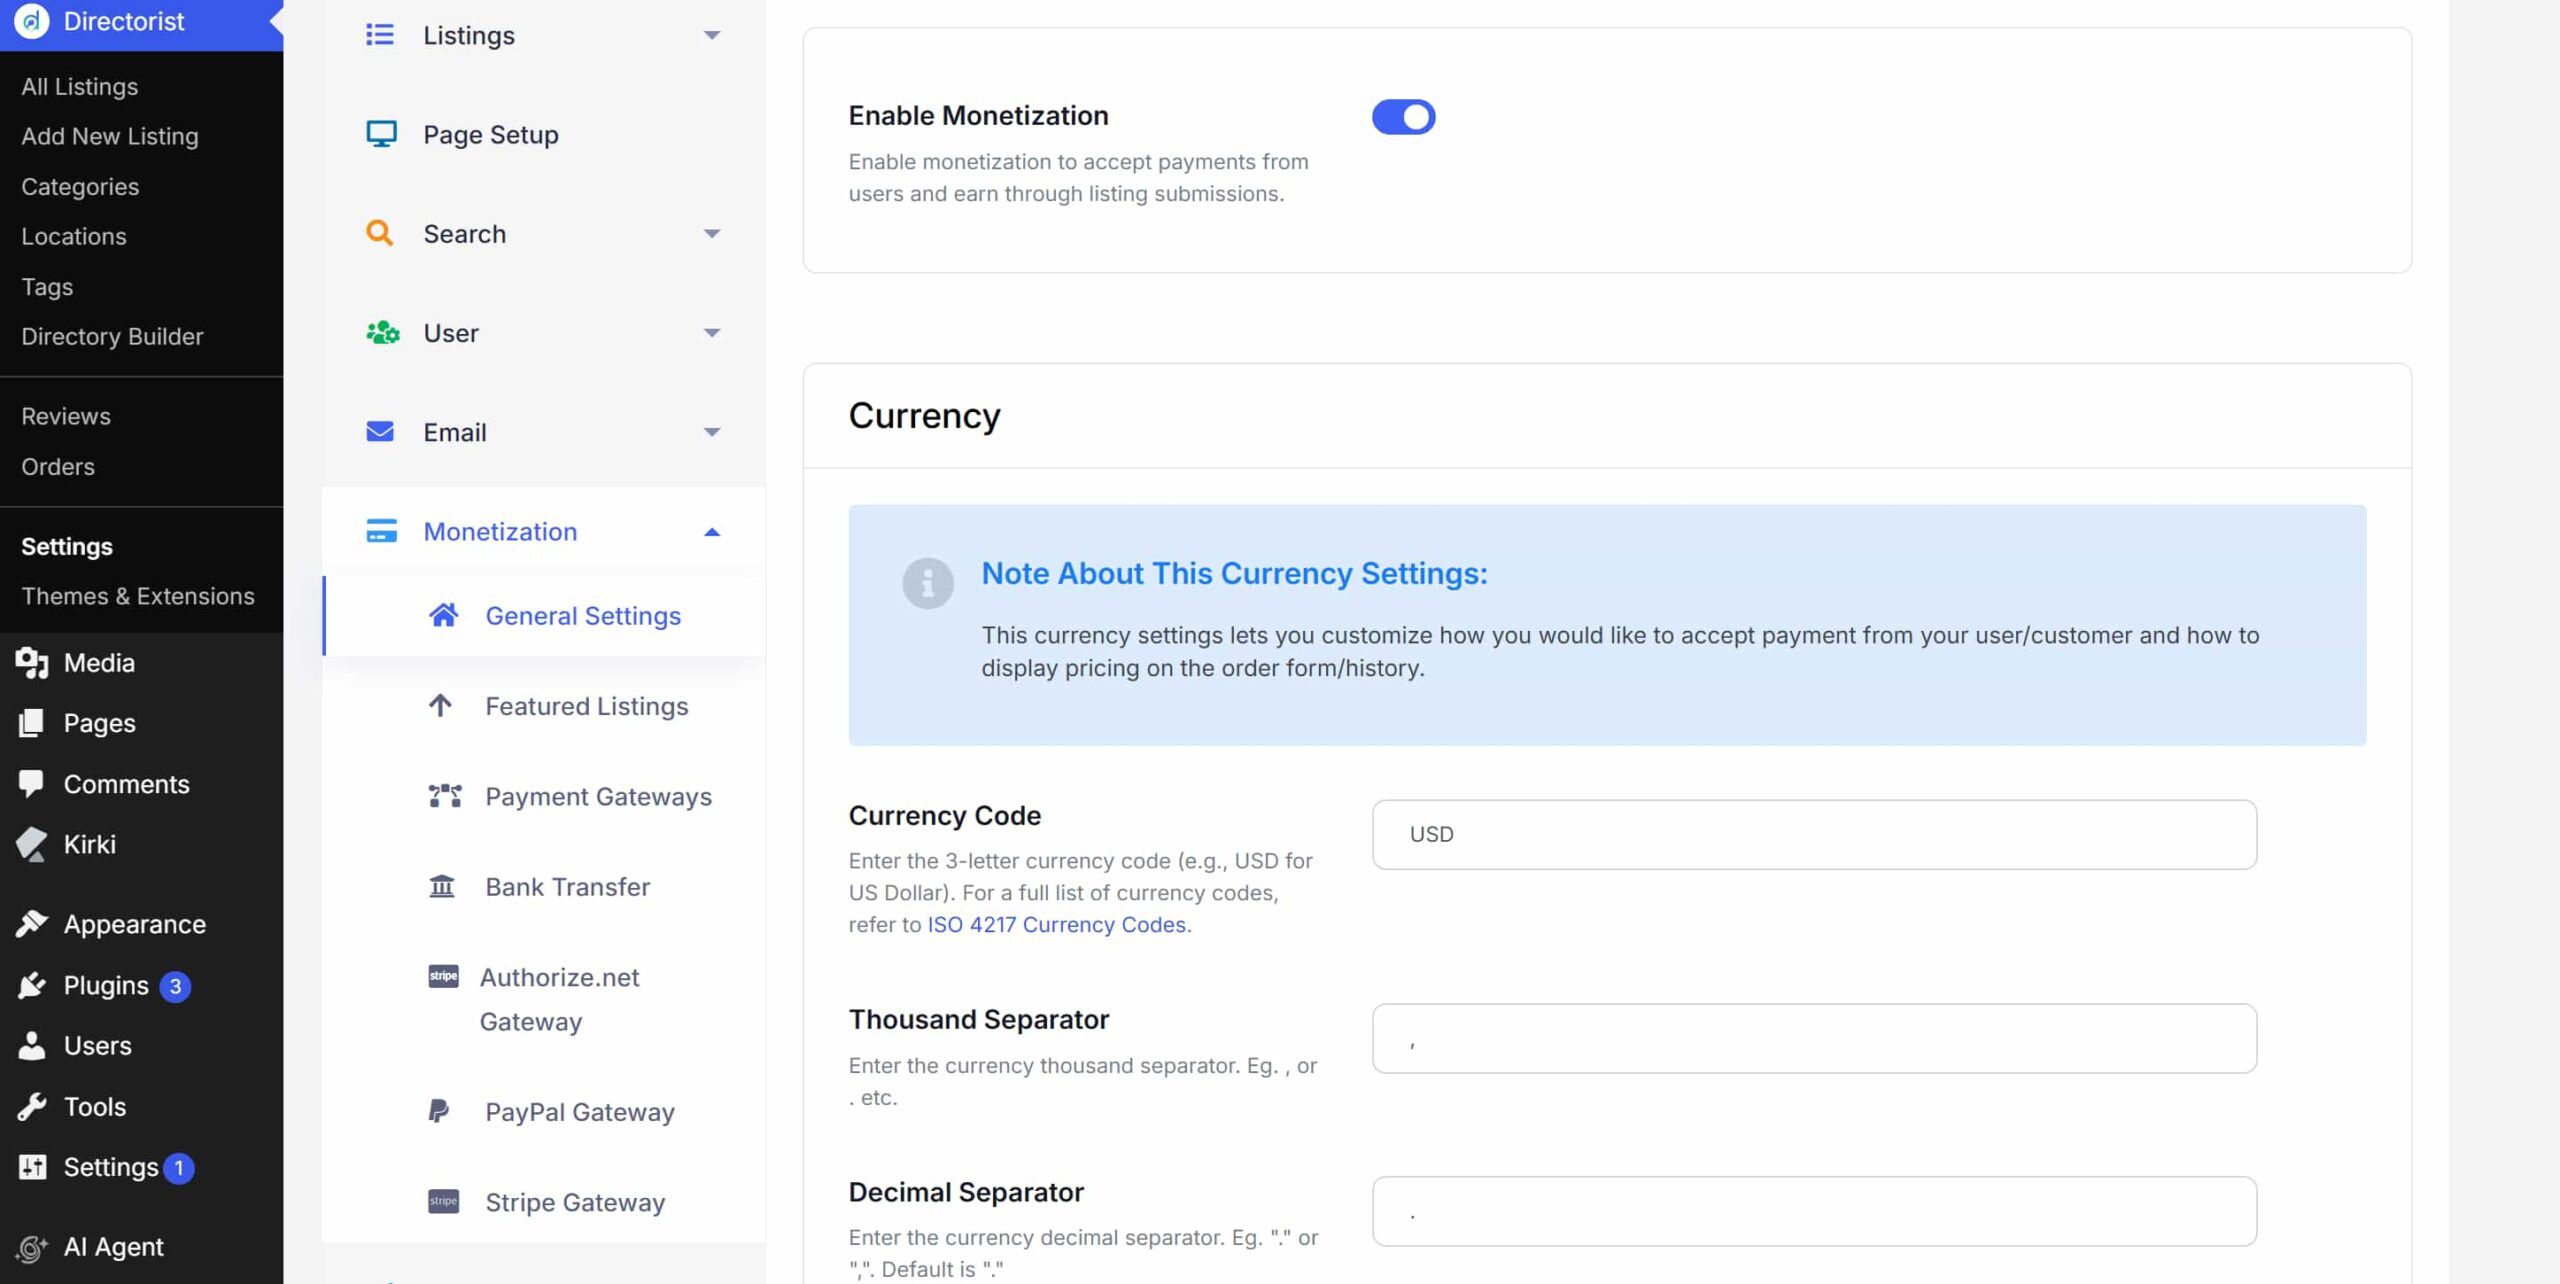
Many directory owners eventually turn their websites into revenue-generating businesses.
Directorist includes features related to paid listings, featured listings, subscriptions, advertising, and other monetization methods.
However, if you’re just starting, focus first on building useful content and attracting visitors.
Monetization often becomes easier after the directory gains traction. With Directorist, you can enjoy multiple monetization features to earn money from multiple ways which we explained in How to Monetize a Directory Listing Website.
Step 11: Test Everything Before Launch
Before making your website public, review it from a visitor’s perspective.
Ask yourself:
- Can visitors easily find listings?
- Are categories organized logically?
- Are locations accurate?
- Do listing pages contain complete information?
- Does the search function work properly?
- Does the website look good on mobile devices?
Fixing these issues before launch can significantly improve the user experience.
Step 12: Launch and Grow Your Directory
Once you’re satisfied with the setup, it’s time to launch.
Start by reaching out to local businesses and inviting them to join the directory.
You can also publish local content related to your city, such as:
- Best restaurants in your city
- Top attractions to visit
- Popular local services
- Recommended healthcare providers
This type of content can help attract visitors who are already searching for local information online.
How Do You Help Visitors Find Businesses More Easily?
The success of a city directory depends heavily on user experience.
Visitors should never feel overwhelmed by too many categories or confusing navigation.
Keep your category structure simple, organize listings by location, and make search accessible from important pages.
The easier it is for users to discover businesses, the more likely they are to return to your directory in the future.
To Sum Up
Building a city directory in WordPress is much more achievable today than it was a few years ago.
Instead of developing a custom directory platform from scratch, you can use WordPress together with Directorist to create a structured directory website for local businesses and services.
Start with a clear niche, organize your listings carefully, focus on providing accurate information, and improve the directory as it grows.
You don’t need thousands of listings on day one. A small city directory with useful and demanding information can provide more value than a large directory filled with incomplete listings.
The key is to start simple, stay organized, and expand gradually as your audience grows.

Helpful Articles:
How to Create a Local Business Directory for a Specific City (and Actually Get Listings)
How to Drive Repeat Traffic to Your Directory Website (12 Tactics That Work)
How to Promote a Directory Website: A Pre-Launch and Early Growth Playbook

Rezaul Karim
Rezaul Karim is a Digital Marketer and Content Strategist at wpWax, the team behind Directorist — trusted by 20,000+ directory websites worldwide. With 6+ years of experience in SEO-driven content and WordPress plugin marketing, he provides data-backed insights on building high-authority directory businesses. From optimizing search visibility to streamlining directory user experiences, Rezaul focuses on practical solutions that drive impressions and conversions. When he isn't auditing site performance or exploring the latest AI-integrated marketing tools, he is an avid reader and advocate for sustainable digital growth.


Leave a Reply
You must be logged in to post a comment.