

Table of Contents
- 1 Requirements
- 2 Step 1: Buy a Domain & Hosting
- 3 Step 2: Installing WordPress (Free)
- 4 Step 3: Installing a WordPress Multi Directory Plugin (Free)
- 5 Step 4: Configure the Directorist Setup Wizard (Optional)
- 6 Step 5: Add the Pages to the Menu
- 7 Step 6: Move the Demo Listings to Trash
- 8 Step 7: Add New Listings
- 9 Step 8: Enable multi-directory option
- 10 Step 9: Frontend Form Submission by a User
- 11 Conclusion
How to Create a Multi Directory Website with a WordPress Multi Directory Plugin for Free
-

- Directorist Tutorials
- 6 mins read
The smartest people are pursuing online business as it is the most lucrative platform to make money. An online directory business allows the site owner to enjoy profits from the business owners in a variety of means.
Among others, one way to scale an online directory business is converting your regular directory website into a multidirectory one. For instance, if you already have a directory business on automobiles, you can scale your business up with an automobile servicing directory. But how can you do that?
Well, making a multi-directory website can be a daunting task if you are not running a WordPress website. Meaning, you can do it only with a single click if you are using a WordPress multi-directory solution. Now, without further ado, let’s begin with how you can effortlessly build a WordPress multi-directory website.
Requirements
- Domain & hosting
- WordPress (Free)
- A WordPress multidirectory plugin (Free)
- A WordPress directory theme (Free)
Step 1: Buy a Domain & Hosting

A domain is the URL of your website and hosting is a web space where you will store your website.
Before buying a domain, make sure your domain name resonates with your directory niche. You can get a domain and hosting service from various providers.
Initially, you can get a domain for just $10 and hosting for just $10. Later if your site starts to get a lot of traffic you can consider getting more expensive hosting plans.
We recommend you use hosting from providers such as Bluehost, Namecheap, Kinsta, Godaddy, and Cloudways WooCommerce Hosting due to their trustworthiness.
Step 2: Installing WordPress (Free)

Now that you have the domain and hosting aboard, you have to install the best CMS, WordPress on your website. Why WordPress? The blunt answer is it is now powering up more than 40% of all websites you see on the internet. So, rest assured of its quality.
And in case you are in any trouble, you can get a quick fix from the support team or from the community. Thus you will never feel stranded.
To download WordPress, visit the official WordPress.org page. After downloading, install it on your hosting’s C panel. Some hosting providers may install WordPress out of the box. If not, contact your hosting provider to install it.
If you are a DIY type person, you can go through this official tutorial for the installation process.
Step 3: Installing a WordPress Multi Directory Plugin (Free)
Next up, you need a free WordPress plugin with the multi-directory feature for your website. This tutorial will use a free multi-directory website solution called Directorist. It’s free and has a quite satisfactory rating of 4.7 out of 5 in the WordPress.org repository.
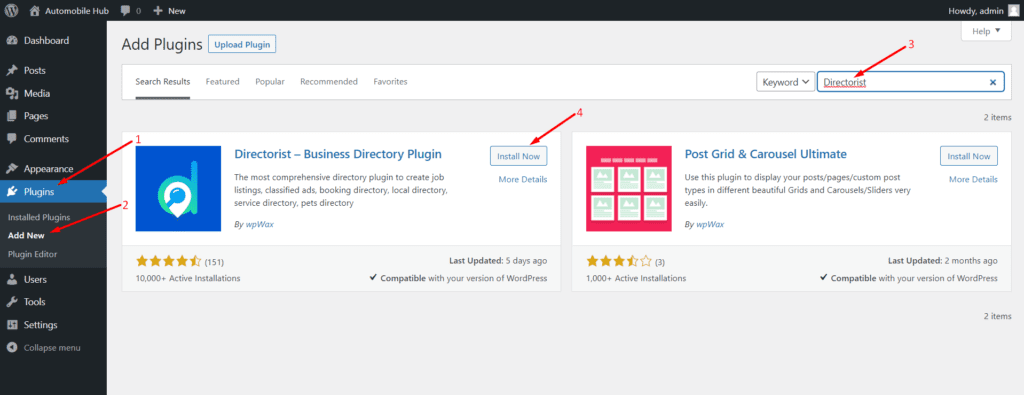
After installing WordPress on your website, navigate to the WP Admin Dashboard > Plugins > Add New > Search for Directorist > Install and activate the Plugin.
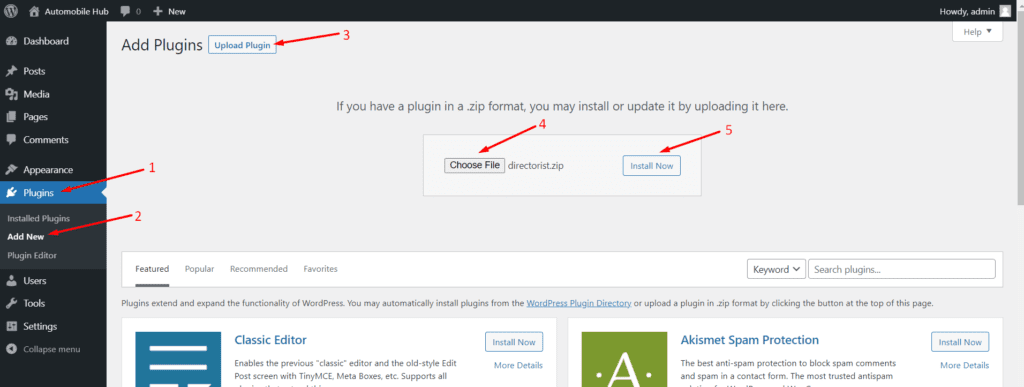
Alternatively, you can also download the .zip file from here and upload it by going to the WP Admin Dashboard > Plugins > Add New > Upload Plugin > Choose File > Install Now.
Step 4: Configure the Directorist Setup Wizard (Optional)
Upon activating the free WordPress multi-directory plugin, you will be able to see the following setup wizard:
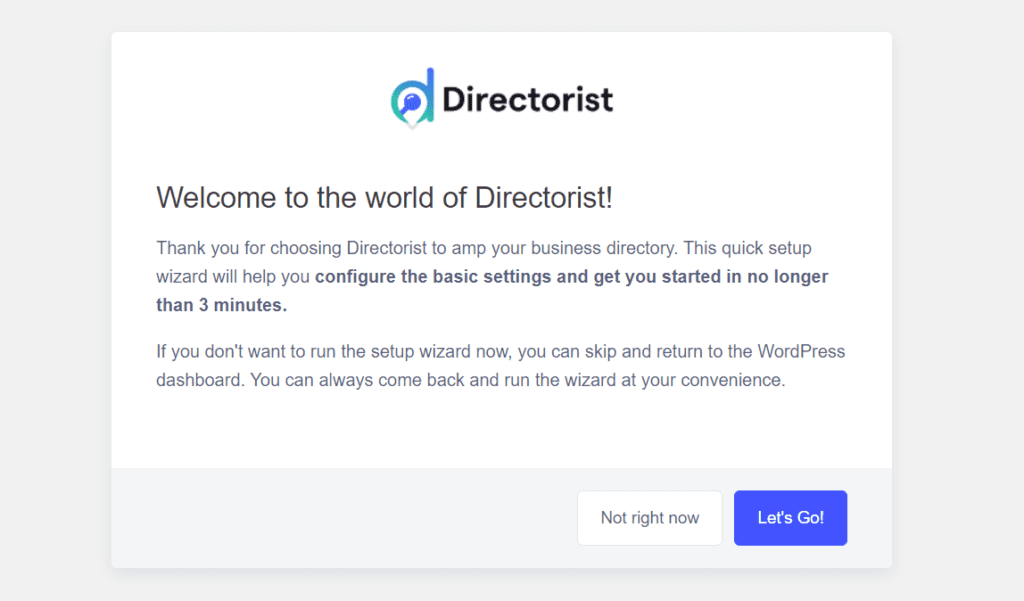
You can select the “Not right now” button to postpone the setup or hit the “Let’s Go!” button to proceed to the wizard.
After you select the “Let’s Go!” button, you will be taken to the following screen:
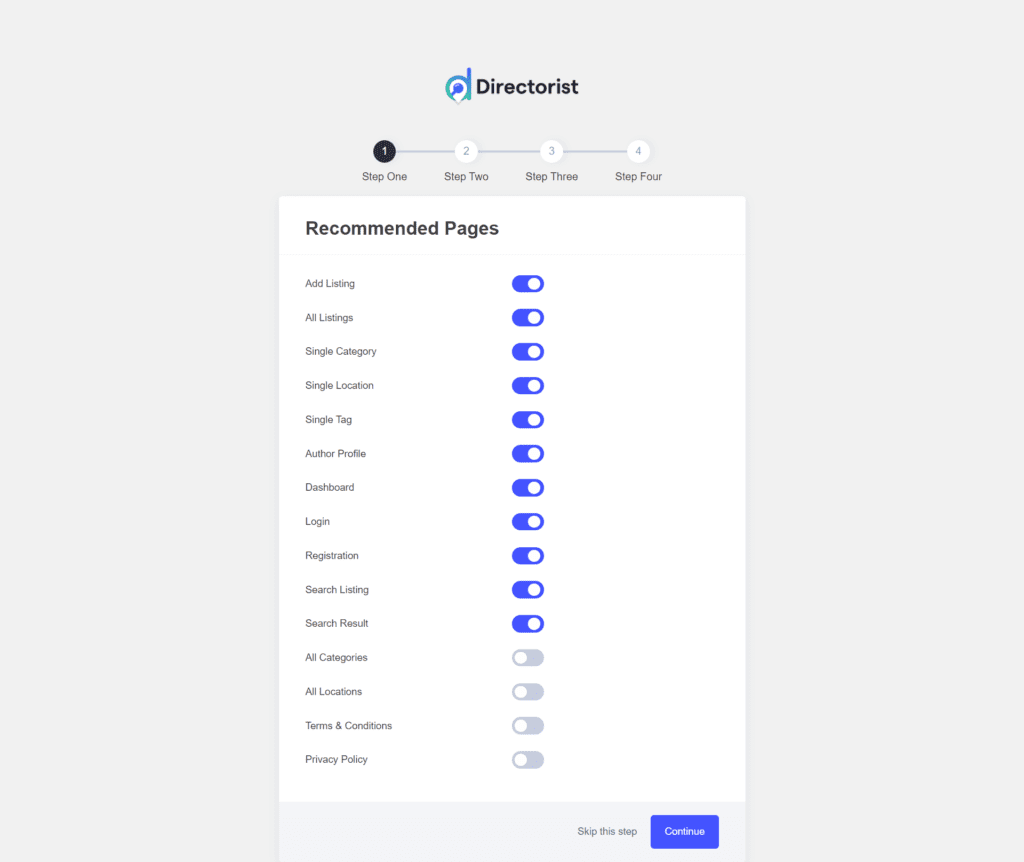
From here, you can disable or enable the pages from viewing on the front end. In this tutorial, we will keep the settings as it is. Now, hit the ‘Continue’ button to go to the next step.
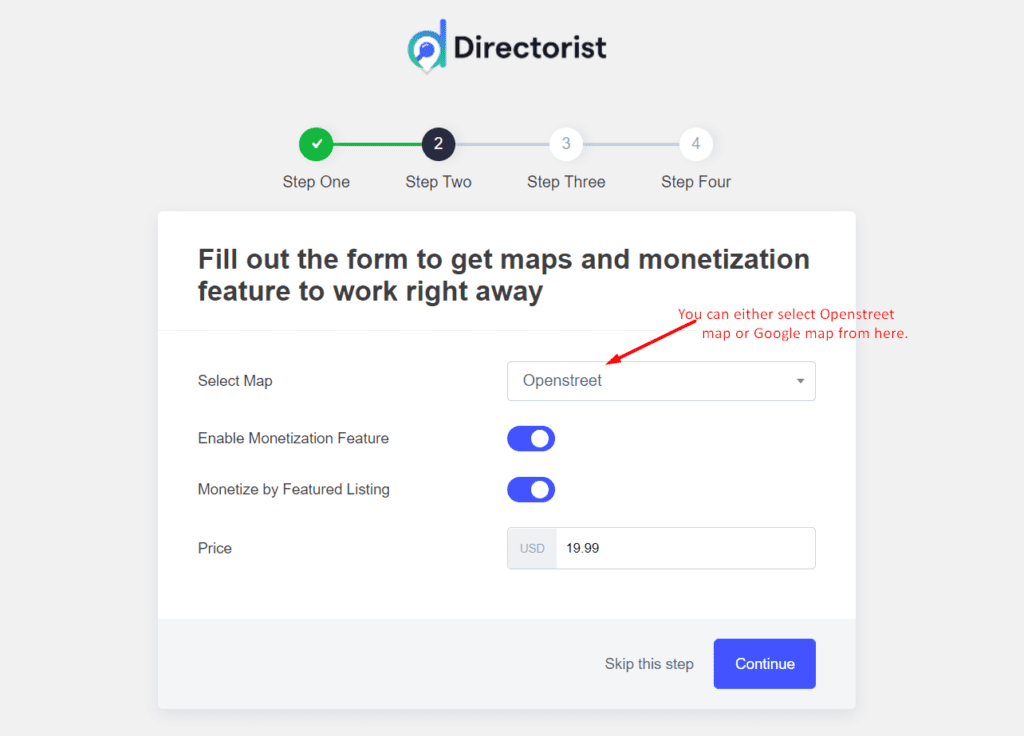
On this screen, you will be able to select the type of maps such as Openstreet map or Google map from the dropdown. You can also enable monetization features and monetize featured listings as well as set the price for the monetization of the Featured Listing. Again, hit the ‘Continue’ button.
Now it’s time to import some demo data for the quick setup of your directory website. This is an optional step and the demo data you import comes locally from the plugin.
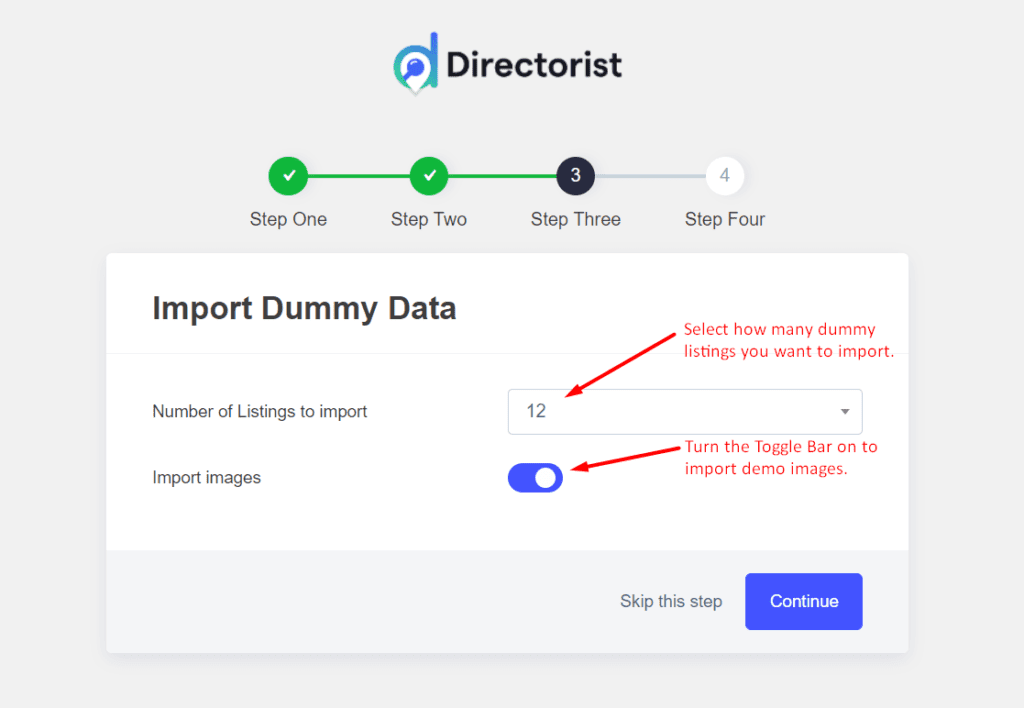
Hit continue button to go to the next step.
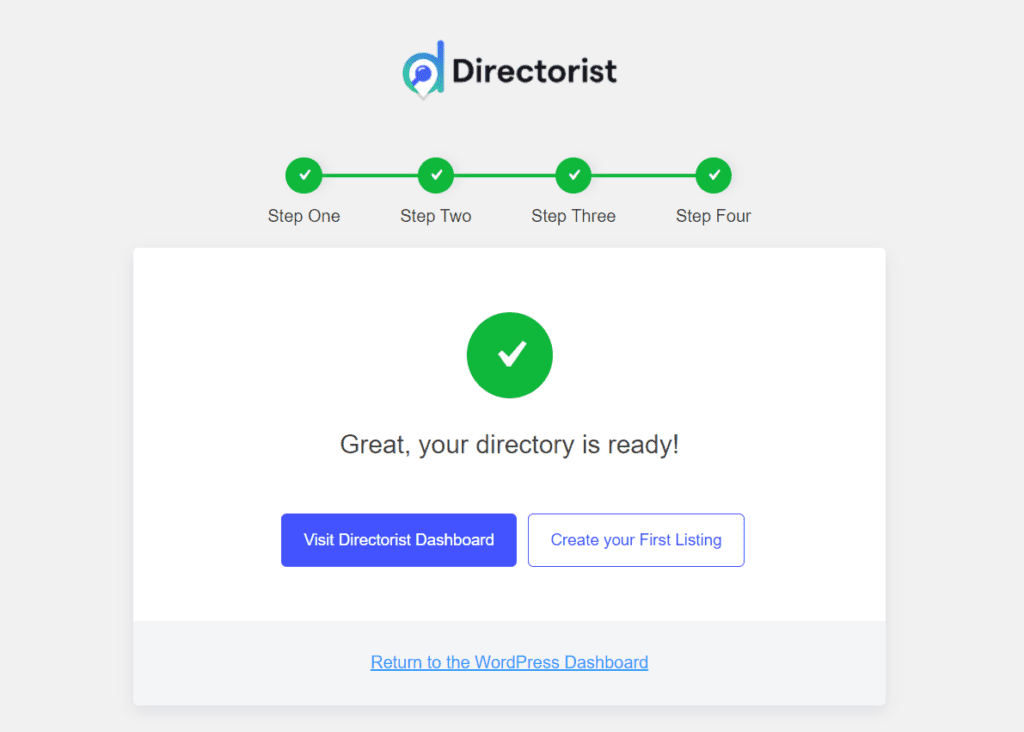
Now, you can start creating your first listing or go back to the dashboard of Directorist. There is also an option to go back to the WordPress admin dashboard below.
For now, let’s select the “Return to the WordPress Dashboard” button.
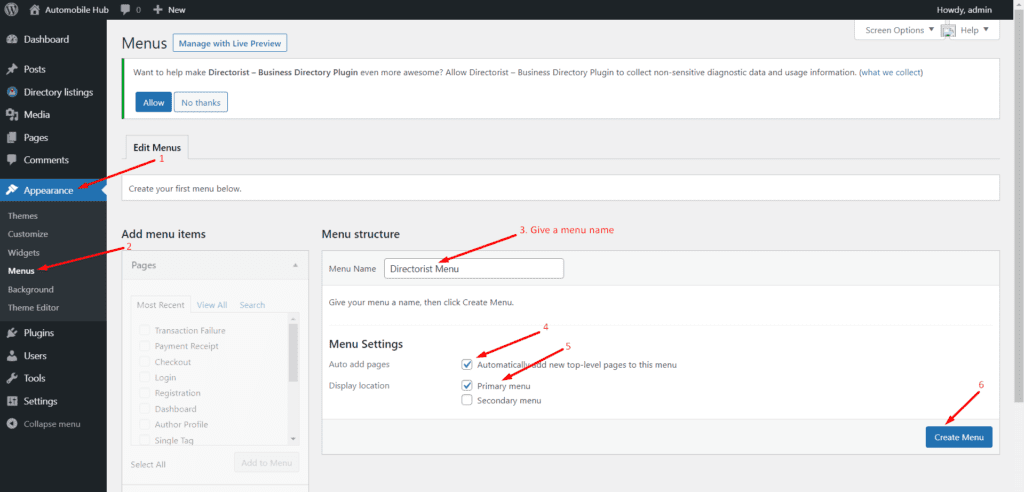
Step 5: Add the Pages to the Menu
Now, navigate to the WP Admin Dashboard > Appearance > Menus > Give a menu name > check “Auto Add Pages” > Check “Display Location” to Primary Menu > Create Menu.
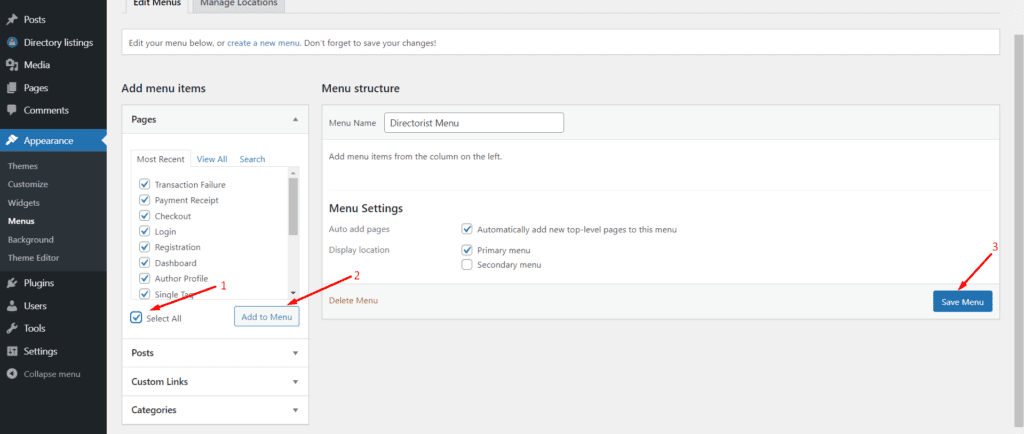
Next up, select all the pages by hitting the “Select All button” > Add to Menu > Save Menu.
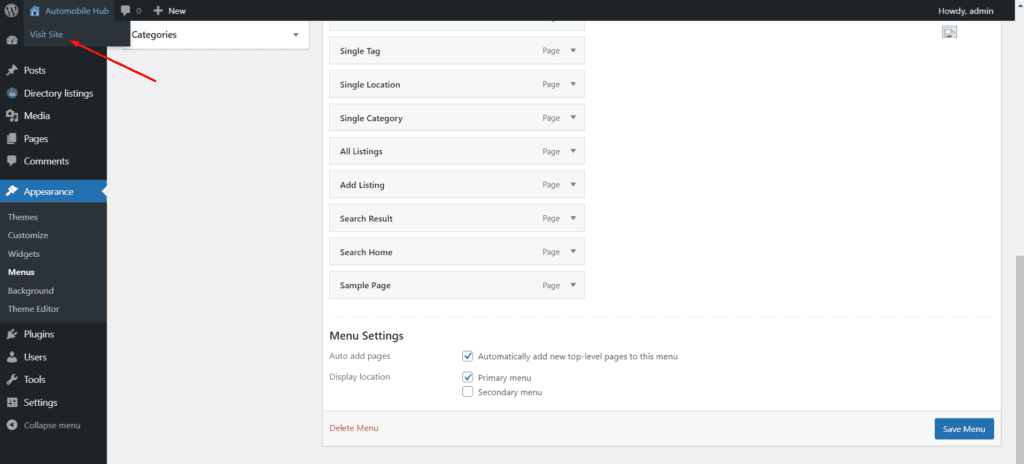
Now, you can see the frontend view of your directory website from the “Visit Site” option.
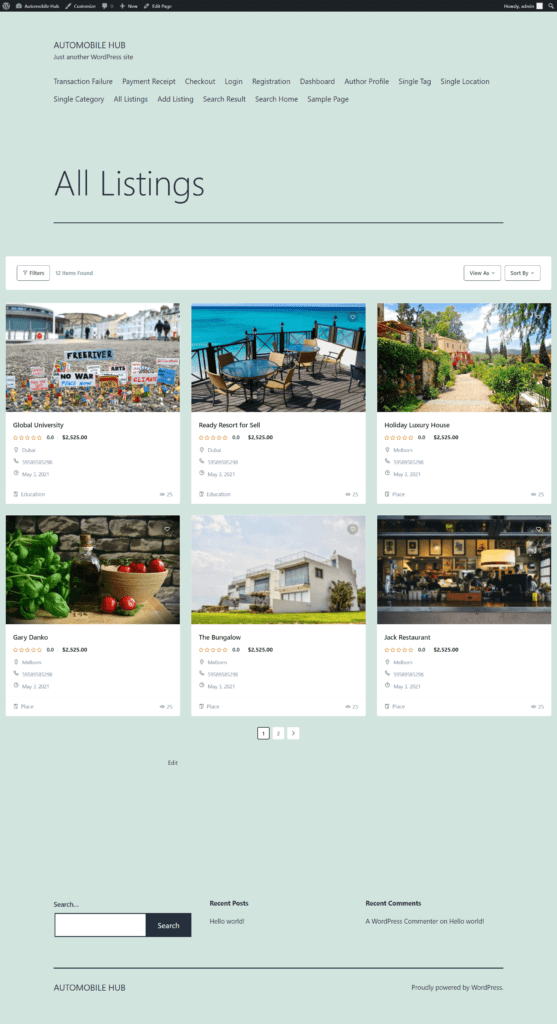
Next up, you will be able to see the frontend view of the website. The preview will vary from theme to theme. Now, select the “All Listings” page from the navigation bar:
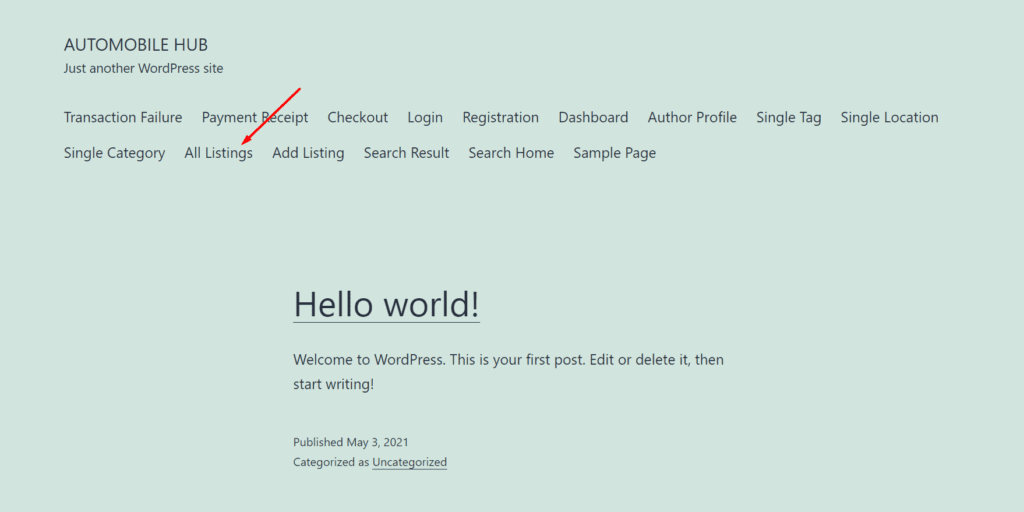
And this is how all the Listings will appear on the frontend:
Didn’t like the appearance of this free theme?
Step 6: Move the Demo Listings to Trash
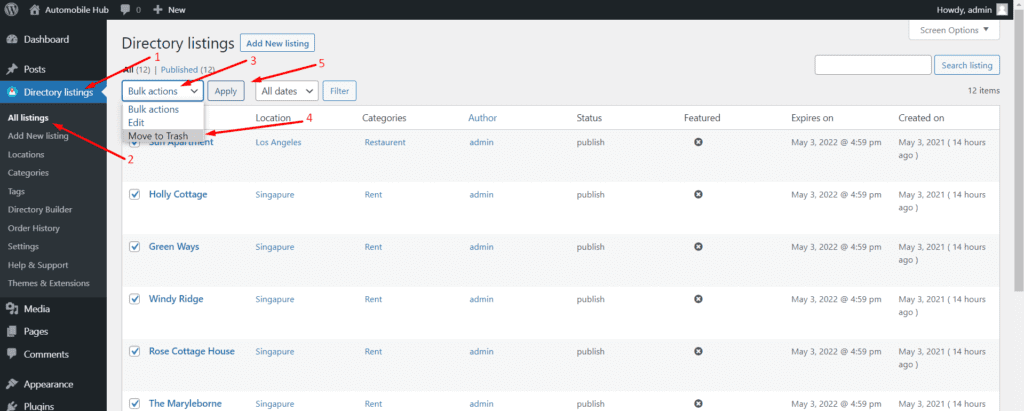
As we want to build an automobile multidirectory, we don’t need these demo listings. Go to the WP Admin Dashboard > Directory Listings > All Listings > Select All Listings > Bulk Actions > Move to Trash.
Step 7: Add New Listings
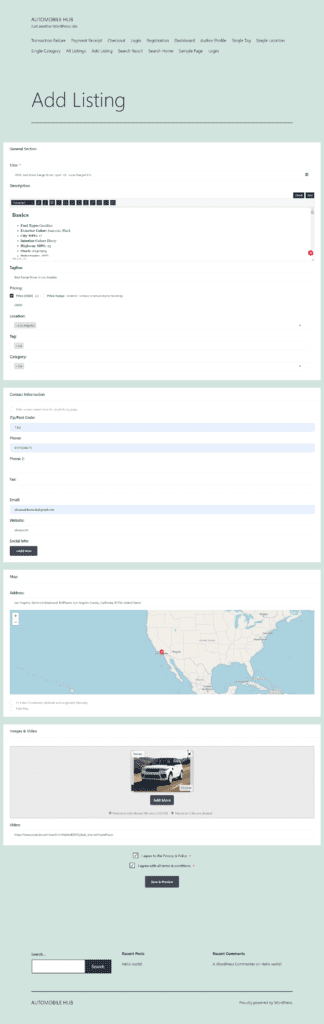
Now, go to the WP Admin Dashboard > Directory Listings > Add New Listing. You will get options to give listing names, upload images, set the price, listing owner, etc. Here is a sample screenshot:

Hit the Publish button after you finish adding product data.
Please note that most of the listings will be added and submitted by the business owners or product owners. Depending upon the settings, you may have to review them before publishing. You can also allow your vendors to publish their products directly on the website.
But before letting them submit products, they must register to your site:
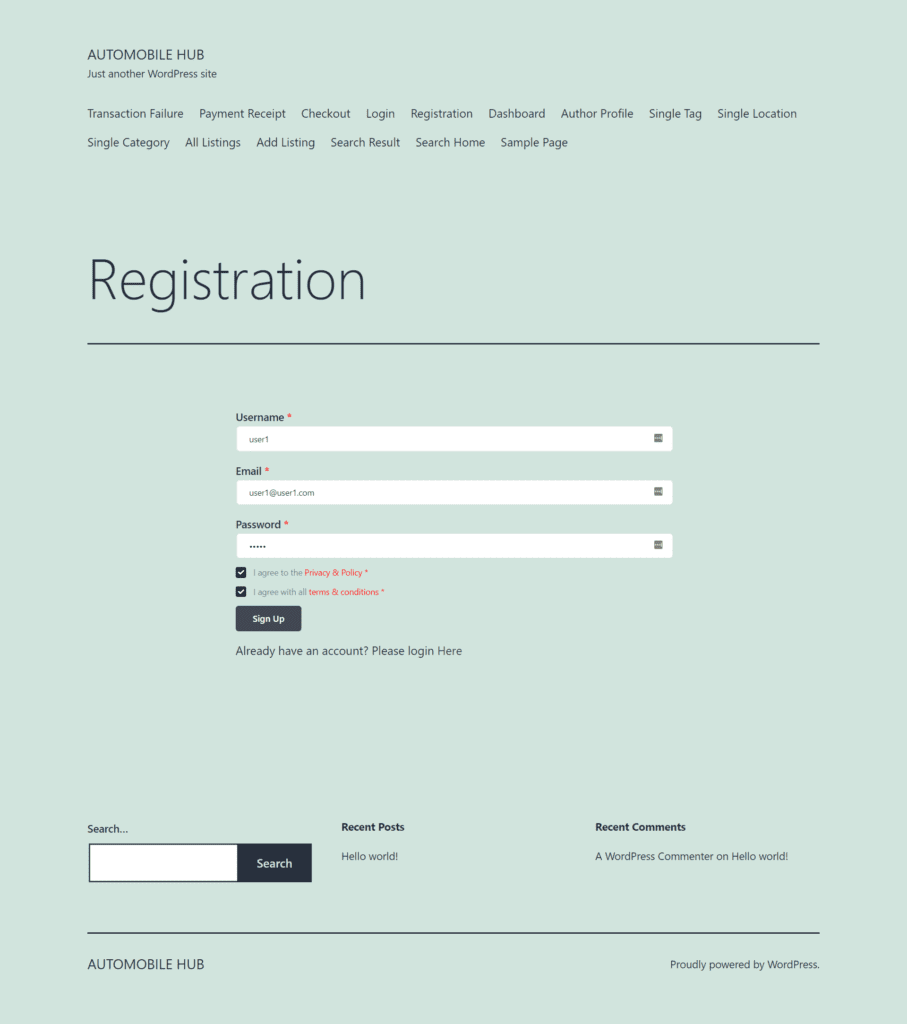
A vendor can effortlessly add a listing from the “Add Listing” page:
The vendor will be able to submit the listing after selecting the “Save & Preview” button. After that you can review the submission whether to publish or not.
Step 8: Enable multi-directory option
Now that you want to make your directory website more versatile by adding multiple directories, you need to enable the multidirectory option. To do so, navigate to the WP Admin Dashboard > Directory Listings > Settings > Listings > General > Enable Multi Directory.
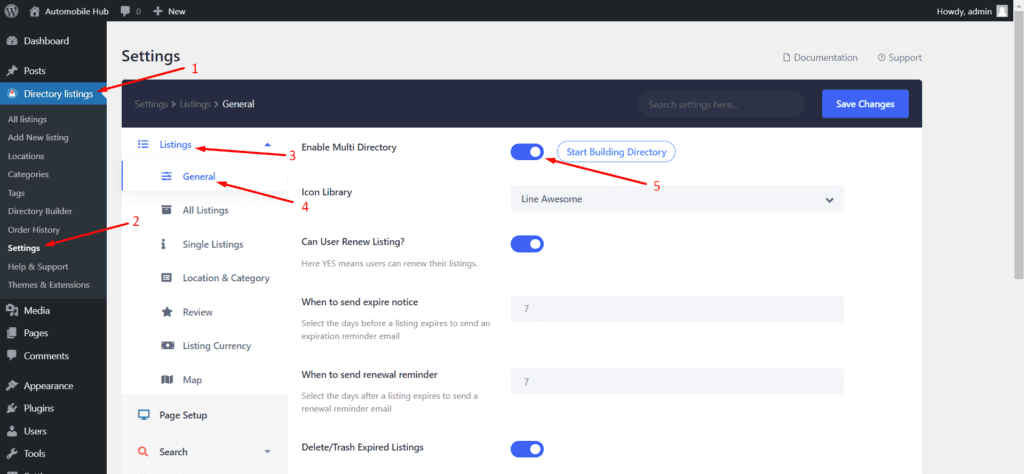
Now, click on the “Start Building Directory“.
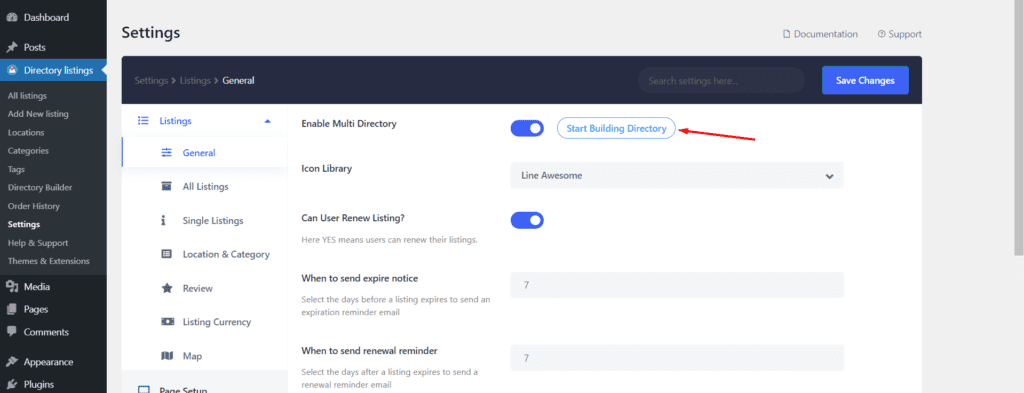
Now, select the “Start Building Directory” option:
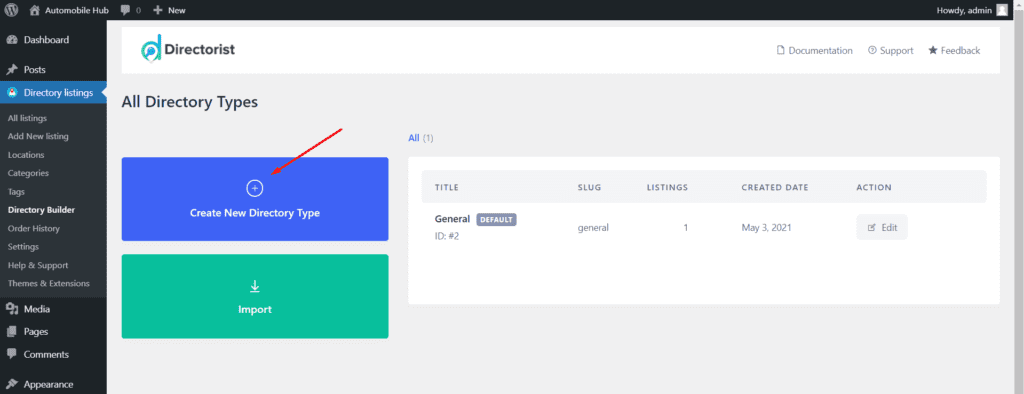
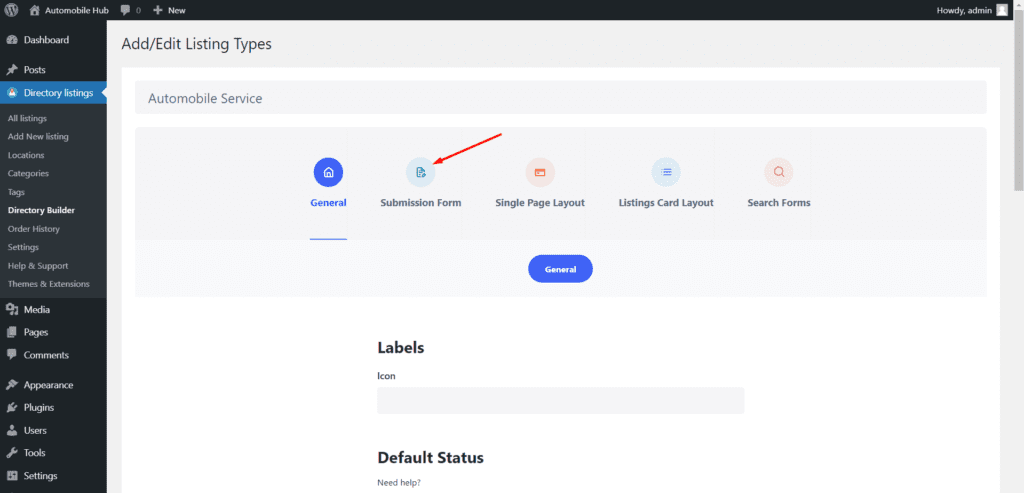
Now, give a name to the Directory Type. Here we are inserting “Automobile Service”. Click
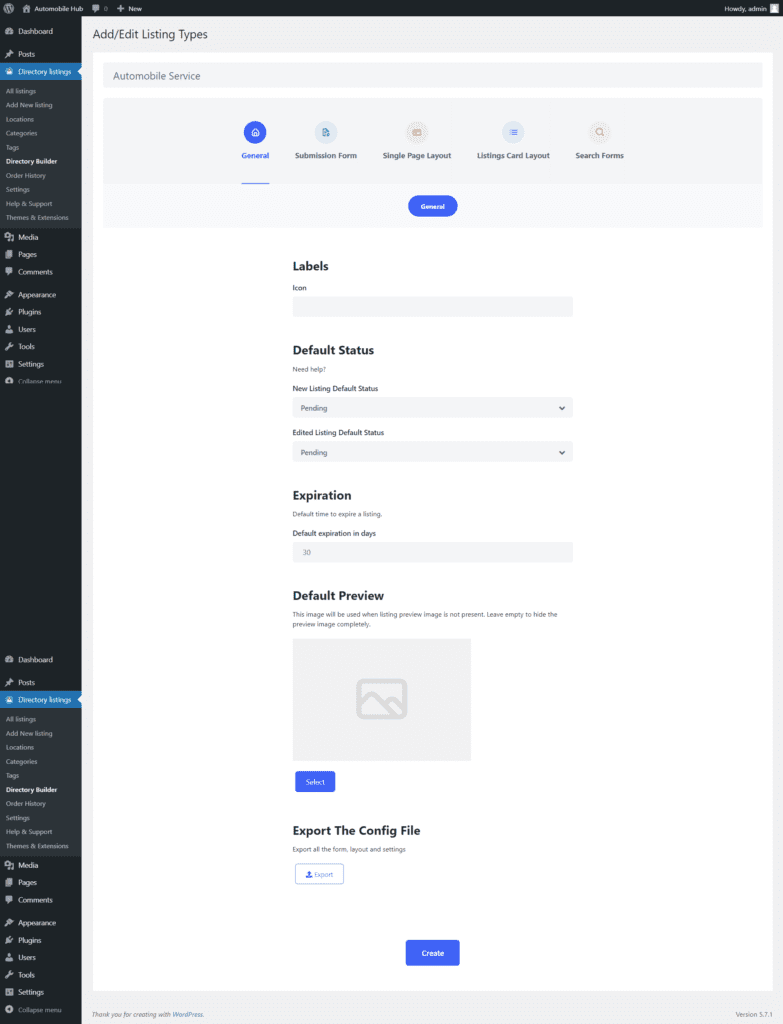
Again, go to the Submission form to add some form fields:
This time you will get the form builder to edit the submission form. You can add fields by dragging and dropping them from right to left. You can select both the Preset Fields and the Custom Fields for unlimited field addition.
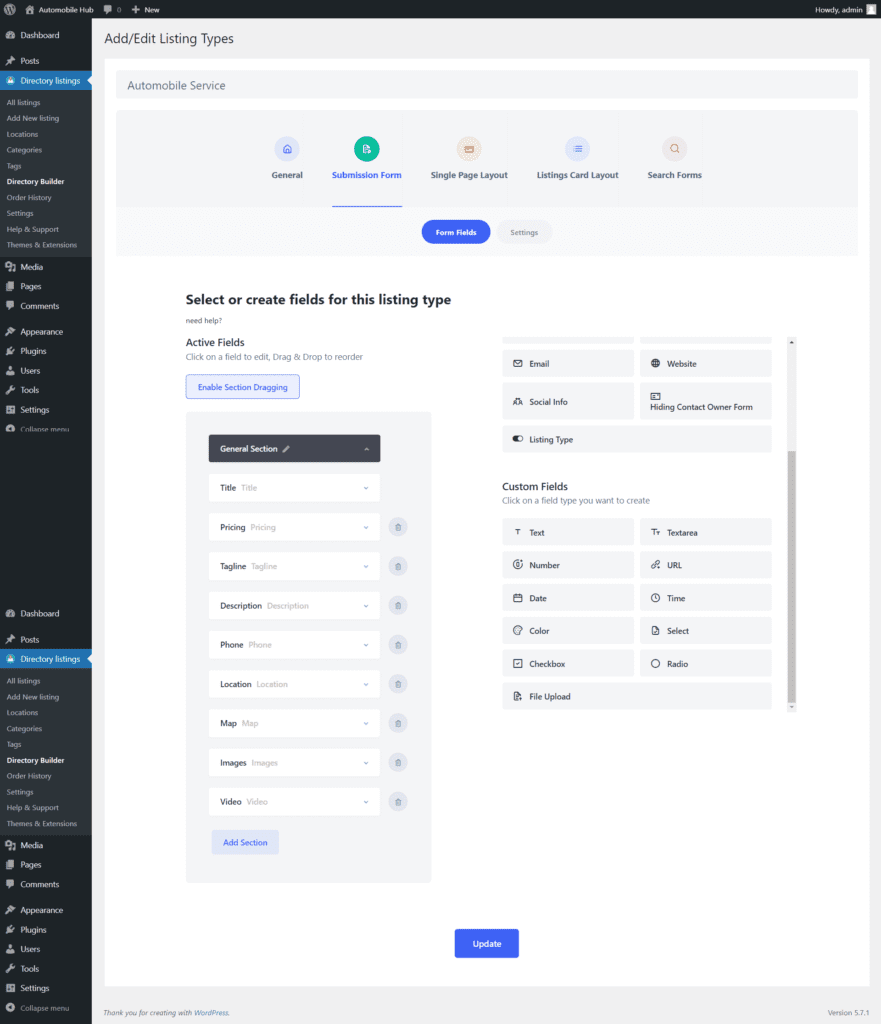
After completing editing, hit the Update button to save the changes you made.
Step 9: Frontend Form Submission by a User
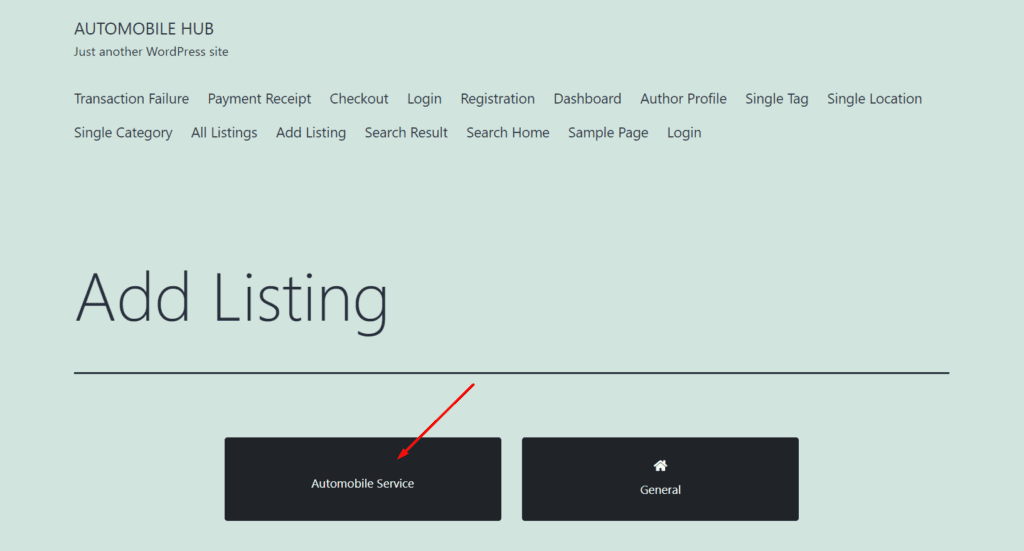
Let’s see from the frontend view how a user submits a form to the new directory type, Automobile Service.
On hitting the “Add Listing” page, he will get two options. One is the General and the other is the newly created type “Automobile Service”.
After the user or vendor selects the “Automobile Service”, he or she will get the submission form we built in Step 8.
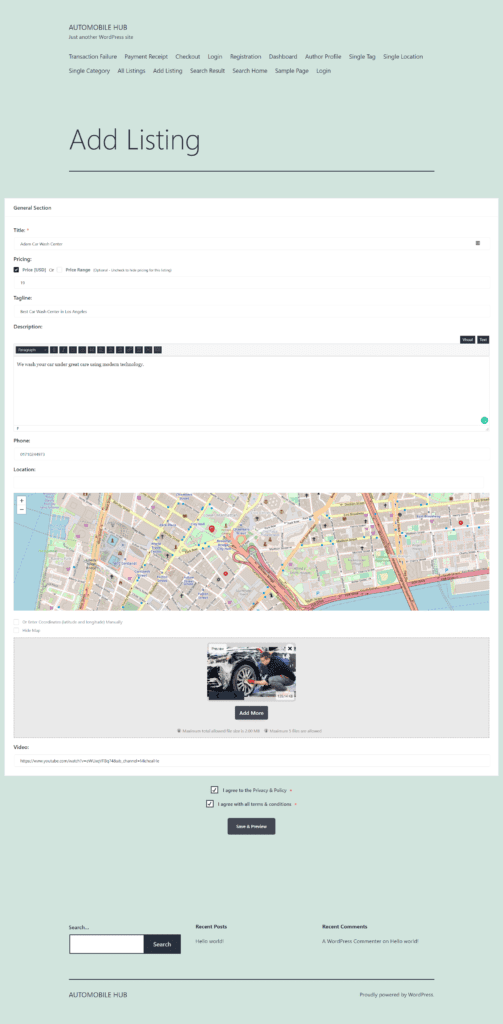
Now the user can submit the form after hitting the “Save & Preview” button like a regular Directorist submission form under the type “Automobile Service”.
Conclusion
That’s it! With Directorist, you can create your multi-directory website with that ease. We have shown this tutorial only with a free theme and free directory solution.
However, you can make your website more attractive and more feature-rich using the premium themes and the Directorist pro version.
If you are already using the multi-directory functionality using Directorist, don’t forget to share your thoughts and experience in the comment section below.

suzauddowla
Al Suzud Dowla plays the role of a content strategist at Directorist. He is basically a digital marketing expert and a tech enthusiast (by heart) who excels particularly in technical content writing. In his pastimes, he is seen playing Ping Pong, performing Karaoke, reading books, and playing around with JavaScript as well.
Related Articles


2 Comments
Leave a Reply
You must be logged in to post a comment.
Robert F
January 13, 2024In a multi-directory website, can two directories be linked. For example a directory of organizations link to a directory of the members of that organization? e.g. a one-to-many relation Thanks, Robert
Md. Hamim Khan
January 14, 2024Hello Robert,
We appreciate your inquiry. Certainly, you can link different directories within your website using the Directorist “Multi-Directory Linking” plugin. To learn more, please visit: https://directorist.com/product/directorist-directory-linking/
Thank you.