• Why Directorist
    • All Features
    • Solutions
    • Customer Showcase
    • Testimonials
  • Extensions
  • Themes
  • App
  • Resources
    • Documentations
    • Support Center
    • Contact Us
    • Roadmap
    • Beta
    • About Us
    • Team
  • Pricing
  • Blog
Sing In

Extensions

Installation

  • Installation
  • Activate/Renew License

Pricing Plans

  • Configuring Checkout Pages
  • Managing Orders
  • What are the differences between different listing plans?
  • Switching Plan
  • Submitting listings using a free package/plan
  • Listing Renew with Plan
  • Create a Plan
  • Display Plans
  • Directorist Pricing Plan Overview Video
  • Step By Step Guide

WooCommerce Pricing Plans

  • Creating Plans
  • Displaying Plans
  • Managing Orders
  • Video Walkthrough
  • Create WooCommerce Subscription
  • Step By Step Guide

Claim Listing

  • Overview
  • Initial Configuration
  • Permalinks & Default Pages
  • Monetization & Gateways
  • Setting up a price or plan
  • Display of Claim Listing
  • Moderating Claims
  • Notification Settings

PayPal Payment Gateway

  • PayPal Payment Gateway
  • Recurring Plan/Package

Stripe Payment Gateway

  • Stripe Payment Gateway

Business Hours

  • Overview
  • Key Features
  • Installation and Configuration
  • Builder Setup
  • Sidebar setup
  • How It Works

Listings Slider & Carousel Listing

  • Listings Slider & Carousel
  • Detailed Guideline

FAQs

  • Listing FAQs

Image Gallery

  • Overview
  • Installation & Configuration
  • Settings
  • Builder Setup

Google ReCAPTCHA

  • Google ReCAPTCHA

Social Login

  • Overview
  • Configure Google Client
  • Configure Facebook APP ID

Post Your Need

  • Overview
  • Shortcodes

Listings with Map

  • Overview
  • Configure

Directorist Booking

  • Installation
  • Configure
  • Service Booking
  • Rental System
  • Event Booking
  • Booking Payment Service (Coming Soon)
  • Split Payment System (Commission and Wallet)
  • Booking Refund

Directorist Live Chat

  • Install and Configure

Rank Featured Listings

  • How To Use Rank Feature Listing – A step by step guide

Compare Listing

  • Compare Listings Overview

Mark as Sold

  • Configuration
  • Installation and License Activation
  • Mark as Sold
  • Mark as Negotiating

Directorist Coupon

  • Installation and Activation
  • Create a Coupon
  • Publish a Coupon

Oxygen Builder

  • Getting Started
  • All Listings Page
  • Single Details
  • Single Taxonomy
  • All Taxonomies

BuddyBoss Integration

  • Overview
  • Installation and Configuration
  • Add Listings
  • Add Listings to Groups
  • How to use BB Message with Directorist

BuddyPress Integration

  • Overview
  • Installation and Configuration
  • Add Listings
  • Add Listings to Groups
  • How to use the BuddyPress Private Messaging in Directorist

Directorist - GamiPress Integration

  • How to earn points with GamiPress in Directorist
  • How to redeem points

Directorist WPML – Translation Guide

  • Directory Type Translation
  • Listings Translation
  • String Translation
  • Admin Text Translation
  • Directorist Pages Translation

Directorist Job Manager

  • Overview
  • Key Features
  • Installation
  • Builder Setup
  • Page Setup
  • Email template Setup

Directorist Marketplace

  • Directorist Marketplace

Directorist Ads Manager

  • Ads Manager Overview

Directorist Multi Directory Linking

  • Multi Directory Linking

Authorize.net Payment Gateway

  • Overview
  • Installation
  • Configuration
  • Settings

Directorist Helpgent Integration

  • Overview
  • Key Features
  • Installation
  • User Dashboard

Directorist Mailchimp Integration

  • Overview
  • Key Features
  • Installation
  • Configuration
  • Settings

Universal Search

  • Documentation
Setting up a price or plan
You can set a price for claiming a listing in 3 different ways: 1. Fixed price, 2. Pricing Plan powered by the Directorist Pricing Plans add-on, and 3. Pricing Plans powered by WooCommerce & Directorist WooCommerce Pricing Plans add-on. Choose the one you think best for your business. 
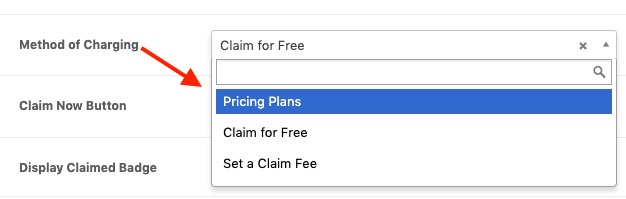
You can choose a default global method of charging a user for claiming for a listing from Directory Settings > Extensions Settings > Claim Listing and Set ‘Method of Charging‘ to one of the 'Pricing Plans',  'Claim for Free', and 'Set a Claim Fee'
Method of Charging
Method of Charging

Set a claim fee

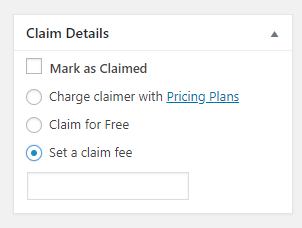
In the edit listing screen, you will see the "Claim Details" meta box on the top-right corner.  Select the 'Set a claim fee' option and enter a price to charge an owner when a claim is made.
Setting a claim fee
Setting a claim fee

Setting up Directorist Pricing Plans

Install the Directorist Pricing Plans add-on like any other plugin. For detailed installation instruction, see the documentation of the Directorist Pricing Plans from the left menu. Once you have installed it, you should see a new submenu called Pricing Plans under the directorist listings menu.
Adding Plans
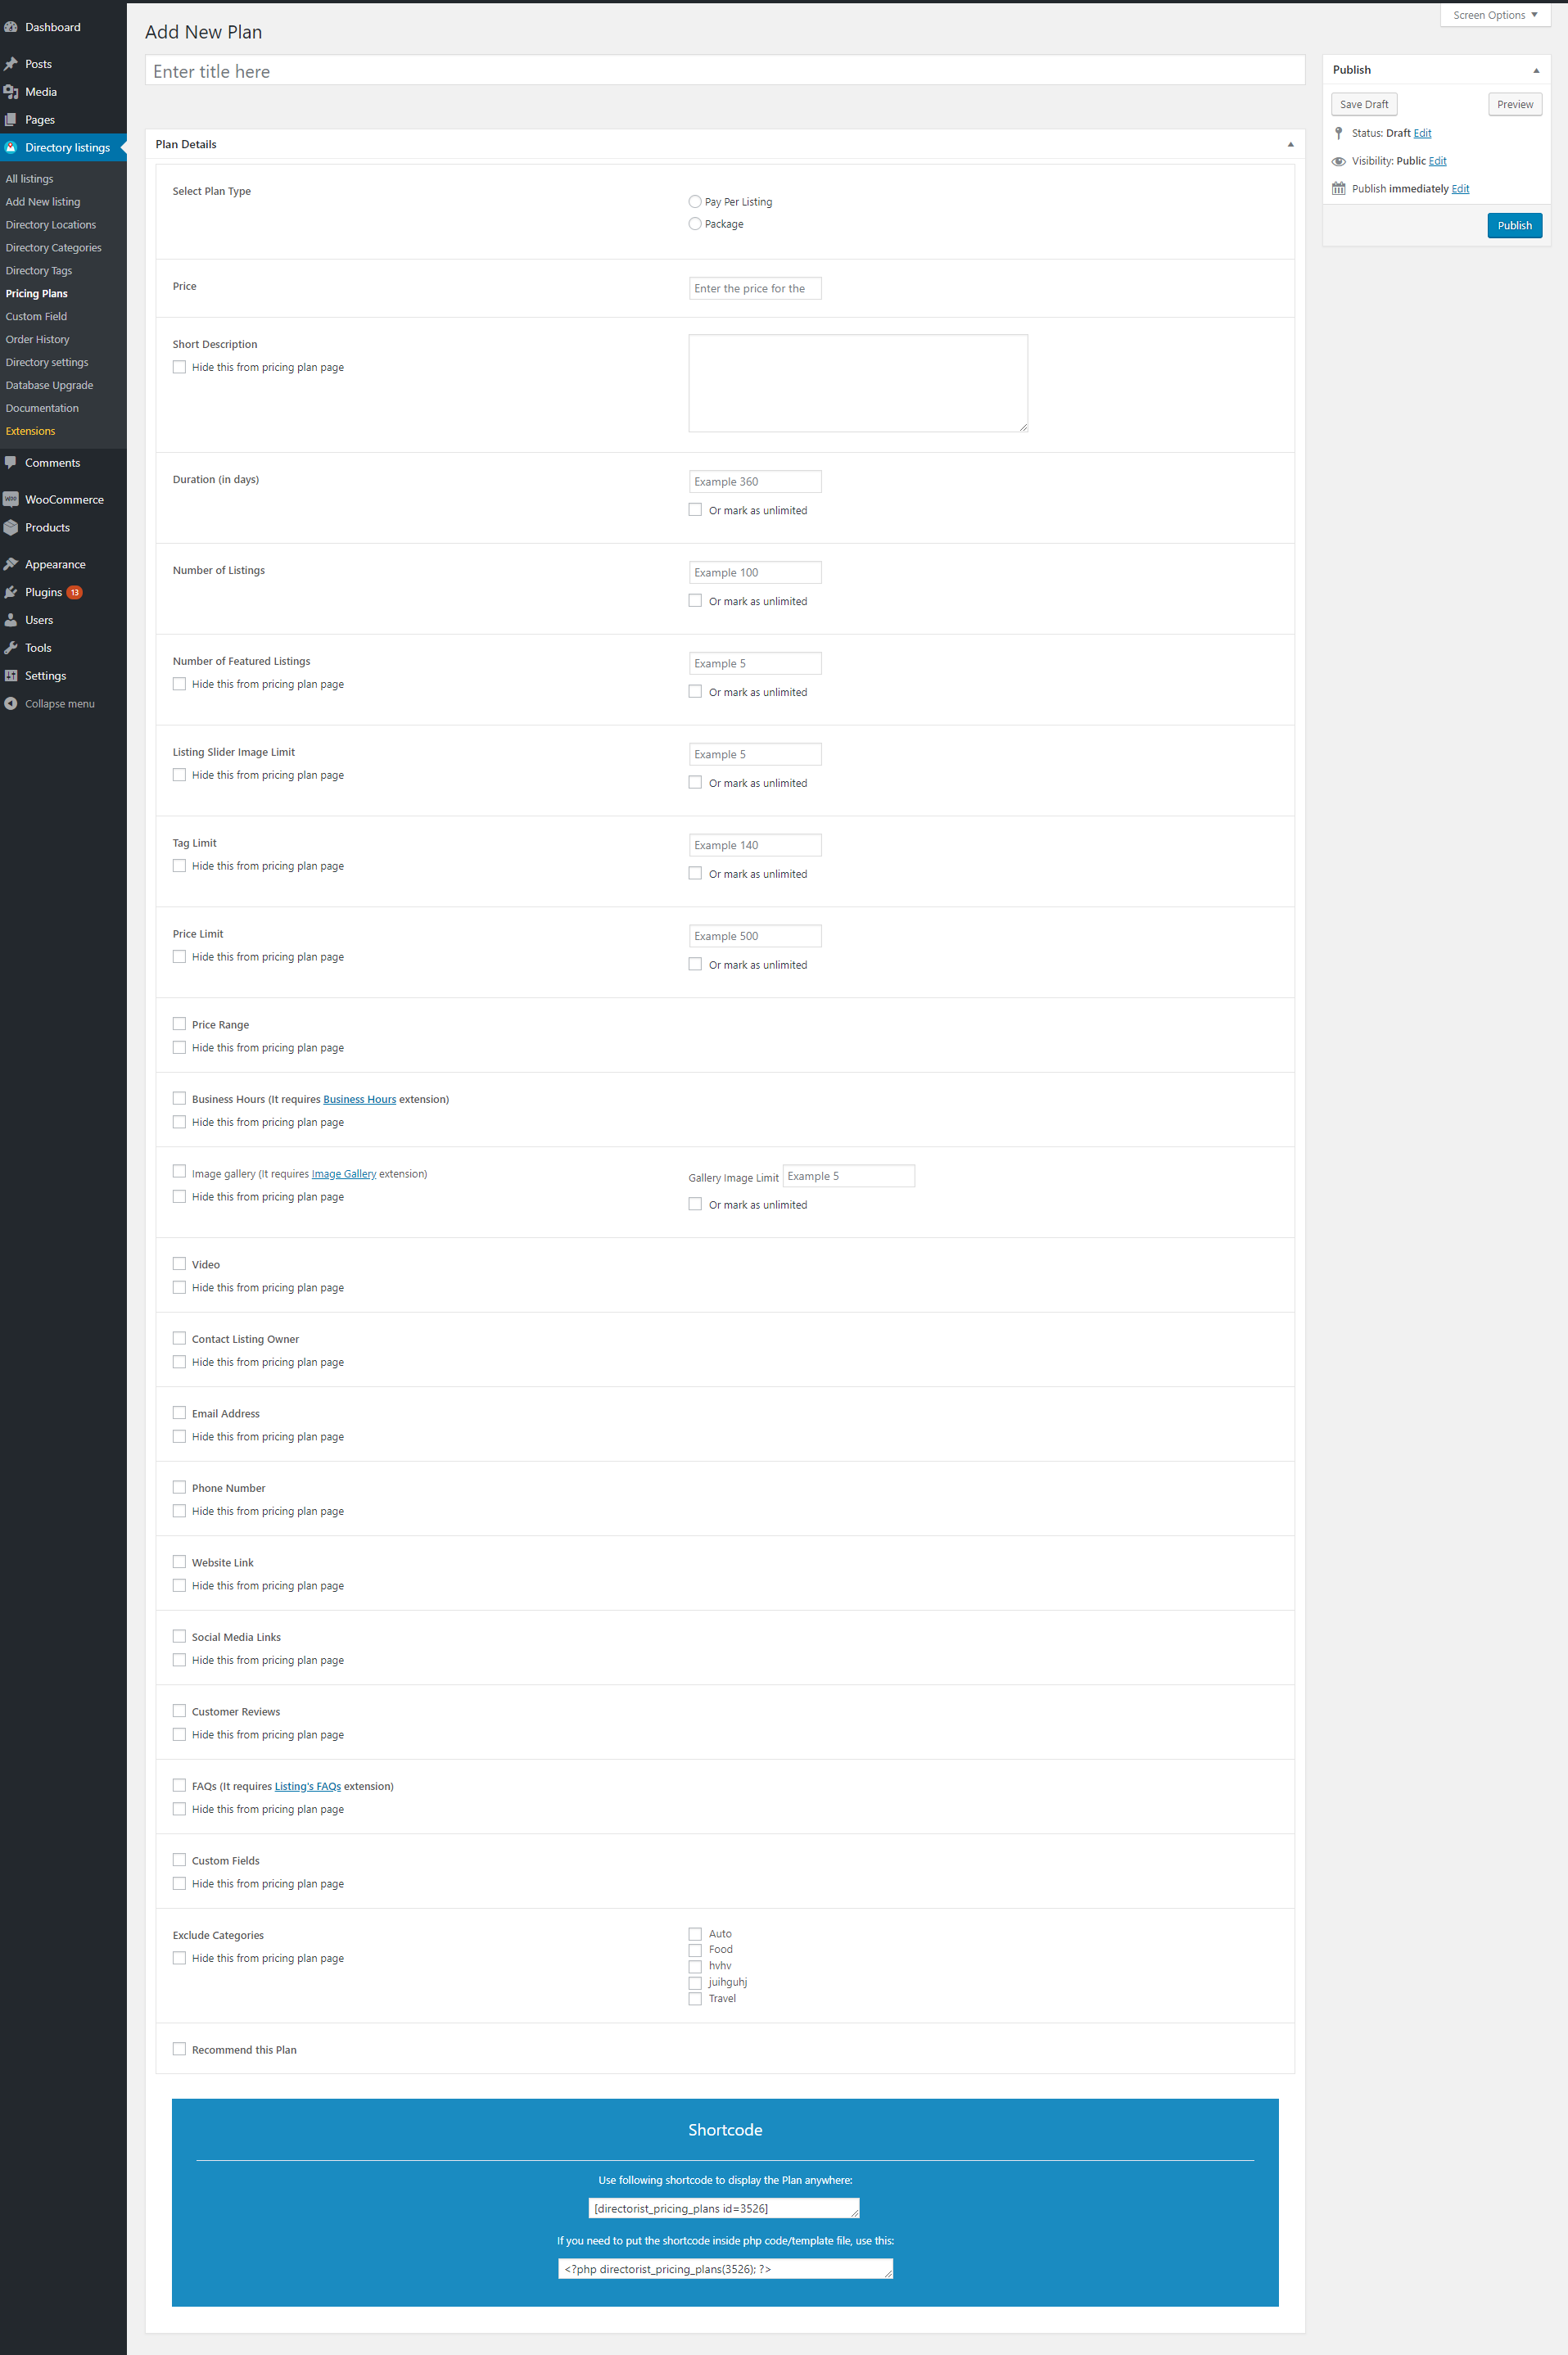
Go to Directory Listings > Pricing Plans > and click "Add New" to add a new pricing plan.
Adding a new pricing plan
Check all the features you want to provide with this plan and hit publish. You can add as many plans as you want in this way.
Displaying the plans
You can display all plans using the following shortcodes on any page. Shortcode: [directorist_pricing_plans] 
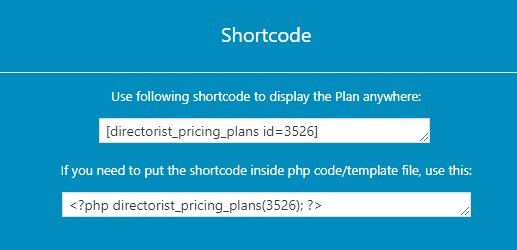
You can also display a particular pricing plan on any page using the shortcode found at the bottom of the pricing plan edit page. It will look somewhat like below. The id may be different for your plan.
Shortcode for displaying a single plan
Note: the page with the shortcode [directorist_pricing_plans] or a single plan shortcode should be assigned to the Directory Settings> Pages, Links & views > 

Setting up Directorist WooCommerce Pricing Plans

Install the Directorist WooCommerce Pricing Plans add-on like any other plugin. For detailed installation instruction, see the documentation of the Directorist WooCommerce Pricing Plans from the left menu of this page. 
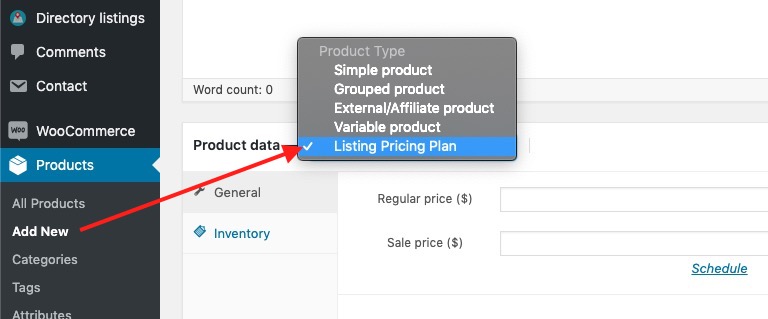
Once you have installed it, you will see a new product type called "Listing Pricing Plan" appears in the product type select menu.
New WooCommerce Product Type: Listing Pricing Plan
Any listing pricing plan using this add-on is like adding a new type of WooCommerce Product called 'Listing Pricing Plan'. As it is nothing but a WooCommerce product, therefore, the order of this product/pricing plan is handled by WooCommerce. What it means is that you will find all the orders of this pricing plan under WooCommerce > Orders instead of Directory Listings > Order History.

Adding Plans

Adding a listing pricing plan using this add-on is very easy. Follow the steps below to add a pricing plan using WooCommerce and Directorist
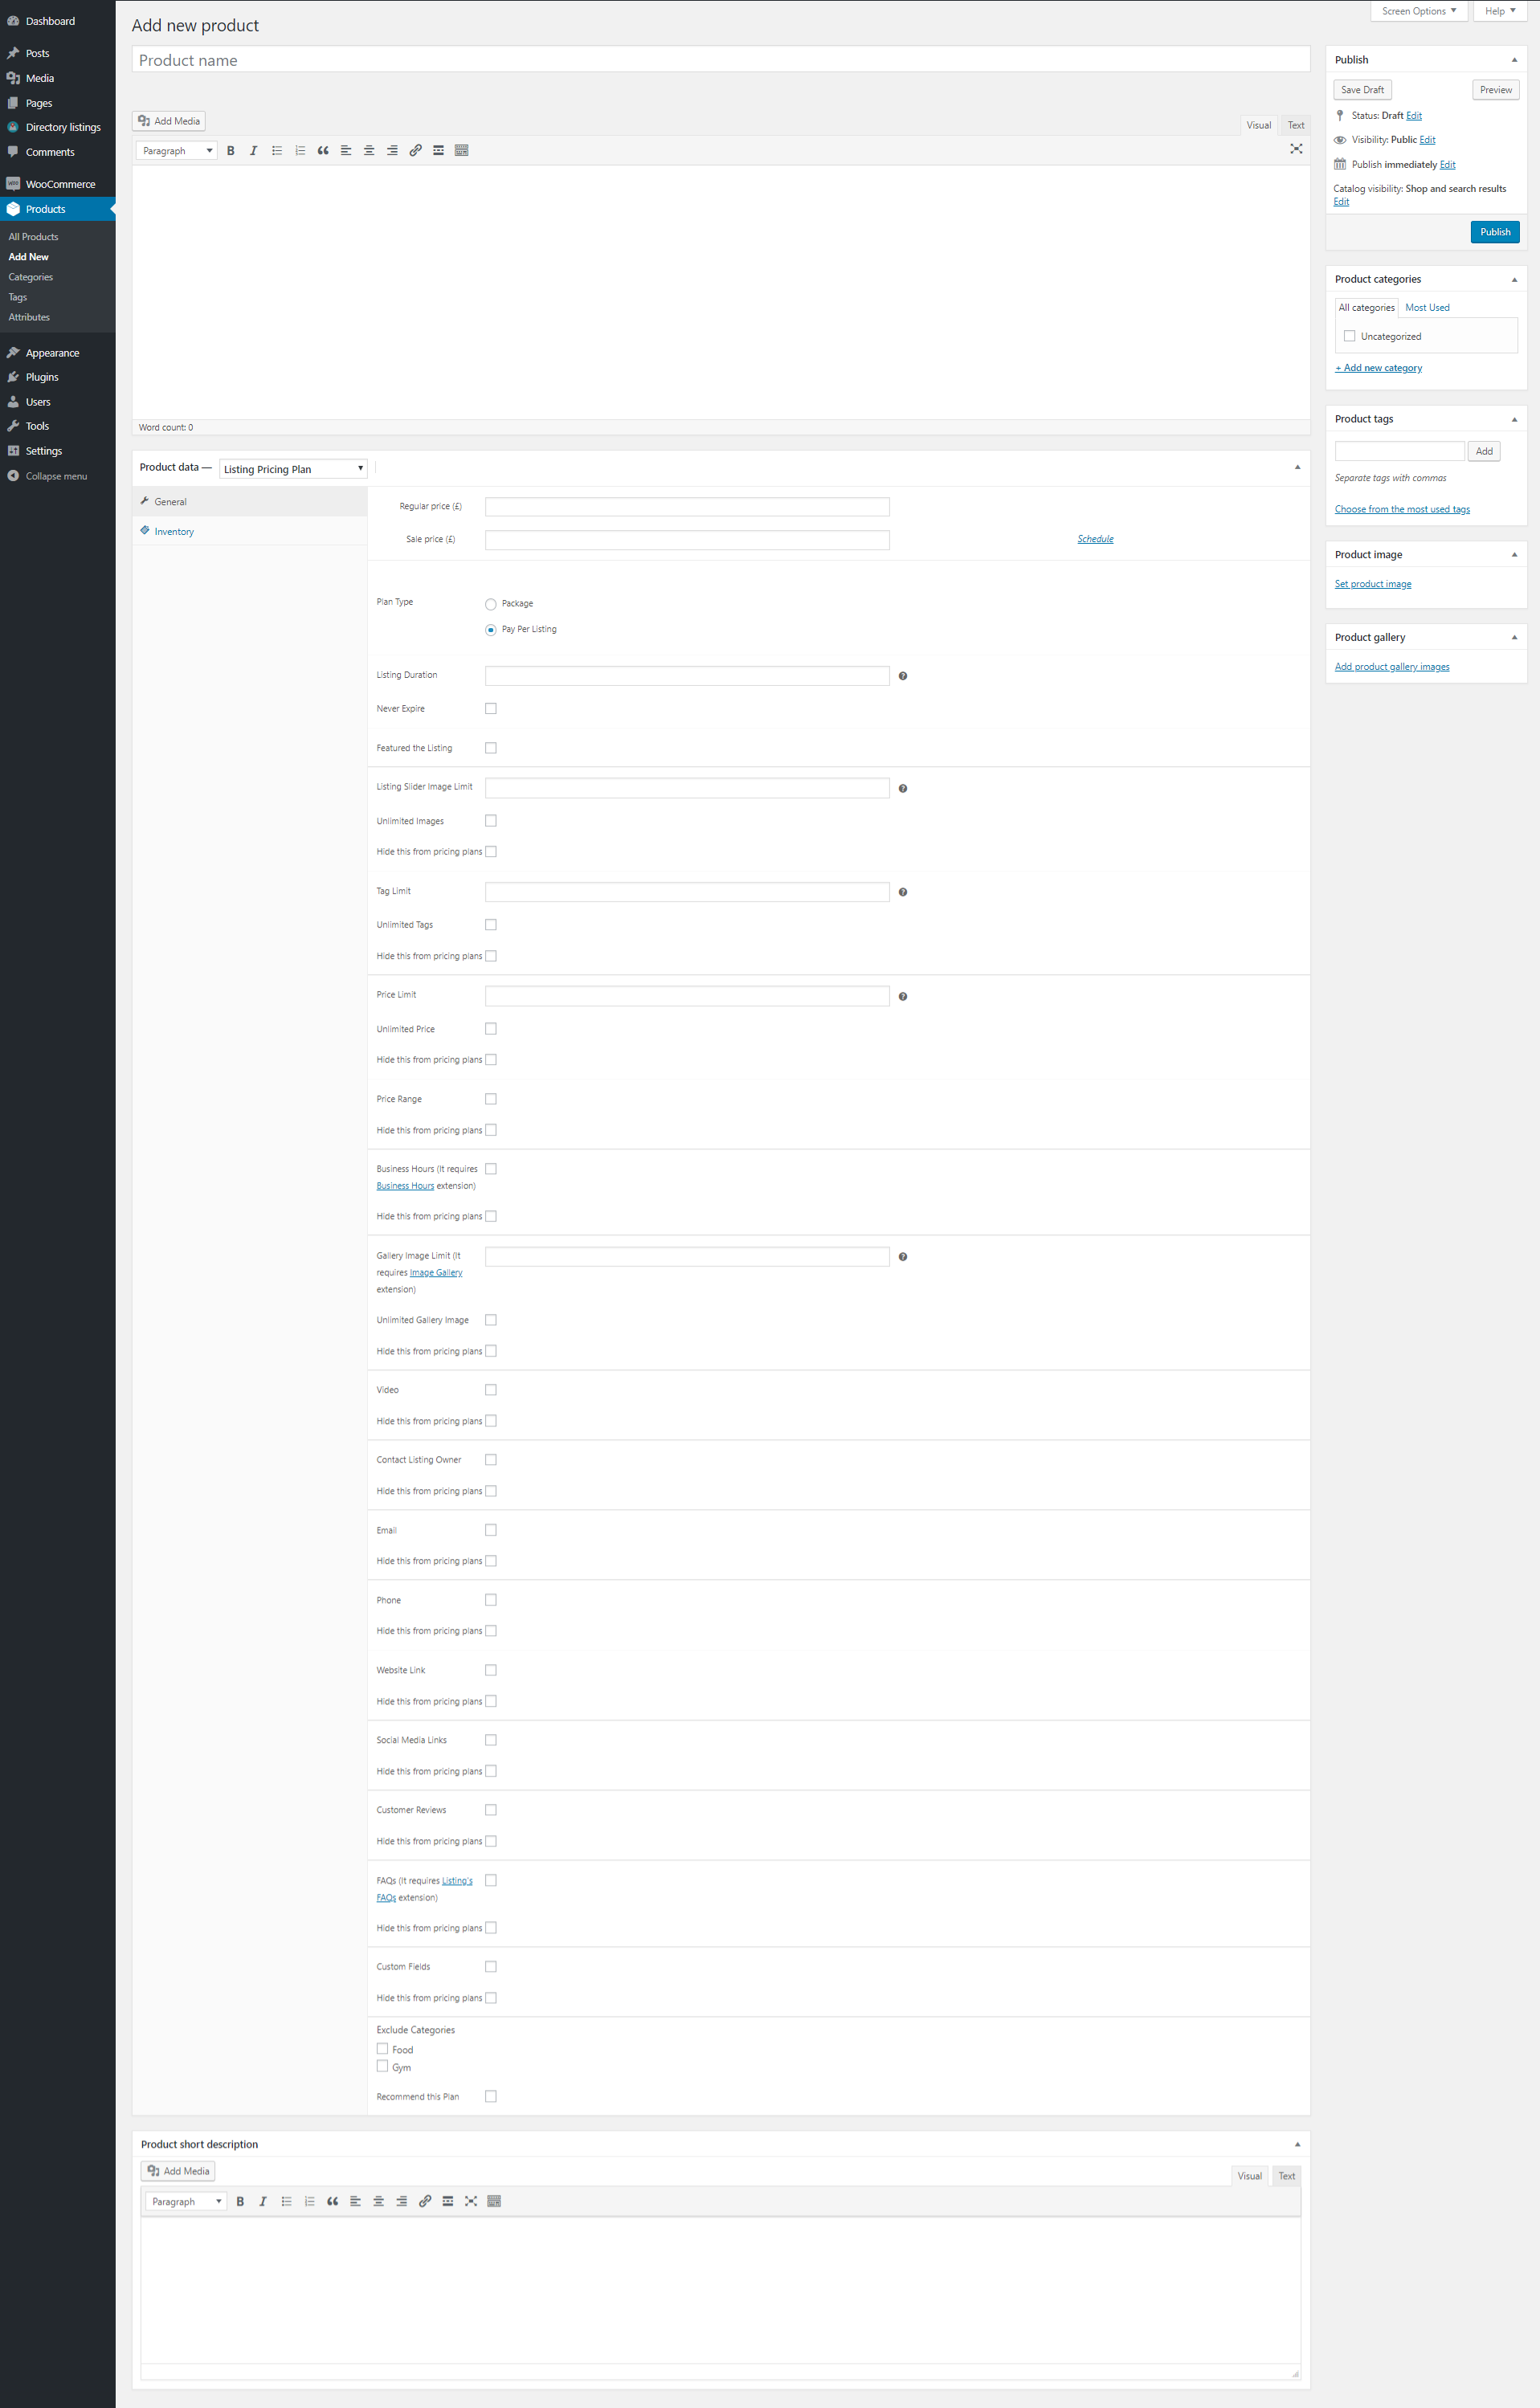
  1. Go to WordPress Dashboard > Products and click "Add New".
  2. Select Listing Pricing Plan from the Product Type select menu.
  3. Set a regular price (optionally a sale price) and check/set the features you want to offer for this plan and hit the publish button.
Adding new pricing plan product
Adding new pricing plan product (click on the image to view in large)
Select New WooCommerce Product Type: Listing Pricing Plan
You can add as many pricing plans as you want in this way.
Displaying the plans
You can display all plans using the following shortcodes on any page. Shortcode: [directorist_pricing_plans]

Last Updated: March 20th, 2024

Related Article

  • Notification Settings
  • Moderating Claims
  • Display of Claim Listing

© 2025 All rights reserved