

Table of Contents
How to Create a Directory Website for Courses?
-

- Directory Niche Tutorials WordPress
- 6 mins read
As we step into the digital world, the demand for accessible and diverse educational resources is becoming higher and higher than ever. A directory website for courses serves as a centralized platform where students, educators, and course providers can connect, share, and access a wide array of educational opportunities. Such a website simplifies the search for the right course and enhances the overall learning experience by offering a structured, user-friendly interface.
But, how do you ensure that your course directory website stands out of the box? Well, if you want to host your site on WordPress, then this article is for you. Here we will walk you through the steps to build a lucrative directory website for courses.
So, without further ado, let’s dig deeper.
Requirements
To build a course directory website with WordPress, you just need several things –
- WordPress latest version
- A niche-specific domain ( Namecheap, GoDaddy, etc.)
- A reliable hosting ( Bluehost, Hostinger, Cloudways, etc)
- A WordPress directory plugin, Directorist.
Why Choose Directorist?

Directorist is a widely-used directory website builder plugin, boasting over 10,000 users globally and a stellar customer rating of 4.7 out of 5. It offers the following benefits:
Core (free) features include:
- includes a drag-&-drop based form builder with unlimited custom fields
- CSV Bulk Importer
- Powerful search filter
- Multi Directory facility
- WooCommerce multi-vendor plugin compatibility
- 17 Elementor widgets
- 16 Gutenberg blocks
- monetization with featured listing
- charge for every listing
- receive payments through offline bank transfer
- CSV export-import
- one-click demo import
- google maps integration
- OpenStreet maps integration
- free support via WordPress.org
- free directory themes like BestListing, Directoria, etc.
- 100% mobile responsive with an intuitive design
- RTL Support
- Loco translate support
- WPML integration
- and many more
Premium features include:
- Comes with a flutter-based native mobile app, compatible with both Android & iOS
- Integration with Oxygen Builder, MailChimp, Google reCaptcha, BuddyBoss, BuddyPress, etc.
- Integration with popular payment gateways such as Stripe, PayPal, Authorize.net
- Niche-based themes (dPlace, dRestaurant, dLawyers, OneListing Pro, dDoctors, dRealEstate, dCar, dList, dService, and dClassified, dHotels, dJobs, etc.)
- Monetization with regular subscription plans
- Monetization with WooCommerce Pricing Plans
- Monetization with Rank Featured Listing
- Advanced review system
- Coupon creation
- HelpGent integration
- Digital Marketplace
- and many more
Explore all the premium features from this link.
If you’re looking for the best directory website builder, this one stands out. We believe this tool is the perfect deal to create a directory website for courses.
How to Build a Directory Website for Courses in a Flash
We assume that you have a WordPress website up and running. Now the only thing you have to do to create an online directory is to follow these steps:
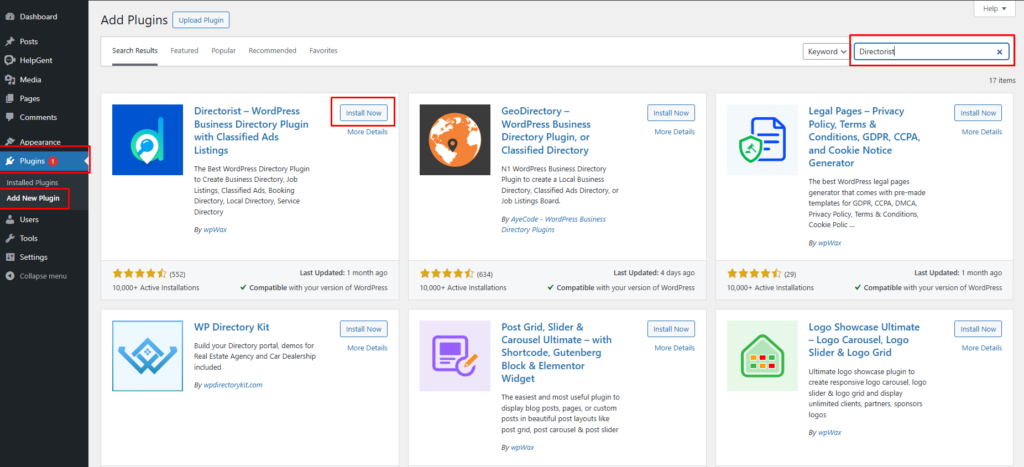
Step 1: Install & activate Directorist
Navigate to the WP Admin Dashboard > Plugins > Add New > Search for the keyword ‘Directorist’ > Hit the “Install Now” button.
Next, activate and configure the setup wizard for a fresh start. For optimal configuration, we recommend visiting our official documentation to tailor the settings to your needs.
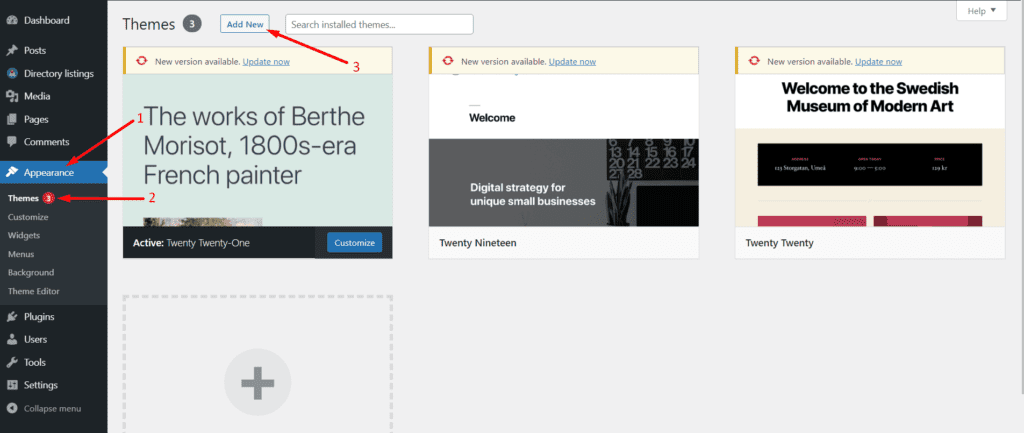
Step 2: Install a free directory theme
Directorist is compatible with all WordPress themes, allowing you to select any theme you prefer. However, opting for a directory-specific theme can enhance the overall look and feel of your website.
To do this, you can install the niche-centric ‘OneListing‘ theme, which is available for free. If you want to enhance your directory website further, you have the option to upgrade to the premium version later.
Once you get the theme, navigate to the WP Admin Dashboard > Appearance > Themes > Add New.
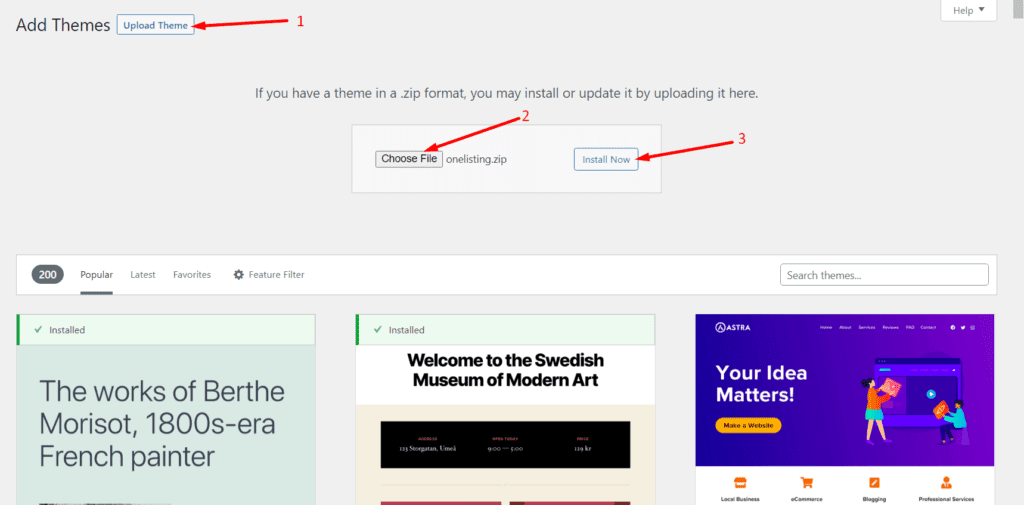
Then click on Upload Theme > Choose File and select the ‘onelisting.zip’ > Install Now.
Now, activate the theme to take an effect:
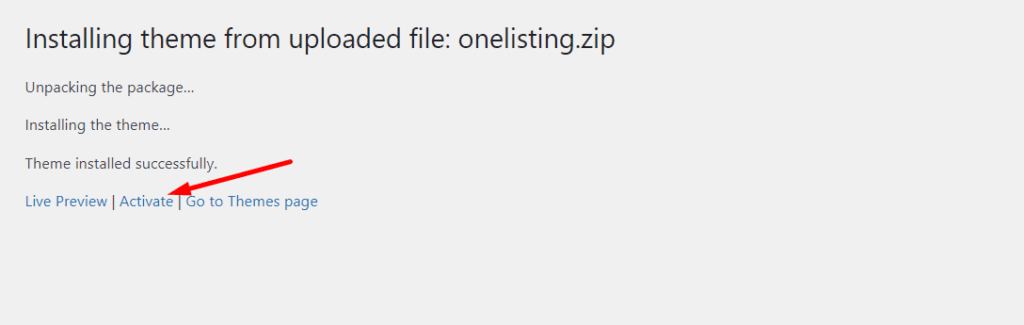
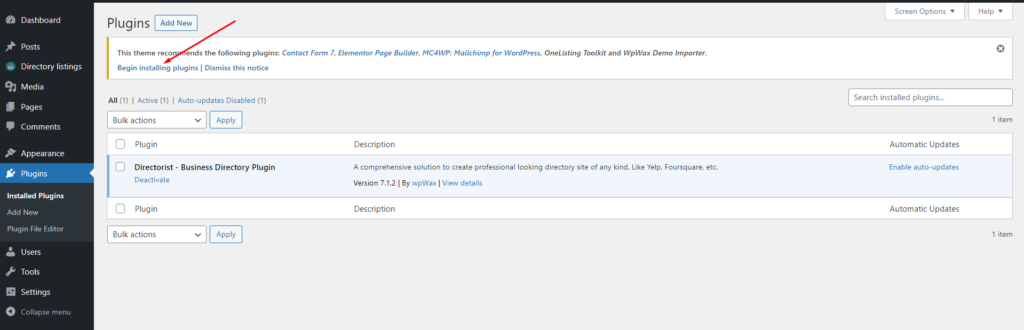
Upon installing the theme, you will see some plugins and tools suggested to install. So, make sure you have installed all the suggested ones so that the theme works perfectly fine. For example, you must install & activate the Elementor, Contact Form 7, MailChimp, and a Theme ToolKit. So, we recommend you hit the “Begin Installing Plugins” option to install them all at once.
And that’s it!
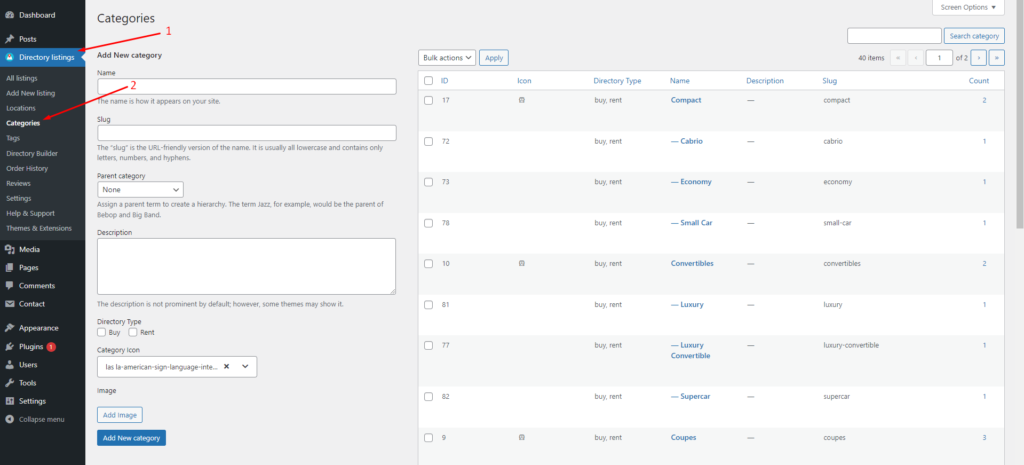
A directory website must be user-friendly in a way that visitors can find their listing item in a flash of an eye. Upon creating relevant categories, Directorist can suggest related listings according to the visitors’ choice.
To this end, you need to create a set of relevant categories and tags. In the Directorist menu, you will find both of these items where (category) you can also add images, assign the category to a parent one, give a description, add icons & colors.
To do so, you just need to go to the Directory Listings > Categories > Fill out the fields > Hit the “Add New Category” button.
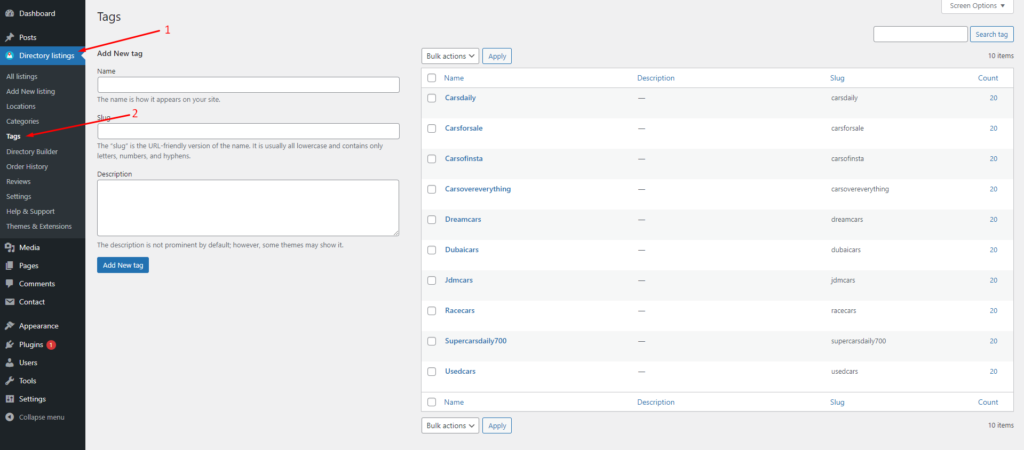
Similarly, you can add tags so that Directorist can show the relevant listing item to the visitors. You can do it from Directory Listings > Tags > Enter Credentials > Add New Tag.
Step 4: How to add new locations
Just like adding categories or tags adding locations helps the users find the desired course listing from course providers. To add locations, you have to go to the Directory Listing > Locations > Enter credentials (name, description, directory type, etc.) > Hit the Add New Location button.

Step 5: Listing submission by users
To add listings to your course directory website, navigate to the WP Admin Dashboard > Directory Listings > Add New Listing.
However, the course owners will add or submit the majority of the listings. One thing you can do is to check whether the listings violate your community standard or not. And, you can charge money for every listing.
To add listings, course owners need to have a registration with your site. After the registration is done, course owners can freely add more listings from the “Add listings” option. You can check the progress whether the submission is okay or not.
Extending Functionalities of a WordPress Directory Website for Courses
Earlier, we finished building the basic directory website for courses. Now, if you want to extend the functionalities of your course directory website, then you can move easily with Directorist’s advanced features and extensions.
For example, you want to allow the listing owners to set different pricing plans for their listings so that their users can have different options to choose from. To set this feature, you can add this feature to your course directory website using the Pricing Plans extension.
Again, you can allow directory website users to compare listings just by adding an extension to your existing course directory website.
To add the extension, go to the WP-Admin Dashboard ➝ Plugins ➝ Add New ➝ Upload Plugin ➝ and upload the Extension ZIP file and Activate it.
Pro Tips: Monetize Your Course Directory Website with Directorist
Making money from a directory website should be one of the prime goals of a directory website owner. With Directorist, you can monetize your course directory website in a number of ways.
- Charge for listings (Free)
- Featured listings (Free)
- Allow businesses to claim listings (Premium)
- Charge for viewing private listings (Premium)
- Allow private/sponsored advertising (premium)
- Charge for membership (Premium)
- Sell business leads (Premium)
- Promote affiliate products (Premium)
- Allow sponsored articles/guest posting (Premium)
- Bookings & appointment (Premium)
- Paid ad placement (Premium)

Bonus Tips: Adding a Free Payment Gateway
Directorist free version supports only the offline bank transfer method to receive payments. To add your bank account details, navigate to the WP Admin Dashboard > Directory Listings > Settings > Monetization > Offline Gateways Settings > Insert your details > Save changes.
- You should remember that this payment gateway needs some manual action to complete an order. After getting a notification of an order using this offline payment gateway, you should check your bank if the money is deposited into your account. Then you should change the order status manually from the “Order History” submenu.
- Apart from the offline Bank transfer method, Directorist also supports online payment gateways like Stripe, PayPal, and Authorize.net. However, they are available in the premium version only.
Final Thoughts
We believe you have mastered the basics of creating a course directory website. To elevate the visual appeal and functionalities of your course directory website, consider upgrading to the pro version of Directorist. This version is meticulously crafted to help you build a top-notch directory website for any niches.
If you liked our posts, don’t forget to subscribe to our blog so that we can notify you once any post is published. Directorist is now on Facebook, Twitter, and LinkedIn! You can also join the Directorist Community for sharing your thoughts and experiences relating to the directory niche. Come and join us to see what we’re up to.


Md. Hamim Khan
Md Hamim Khan is the Content and SEO Manager at Directorist, where he creates engaging content that helps improve online visibility. When he’s not at work, he loves playing cricket and enjoys chatting with friends, family, and colleagues.


Leave a Reply
You must be logged in to post a comment.