 Up to 35% Off!


Table of Contents
- 1 Basic (or Core) Features to Create a Restaurant Directory Website?
- 2 Create a Restaurant Directory Following These 5 Easy Steps
- 2.1 Step 1: Install & activate Directorist
- 2.2 Step 2: Download & install a Restaurant directory theme
- 2.3 Step 3: Create categories & tags for your website
- 2.4 Step 4: How to add new locations
- 2.5 Step 5: Listing Submission by Users
- 2.6 Adding Advanced feature: Monetizing your restaurant directory website
- 3 Bonus Tips
- 4 Close-down
How to Create a Restaurant Directory Website
-

- Directorist Tutorials
- 6 mins read
I’m sure you have often felt the necessity to find the “best restaurant near me” with Google. But oftentimes people need more information and flexibility just beyond Google’s information. That’s where a restaurant directory comes to the spot right away! These restaurant listing websites are becoming pretty popular with foodies or someone who likes to visit new places.
It gives the searcher all information including maps, direction, food items, ratings, reviews, booking and reservation, and what not! You can let your users get this type of information with ease by simply creating a restaurant directory website.
In this tutorial, we will not only show you a code less way to create a restaurant directory website but also display the tricks to monetize your website with WordPress.
Basic (or Core) Features to Create a Restaurant Directory Website?
When we talk about the basic features of a restaurant directory we mainly discuss only the bare minimums:
- Directions: A good restaurant listing website helps visitors find their desired restaurant with maps, addresses, phone numbers etc.
- Location based Search: Location-based search helps visitors find their desired restaurants that they can
- Ratings & Reviews: The visitors can rate the restaurants and submit reviews that other users or visitors can see later.
- Front-end Submission: If you want to create a dynamic restaurant directory, you must enable your users to submit from the frontend. This way, you can remove the necessity to let them log in to the backend of your website.
- Advanced Search Form: It’s an important feature for your users so that they can run custom search based on different criteria like Category, tags, location, area, condition, transmission, fuel type, number of Cylinders and many more.
- Featured Listing: Featured listing is needed when you want to push a particular item to the top of all other items.
- Payment Reception: A good restaurant directory solution comes with online and offline payment system.
- Page builder support: The support for page builders like Elementor, Oxygen Page Builder, and Gutenberg block editor will allow you to design your website exactly the way you want.
- Export import option: With this option, you can effortlessly switch from one solution to another.
- Multidirectory feature: You extend your business with multi directory feature.
Other important yet basic aspects include:
- Scalability: A good restaurant directory solution is always scalable with extensions.
- Security: It must come with a good degree of security protection enough to protect your directory website from hackers.
- Support: Whichever tool you choose, make sure to pick a directory tool that provides the necessary support in case you face any issues.
- Integration: A good directory solution has integrations with popular platforms like MailChimp, BuddyBoss, BuddyPress, Stripe, PayPal, Authorize.net, WooCommerce, and many more.
- Mobile apps: With mobile apps, you can reach out to more than 7.26 billion users from around the world. Make sure the directory tool you choose has a mobile app available for Android and iOS.
Create a Restaurant Directory Following These 5 Easy Steps
Before we move any further, make sure you have a WordPress website up and running. If not, follow our step-by-step guide and try to follow these steps:
Step 1: Install & activate Directorist
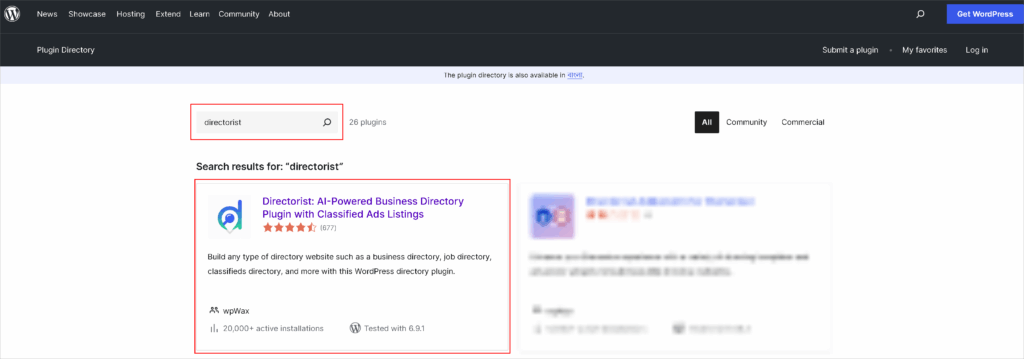
Directorist is one of the best directory website builders that allows you to create any kind of listing website with full control. It has a very good customer rating of 4.7 (out of 5) with more than 20K+ users from across the globe. So, rest assured of its quality.
To download Directorist, navigate to the WP Admin Dashboard > Plugins > Add New > Search for the keyword ‘directorist’ > Install the following plugin as indicated with an arrow.
Next up, you need to activate and configure the setup wizard to get the ball rolling. We recommend you to visit our official documentation that will help you to do so
Step 2: Download & install a Restaurant directory theme
Directorist supports any WordPress compatible theme. But we recommend you pick a theme that was specifically designed for restaurant directory. We will be using the dRestaurant theme for this tutorial. If you have tight budget, you can use OneListing theme but you’ll missed the premium features and will require more customization tasks. For a free directory setup, you can follow this guide – How to Create a Directory Website in WordPress for Free
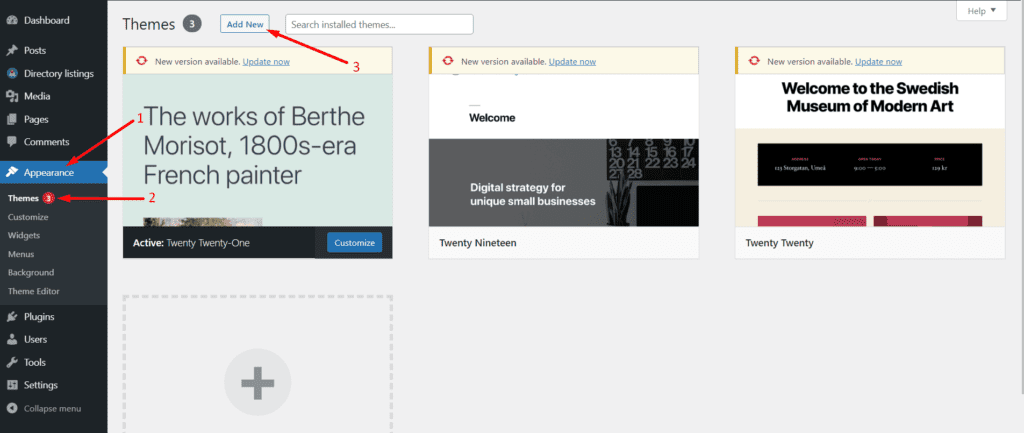
Once you download the theme, navigate to the WP Admin Dashboard > Appearance > Themes > Add New.
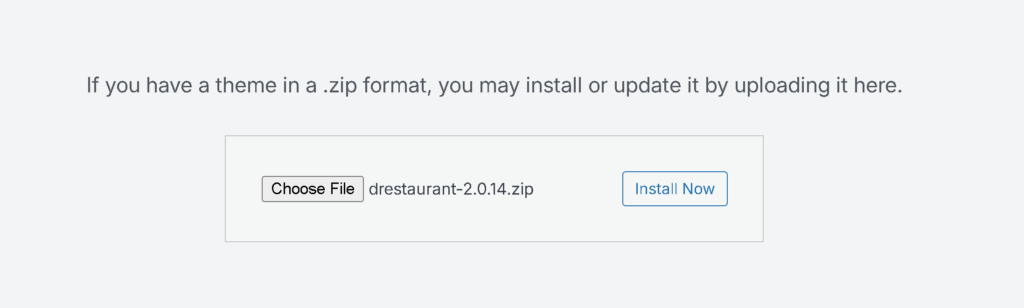
Then click on Upload Theme > Choose File and select the ‘onelisting.zip’ > Install Now.
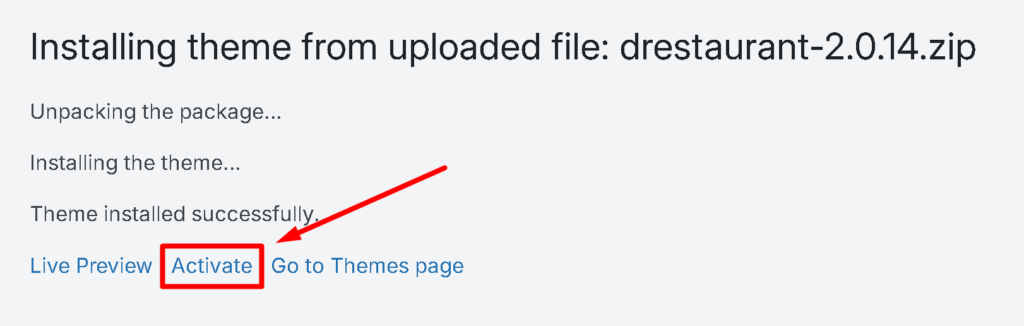
Now, activate the theme to take an effect:
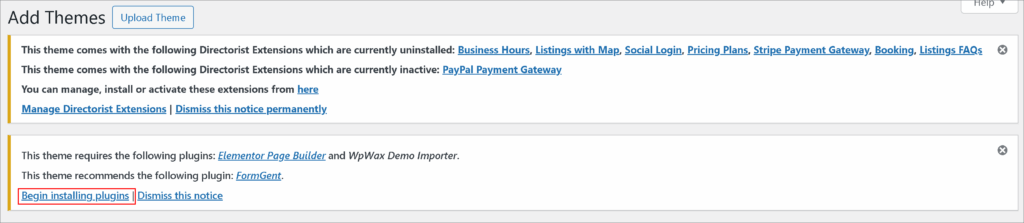
After activating the theme, you will see a notice to install a few plugins: : Elementor, FormGent, Listings with Map, Business Hours, Social Login, Pricing Plans, Booking, PayPal Payment Gateway, Stripe Payment Gateway, Claim Listing, Listings FAQs
Make sure you have download from Directorist user dashboard and installed them for the theme to work properly. You can just hit the ” Begin Installing Plugins” option to make them installed with just a click. Finally activate all of them.
And that’s it!
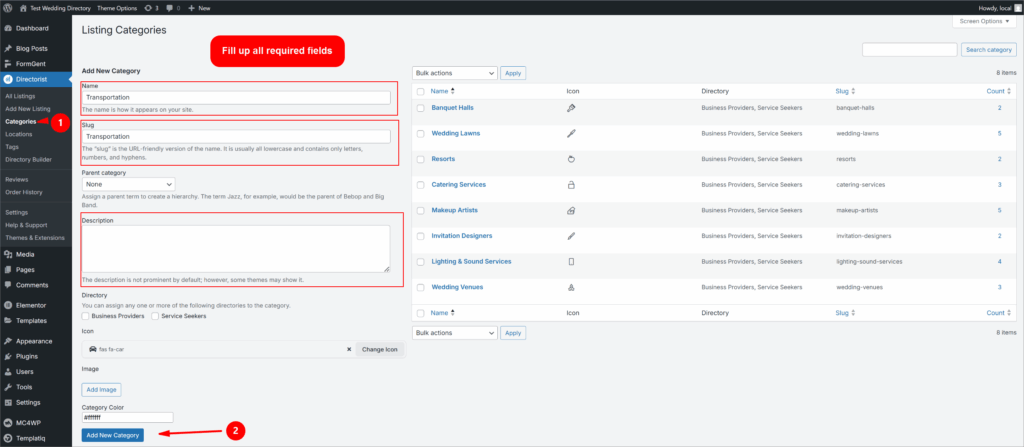
Upon installing the theme, you need to create a few categories & tags for your website to make your website more user-friendly and easily accessible. Without categories, it will be really time-consuming for the visitors to find their desired listing.
To add categories in Directorist, you need to go to the Directorist > Categories > Fill out the fields and make sure to hit the “Add New Category” button.
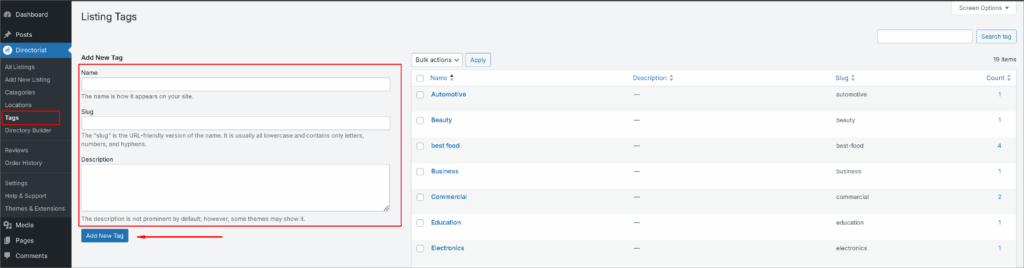
Similarly, you can add tags so that the visitors can find their desired item as fast as possible. You can do it from Directorist > Tags > Enter Credentials > Add New Tag.
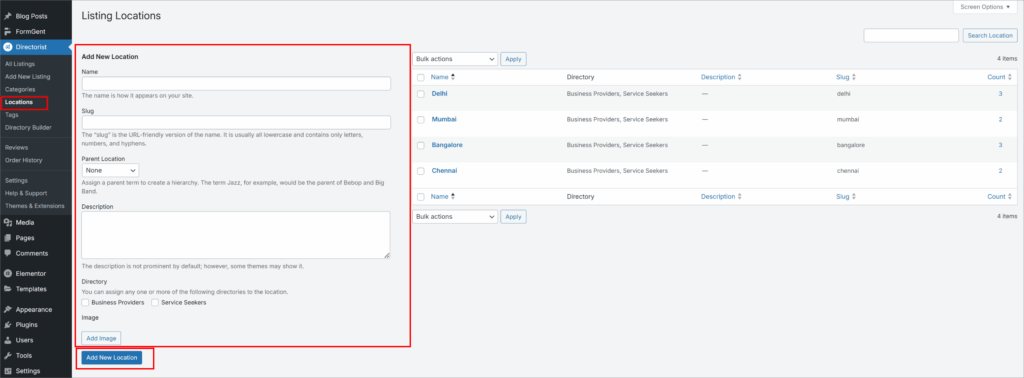
Step 4: How to add new locations
Adding locations is an important factor for your website so that users can get more relevant restaurants while they search for a listing. To add locations, you have to go to the Directorist > Locations > Enter credentials > Add New Locations.
Step 5: Listing Submission by Users
Now that you set up all the basic stuff, it’s time to add some listings. You can use import listings through CSV, or add manually or using a add listing form. You can learn in detail from our Ultimate Guide on how to create a directory website. Let’s add a listing from the front as if we are like a visitor. Create a submission form: Directorist > Directory Builder > Add Listing Form
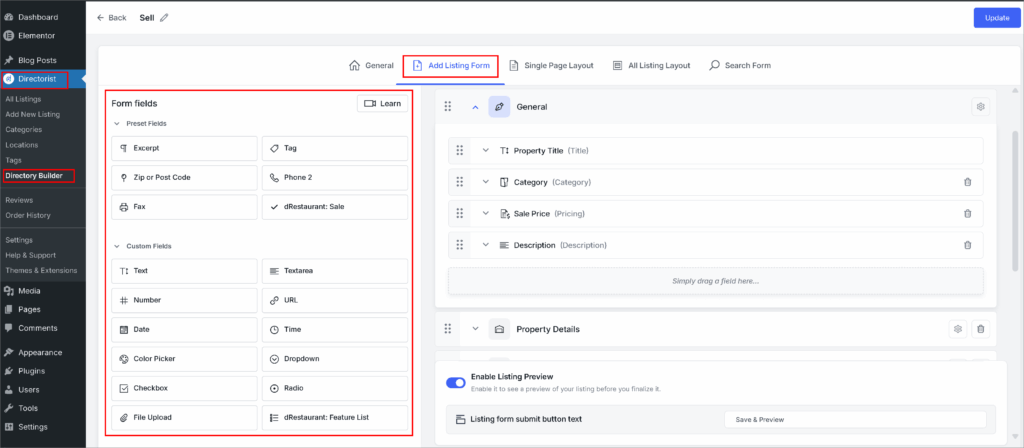
To upload a restaurant listing, navigate to the front and you will get a submission form. Fill out and submit. That’s it!
After you have a series of listings on your restaurant listing website, the all listings page will look something like this:
So, you are already done with creating a basic restaurant directory website. Now, let’s add some advanced features so that you can start earning from your website.
Adding Advanced feature: Monetizing your restaurant directory website
Here comes the optional yet most important part, we know. With Directorist, you can monetize your website in a number of ways. Here are a few notable ways:
- Charge for listings
- Featured listings
- Bookings & appointment
- Sell premium listings
- Allow businesses to claim listings
- Charge for viewing private listings
- Allow private/sponsored advertising
- Charge for membership
- Sell business leads
- Promote affiliate products
- Allow sponsored articles/guest posting
- Access control
- Ranked featured lists
- Paid ad placement
Want to learn these ways in detail? Give a read to this article, “How to Monetize a Directory Listing Website” now!
Bonus Tips
- Free Elementor Support: You can add the filtered Search Bar from the Directorist Elementor widgets. If you are using the OneListing theme follow this short video to insert the search bar directly from the “Theme Elements” section:
You can also style or customize the search bar from the Elementor editor panel like any other widget.
Just like the Theme Elements, you can effortlessly edit the Directorist Elementor widgets too.
- Free Gutenberg Support: You can also create your restaurant directory website pages using Gutenberg blocks. You will just need to click a Directorist Gutenberg block to generate pages in the blink of an eye just like the Elementor widgets. For example, here we have created the all listings page using the Directorist Gutenberg blocks:
Close-down
And that’s that! Creating a restaurant directory is full of fun and excitement. We have tried to show you only the bare minimum. You will get much more functionalities in the tool. If you are stuck with something, visit the official documentation immediately. Still, stuck? Then don’t hesitate to share your problem in the comment section below. If you are already using Directorist for your restaurant directory, feel free to share your experience below.
Finally, before you start downloading Directorist we recommend you use the demo version to get a quick hands-on experience.

suzauddowla
Al Suzud Dowla plays the role of a content strategist at Directorist. He is basically a digital marketing expert and a tech enthusiast (by heart) who excels particularly in technical content writing. In his pastimes, he is seen playing Ping Pong, performing Karaoke, reading books, and playing around with JavaScript as well.


Leave a Reply
You must be logged in to post a comment.