Directorist Custom Fields – Elevate Your Directorist Experience with Custom Fields
WordPress is much like Disneyland because as a CMS, one can imagine every design or functionality to embellish their website anytime anywhere. This holds even if you are making a directory website using Directorist.
Now, you may probably be wondering why you need to implement custom fields on your directory website, right? Well, the answer is preference varies from person to person, that is, one needs a particular feature while others don’t. with the Custom Fields option in Directorist, you can reflect your preference on your directory website like a pro.
In this article, we will show how you can make your directory submission form personalized exactly the way you want. No more flapdoodles, let’s jump right in.
Directorist Custom Fields – How They Benefit You
Simply put, custom fields will help you customize the submission form of add listing page and other pages like the single listings page and even the search filter form. We assume that you are already using Directorist and you have the following submission form on your add listing page for your users:
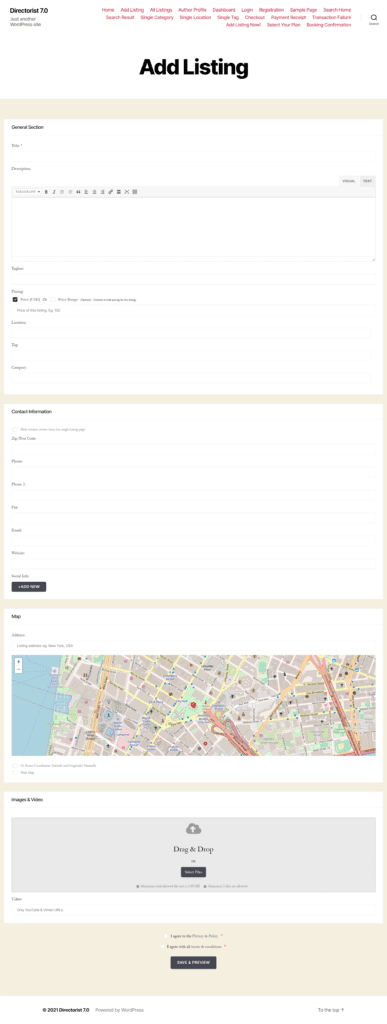
As you can see, it contains default options such as General Option, Contact Information, Map, Images and Video.
Suppose you want to customize the preset fields of General Section with custom fields. And the current General Section includes the following fields:
- Title
- Description
- Tagline
- Pricing
- Location
- Tag
- Category
How can you customize? Simply follow these steps:
Customizing Submission Form with Custom Fields
In this article, we will only walk you through the process of customizing the submission form with custom fields. That’s because the customization process is more or less the same in the case of other pages. Now, let’s begin:
Step 1: Go to the Custom Field Options
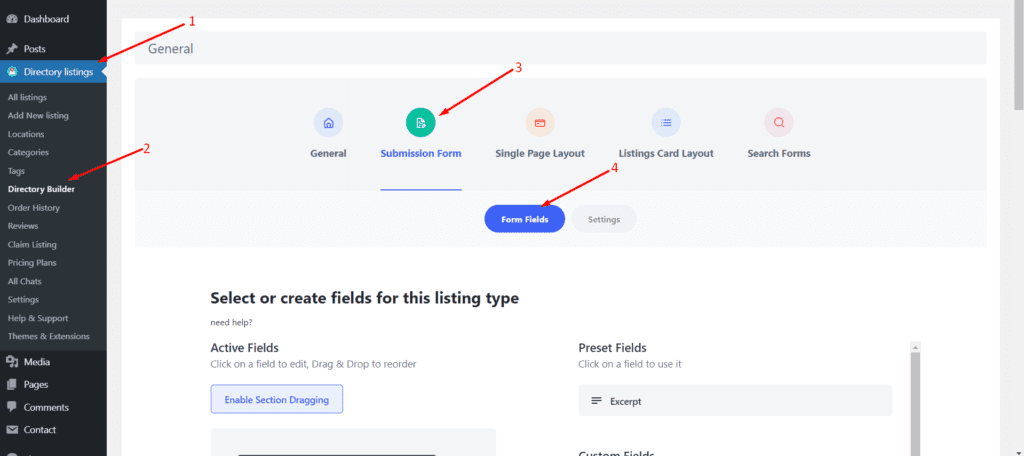
Next, up, you need to navigate to the WP Admin Dashboard > Directory Listings > Directory Builder > Submission Form > Form Fields. Here you will be able to see both preset fields and custom fields.
Step 2 : Start Customizing the Fields
- Deleting a preset field:
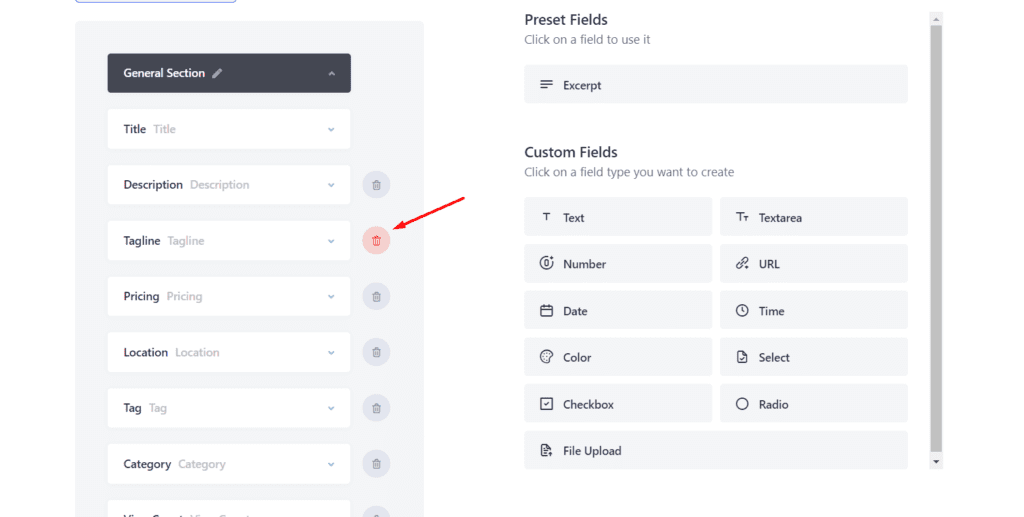
Now, let’s delete the tagline field for example. You can do it either by clicking on the delete sign located on the right side of the field.
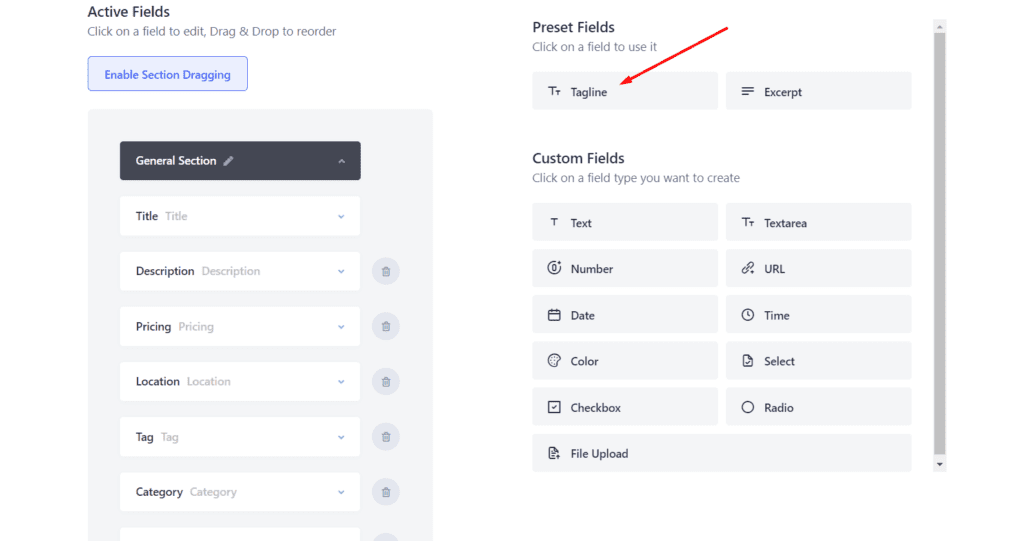
Or by dragging and dropping the field from left to right section under the Preset Field option. After you delete an active field from the menu it will appear at the Preset Field section.
Adding a custom field:
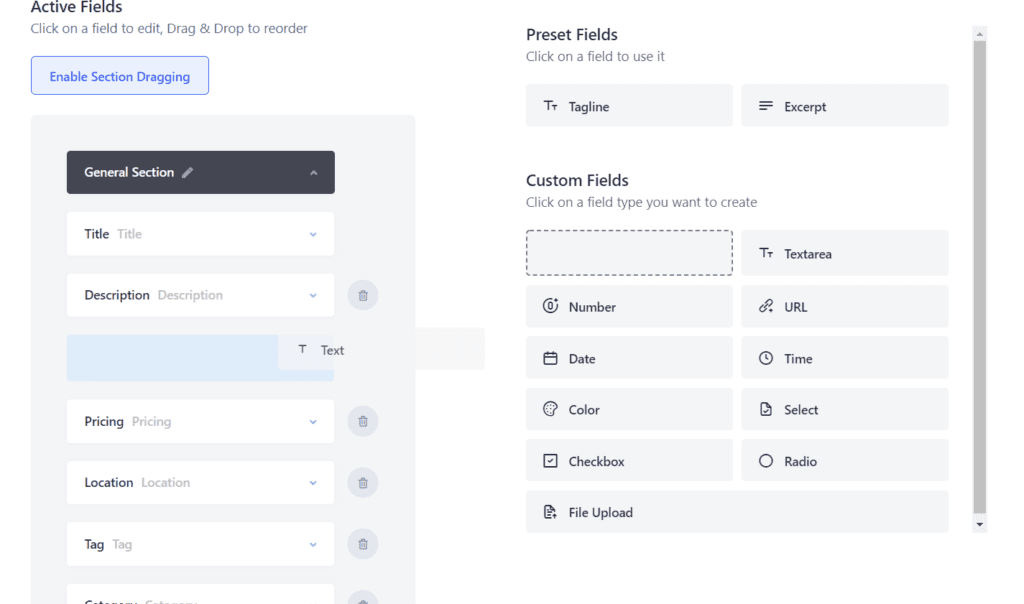
To add custom field, hover your mouse over the Custom Fields area and click on any field or simply drag and drop them to the General section. Here for instance, we are selecting the text field:
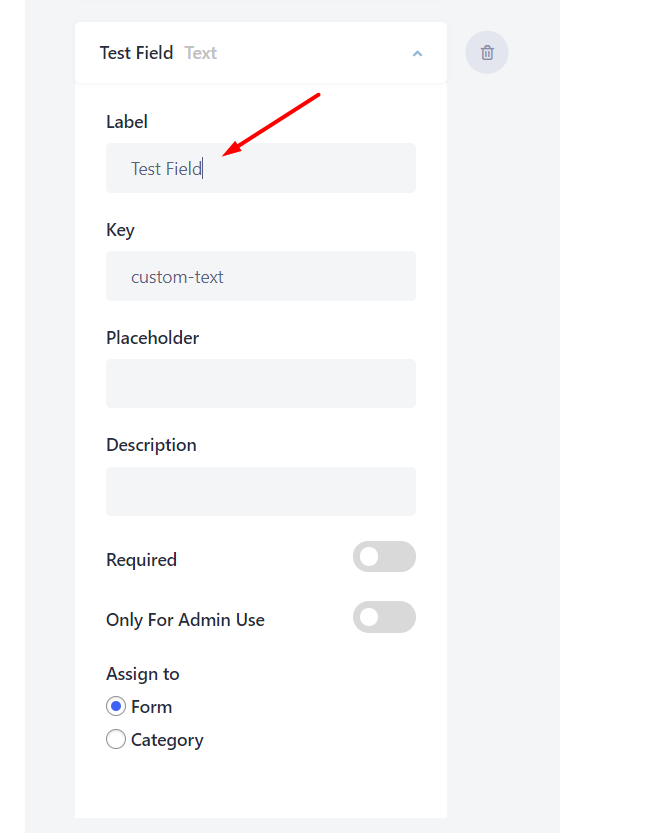
you can also customize the parameters of the text field like changing the Label, Key, Placeholder, Description, Required, Only for Admin Use, etc. In this example, we are going to change the Label to “Test Field” from ‘Text’.
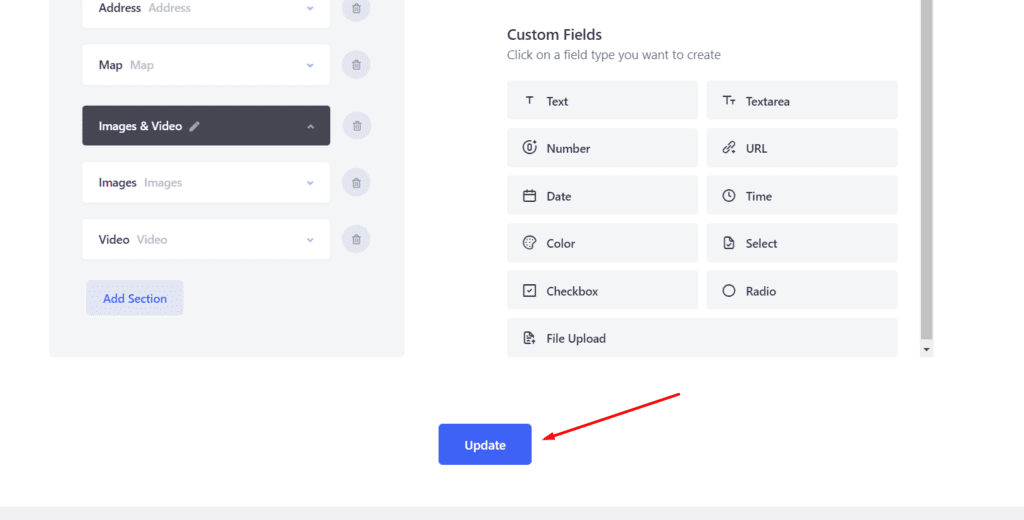
Now, save changes by hitting the “Update” button from below.
That’s it! You have customized the Submission Form of Add Listing.
Seeing the Custom Field from the Frontend
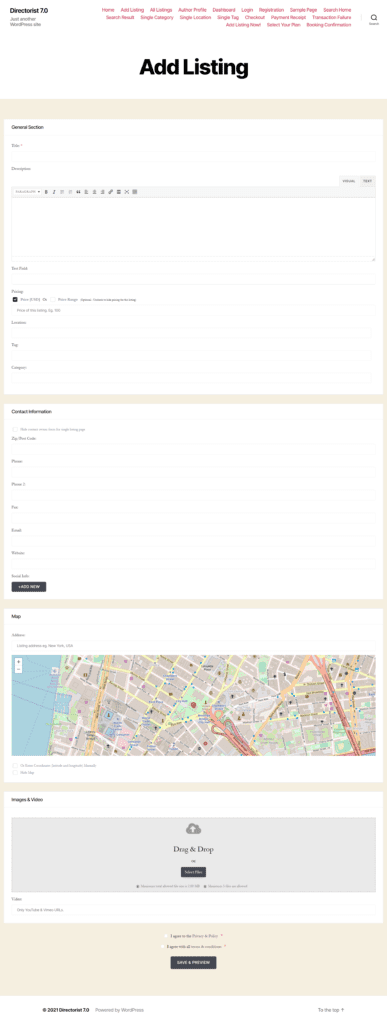
Now, reload the add listing page to see the changes we have made just now. After that, you will be able to see that the Tagline has gone and the new “Test Field” has been added there.
That’s Not the End! You Can Add an Entire Section too!
However, if you want to add and entire section, feel free to use the Custom Field option. To do so, select the Add Section option from the Submission form.
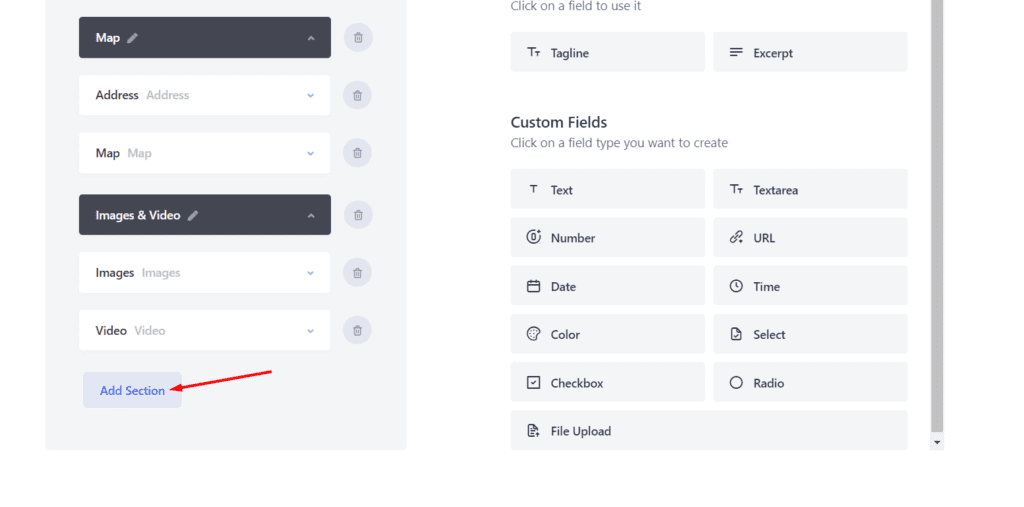
After selecting the “Add Section” option, you will see a pencil icon to change the Group Name:
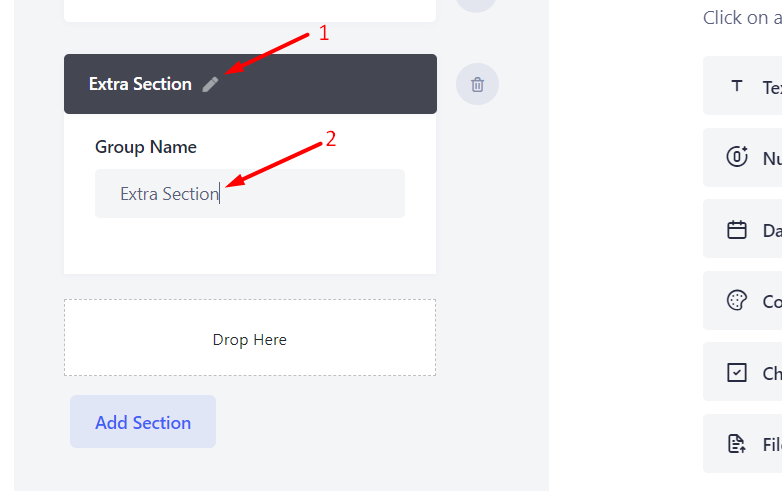
Now, click the pencil icon again to hide the Group Name option.
Next up, let’s take the URL field and File Upload field to the Extra Section area:
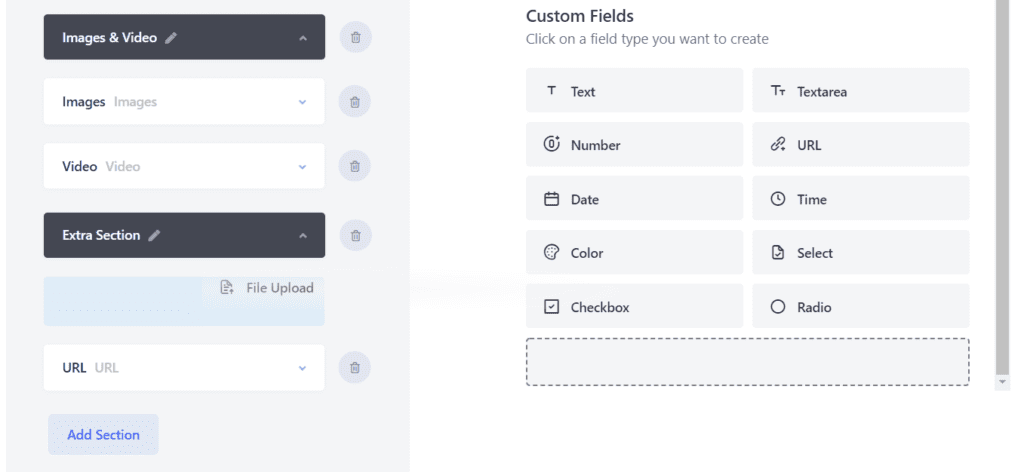
You can also change the attributes of these fields. For example:
- Label
- Key
- Choose a File Type
- File Size
- Description
- Required
- Only for Admin Use
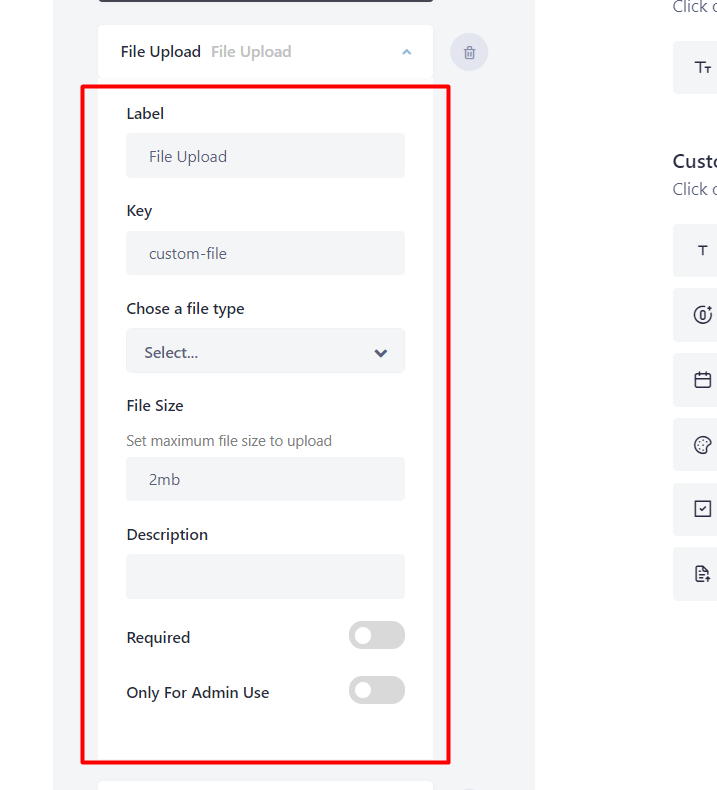
Don’t forget to hit the Update button to save the changes.
Now, let’s see from the frontend if this Extra Section do appear:
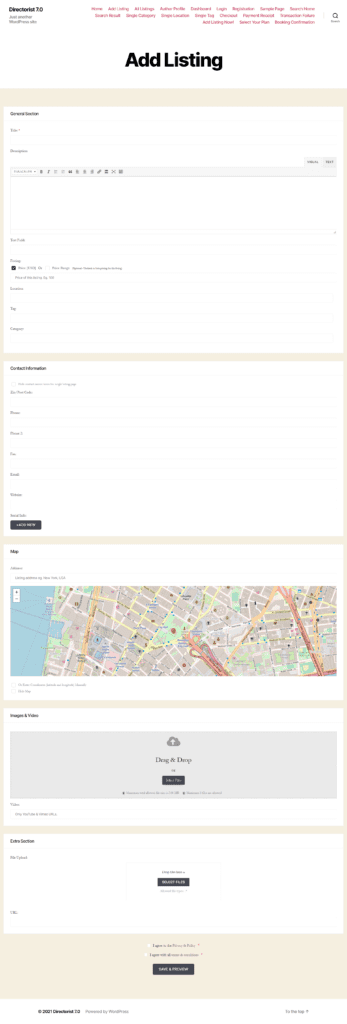
There you go! The Extra Section appears at the end of the Submission form.
Conclusion
We have only shown one or two fields here in this tutorial. If you want to know all the custom fields in detail, we would like to suggest you go through our official documentation page.
If you are already using Directorist, why are you waiting for? Take your Directorist website to a new level and run circles around your competitors by crafting a directory website exactly the way you or your visitors want.
Finally, feel free to contact us by dropping us a line below in the comment section in case you need any help while implementing the custom field feature.
15 Comments
Leave a Reply
You must be logged in to post a comment.


Rachid Beggar
July 3, 2021Contact information are not showing on the single listing page, how to solve that?
Thank you!
Al Suzaud Dowla
July 4, 2021Hi Rachid!
To show a field on the Single Listing Page, you must add that field on Add Listing Page first.
To do so, go to the WP Admin Dashboard > Directory Listings > Directory Builder > Edit Your Directory > Add Listing Form > Add the field you want to show on your single listing page by dragging and dropping from the field panel (located at the right side) > Update.
Then again, make sure to navigate to the Single Page Layout > Contents > Add the field again to the page by dragging and dropping from the field panel (located at the right side) > Update . Bingo!
If the issue still persists, make sure to create a support ticket at ” https://directorist.com/dashboard/?tab=support “.
Jaimie Featherstone
March 10, 2022How can I import a set of options/values for a custom Select field? For example a list of countries?
Al Suzaud Dowla
March 14, 2022Hi Jaimie,
Currently, we don’t have this option in place yet! But we will roll out this feature very soon. Till then stay connected and don’t forget to subscribe to our website to get exciting news, posts, and articles right in your inbox. Thanks for stopping by.
Abdul Waheed
November 18, 2022Hi,
When I drag and drop a custom field, I am missing some field attributes, like “Key”. How can I get that to show up?
rashed
November 20, 2022Hello Waheed!
The “Key” attribute has been removed from the attributes of the fields considering not that much used by the users. However, the other attributes should be available.
Sahil
November 24, 2022How can I add two or three fields in one line to avoid long form
rashed
November 24, 2022Hi Sahil!
Apparently, there is no option for that. However, you can achieve that using Additional CSS.
meschoe
December 28, 2022I added custom fields to the my listing form, assigned to a category but it’s not showing on the front end of the form. Is there an additional step required to get the fields on the form apart from the builder?
rashed
December 28, 2022Greetings!
To make the custom fields that are assigned to a category appear, you need to select that category. If the fields still do not appear after selecting the categories, then we need to inspect the issue further on your site. I noticed that you have created a support ticket regarding this. Kindly allow us some time to reply to that to have further discussion.
aletheya
February 15, 2023Hi, how do I change the icon of a custom field ? Is that possible? I’m changing the ‘All Listing Grid Layout’ but all of my custom fields have the same default icon.
Tauri Taal
March 23, 2023Can we get the “key” field back as it provides more options for customization with Elementor? It is absurd that we cant use any meta-fields to create templates.
Md. Hamim Khan
April 6, 2023Hello Tauri,
Yes. It’s possible. To know more, contact here: https://directorist.com/contact/
Richard Karinguri
February 28, 2024Hi, how can I make the “Select” custom field in the Directory Builder a multiselect?
Md. Hamim Khan
February 29, 2024Hello Richard,
Thank you for your inquiry. Please note that our custom select fields support multi-select by default. Feel free to contact us if you have any additional queries or require any assistance.