Directorist allows you to have a split payment system for the site owner and the listing owner using Booking extension. To get the feature on your system, first of all, you need to install the extension after purchasing through the official website of the plugin.
Once you're done with the installation process, you need to ensure Booking Confirmation Page using the Page Setup option. To ensure it, go to the Directory Listing ➝ Settings ➝ Page Setup ➝ Booking Confirmation Page ➝ choose Booking Confirmation from the dropdown menu. By default, it is selected with the Booking Confirmation option. You just need to ensure to make it sure.
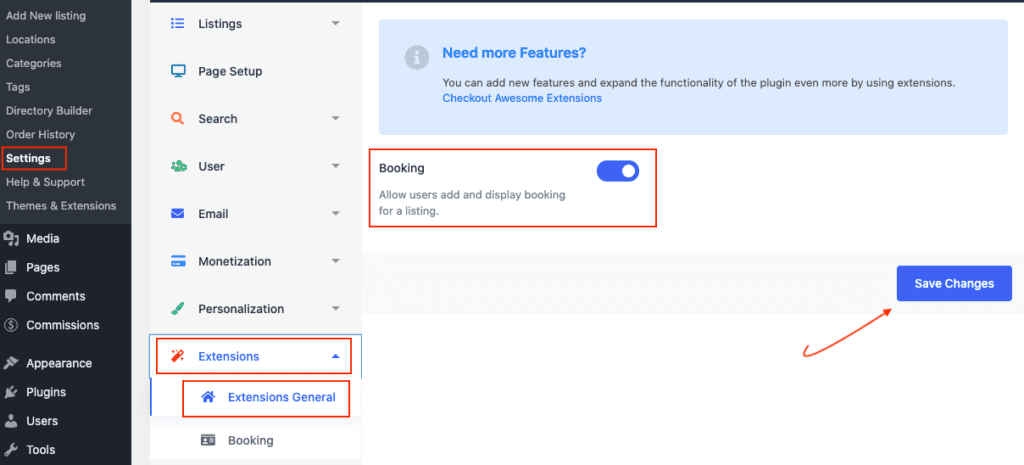
Now, you need to configure the split payment system using the Booking option under the Extensions section. To have this configuration, please, go through the following path: Directory Listing ➝ Settings ➝ Extensions ➝ Extensions General ➝ enable Booking option, click on the Save Changes button.
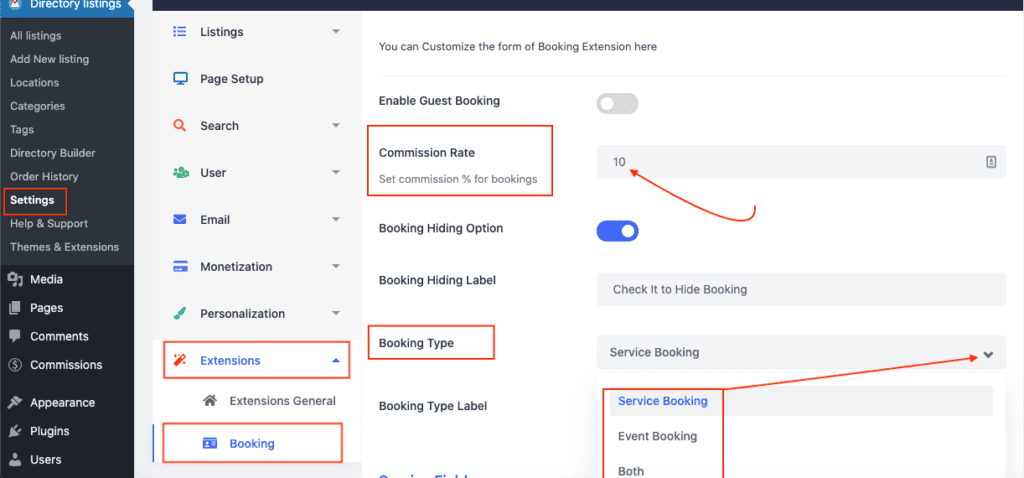
Once you enable the Booking option, Now, head over to the Booking section through the following way: Directory Listing ➝ Settings ➝ Extensions ➝ Booking. For the split payment system, go to the Commission Rate option to set commission % for bookings. Suppose, for a 10% commission rate, the site owner will get 10, and the listing owner will get 90.
Next, define the booking type using the Booking Type option from the same page. There are two types of booking named Service Booking and Event Booking to set up your split booking system or you can choose Both for having both the option. For demonstration purposes, I'm choosing the Sevice Booking type. Then click on the Save Changes button, to execute the changes.
Next, set a payment gateway other than bank transfer. Usually, you can get the bank transfer option by default. For demonstration purposes, we're adding PayPal for making things clear to you. To add a PayPal payment gateway, add a cost-effective extension named Directorist PayPal through the plugin page.
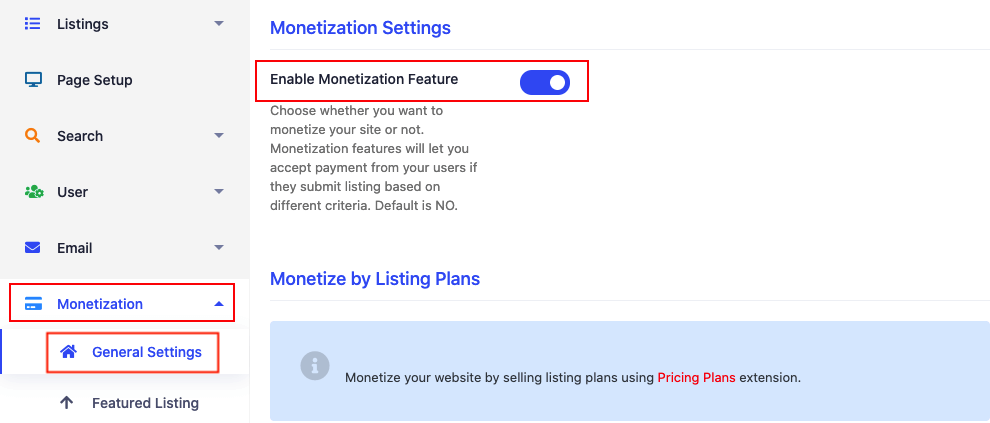
To set up the payment gateway, you need to go to configure it in the following way: Directory Listing → Settings → Monetization → General Settings → Enable Monetization Feature. Then click the Save Changes button.
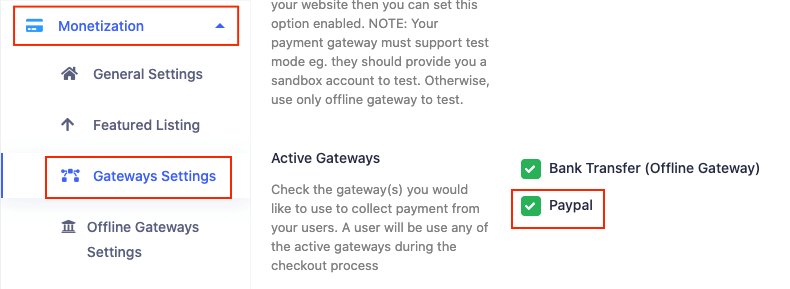
Now go to the Gateways Settings tab and check the PayPal option from the Active Gateways section.
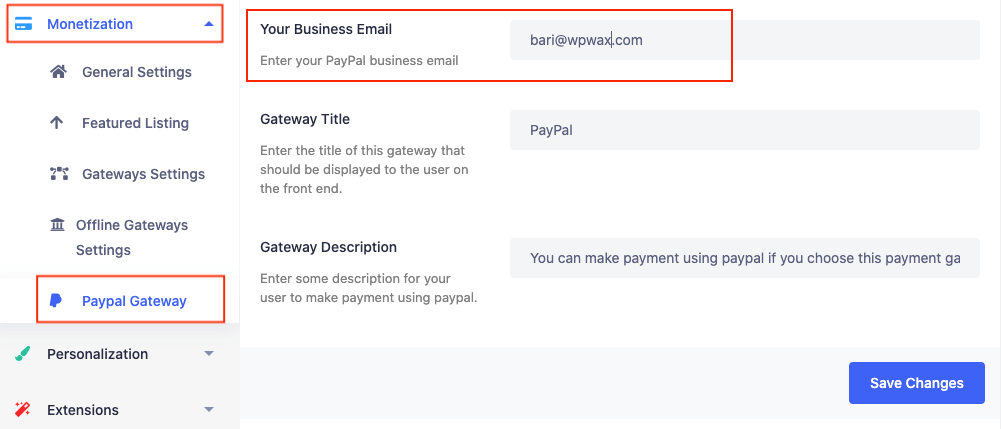
Click on the Save Changes button. Finally, you'll find the PayPal Gateway tab to provide the email for PayPal ID which is used to get paid.
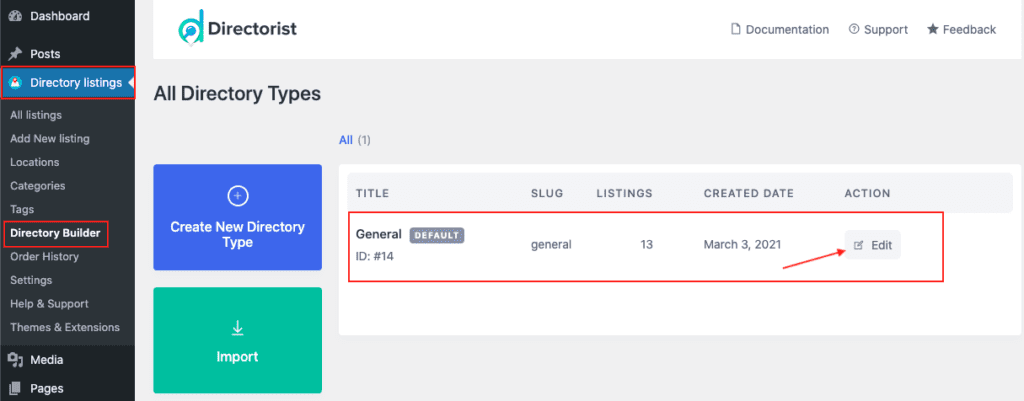
Now, you need to set up the booking feature in your directory builder. To make it happen, got to the Directory Builder, then head over to the builder that you're working on. In my case, I'm working on the General default builder, that's why I need to go to the Edit button to set up the booking feature in the Directory Builder. Follow the steps: Directory Listing → Directory Builder → General DEFAULT → Edit.
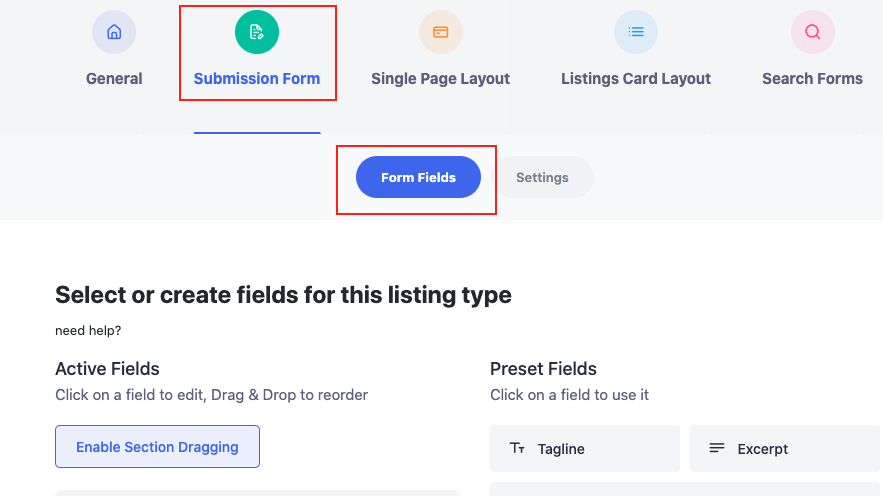
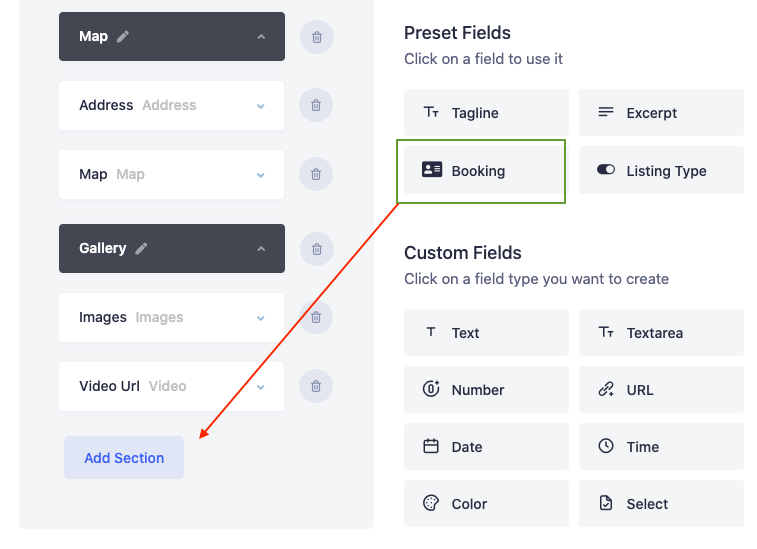
Once you click on the Edit button, you'll be taken to the General section of the builder page. Here, click on the Submission tab and drag the Booking item from the Preset Fields panel and drop it to the builder section.
You can place the Booking item anywhere according to your choice. In this case, I place the Booking feature at the bottom of the builder. This output will appear on the add listing page.
Once you're done with the Submission Form for the add listing page, now you need to define a single listing page of this submission means where to place the booking feature. You can set booking in two ways, either in the right sidebar using the widget or in the specific section of the single listing page. For demonstration purposes, I'm setting up it right sidebar using the widget. To make it happen, click on the Appearance → Widgets → Drag and Drop the Directorist Booking widget to the right sidebar.

Now, confirm that this booking option has placed properly on the sing listing page. To make sure, go to Directory Listing → Directory Builder → Edit → Single Page Layout → Content → Booking feature in the Preset Fields section.
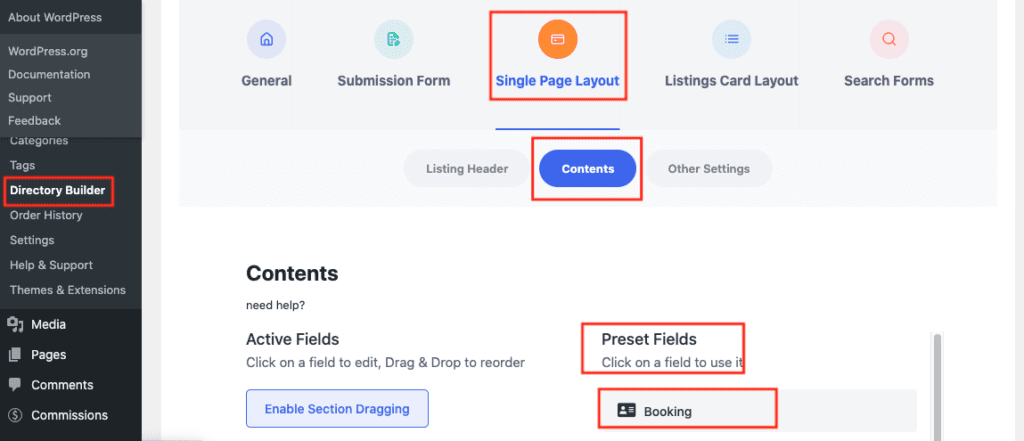
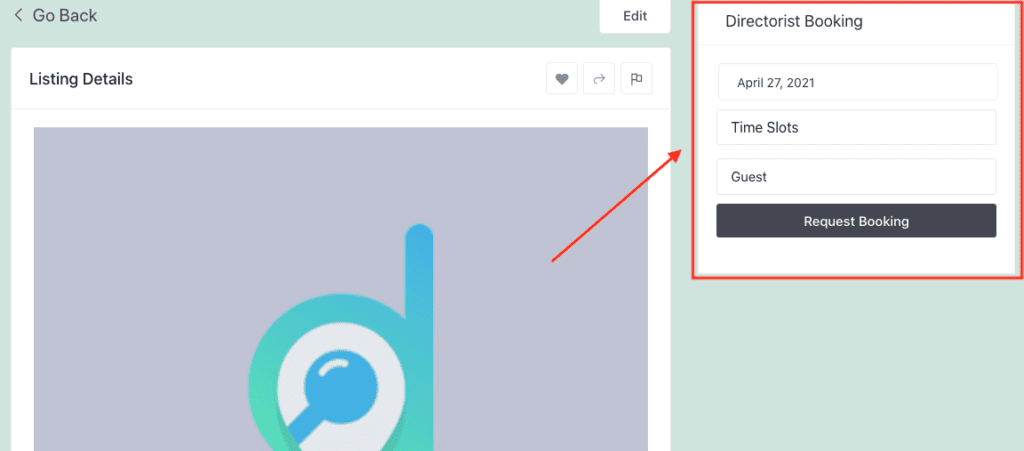
Now, in the dashboard, third-party users can find the booking feature while they want to book a particular service in the right sidebar ofn the single listing page.
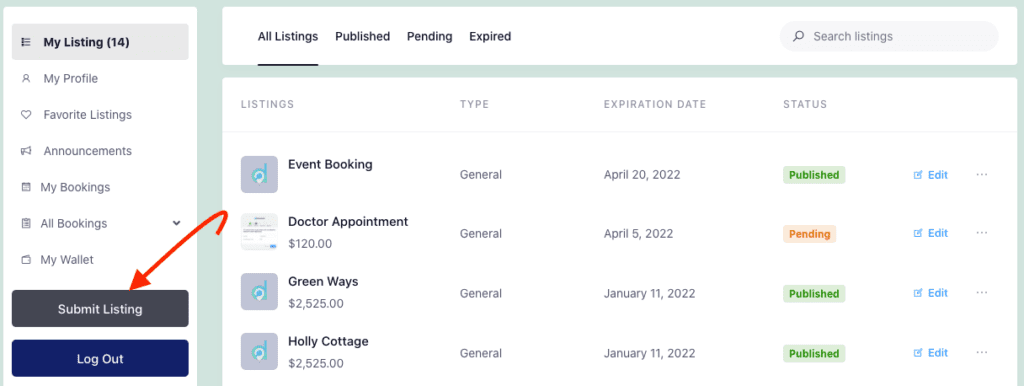
Listing owner can add listing as much as he wants though Submit Listing button.
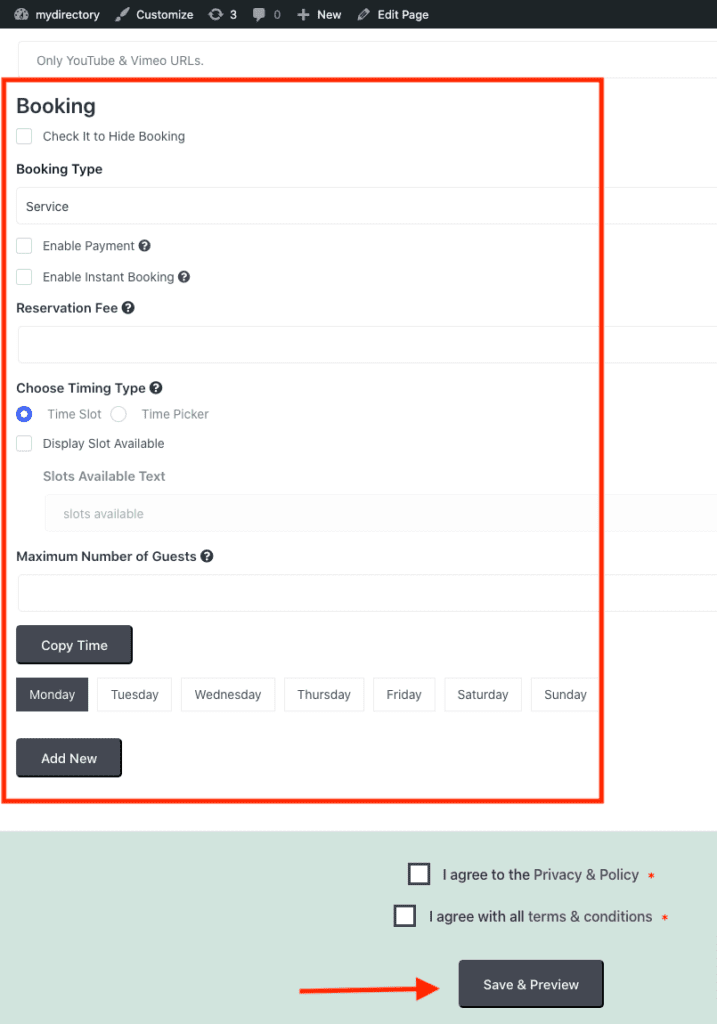
Once you click on the Submit Listing button, as a listing owner, you'll find the add listing form where you will get the Booking option to configure based on your placement you set up in the last step.
Now, define the service of a particular booking on the add single listing page for third-party users. To make it, the admin can add a listing by clicking the edit icon of a particular listing or a listing owner can do the same by going through the single listing page using Submit Listing button from the user's dashboard. In the Booking section, make sure the Booking Type, always check the Enable Payment option, provide the reservation fee, define Chose the Timing Type and Maximum Number of Guest, and adjusting timing options.
Once a listing owner submits a listing with filling up the booking features and gets approved by the admin, now both can earn money through third-party users. Let's see how things happen!
When the listing owner has listed his listing with the service, now, it's time to book a service by a third-party user. Suppose, the listing owner submitted a listing about event booking; to book this service, the third-party user needs to go to the all listing page. In the case of booking the event listing, the user needs to click the Event Service listing to book a specific service. Once, the person clicks on the listing, it will take him to the single listing page of the particular listing.
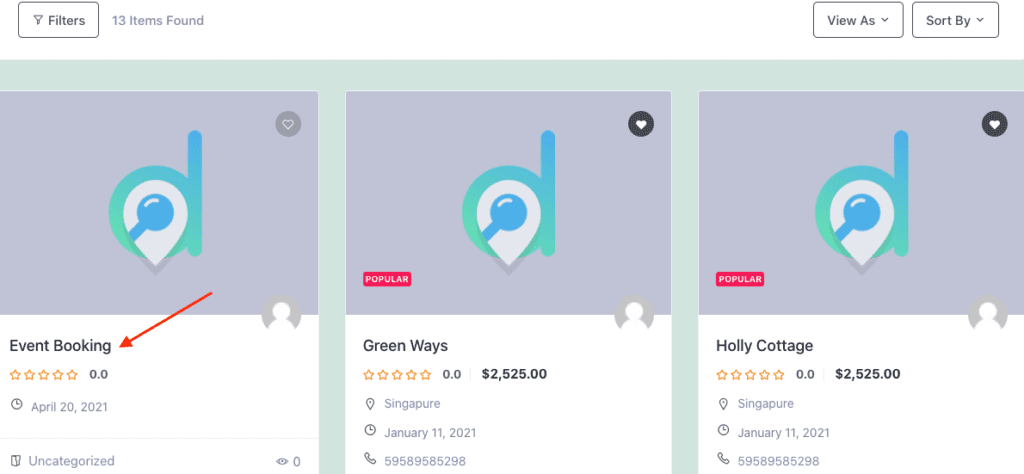
Now, from the right sidebar, configure your booking needs to complete the booking process. Once you're done with the configuration, click on the Request Booking button to the next step of the booking process.

Now, the user needs to define the necessary information that you set earlier in the booking section. When defining the booking info, there will have an automated charge for the specific booking that you set up earlier by default. Based on the information the user provides, usually, the charge appears under the Request Booking button.

Once the user clicks on the Request Booking button after defining the necessary information that you set earlier in the right sidebar, then he will be taken to the Booking Confirmation page.
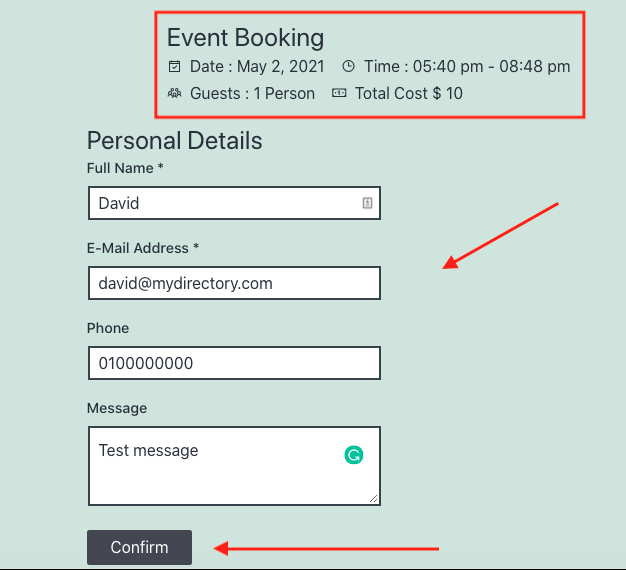
To complete the process, provide the necessary information and hit the Confirm button. Then you'll be taken to the checkout page.
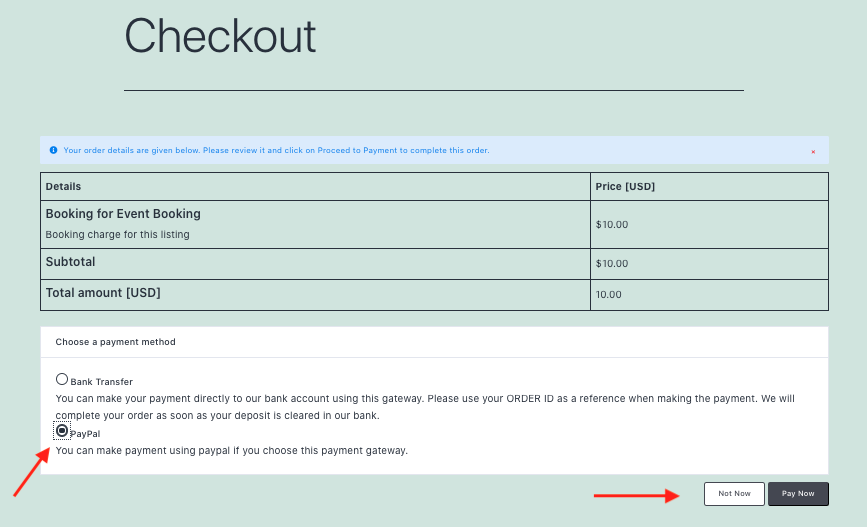
On the checkout page, you'll find two payment gateways; one is free default that is Bank Transfer, another one is PayPal which needs to install a cost-effective extension. For demonstration purposes, I'm choosing PayPal as the payment gateway. After choosing the PayPal option, click on the Pay Now button. Then it will be redirected to your preferred to complete the payment process.
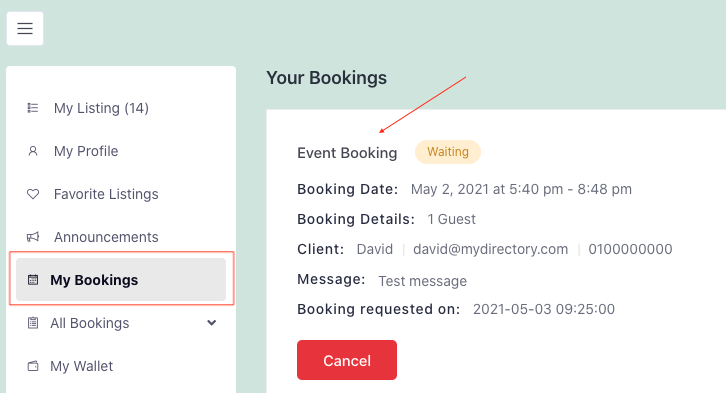
When the user pays the charge then it will stay in a pending position in order to approve. The respective user can see that pending listing in the user's dashboard under the My Bookings section.
Now, it's time to approve for admin after ensuring that he gets payment. Admin needs to go on his admin panel to approve it. To make it happen, go to the Order History and check the order that is placed. Next, choose the Set Status to Completed from the dropdown menu, click on the Apply button.
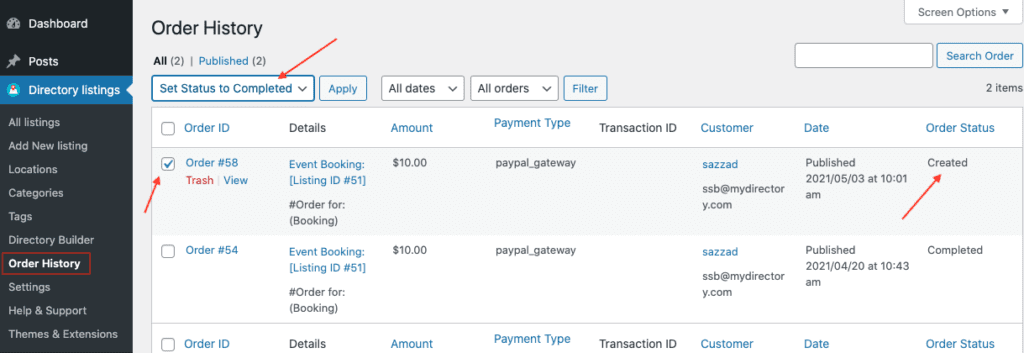
Once the admin has approved the listing the status will be changed as completed.

You can see that order status has changed in the Booking tab as well.
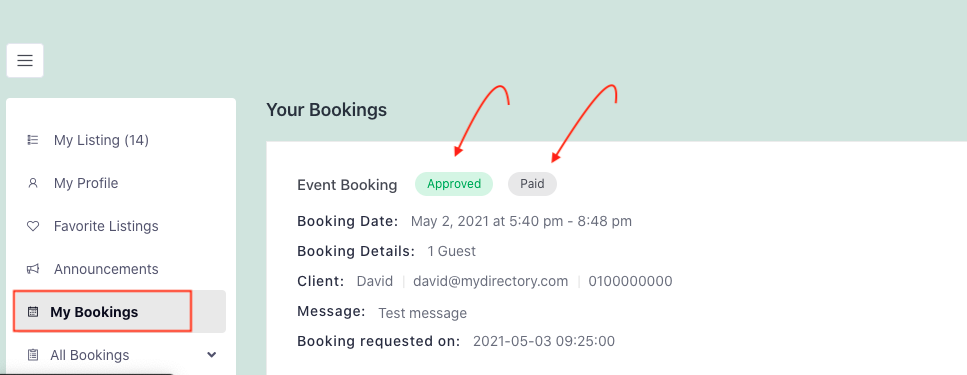
You can see that the listing cost has been paid to the site owner. Now, it's time to split the payment into two parties. For now, Directorist supports the only manual process of dividing the payment through the admin.
[N.B: Currently, Directorist doesn't support any automated splitting method to get paid separately. Developers are working on it and it will be done shortly.]
Now, if you see the user dashboard where you would find the available balance in Wallet that has to send to the listing owner. Once the admin will pay the listing owner completely, there will have no balance in this section.
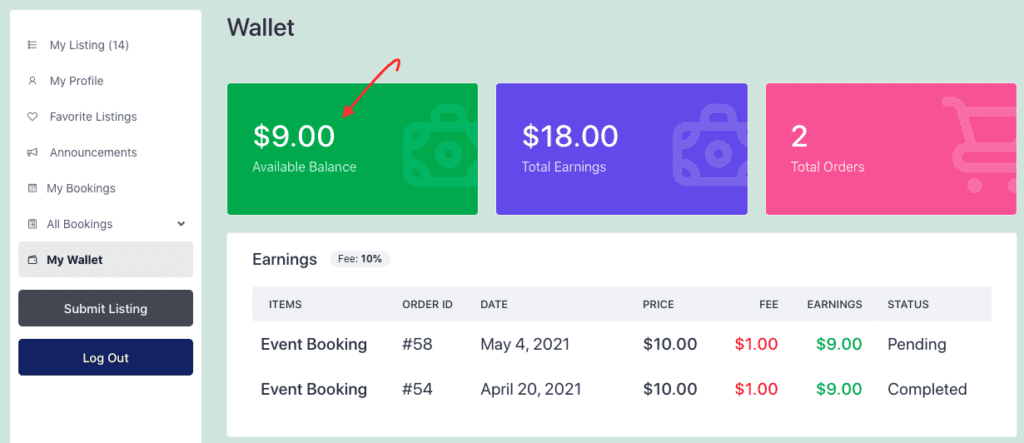
In this case, Admin got a listing of $10. He took $1 and rest $9 is pending that will be sent to the listing owner.
Manual Splitting Process of Payment:
Once the admin gets paid, he has to complete a small manual process to pay the listing owner. In this case, our user booked an Event Booking for $10. That means, admin gets $1 and the listing owner gets $9 out of it. To make it happen, the admin needs to go the commission tab where he will find the pending payment that needs to send the listing owner.

You can see listing details clicking on the user name option.
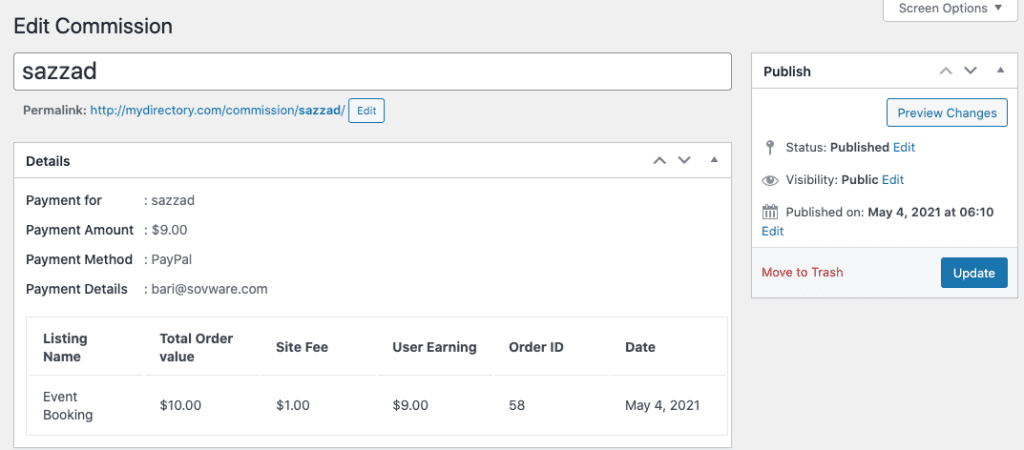
Now, it's time to complete the ultimate splitting process by checking the payment item and using the Payment option from the dropdown.

Once the admin click on the Apply button selecting the Payment option, it will get paid to the listing owner. Now, you can see that there is no available balance in Wallet since the amount is paid already.
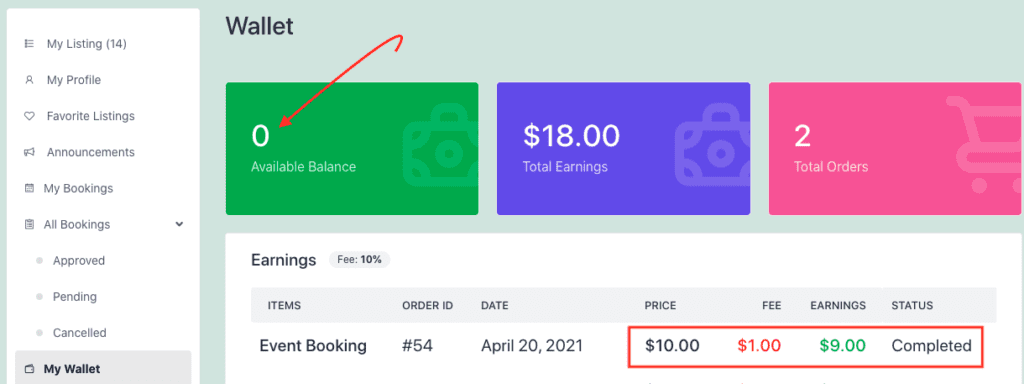
The above screenshot shows that the available payment is paid now which was pending to ship listing owner. That's why the figure is zero now. The split payment is done as you can see that 10% is distributed to the site owner and 90% has been provided to the listing owner.
This is how the split payment process works using Directorist. Though, currently automation is not working but it's still under the development. The feature will be added very shortly.
Last Updated: July 19th, 2021
