

How to Add Social Media Login to Your Directory Website
Wondering how to add social login in WordPress? Adding social media login in WordPress is simple when you will come up with the right strategies. In this article, we will cover up the benefits of adding social media login and how to add them in WordPress with extreme ease.
Gone are the days when people had to create a new account with a new password just to log in to the directory website. Interestingly enough, the emergence of the option to log in with social media like Facebook, Google, etc. has made the way more easy-breezy. Now people don’t need to register and log in to a directory site by default. And, they can even centralize their logins.
With the social media log in, you can bunch up even more valuable information about your users which in turn can jazz up your brand, advertising, and more like improving your conversion rate. Below are several steps that will help you to get started with adding social media login to your site.
Let the air flow out.
Why Add Social Media Login to Your Directory Website?
Adding social media logins to your directory website has a number of perks. Let’s get to grips with them.
1. Increase registrations

According to a Web Hosting Buzz survey, 86 percent of users get bothered while creating new accounts. Some of the users would rather leave your site than register. Here, adding social media login increases the number of registrations instead. So, having this option on your site will be a red hot.
2. Email verification

Fake addresses that some users typically use in web applications. But, the social network provider verifies the given mail addresses. And if the provider shares this information, then you are more likely to avoid fake addresses.
3. Access richer user profiles

Social network providers can provide you with additional information about users, like their location, interests, birthdays, and more. Using this data, you can send them personalized content which eventually leads to better UX.
How to Add Social Login in WordPress Focusing on Directory Website (Step-by-Step)
Adding social media login is a great way of not only making the registration process of your directory site more efficient for users but also gathering relevant information about them to get more leads. To do this, follow the steps laid out below.
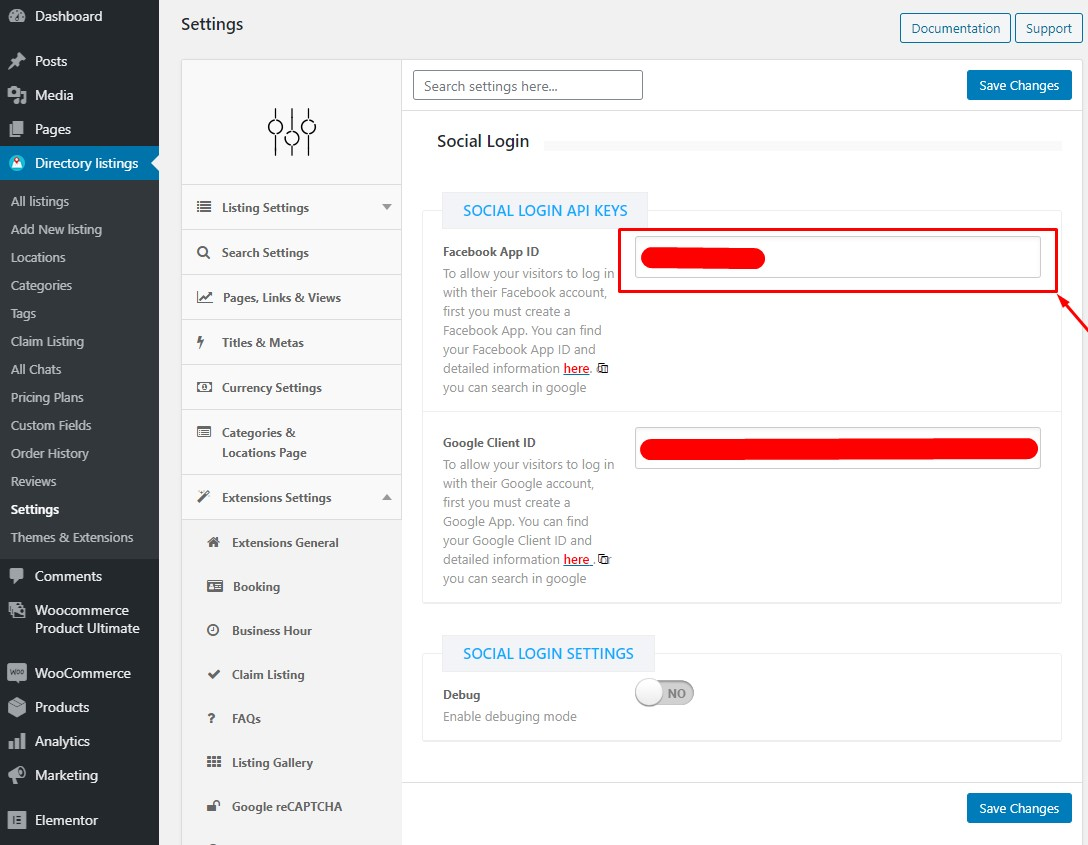
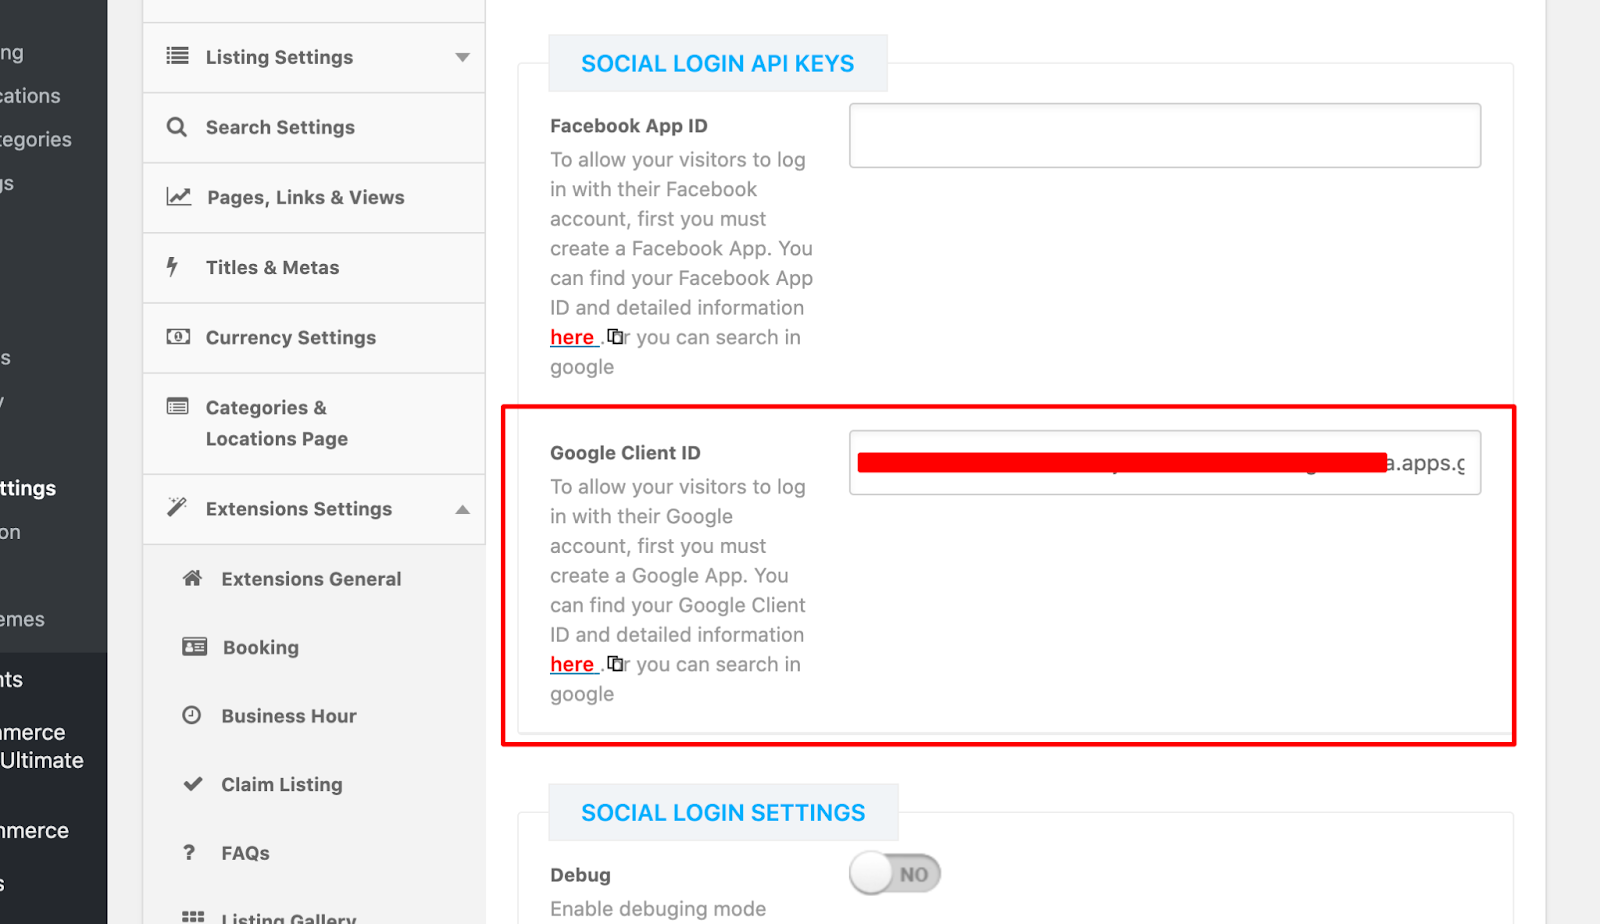
To get started, add social login buttons to the Directorist login form, you need to set up their API keys first. To do that go to Directory Settings >> Extension Setting >> Social Login, where you will see some input fields to add the API keys. Now create the API keys by clicking on the link attached to each input field. After you create the API keys, place them in their input field and save changes.
2. Configure APIs
There are a number of social login options you can add to your directory website to make it even more exciting and lucrative to users. Let’s start with.
(A) Configure Facebook app id
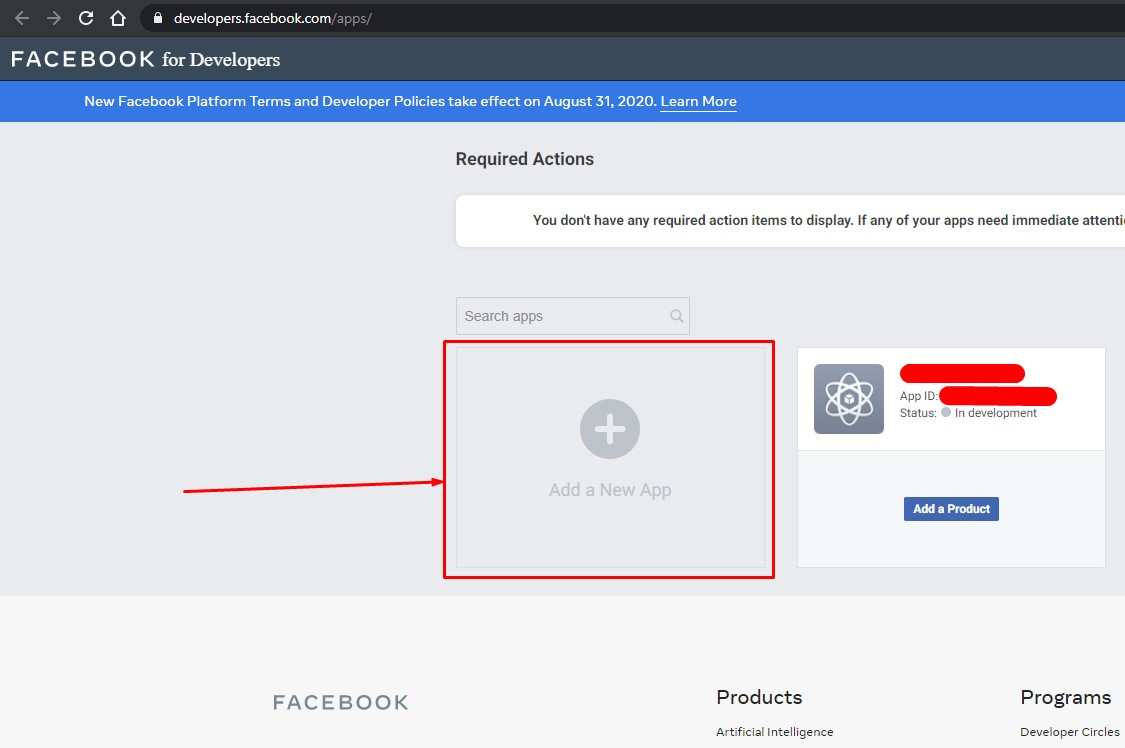
Step- 1: To do this, navigate to Directory Listings-> Settings->Extension Settings->Social Login, then log in to your Facebook account after clicking on the marked area.

Step 2: Now, click on Add a New App
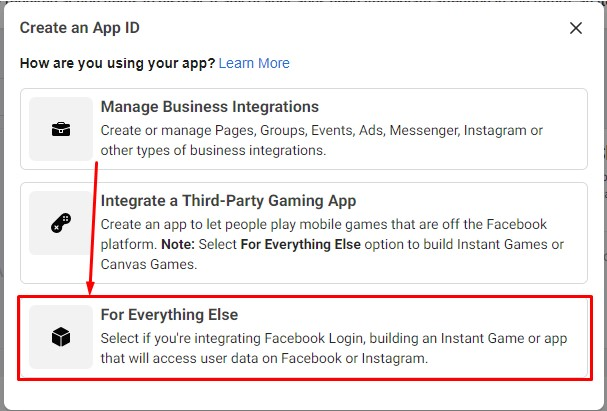
Step 3: Select “For Everything Else”
Step 4: Give your app a name and set an app contact email. Then click on Create App ID.

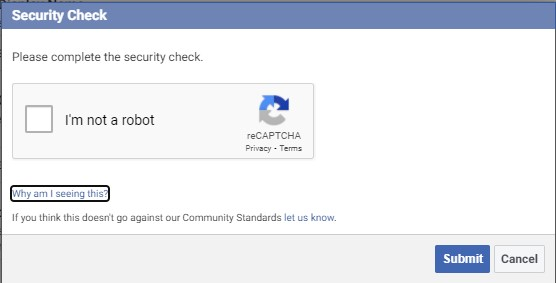
Step 5: Complete the reCAPTCHA test. And, you are almost done.
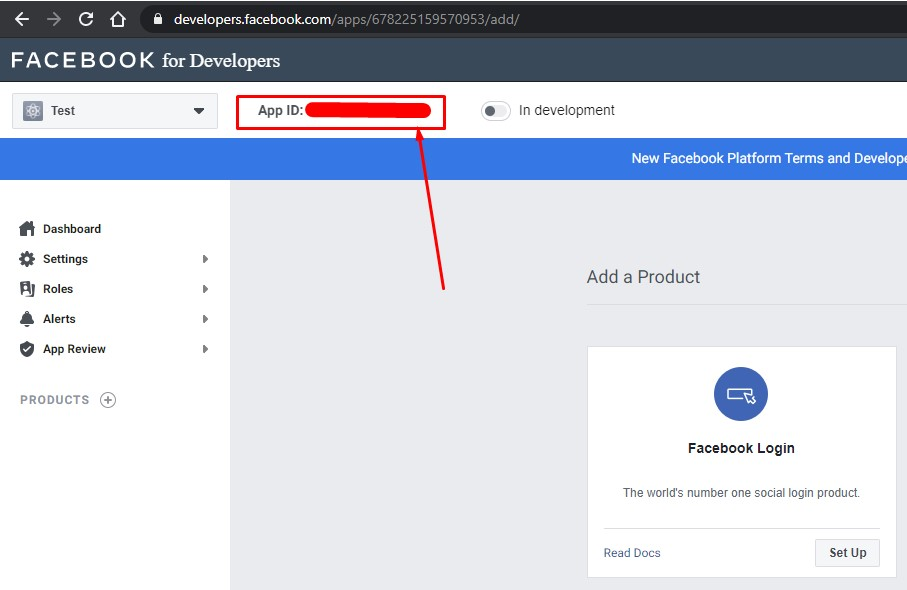
Step 6: You will find your APP ID in the marked area
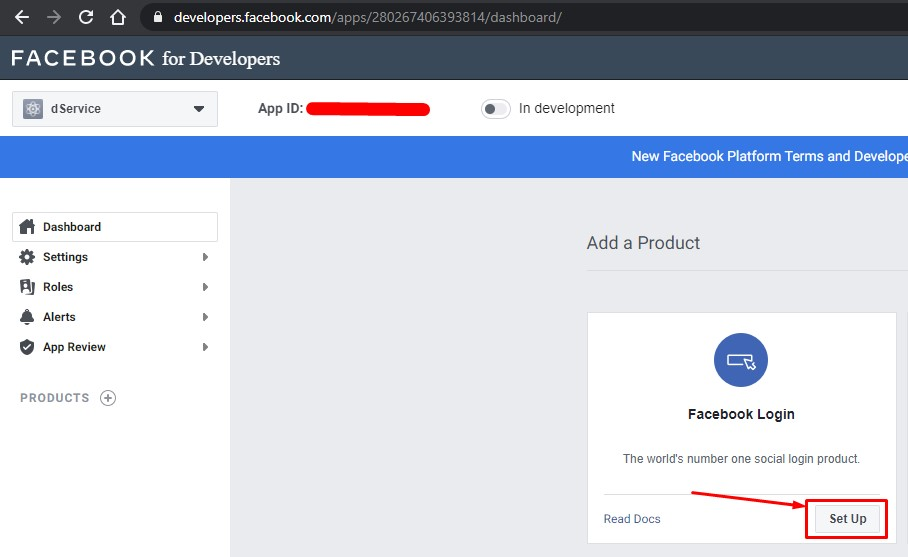
Step 7: Click on Set Up to configure Facebook login
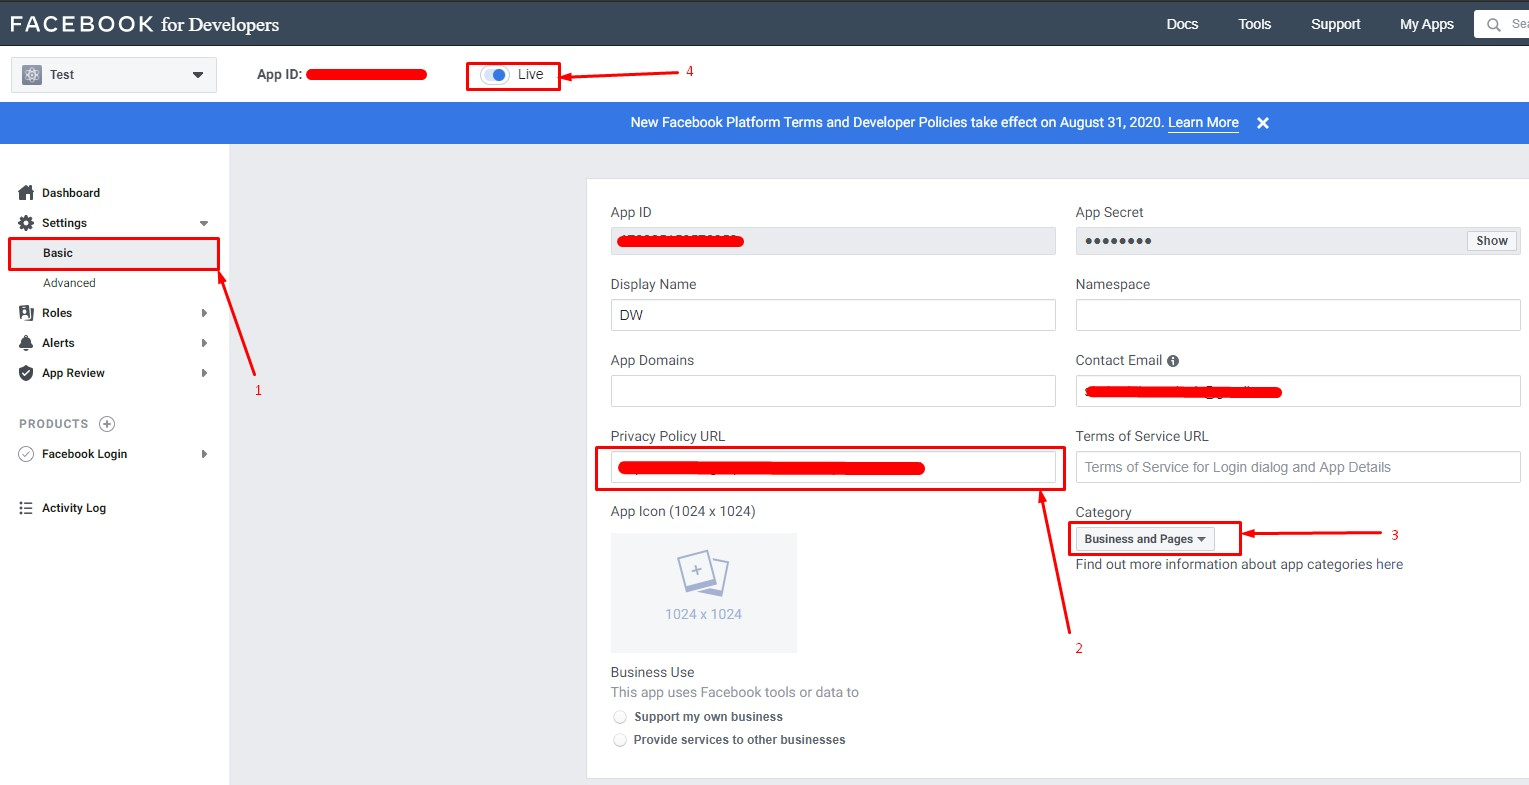
Step 8: Add your website URL in the box marked as 3

Step 9: Add the privacy page URL in the box marked as 2. Then select a category type (marked as 3). After filling up these two options, you will be able to activate the live mode (marked as 4).
Step 10: Once, you are done with all the steps, paste the APP ID in Directory Listings-> Settings->Extension Settings->Social Login->Facebook App ID.
(B) Configure Google Client
Step 1: Log in to your Google Account and go to the following URL. https://developers.google.com/identity/sign-in/web/sign-in
Step 2: Click on “Credentials Page”
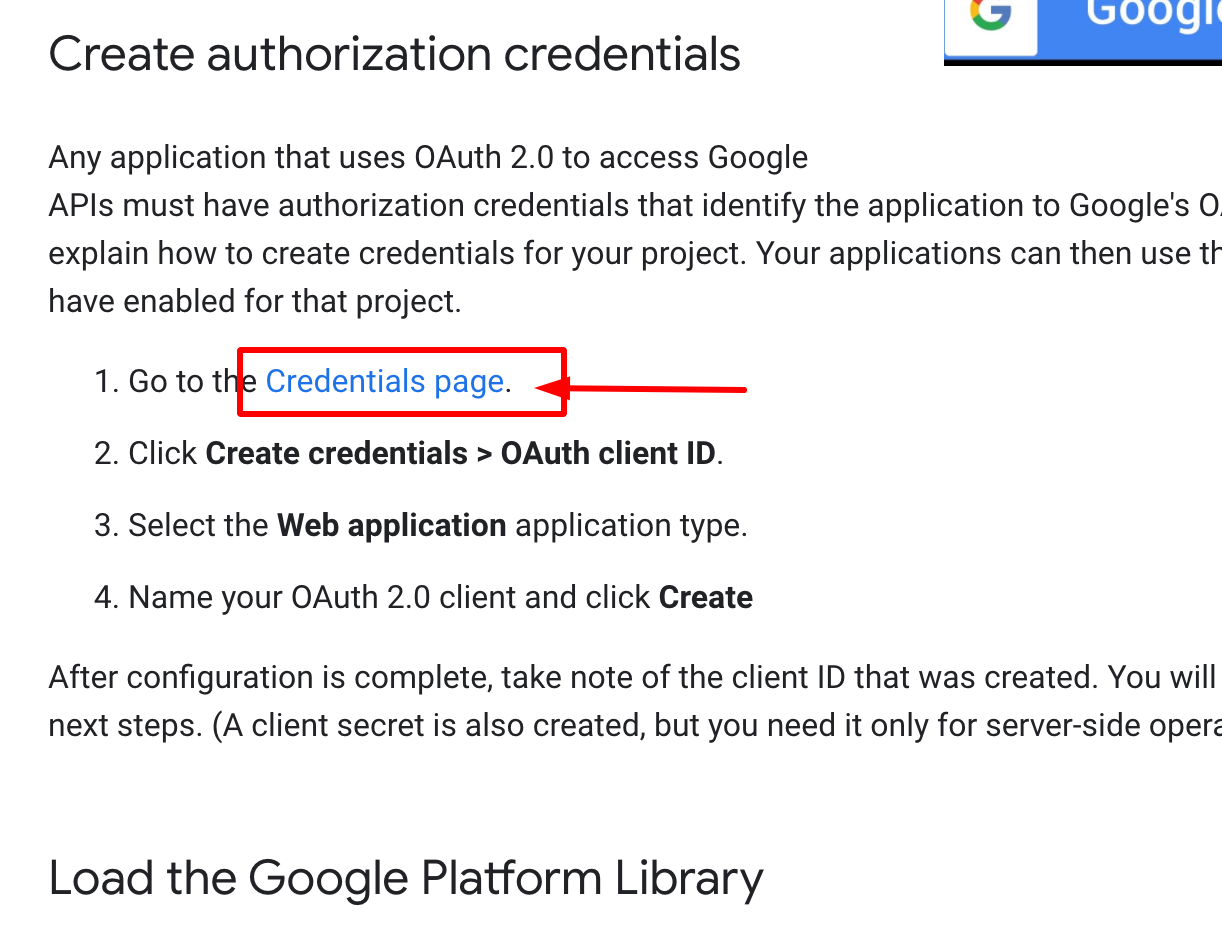
Step 3: You will be redirected to the credentials page. Click Create Credentials

Step 4: A dropdown will appear and make sure to select “0Auth Client ID”

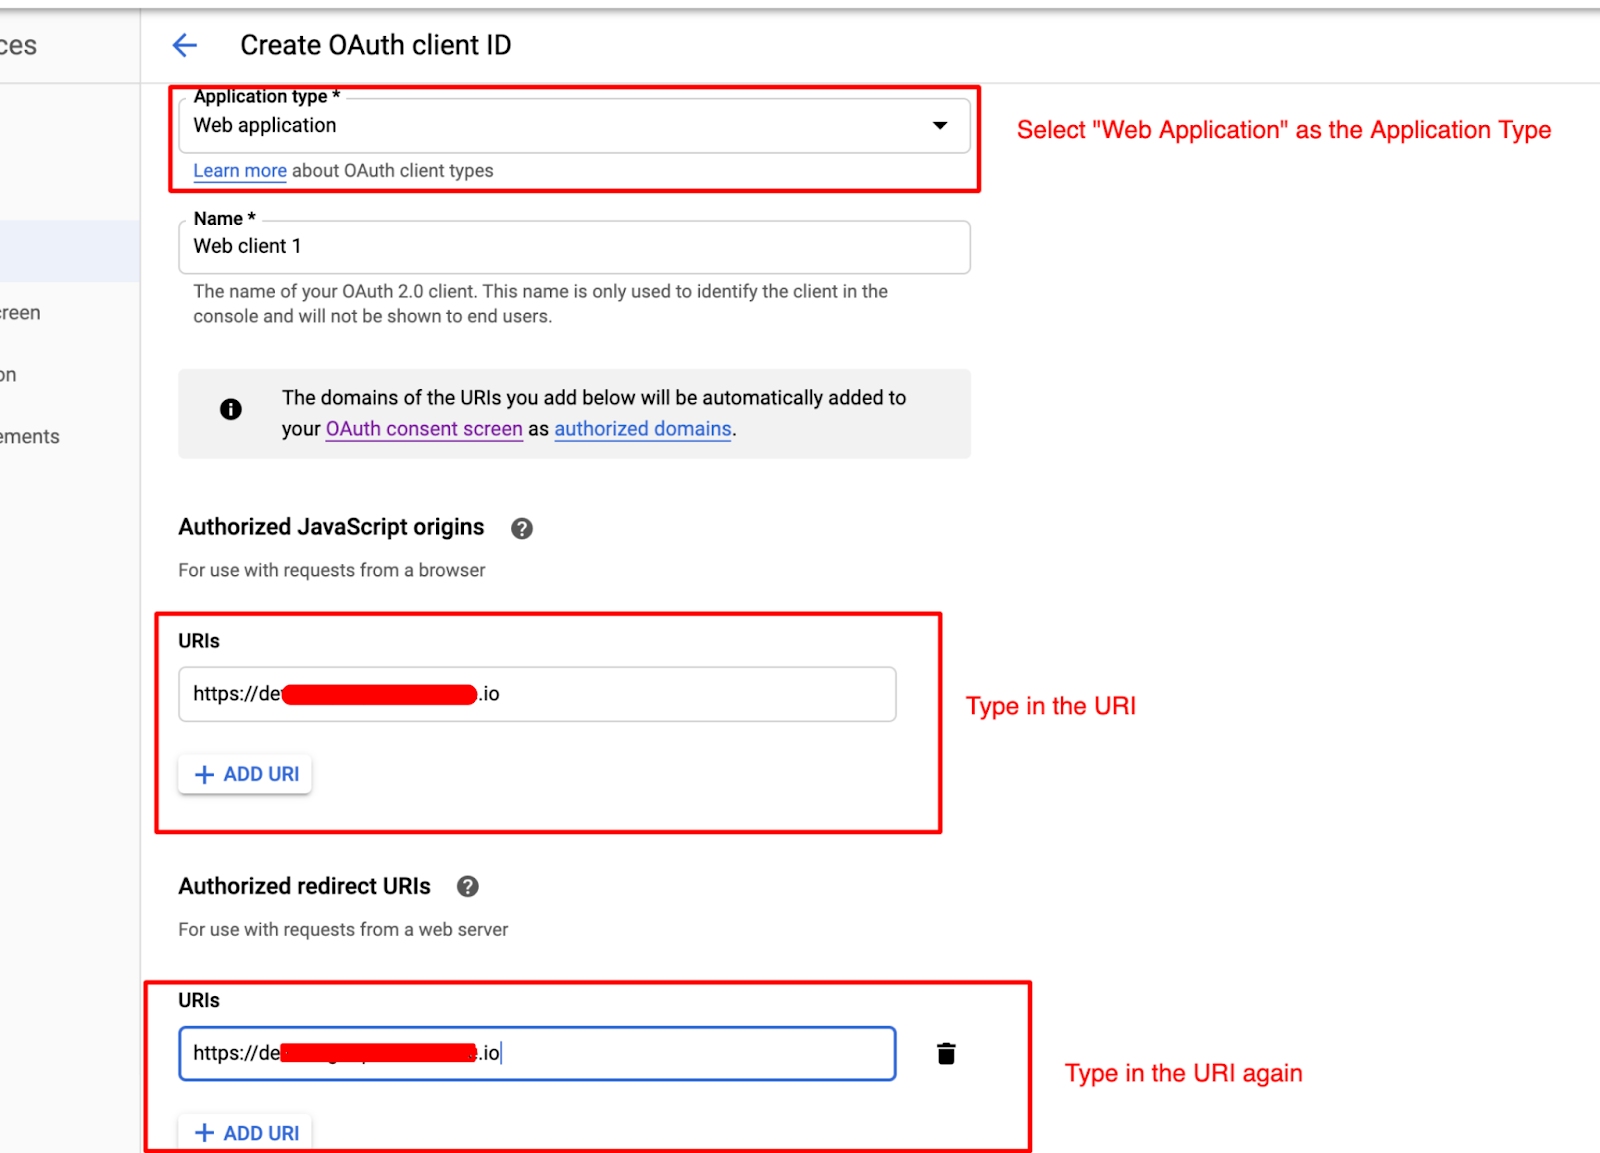
Step 5: In the next step, a form will come in view and do the following
- Select “Web Application” as Application Type
- Type in the URI in “Authorized JavaScript Origins”
- Type in the URI again in “Authorized Redirect URIs”
Step 6: OAuth client will be created, and you will get your Client ID and the Client Secret in a pop-up. Copy the Client ID and paste it in Directory Settings → Extensions Settings → Social Login → Google Client ID
Conclusion on How to Add Social Login in WordPress
This is how you can successfully add social media login to your directory website and improve visibility & trust among the users. Hence, you are no longer losing your traffic from your site and are always a step ahead of your competitors to improve the UX for your visitors and customers as well.
If you have already added the social media login to your directory site, then please don’t sit on the fence to leave a mark on the comment section regarding your experience.
Finally, if you liked our posts, don’t forget to subscribe to our blog so that we can notify you once any post is published. Directorist is now on Facebook, Twitter, and LinkedIn! You can also join the Directorist Community for sharing your thoughts and experiences relating to the directory niche. Come and join us to see what we’re up to.


Md. Hamim Khan
Md Hamim Khan is the Content and SEO Manager at Directorist, where he creates engaging content that helps improve online visibility. When he’s not at work, he loves playing cricket and enjoys chatting with friends, family, and colleagues.
Related Articles


4 Comments
Leave a Reply
You must be logged in to post a comment.
Saint
July 25, 2022Facebook and Google login not working after adding the ID’s.. your plugin seem not to be the best afterall.. even user verification email is not added to the mighty plugin.
Mahdi
July 31, 2022Hey @Saint,
Facebook and Google Login should work if you add App ID and Client ID correctly. If it isn’t that’s something our support should look into, kindly get in touch with them here: https://directorist.com/contact.
For user verification, it is already in our plan, we understand that it is something important for our users.
Regards,
Mahdi.
Ryan Molkentin
September 8, 2022I’m also running into the issue of the google login not working even after client ID was put in. Could this be an issue not using a directorist theme? I’m using astral + elementor on my wp site
Md. Hamim Khan
September 11, 2022Hey Ryan,
Would you please contact our support team here https://directorist.com/contact?