


Table of Contents
- 1 How to Create Rental Listings Websites for Locations with WordPress
- 1.1 Requirements
- 1.2 Step 1: Install & Activate Directorist
- 1.3 Step 2: Install a free directory theme
- 1.4 Step 3: Create categories & tags for your website
- 1.5 Step 4: How to add new locations
- 1.6 Step 5: Listing Submission by Users
- 1.7 Step 6: Adding Advanced feature: Monetizing your directory website
- 1.8 Step 7: Adding a Free Payment Gateway
- 2 Bonus Tips
- 3 Common Mistakes to Avoid When Building Rental Websites
- 3.1 1. Skipping Niche Focus
- 3.2 2. Using Generic Listing Titles
- 3.3 3. Ignoring Mobile Optimization
- 3.4 4. Forgetting to Add Clear Search Filters
- 3.5 5. Poor Listing Quality Control
- 3.6 6. Neglecting SEO Basics
- 3.7 7. Ignoring Monetization Early On
- 3.8 8. Not Automating Routine Tasks
- 3.9 9. Skipping Regular Updates
- 3.10 10. Forgetting the User Experience
- 4 Partying Song
How to Create Rental Listings Websites for Locations with WordPress
-

- Directorist Tutorials
- 9 mins read
Have you ever searched for the keyword “tourist spots near me”? I am sure you had checked Google at least once to get a rough idea of a tourism location before you wanted to go in. Travelers & tourists nowadays, love to vet their destinations online beforehand so that they can get a better idea of a tourism location.
In addition to that the market size for global online travel booking services was estimated at USD 519,068.6 million in 2021 and is expected to expand to USD 1,127,847.6 million by 2030, achieving a CAGR of 9% between 2022 and 2030. (Source: Grand View Horizon). So, if you are wondering to create rental listings websites for places, it is high time you gave it a shot.
In this tutorial, we’ll be walking you through the process of creating rental listings websites for a location or a place. Now, let’s get started.
How to Create Rental Listings Websites for Locations with WordPress
Before we move any further, make sure you have a working WordPress website already in place. Also, make sure you have the following two tools to proceed further.
Requirements
1. A directory plugin (Free)
(For this tutorial, we will be using Directorist free version as it is the most scalable and versatile plugin you can find in the WordPress repository. It has a dedicated drag & drop-based directory builder with custom fields to build the necessary pages, free page builder support (Elementor & Gutenberg), multidirectory, Google map, OpenStreet map, frontend submissions, CSV export-import, demo import, separate frontend dashboard for users, rating & reviews, Yoast SEO integration, RTL language support & WPML support, and much more.
Its premium features (paid) include social login, live chat, compare listings, booking & appointment, rank featured listings, mark as sold, post your need, image gallery, Google reCaptcha, business hours, claim listings integrations with a bunch of other platform integrations like Stripe, PayPal, Authorize.net, BuddyBoss, BuddyPress, MailChimp, Oxygen Builder, etc. The plugin also has a native mobile app (paid) to turn your rental listings website into a native mobile app. Currently, the plugin has more than 10,000 active installations with more than 4.7 ratings out of 5.)
2. A directory theme (Free)
You can use any WordPress theme to create your place rental directory website. That’s because Directorist is compatible with all WordPress themes. But you will get the best result if you install a theme that is primarily made for Directorist.
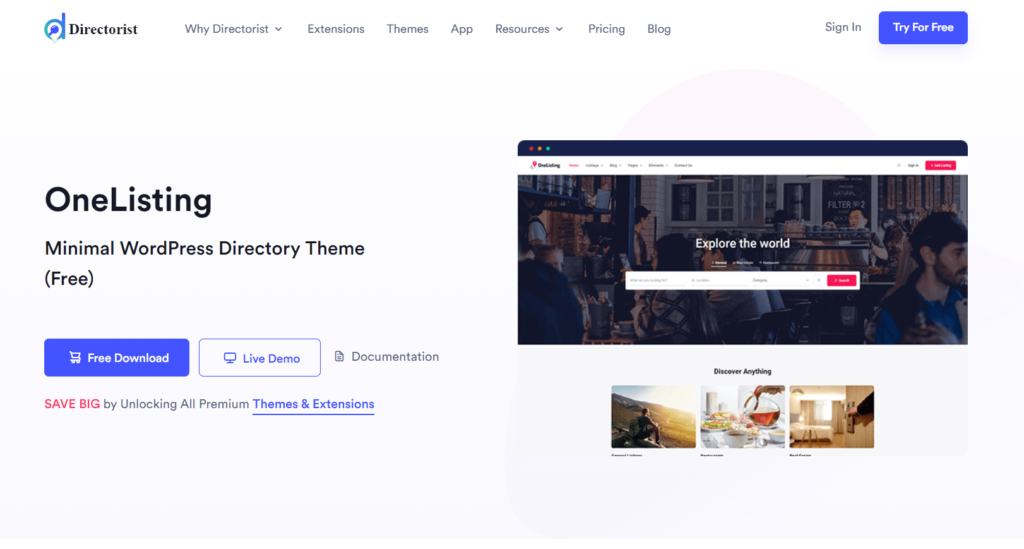
So, for this tutorial, we will use a free theme called OneListing which is developed by the same team who developed Directorist as well. This free theme has enough potential to give your website
(OneListing also has a premium version. You can also use another theme called dPlace which is specifically developed by the same developers to build rental listings websites with Directorist.)
Next up, the only thing you have to do is to follow these steps:
Step 1: Install & Activate Directorist
First, go to the WP Admin Dashboard > Plugins > Add New > Search for the keyword ‘Directorist’ > Hit the “Install Now” button (as indicated with arrows).

Next up, you need to activate and configure the setup wizard to make a fresh start. In the setup wizard, you will be able to configure the basic settings such as whether to monetize your website or specify the pricing for each and every listing submission and so forth.
Step 2: Install a free directory theme
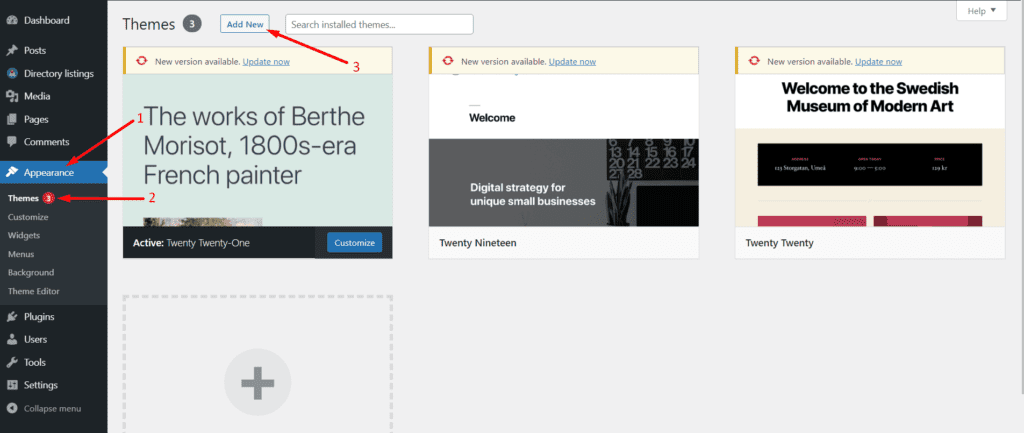
Once you download the OneListing theme in ZIP format, navigate to the WP Admin Dashboard > Appearance > Themes > Add New.
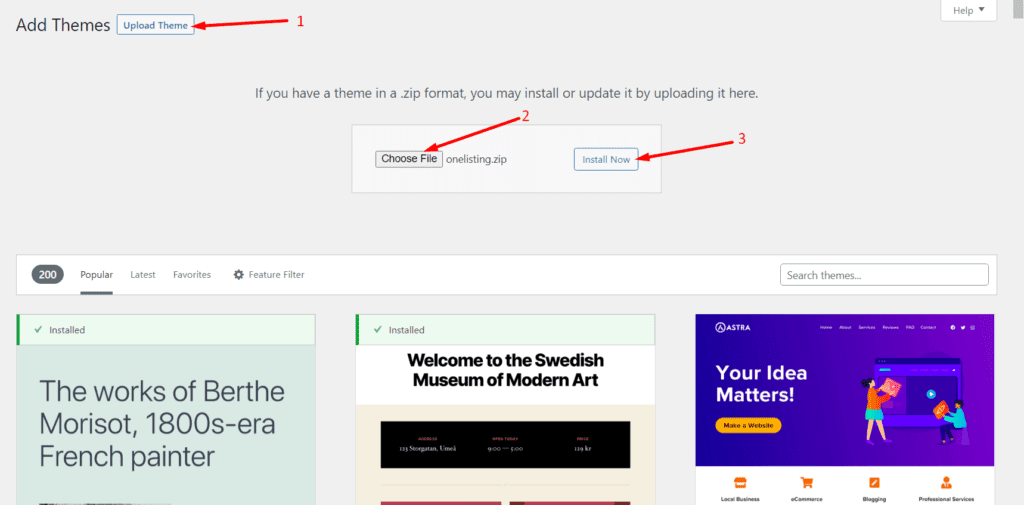
Now, click on Upload Theme > Choose File and select the ‘onelisting.zip’ > Install Now.
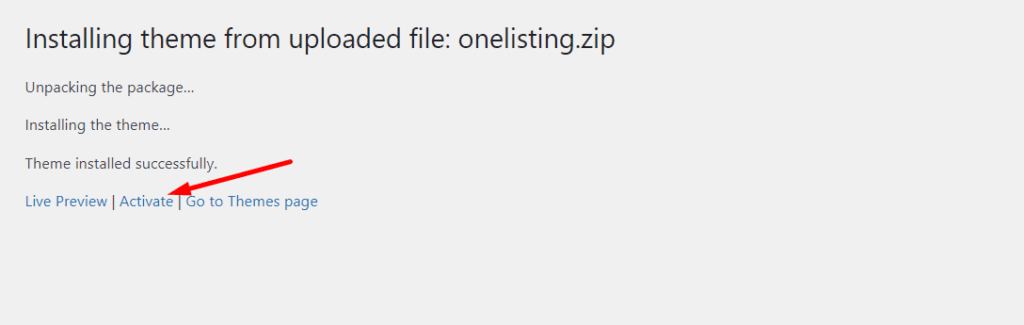
Finally, activate the theme by simply hitting the ‘Activate’ button:
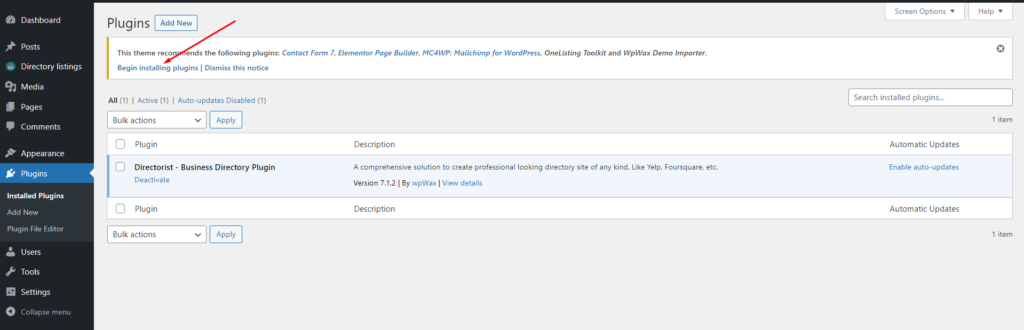
After activating, you will see a notification to install certain plugins and tools so that the theme works in a better way. The suggested plugins are – Elementor, Contact Form 7, MailChimp, and a Theme Toolkit. Make sure to install them by just clicking on the “Begin Installing Plugins” button.
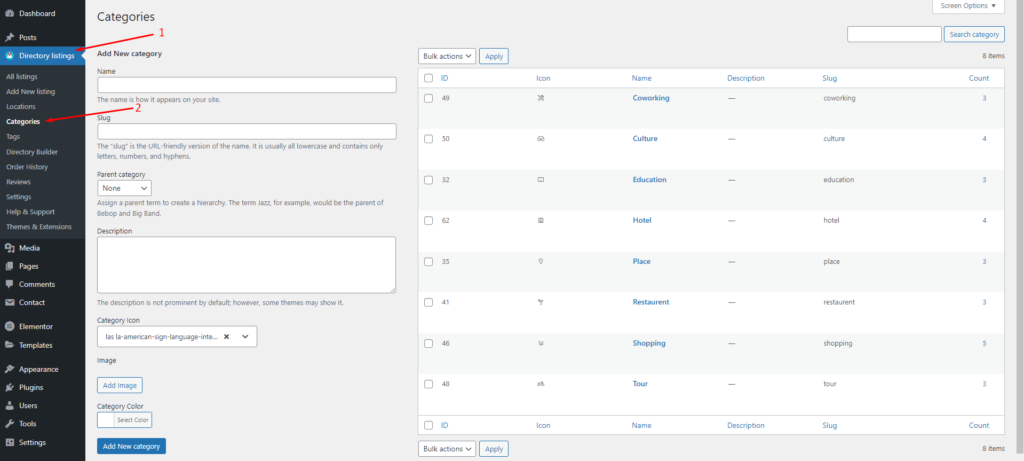
Creating categories is necessary to give an organized appearance to the listings of your website so that they are easily accessible. To create categories, you just need to go to the Directory Listings > Categories > Fill out the fields > Hit the “Add New Category” button.
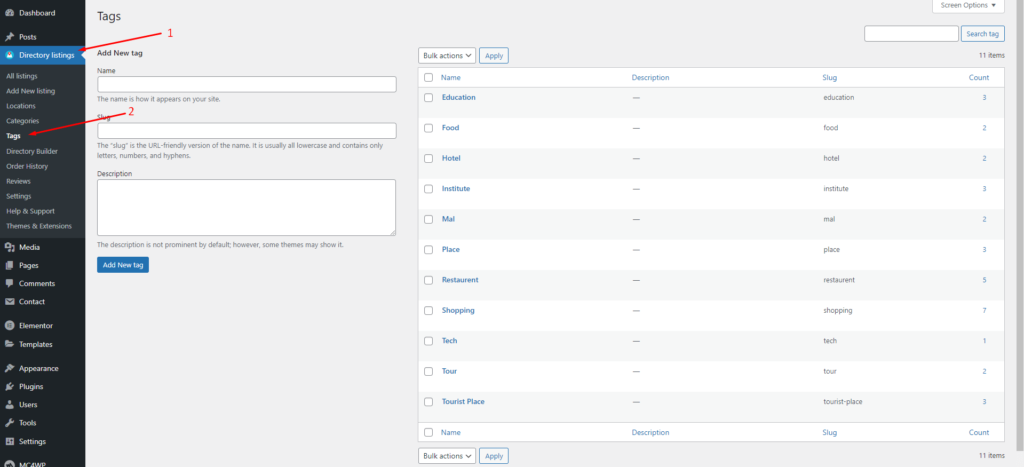
Similar to adding categories, when the listing owner gets some relevant tags to add while submitting listings, your place listing directory website becomes much more organized and meaningful. You can add tags from Directory Listings > Tags > Enter Credentials > Add New Tag.
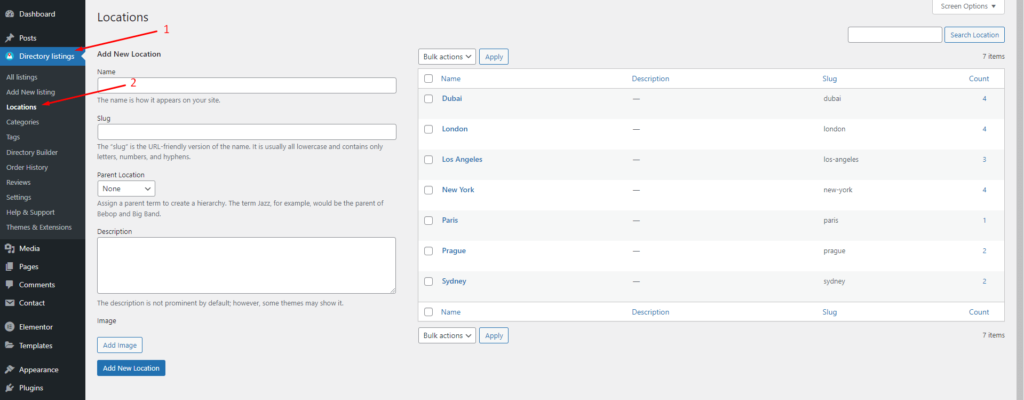
Step 4: How to add new locations
Again, adding locations will help the listing owners select the appropriate area of their businesses. This will add a better experience for the visitors to navigate to the place listing in which they are interested. To add locations as an admin, you have to go to the Directory Listing > Locations > Enter credentials (name, description, directory type, etc.) > Hit the Add New Location button.
Step 5: Listing Submission by Users
This step is basically for the listing owners who will use the Add Listing form to submit their places or locations. The add listing form or submission form includes all the important fields such as listing type, directory type, pricing, video URL, terms & condition check box, category, tax, location, address, maps, and much more. The user must fill out them before hitting the ‘Submit‘ button.
Now, if a number of listing owners submit a bunch of place listings or rental listings the All Listings page layout will look like this:
A visitor can also select a listing card to see them in detail.
Step 6: Adding Advanced feature: Monetizing your directory website
You are already done with creating your first rental listings directory website. However, you can also beef up your rental listings directory websites with monetization features to make a handsome amount of money. Directorist allows you to monetize your website in the following ways:
- Charge for listings (Free)
- Featured listings (Free)
- Allow businesses to claim listings (Premium)
- Charge for viewing private listings (Premium)
- Allow private/sponsored advertising (premium)
- Charge for membership (Premium)
- Sell business leads (Premium)
- Promote affiliate products (Premium)
- Allow sponsored articles/guest posting (Premium)
- Bookings & appointment (Premium)
- Access control (Via 3rd party plugin)
- Ranked featured lists (Premium)
- Paid ad placement (Premium)
If you want to know them in detail follow this article, “How to Monetize a Directory Listing Website” now!
You can use the first 2 free ways to monetize your rental property listings directory website.
Step 7: Adding a Free Payment Gateway
After monetizing your website you must add a payment gateway to receive the payments. In Directorist as a free payment gateway, you can add your bank account. To add your bank account details, navigate to the WP Admin Dashboard > Directory Listings > Settings > Monetization > Offline Gateways Settings > Insert your details > Save changes.
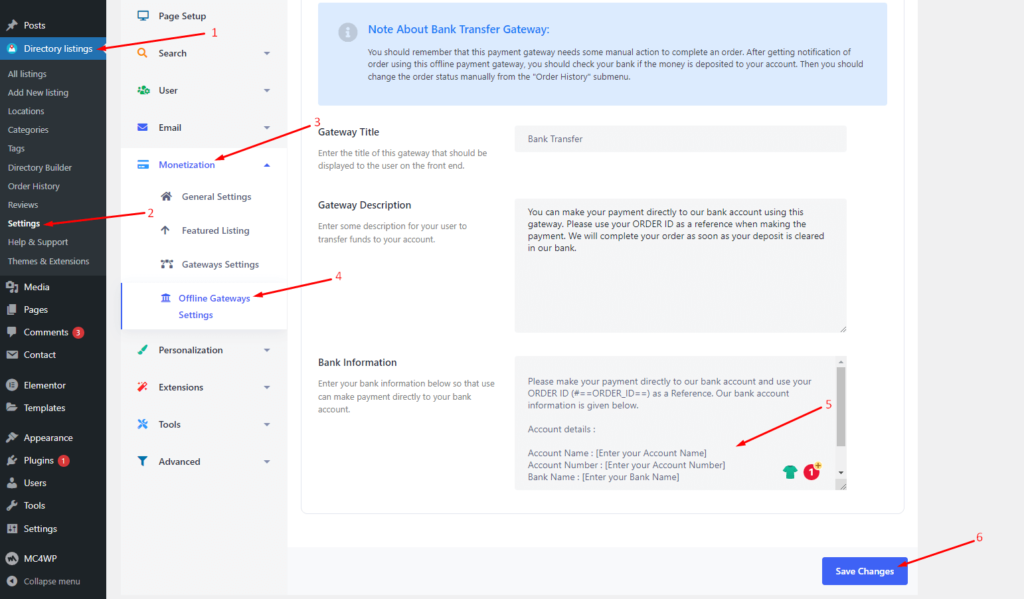
Note about Bank Transfer Gateway:
- You should remember that this payment gateway needs some manual action to complete an order. After getting a notification of an order using this offline payment gateway, you should check your bank if the money is deposited into your account. Then you should change the order status manually from the “Order History” submenu.
- Apart from the offline Bank transfer method, Directorist also supports online payments gateways like Stripe, PayPal, and Authorize.net. However, they are available in the premium version only.
Related Post: How to Add Payment Gateways to Monetize Your Directory Website
Bonus Tips
- Free Elementor Support: Directorist ships with 17 widgets and is fully compatible with Elementor. If you use the OneListing theme, you will get a section called “Theme Elements” in the Elementor editor panel. This section contains some important widgets such as Section Title, Contact Info, All Listings, and Search Form. Let’s enter the “Search Form” from it:
- You build all of your directory website pages with 17 free widgets like magic. In addition to that, you will also get a free theme toolkit that also has a few widgets (like section title, all listings, contact info, search form). See the video below:
You can insert the same search bar from the widgets as well:
Not to mention, all of these widgets are highly customizable just like any other Elementor widgets. Meaning you can control all the CSS properties, pagination, width of the container, and whatnot!
- Free Gutenberg Support: Directorist has 16 Gutenberg blocks that work much like Elementor widgets. With these blocks, you can create all of your necessary rental listings websites’ directory web pages. Sooner or later, Gutenberg is going to take over all the page builders. So, this block editing experience is going to be a viable way for the unseen future. With that in mind, we have built these useful and practical Gutenberg blocks.
Common Mistakes to Avoid When Building Rental Websites
Building a rental directory sounds easy, but a few small missteps can hold your website back from growing.
Here are the most common mistakes you’ll want to avoid — and how to fix them before they cost you traffic or revenue.
1. Skipping Niche Focus
Trying to cover every kind of rental — homes, cars, bikes, tools — is a fast way to confuse your audience.
Pick a clear niche and build around it. A focused directory ranks faster and attracts the right visitors. If you try to please everyone, you’ll end up pleasing no one.
2. Using Generic Listing Titles
Many beginners use vague titles like “Nice Apartment for Rent.”
That doesn’t tell search engines or users much.Add specific details — location, size, or style — such as “2-Bedroom Apartment in Downtown Chicago.” It helps with SEO and boosts click-throughs.
3. Ignoring Mobile Optimization
More than half of your visitors will come from mobile devices. If your site loads slowly or looks broken on phones, they’ll bounce before reading a single line. Use a responsive theme, compress images, and test every page on mobile. Don’t shoot yourself in the foot by ignoring mobile users.
4. Forgetting to Add Clear Search Filters
Users want results fast. If they can’t filter listings by location, price, or category, they’ll leave.
Make search and filtering a top priority — not an afterthought. A simple, intuitive filter bar can double engagement time.
5. Poor Listing Quality Control
Low-quality photos or incomplete listings make your directory look untrustworthy.
Set clear submission guidelines: require high-res images, proper descriptions, and accurate pricing. Review new submissions before they go live. Remember, one sloppy listing can hurt the entire site’s reputation.
6. Neglecting SEO Basics
Don’t rely on luck to show up in Google. Each listing should have a keyword-friendly title, meta description, and schema markup. Use tools like Rank Math or Yoast to cover the basics. Good SEO builds traffic while you sleep.
7. Ignoring Monetization Early On
Many directory owners build traffic first and think about money later. That’s backward.
Plan your monetization model from day one — whether it’s paid listings, featured spots, or memberships. You can adjust prices later, but having a plan gives your site structure.
8. Not Automating Routine Tasks
Doing everything manually will burn you out. Set up automation for email follow-ups, review requests, and expired listing reminders. It keeps your site active and saves hours of repetitive work. Don’t spin your wheels on tasks that software can handle better.
9. Skipping Regular Updates
An outdated site signals neglect. Check plugins, renew expired listings, and post fresh content regularly. A directory that feels alive keeps both Google and users coming back.
10. Forgetting the User Experience
Cluttered layouts, hidden buttons, or too many pop-ups turn users away. Keep navigation simple, pages clean, and calls-to-action visible. In short, make it easy for users to find what they need without thinking twice.
Partying Song
We hope this tutorial will help you create rental listings directory websites just like a seasoned veteran. If you get stuck in any of these steps don’t hesitate to let us know in the comment section below. Some of us will get to you with a helping hand.
If you liked our posts, don’t forget to subscribe to our blog so that we can notify you once any post is published. Directorist is now on Facebook, Twitter, and LinkedIn! You can also join the Directorist Community for sharing your thoughts and experiences relating to the directory niche. Come and join us to see what we’re up to.


suzauddowla
Al Suzud Dowla plays the role of a content strategist at Directorist. He is basically a digital marketing expert and a tech enthusiast (by heart) who excels particularly in technical content writing. In his pastimes, he is seen playing Ping Pong, performing Karaoke, reading books, and playing around with JavaScript as well.


Leave a Reply
You must be logged in to post a comment.