


Table of Contents
- 1 Install a WordPress Directory Theme( Free)
- 2 Installing Free Plugin, Directorist
- 3 Directorist Wizard Setup Configuration (Optional)
- 4 Customizing/Configuring the Service Directory
- 5 How to Add Categories
- 6 How to Add Location
- 7 Listing Submission by Users
- 8 How to Extend Functionalities of Service Directory Website
- 9 How to Monetize a Service Directory Website with Directorist?
- 10 Terminus
How to Create a Service Directory Website in WordPress
-

- Tutorials Directorist WordPress
- 8 mins read
Do you have a passion for helping people find the services they need? Do you want to create a website that can make a real difference in people’s lives? If so, then you need to create a service directory website in WordPress!
With a service directory website, you can connect people with the businesses and professionals they need, whether it’s a plumber, a lawyer, a doctor, or anything else. You can make a real difference in people’s lives by helping them find the services they need quickly and easily.
But creating a service directory website isn’t easy. It takes time, effort, and dedication. But if you’re willing to put in the work, it can be incredibly rewarding.
In this article, we will walk you through some steps needed to create a service directory website in WordPress. Let’s bring the show to the interface.
Install a WordPress Directory Theme( Free)
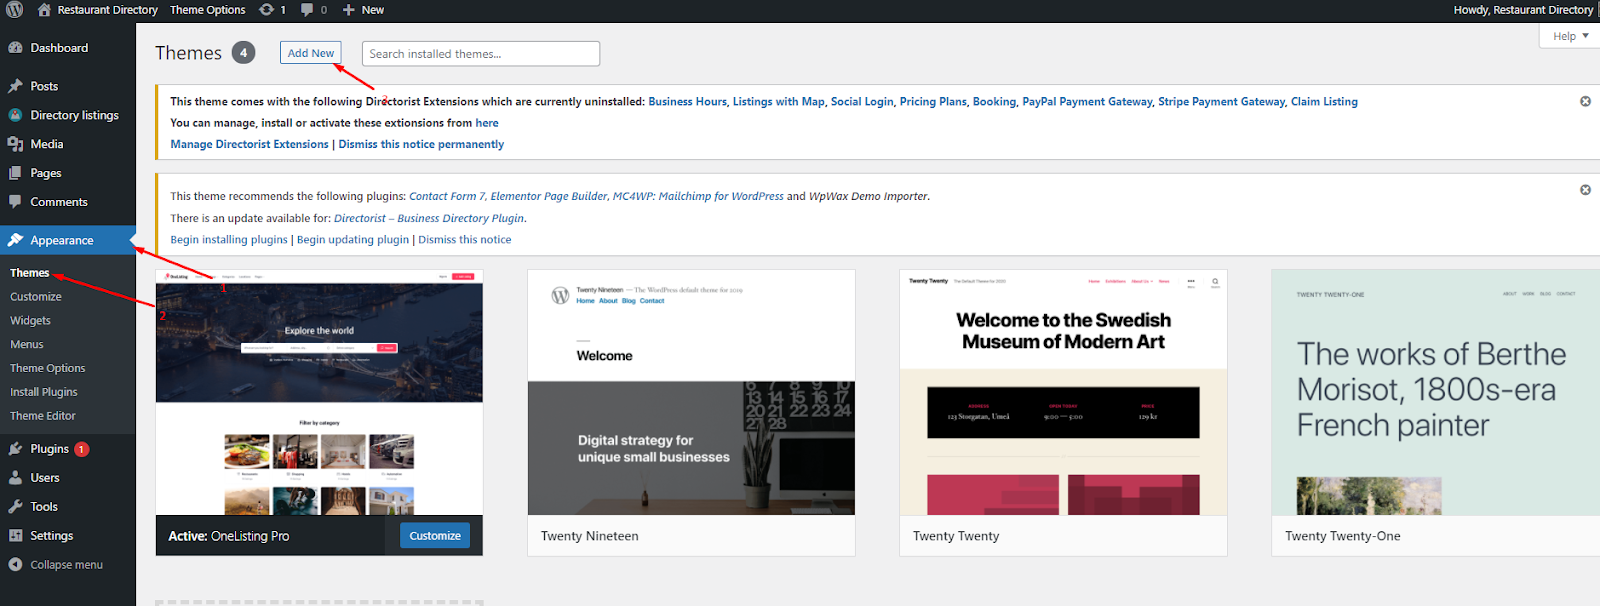
You can use any theme to make your website look gorgeous. But, here we will use the free version of OneListing which is fully compatible with any directory plugin out there in the directory niche. Besides, you can use Directoria which is a free theme as well.
To install the theme, navigate to the WP Admin dashboard>Appearance>Themes>Add new and then activate the theme. You can have a closer look at the screenshot below just for a better understanding.
Installing Free Plugin, Directorist
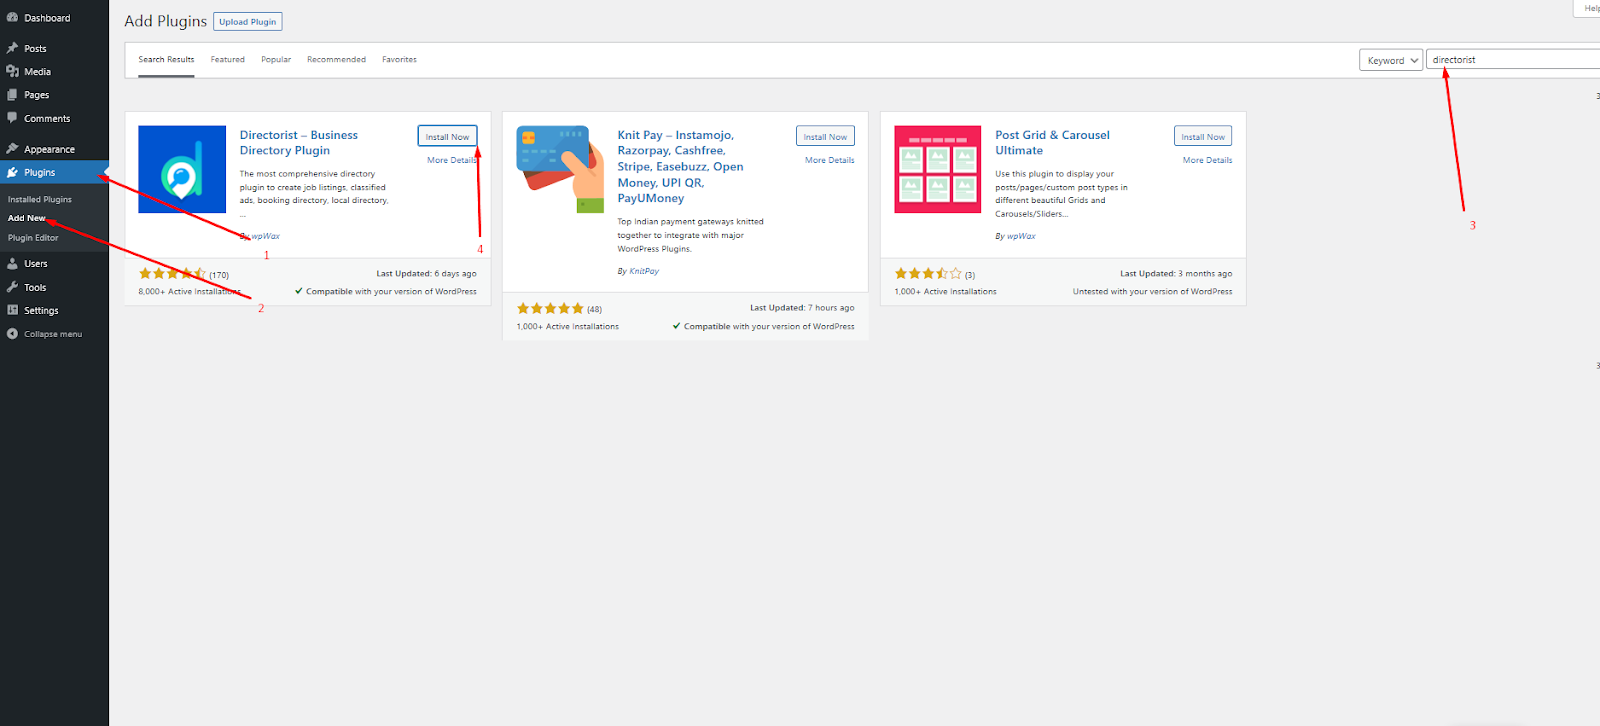
In this step, we will take and install an intuitive directory plugin. Directory plugins serve the purpose of creating a user-friendly database with up-to-date details for users. We are going to choose and install Directorist, an intuitive multi-directory plugin with some exclusive features like extendability, custom fields, free directory builder, etc in the WordPress repository.
To install the plugin, navigate to the WP Admin Dashboard > Plugins > Add New > Search for Directorist > Install and activate the Plugin.
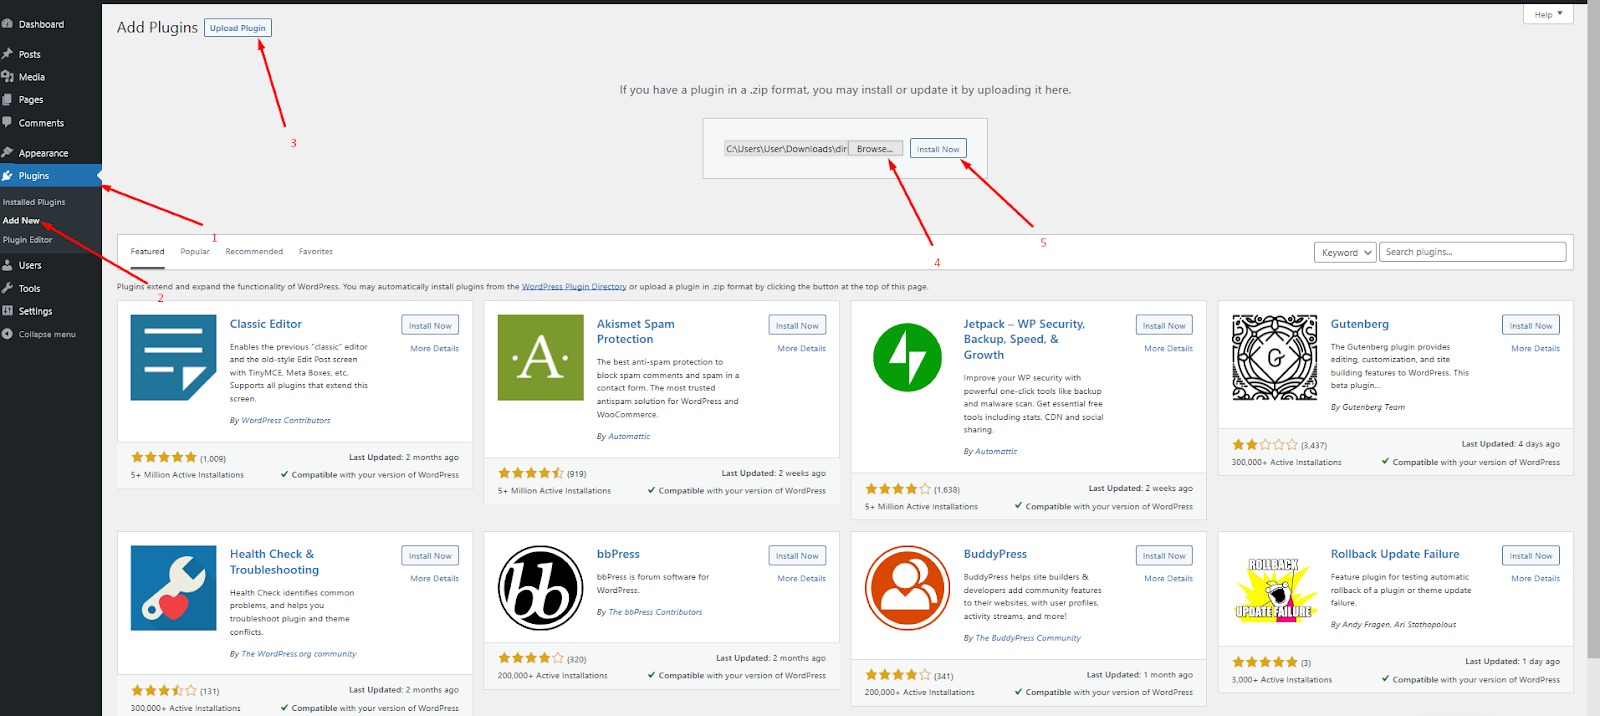
You can alternatively install the plugin. Download the .zip file of Directorist from the link and upload the plugin from your dashboard. To upload, navigate to the WP Admin Dashboard > Plugins > Add New > Upload Plugin > Choose File > Install Now.
Directorist Wizard Setup Configuration (Optional)
After the activation of Directorist, you’ll find the following setup wizard to configure your directory website.

Now, two options will appear “ Not right now” & Let’s Go. If you want to postpone for a while, then click the “Not right now” button. If you don’t postpone and move further, then press the “ Let’s go” button. And, go to the following page.
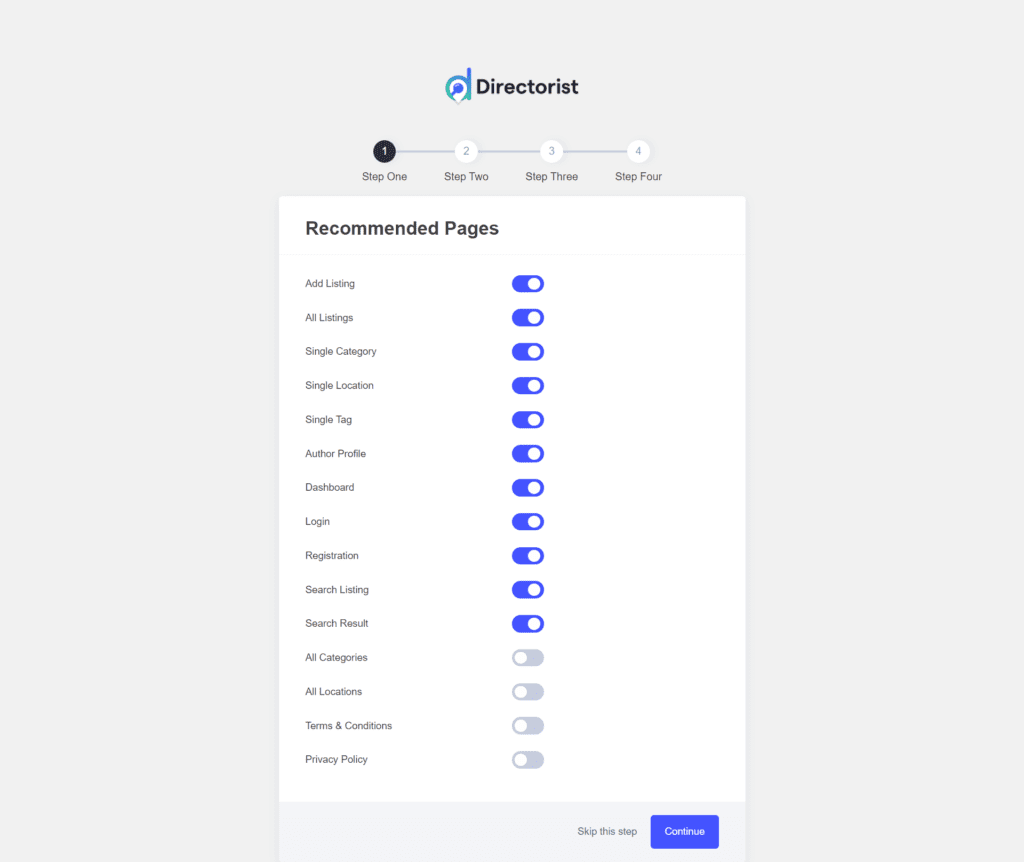
Here, many recommended pages will appear. Enable or disable them according to your needs. But, in this tutorial, we will hit the “Continue” icon and get the following page.
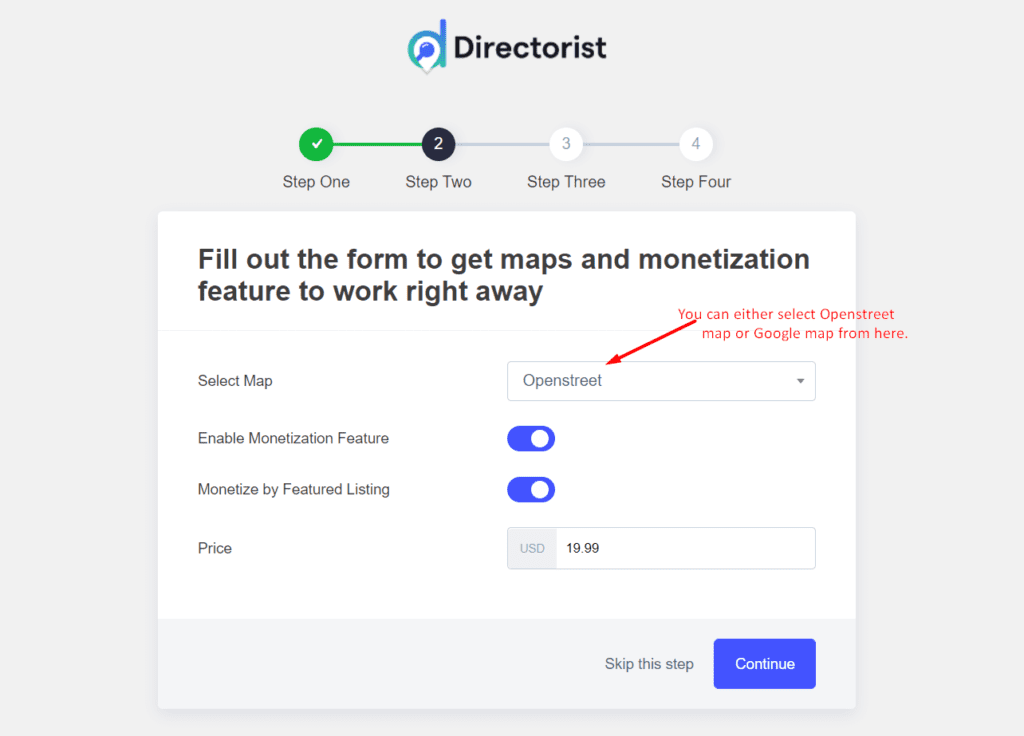
Select either of the Openstreet and Google map options from the dropdown menu. Also, you can enable the monetization feature and monetize by featured listing. Besides, select the price of the monetization feature listing. Finally, hit the “ Continue” icon and go to the next step.
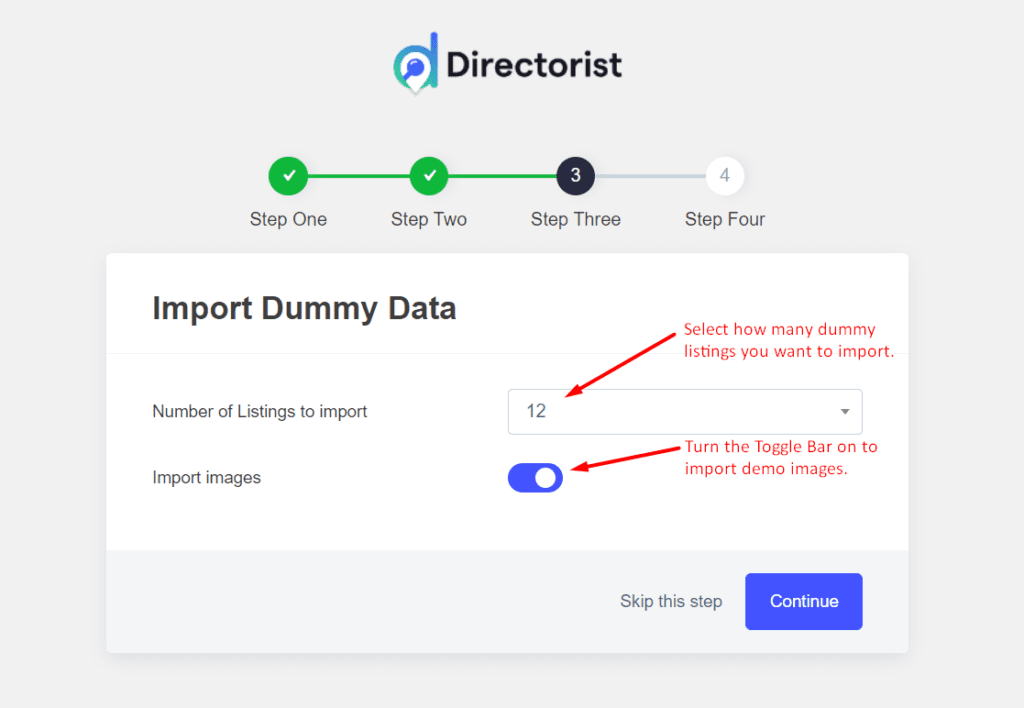
Now, import listings and images. However, this one is optional. Then, press the “ Continue” icon and it brings you to the following page.
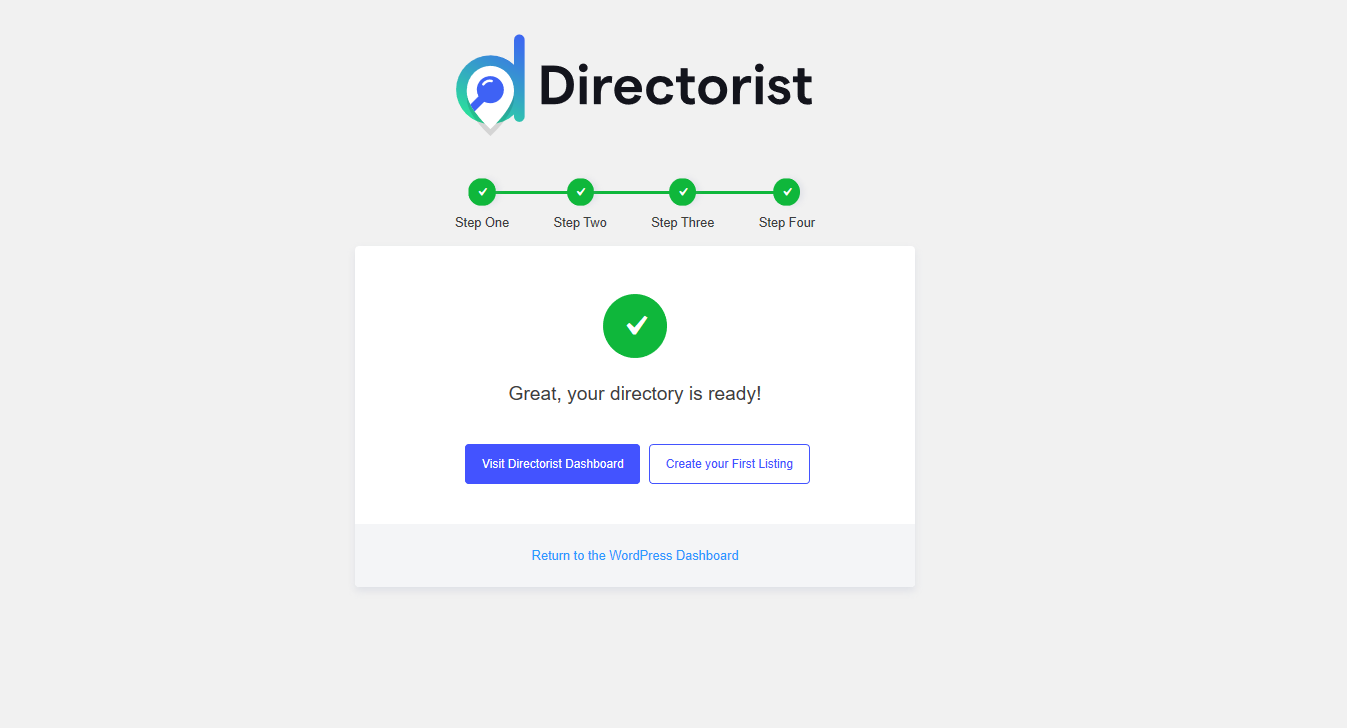
Your directory site is almost ready to go. You can go back to the WordPress dashboard if necessary.
Customizing/Configuring the Service Directory
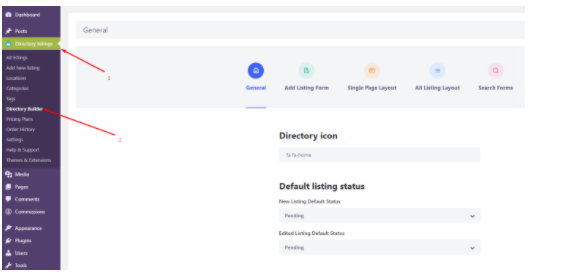
Navigate to the WP>Directory Listings -> Directory Builder ->Add custom fields
> Configure all listing cards and single listing layout > Configure the search form
How to Add Categories
Different types of users search for different types of service listings. As a service-based directory owner, you should split your directory into different categories for the convenience of the users. For example, you want to add a “plumber” category to your directory. To do that, go to the Listings > Categories. Then specify the name of the category and upload the category image. Finish the process by clicking the “Add Category” button and you can see the category on the front end. In the same way, you can add as many categories as you want.
How to Add Location
Many users search service listings based on location. So, adding location to your directory is another important thing to do. Let’s imagine you want to add “ Florida”. In order to do this, go to the listings > Locations and fill in the description field if necessary. You can add more locations to your service-based following the above procedure.
Listing Submission by Users
To add listings to your service-based directory site, navigate to the WP Admin Dashboard > Directory Listings > Add New Listing.
However, the business or product owners will add or submit the majority of the listings. One thing you can do is to check whether the listings violate your community standard or not. And, you can charge money for every listing.

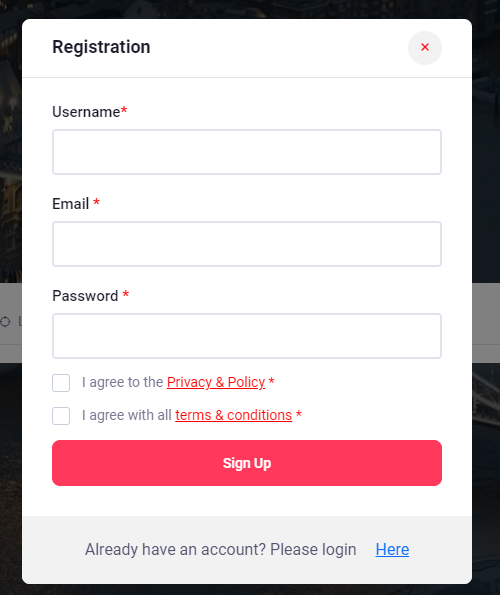
To add listings or products, business owners need to have a registration with your site. After the registration is done, business owners can freely add more listings from the “Add listings” option. You can check the progress, whether the submission is okay or not.
How to Extend Functionalities of Service Directory Website
In the previous step, you have added the basic functionalities of a directory website. Now, it’s time to extend the functionalities using different extensions. Adding more features to your service-based directory website will help you to get exposure to more audiences.
For example, you may add the booking/reservation feature to your service-based directory using the booking/reservation extension. With the booking/reservation option, you can allow the listing owners to control and steer the flow of service-seekers all day long.
Another important feature of the service-based directory website is the opening/business hour which allows the users to learn when the services are available for patients. You can simply add this feature to your directory, using the business/opening hour extension.
One more important feature of the service-based directory is the listing search with the maps. Patients can easily find their desired services through maps. Adding this feature to your service-based directory is easier with the listings with map extension.
You have already got several options to extend the functionality of your service-based directory and make it more user-engaging. There are still many options left to improve your directory by adding more features which you can try using these extensions.
To add the extension, go to the WP-Admin Dashboard ➝ Plugins ➝ Add New ➝ Upload Plugin ➝ and upload the Extension ZIP file and Activate it.
How to Monetize a Service Directory Website with Directorist?
There are many ways to monetize a service directory website with Directorist. Here are some of the most popular methods:
- Charge for listings: This is the most common way to monetize a directory website. You can charge businesses a fee to list their business on your website. You can set different pricing plans for different types of businesses, such as small businesses, medium businesses, and large businesses.
- Featured listings: Charging businesses a fee for enhanced visibility on your platform is another revenue avenue. Prominent listings showcased prominently at the top of search result pages, enjoy the spotlight. These featured entries can also stand out through various means like distinct colors or fonts.
- Sell premium listings: Premium listings are similar to featured listings, but they offer even more benefits to businesses. Premium listings may include additional features, such as the ability to add more photos, videos, and text to their listing. They may also be displayed in more prominent locations on your website.
- Allow businesses to claim listings: You can charge businesses a fee to claim their listing on your website. This is a good way to ensure that the information in your listings is accurate and up-to-date.
- Charge for viewing private listings: You can also charge businesses a fee to view private listings. Private listings are only visible to businesses that have paid for the privilege. This can be a good way to protect the privacy of businesses that do not want their contact information to be publicly displayed.
- Allow private/sponsored advertising: Enabling enterprises to acquire private or sponsored advertisements on your site is a viable option. Usually positioned at the page’s top or within the sidebar, this form of advertising can serve as a beneficial avenue for boosting your website’s revenue.
- Charge for membership: You can charge businesses a monthly or annual fee to become members of your directory website. This can give members access to exclusive features, such as the ability to post unlimited listings, the ability to add a logo to their listings, and the ability to receive priority customer support.
- Promote affiliate products: Generating commissions on sales you generate, affiliate products can be effectively promoted through your directory website. This method stands as a beneficial approach to earning from your platform.
- Bookings & appointments: Enabling enterprises to establish bookings and appointments through your website can serve as an effective method for aiding businesses in the seamless management of their scheduling needs.
- Access control: You can restrict access to certain parts of your website to businesses that have paid for a membership or a premium listing. This can be a good way to protect your content and to ensure that only businesses that are serious about using your directory website have access to it.
- Ranked featured lists: Generate additional revenue from your directory website by offering ranked featured lists for businesses. These lists allow businesses to showcase their services in a prominent position, with higher-paying businesses securing top placements. This innovative feature provides a win-win scenario, enabling businesses to gain increased visibility while contributing to your website’s financial growth.
- Paid ad placement: You can allow businesses to purchase paid ad placements on your website. These ads will be displayed in prominent locations on your website, such as the top of the page or in the sidebar. This can be a good way to generate additional revenue from your directory website.
The best way to monetize your service directory website with Directorist will depend on the specific needs of your website and your target audience. However, the methods listed above are a good starting point.
Terminus
In this way, you can create a service directory website in WordPress. This online directory website can be very helpful for adding different revenue streams to your WordPress website. Now, if you want to create a similar type of directory website with more improved features then, you can pick the plugin and follow this step-by-step tutorial. And you can quickly get your site up and running, and start to make money.
If you liked our posts, don’t forget to subscribe to our blog so that we can notify you once any post is published. Directorist is now on Facebook, Twitter, and LinkedIn! You can also join the Directorist Community for sharing your thoughts and experiences relating to the directory niche. Come and join us to see what we’re up to.


Md. Hamim Khan
Md Hamim Khan is the Content and SEO Manager at Directorist, where he creates engaging content that helps improve online visibility. When he’s not at work, he loves playing cricket and enjoys chatting with friends, family, and colleagues.

Leave a Reply
You must be logged in to post a comment.