 Up to 35% Off!


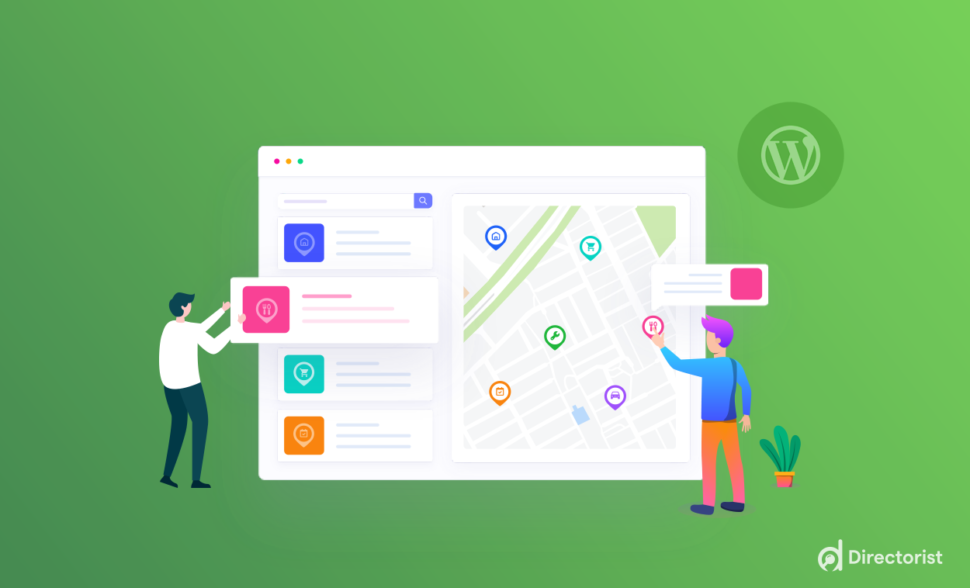
Table of Contents
- 1 How to Create a Niche Directory Website with WordPress
- 1.1 Step 1: Choose a niche
- 1.2 Step 2: Buy a domain name and a hosting
- 1.3 Step 3: Install WordPress
- 1.4 Step 4: Install a directory plugin
- 1.5 Step-5: Install a Directory Theme
- 1.6 Step-6. Create categories & tags for your niche-specific directory website
- 1.7 Step-7. Adding new locations to your niche-specific directory website
- 1.8 Step-8: Listing Submission by Users
- 1.9 Step-9: Configure your directory website
- 1.10 Step- 10. Extending functionalities of your directory website
- 1.11 Step-11: Promote your directory website
- 2 Bonus Tips: Monetize Your Niche Directory Website with Directorist
- 3 How to Add a Free Payment Gateway to Your Niche Directory Website?
- 4 Before Setting The Sun
How to Create a Niche Directory Website with WordPress: A Rookie Guide
-

- WordPress Directorist Tutorials
- 9 mins read
You see a world where people can find everything they need, from the best new restaurant to the perfect vacation spot, with just a few clicks. Here, businesses can connect with their customers and grow their reach.
Literally, you’re going to make that vision a reality to create a niche directory website that will change the world. Your directory will be the go-to resource for people who are looking for something specific. It will be more than just a list of businesses, a community. A place where people can connect with each other and share their experiences.
But first, you have to start somewhere. You have to choose a niche. In this case, ask yourself what are you passionate about. What do you know a lot about? What are you good at?
Once you’ve chosen a niche, you can start building your directory website. Then you’ll need to set up your WordPress website and install a directory plugin. Finally, you can start adding listings to your directory. In case you are just a beginner or didn’t know how to do that, then follow this article to learn the full curve. So, without further ado, let’s dive in.
How to Create a Niche Directory Website with WordPress
A niche directory website is a website that lists businesses or organizations in a specific industry or geographic area. WordPress is a popular content management system (CMS) that can be used to create a niche directory website.
Step 1: Choose a niche
The first step is to choose a niche for your directory website. This could be anything from local businesses to restaurants to online services. Once you have chosen a niche, you need to do some research to see if there is a demand for a directory website in that niche.
Step 2: Buy a domain name and a hosting
Once you have chosen a niche, you need to buy a domain name and hosting for your website. A domain name is your website’s address on the internet, and hosting is the service that stores your website’s files and makes them accessible to visitors. To purchase this stuff, you can ping at Bluehost.com, Kinsta, Hostinger, or Siteground.
Step 3: Install WordPress
Once you have bought a domain name and hosting, you need to install WordPress on your server. WordPress is a free and open-source content management system (CMS) that makes it easy to create and manage websites.
Step 4: Install a directory plugin
There are a number of directory plugins available for WordPress. These plugins will allow you to create and manage your directory website. But, in this guide, we will be using “Directorist”, a free yet powerful and most complete directory plugin out there in the WordPress directory niche.
To add this to your WordPress site, navigate to the WP Admin Dashboard > Plugins > Add New > Search for the keyword ‘directorist’ > Hit the “Install Now” button.

To start fresh, you need to activate and configure the setup wizard. Our official documentation provides detailed instructions on how to do this, so you can configure it perfectly or the way you want.
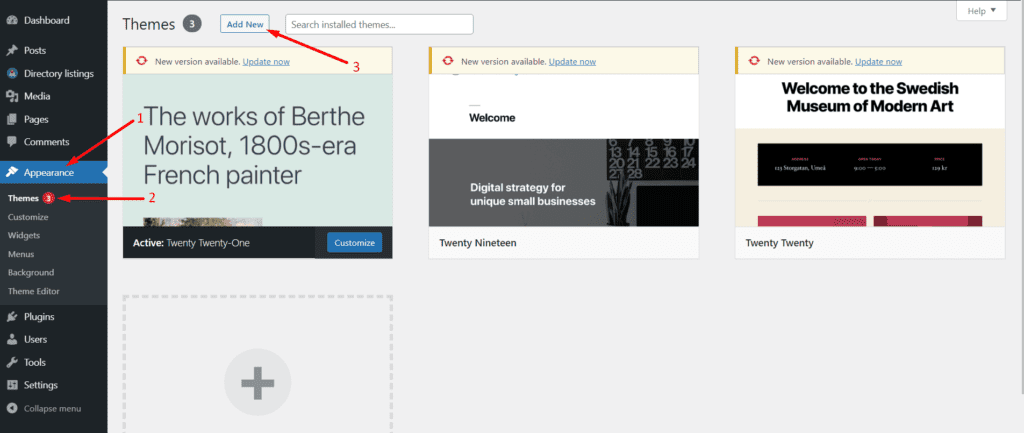
Step-5: Install a Directory Theme
Most surprisingly, Directrorist is compatible with all types of themes, however, choosing a directory theme will give your website a top-notch look and feel. In this case, we will use “Best Listing”
Once you grasp the theme from WordPress repository, kindly make your way to the WP Admin Dashboard, then proceed to the “Appearance” section, and from there, select “Themes.” Once you’re in the Themes section, locate the option labeled “Add New” and click on it. Follow the screenshot here.
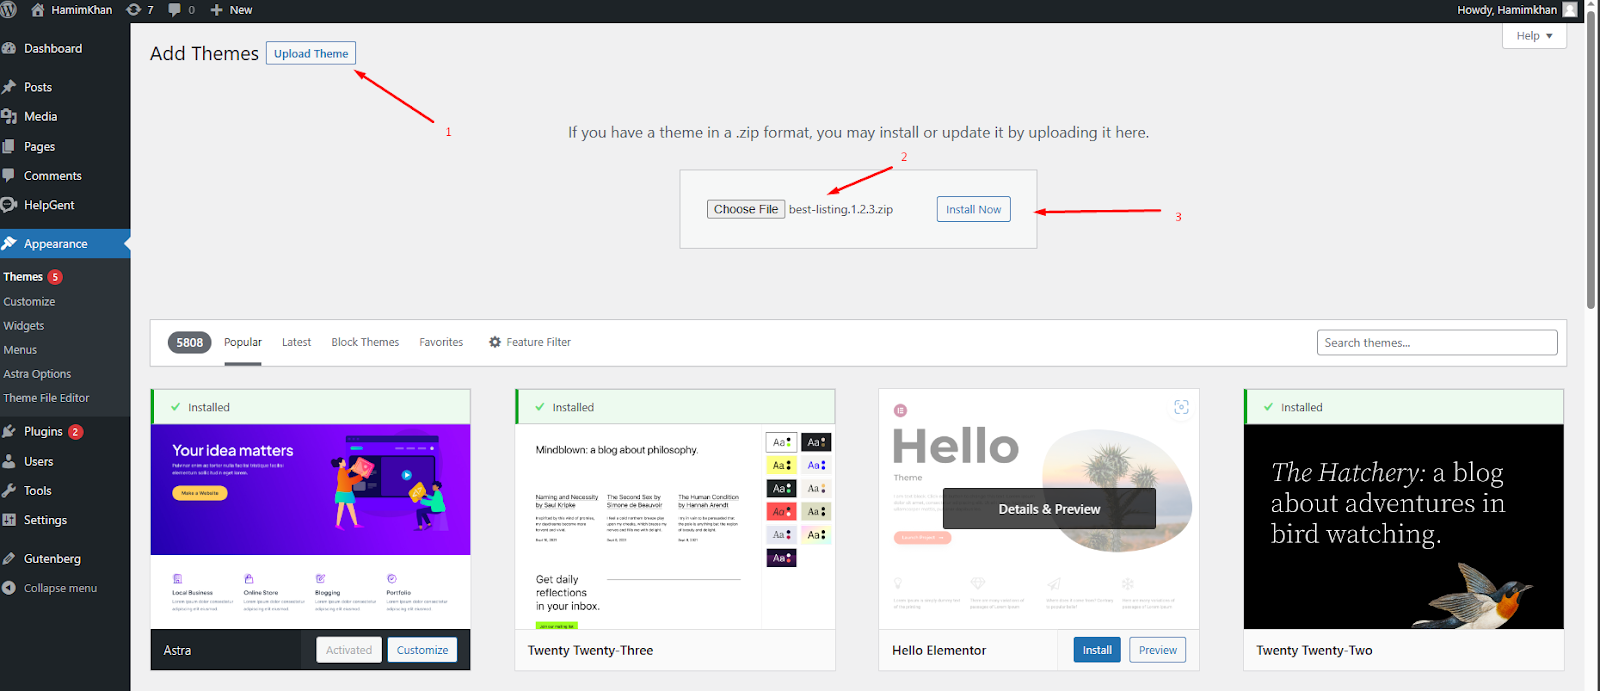
Then click on Upload Theme > Choose File and select the ‘Best Listing.zip’ > Install Now.
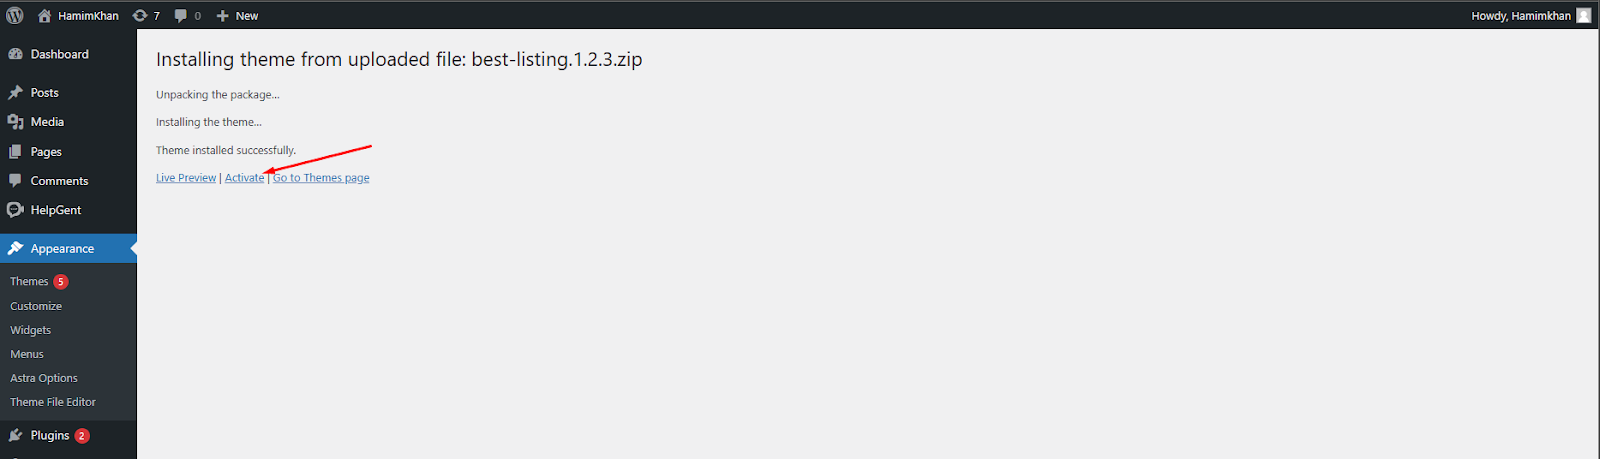
Now, proceed with activating the theme to initiate its intended effect.
Creating a user-friendly directory website involves ensuring that visitors can easily locate their desired listing with minimal effort. Directorist, a comprehensive directory platform, simplifies this process by suggesting relevant listings based on visitors’ preferences through the use of appropriate categories and tags.
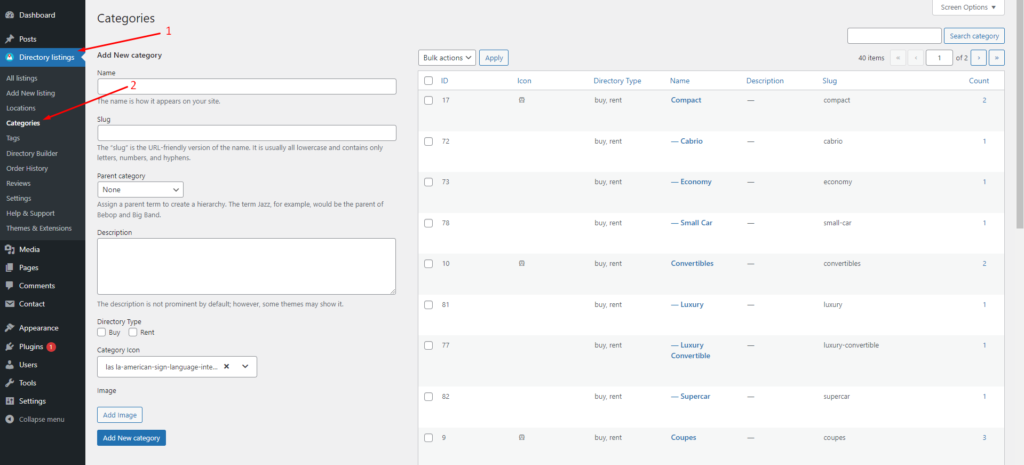
To achieve this, it is essential to establish a well-organized set of relevant categories and tags. Within the Directorist menu, you can access both categories and tags. The category feature allows you to add images, assign a parent category, provide descriptions, and incorporate icons and colors.
To create these categories and tags, follow these simple steps:
- Go to the Directorist menu.
- Click on “Directory Listings.”
- Choose “Categories.”
- Fill out the required fields, including the category name, description, and optional image, parent category assignment, icons, and colors.
- Once all the information is provided, click the “Add New Category” button.
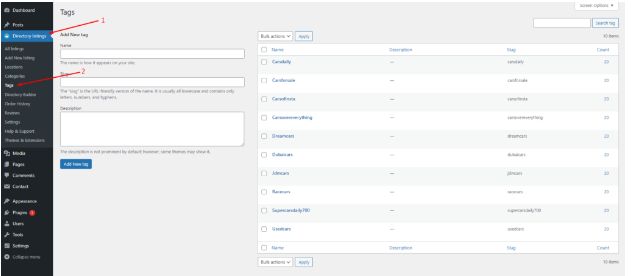
Similarly, you can add tags for your niche-specific directory website so that people can find their desired listings through tags. To do this, follow these steps: Navigate to Directory Listings > Tags, provide your credentials, and proceed to Add New Tag.
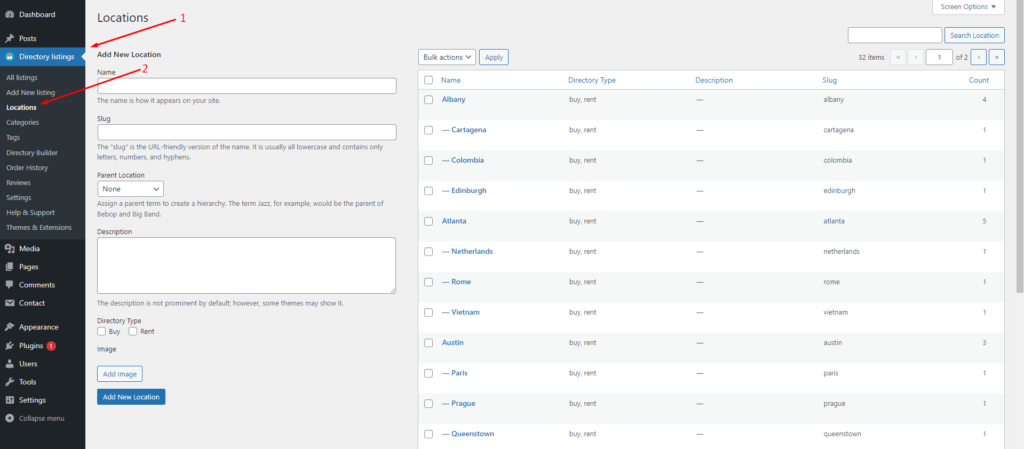
Step-7. Adding new locations to your niche-specific directory website
Adding locations to a niche-specific website is similar to incorporating categories or tags, as it helps users in locating their desired automotive listings. To include a location, follow these steps:
- Navigate to the Directory Listing section of the website.
- Select the Locations tab.
- Enter the required credentials, such as the name, description, and directory type.
- Click on the Add New Location button to finalize the addition.
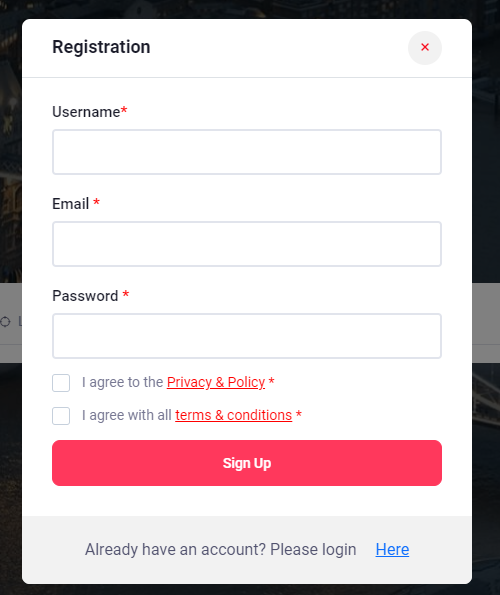
Step-8: Listing Submission by Users
Now it’s time to add listings to your directory website. Allow users to add listings to your site. To do this, users should go to the “Add Listing” button on your website. Up next, the user will find the following form. To submit his or her listings, he or she must fill out the required fields.
Step-9: Configure your directory website
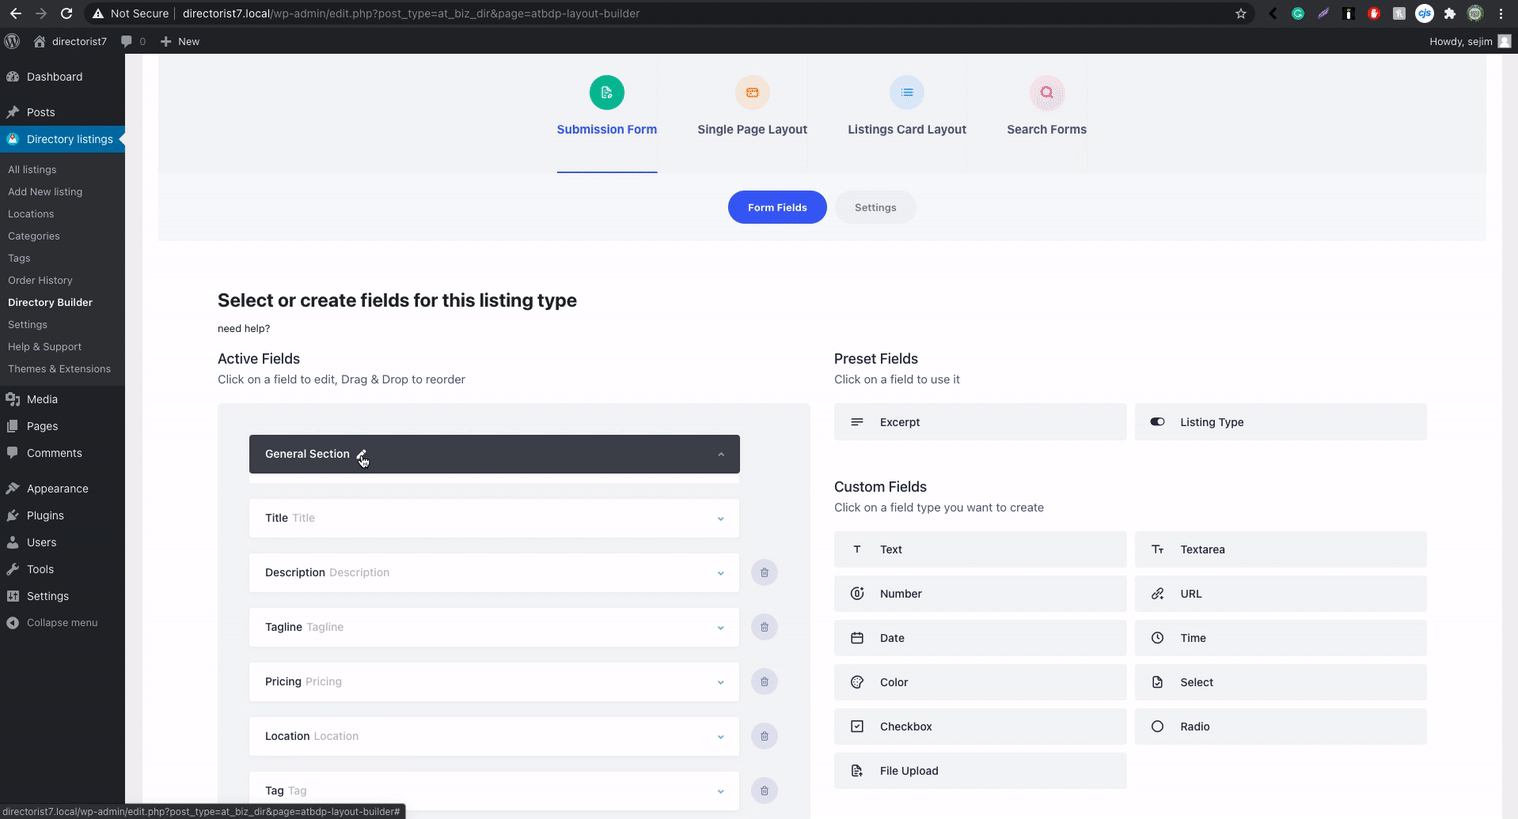
Before you add your advanced functionalities, you need to first configure your directory. Now, If you want to customize your directory site, go to the directory builder and configure your directory according to your needs. For the details, you can click here.
Step- 10. Extending functionalities of your directory website
In the previous step, you implemented the fundamental features of your directory website. Now, it’s time to enhance its functionality by incorporating various extensions.
Expanding the features of your directory website will broaden your audience reach.
For instance, you can introduce the booking/reservation feature to your directory website using the booking/reservation extension. This addition enables listing owners to manage and direct the flow of service-seekers throughout the day.
Another vital feature for a directory website is the opening/business hour feature, which allows users to determine the availability of listings owners. You can easily integrate this feature into your directory by utilizing the business/opening hour extension.
Furthermore, the inclusion of a listing search with maps is a significant enhancement for a directory website. By incorporating the listings with map extension, users can effortlessly locate their desired listing using maps.
Again, you can make your directory website more interactive and communicative through a solid asynchronous communication channel which ensures a complete boost in the conversion rate. To do this, you can use HelpGent-Directorist integration.
You have already presented several options to expand the functionality of your directory website, making it more engaging for users. However, there are still numerous possibilities for improving your directory website by incorporating additional features, which you can explore through these extensions.
To add an extension, follow these steps: Go to the WP-Admin Dashboard ➝ Plugins ➝ Add New ➝ Upload Plugin ➝ then upload the Extension ZIP file. After uploading, activate the extension to enable its functionality.
Step-11: Promote your directory website
Once your directory website is up and running, you need to promote it to attract visitors. You can promote your website through social media, search engine optimization (SEO), and paid advertising.
Bonus Tips: Monetize Your Niche Directory Website with Directorist
Directorist is a powerful WordPress plugin that allows you to create and manage a niche directory website. To monetize your niche directory website with Directorist, you can have the following strategies.
- Charge for listings. This is the most common way to monetize a directory website. You can charge a flat fee for each listing, or you can charge a monthly or yearly subscription.
- Featured listings. You can offer businesses the ability to feature their listings for a fee. Featured listings can be displayed in a more prominent position on your website, or they can be given additional features, such as a larger photo or a custom description.
- Sell premium listings. Premium listings are a more advanced type of featured listing. They typically offer businesses additional features, such as the ability to add videos or documents to their listing, or the ability to create a custom landing page for their listing.
- Allow businesses to claim listings. Businesses can claim their own listings on your website for a fee. This allows them to manage their own listings and make changes to the information.
- Charge for viewing private listings. Offer businesses the ability to create private listings that are only visible to paying members. This is a good way to generate revenue from businesses that want to protect their contact information or other sensitive data.
- Allow private/sponsored advertising. You can allow businesses to purchase private or sponsored advertising on your website. This can be a good way to generate revenue from businesses that want to reach a specific audience.
- Charge for membership. Give businesses a premium membership that gives them access to exclusive features, such as the ability to post unlimited listings or to view private listings.
- Sell business leads. Sell business leads to businesses that are looking for new customers. This is a good way to generate revenue from businesses that are actively looking to grow their business.
- Promote affiliate products. Promote affiliate products on your website and earn a commission on each sale. This is a good way to generate revenue from businesses that are selling products or services that are relevant to your niche.
- Allow sponsored articles/guest posting. Allow businesses to sponsor articles or guest posts on your website. This is a good way to generate revenue from businesses that want to reach a specific audience or promote their products or services.
These are just a few of the ways that you can monetize your directory website with Directorist. The best way to monetize your website will depend on your niche, your target audience, and your goals.
How to Add a Free Payment Gateway to Your Niche Directory Website?
The free version of Directorist only supports the offline bank transfer method for receiving payments. To add your bank account details, follow these steps.
- Go to the WP Admin Dashboard.
- Click on Directory Listings.
- Click on Settings.
- Click on Monetization.
- Click on Offline Gateways Settings.
- Enter your bank account details.
- Click on Save Changes.
[Note: The offline bank transfer method requires manual action to complete an order. After receiving a notification of an order, you will need to check your bank account to confirm that the money has been deposited.]
Here are some additional tips for adding your bank account details to Directorist.
- Make sure that you enter the correct bank account number and routing number.
- If you have multiple bank accounts, you can select the one that you want to use for receiving payments.
- You can also add a memo to your bank account details so that you can easily identify the payments that you receive.
Therefore, let’s take action and transform your niche directory website into a reliable source of passive income, allowing you to earn money effortlessly from the comfort of your own home, even while you’re resting or sleeping.
Before Setting The Sun
Creating a niche directory website with WordPress can be a rewarding endeavor, providing a platform for users to discover and connect with businesses or services in a specific industry. By following the steps outlined in this guide, you can set up a functional and visually appealing directory website.
Don’t forget to select a niche, choose appropriate directory plugins or themes, optimize your website for search engines, and focus on user experience. With dedication and ongoing maintenance, your niche directory website has the potential to become a valuable resource within your chosen industry.

Md. Hamim Khan
Md Hamim Khan is the Content and SEO Manager at Directorist, where he creates engaging content that helps improve online visibility. When he’s not at work, he loves playing cricket and enjoys chatting with friends, family, and colleagues.


Leave a Reply
You must be logged in to post a comment.