Overview #
The Business Hours extension ensures your customers know when your services are available. It supports both 12-hour and 24-hour formats, handles overnight shifts, and shows real-time “Open Now”/“Closed Now” badges.
This is ideal for businesses operating with specific schedules, such as hospitals, tourism services, retail shops, and appointment-based operations.
Key Features #
- Define opening and closing times for each day, with support for both 12-hour and 24-hour formats.
- Mark listings as open 24/7 or set specific daily hours directly from the admin interface.
- Overnight shifts (e.g., 10:00 PM Monday – 6:00 AM Tuesday) remain under the start day while clearly showing the closing day.
- Display live badges like “Open Now” or “Closed Now” to keep customers informed.
- Show countdowns like “Opens in 1 day” for businesses with limited weekly hours to keep visitors engaged.
- Show or hide business hours per listing and place them on listing pages, sidebar widgets, or both.
- Display business hours in your business’s local time zone instead of default site settings.
- Optional AJAX rendering to avoid conflicts with page caching.
- Customizable badge text and colors.
Installation & Configuration #
- Navigate to Directory Listings > Themes & Extensions
- Find “Business Hours” and click Install and then Activate.
- Navigate to Directory Listings > Settings > Extensions > Extension General
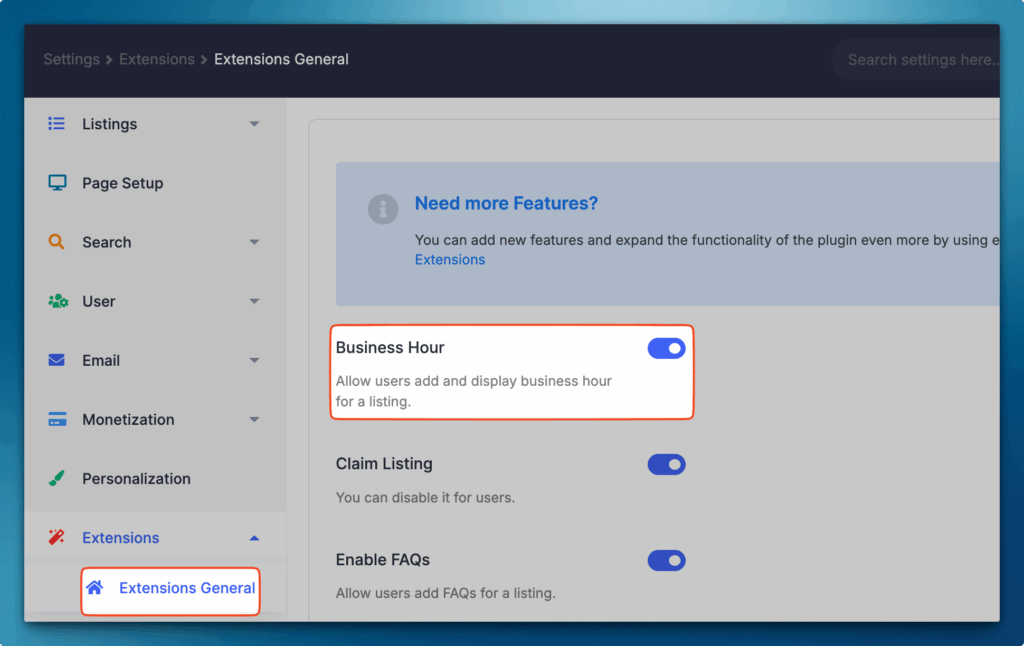
- Toggle on Business Hours, and hit Save Changes.
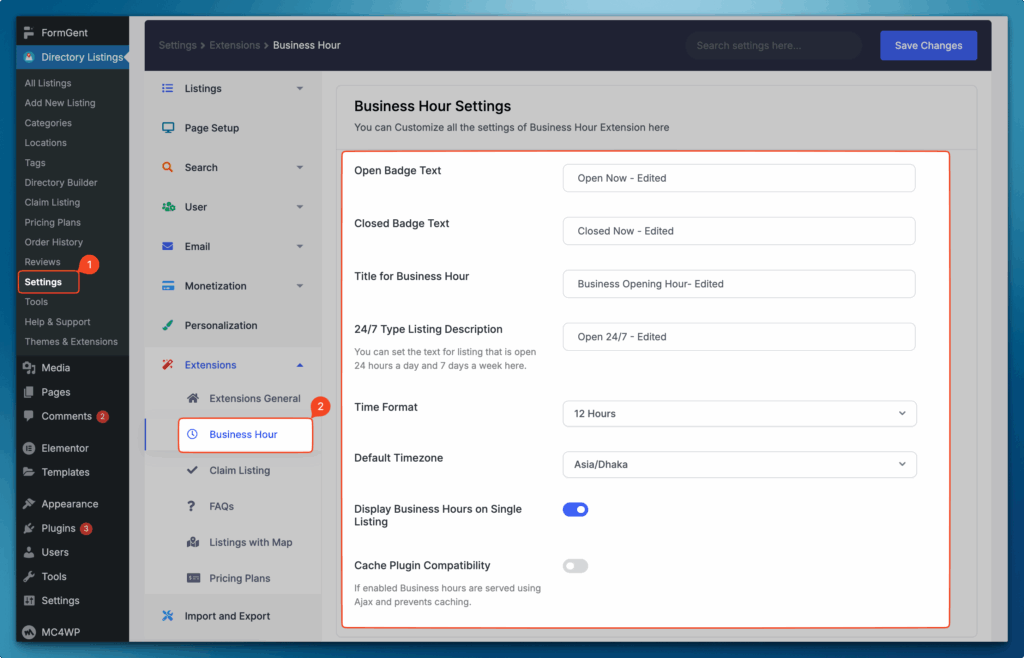
- Click the newly visible Business Hours. These settings are highly configurable.
Settings Reference
| Setting | What it controls | Notes |
| Open Badge Text | Text shown when the listing is open. | Example: “Open Now”. |
| Closed Badge Text | Text shown when the listing is closed. | Example: “Closed Now”. |
| Business Hours Title | Section heading above the hours. | Example: “Opening Hours”. |
| 24/7 Description | Text shown when a listing is set to always open. | Example: “Open 24/7”. |
| Time Format | Global display format for hours. | Choose 12-hour (AM/PM) or 24-hour. |
| Default Timezone | Timezone used for time calculations and badges. | Set this accurately for correct “Open Now” status. |
| Show Business Hours | Toggles visibility of the hours on listings. | Can be controlled per listing layout/area. |
| Cache Compatibility (AJAX) | Renders status via AJAX to bypass cached pages. | Recommended when using full-page caching. |
| Badge Colors | Color pickers for open/closed badges. | Defaults: Open = blue, Closed = black. |
Tip:
- If your site uses caching or a CDN, enable Cache Compatibility (AJAX) to ensure “Open Now”/“Closed Now” updates in real time.
Builder Setup #
Follow these steps to configure and display the Business Hour feature effectively within your directory builder:
1. Add Business Hour to Add Listing Form
- Path: Directory Builder > Add Listing Form
- Drag the Business Hours field from Preset Fields into your preferred position.
- Admin / Listing owners can set hours when creating or editing a listing.
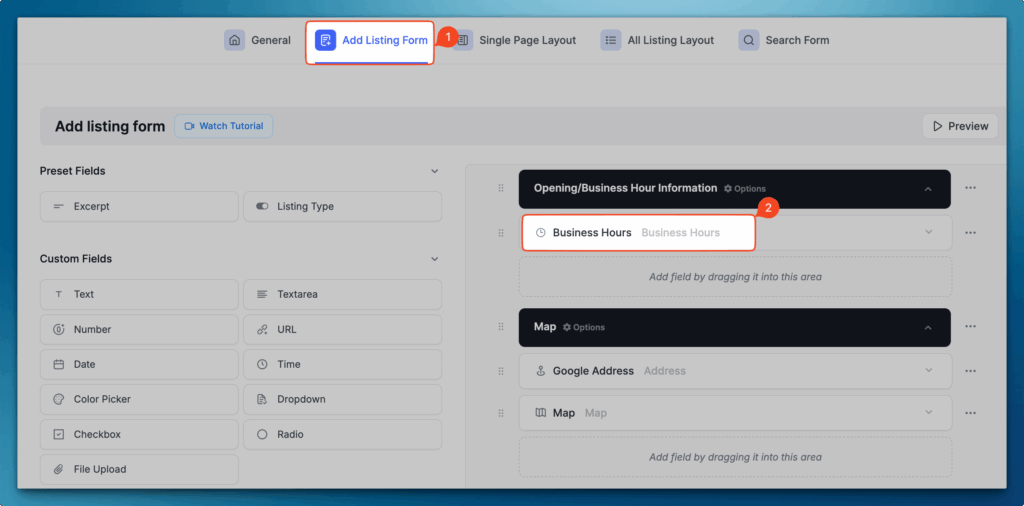
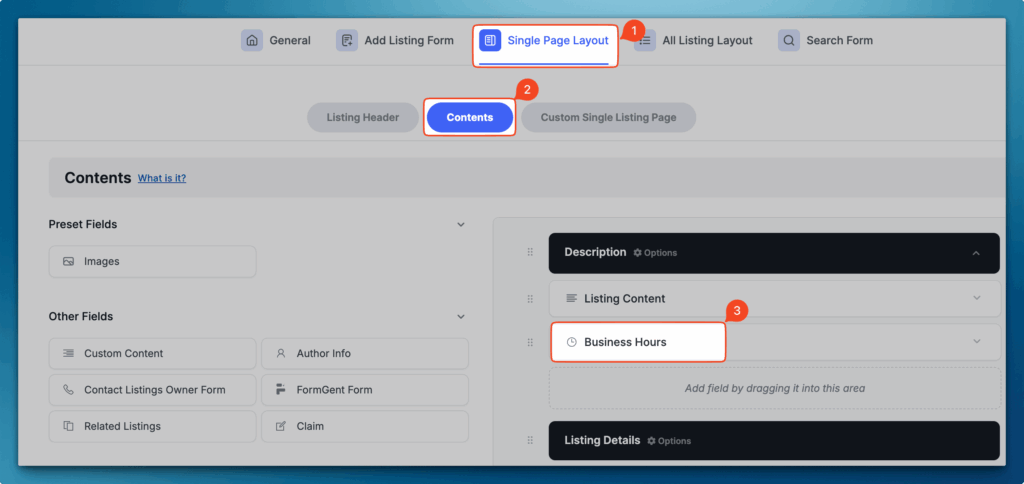
2. Show on Single Listing Pages
- Path: Directory Builder > Single Page Layout > Contents
- Drag the Business Hours block into your desired position.
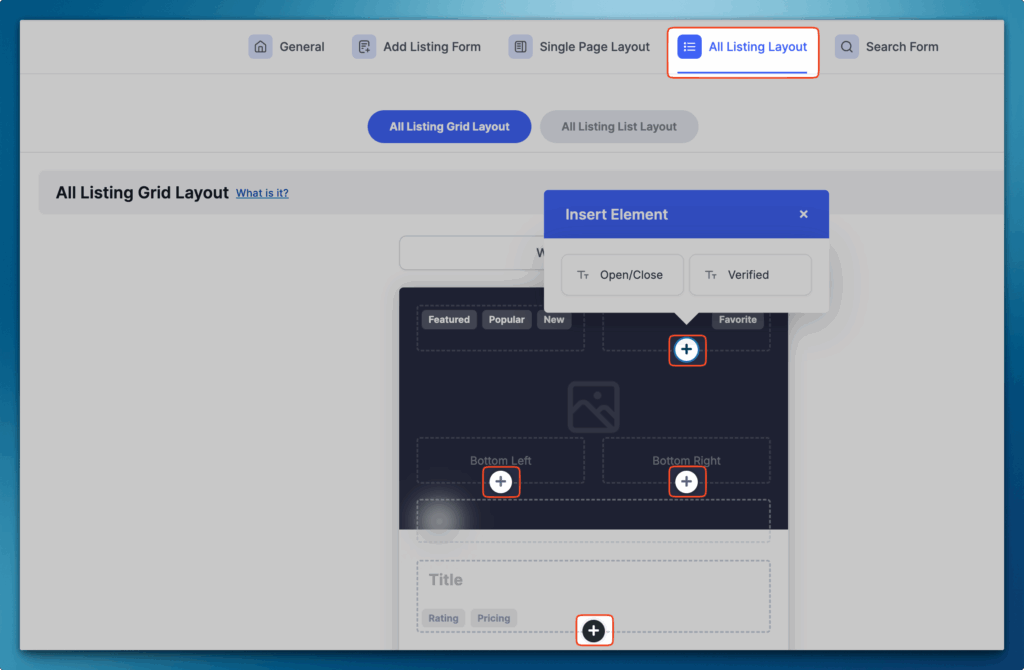
3. Show Status on All Listings (Archive/Grid)
- Path: Directory Builder > All Listing Layout
- Click the “+” icon and add the Open/Close element where you want the status badge to appear.
4. Enable Search Option by Open Status
- Path: Directory Builder > Search Form
- Add the Business Hours field to either the Search Bar or Search Filter to allow users to filter for currently open listings.
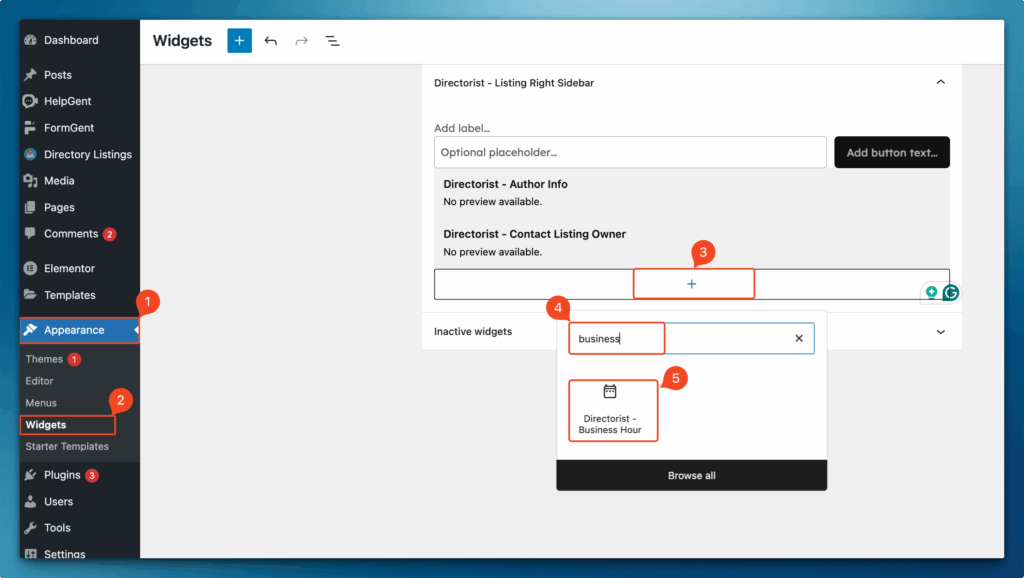
Sidebar setup #
After activation, the Business Hours widget should appear automatically in the Directorist Right Sidebar.
If not:
- Go to: Appearance > Widgets
- Click the “+” icon, search for Business Hours, and add it to the Directorist Right Sidebar.
- Drag to reorder if needed.
Setting Up Hours on a Listing #
- Enable Business Hours
- Go to: Add New Listing (or edit an existing listing).
- Ensure the Business Hours option/field is enabled.
- Choose a Timing Type
- 24/7 Service: Use for always-open businesses.
- Custom Hours: Define hours per day.
- Configure Hours
- All Day: Mark a day as open all day.
- Multiple Time Slots: Add multiple open/close intervals in the same day (e.g., 9–12 and 14–18).
- Overnight Shift: Set hours that pass midnight (e.g., 22:00–06:00). They will be saved under the start day but display the next day as the closing day.
Once you have completed the configuration, hours and badges appear on the All Listings page, Single Listing page, and (if added) within the Search Form and Sidebar Widget.
Frontend Preview of Business Hours #
After configuring the Business Hours settings, you can view the final appearance on the frontend in the following sections:
- Single Listing Page View
- All Listing Page View
- Sidebar Widget View
Notes:
- Ensure the Default Timezone is correct to avoid mismatched status for international visitors.
- If pages are cached, static HTML can display outdated badges. Enable Cache Plugin Compatibility (AJAX) in settings to fetch the live status after the page loads. After enabling, clear your site and CDN caches to ensure new logic takes effect.


