Adding a tag allows visitors to filter and find listings based on specific attributes. Tags make your directory more searchable and improve the browsing experience.
Method 1: From the Add Listing Form #
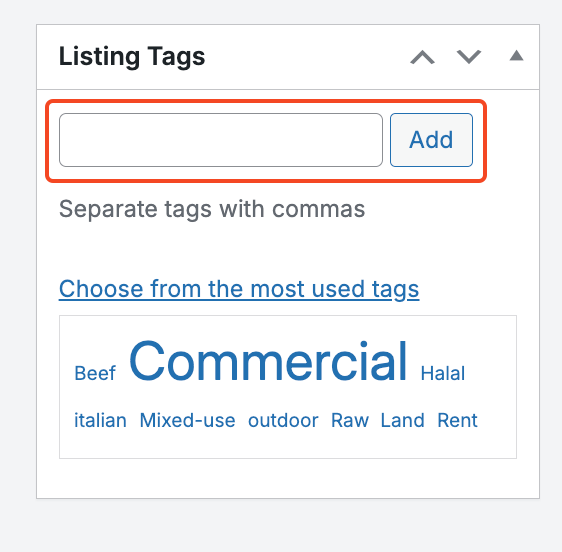
You can assign tags to a listing while creating or editing it. This is useful if you want to organize listings on the go without navigating to the Tags page.
- From your dashboard, go to Directory Listings → Add New Listing (or edit an existing one).
- Locate the Listing Tags panel and type a tag name into the input field.
- Click Add or press Enter to attach the tag.
- To add multiple tags quickly, separate them with commas.
- Click Choose from the most used tags to pick from tags you’ve already created.
- Simply click a tag name, and it will be added to your listing.
Method 2: From Tags Page #
You can create and manage tags centrally from the Tags page. This is helpful if you want to prepare tags in advance or manage them in bulk.
From your dashboard, go to Directory Listings → Tags.
Fill in the required fields:
- Name – how the tag will appear on your site.
- Slug – the URL-friendly version of the name (auto-generated if left blank).
- Description – optional, some themes may display it.
- Click Add New Tag to save.
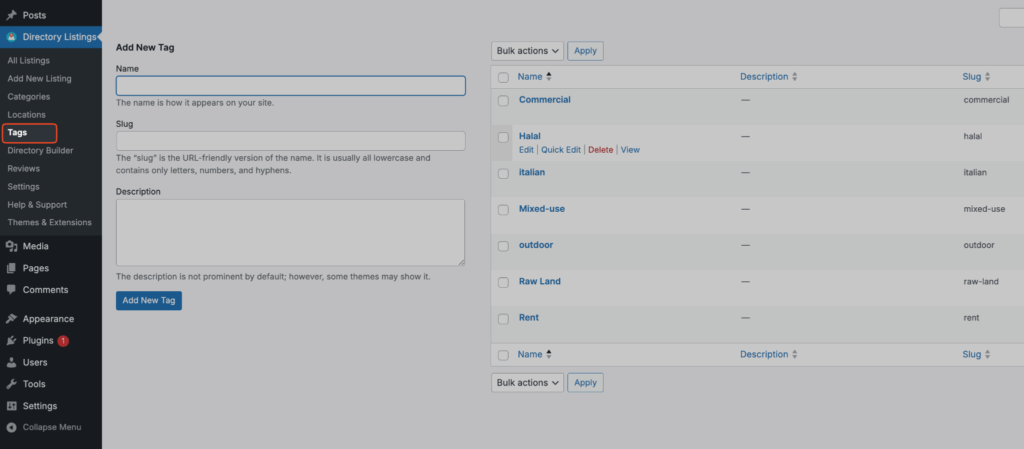
On the right side, you’ll see a list of existing tags. From here you can Edit, Quick Edit, Delete, or View any tag. You can also apply Bulk Actions to manage multiple tags at once.
Best Practices #
- Use tags for specific attributes (e.g., “Pet-friendly,” “24/7 Service”) rather than broad categories.
- Keep slugs short and descriptive.
- Avoid creating too many overlapping tags, as it may confuse users.


