The Single Listing Page is the detailed view of a directory listing that users are taken to when they click on a listing from any archive page such as All Listings, Search Results, or Category Archives.
This page is enabled by default and displays all relevant information about a listing, including descriptions, media, contact details, and more. However, Directorist gives you full flexibility to customize or even disable the single listing view entirely, turning your directory into a simple catalog-style display if needed.
The Single Page Layout settings allow you to control how this page looks and what elements are shown ranging from the header image and title placement to badges, filters, and custom content areas. Whether you want a sleek, minimalist layout or a feature-rich detailed page, this section helps you configure the perfect presentation for your listings.
There are three main parts to configure:
- Listing Header – Customize the top section, including title, images, and action buttons.
- Contents – Manage the layout and order of listing details like description, tags, media, and custom fields.
- Custom Single Listing Page (optional) – To replace the default layout with a custom-designed page using shortcodes or page builders.
Listing Header #
The Listing Header section lets you design the topmost portion of the single listing page. It gives you full control over what appears visually before users scroll into the main content.
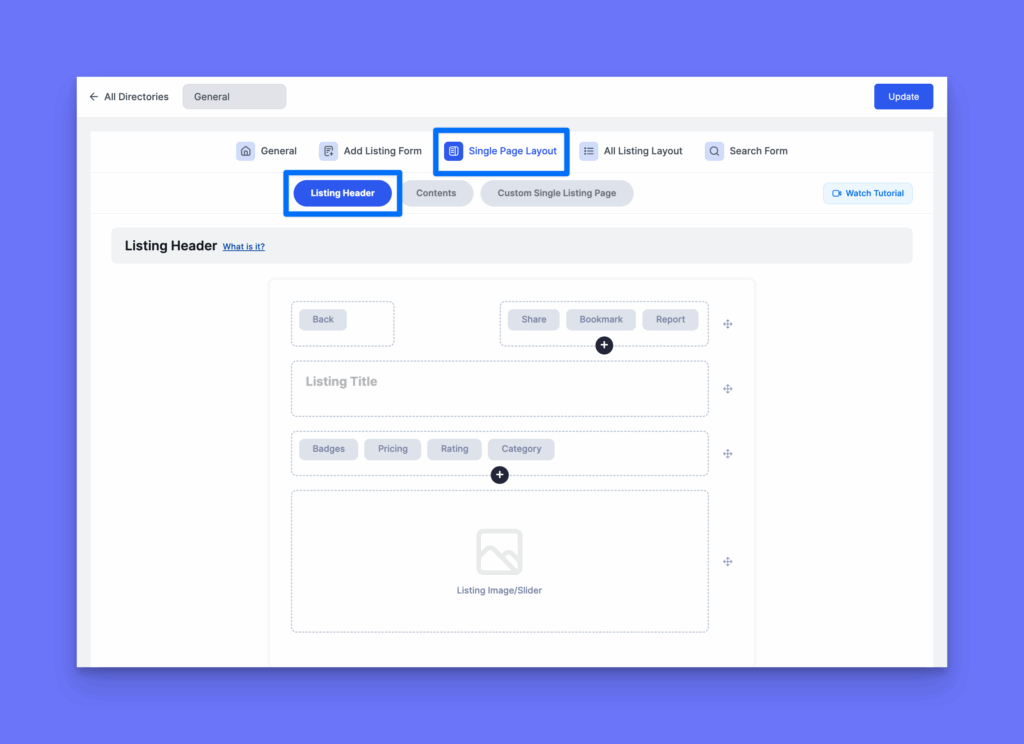
You can:
- Enable or disable the image/slider.
- Reorder elements like the Title, Subtitle (Tagline).
- Choose whether header content appears on top of the image or below the image.
- Add filters and metadata fields such as Category, Pricing, Ratings, Badges, and Location.
- Top Left Area: Optionally enable a Back button.
- Top Right Area: Add buttons like Share, Bookmark, or Report Listing.
Listing Header #
The Listing Header section lets you design the topmost portion of the single listing page. It gives you full control over what appears visually before users scroll into the main content.
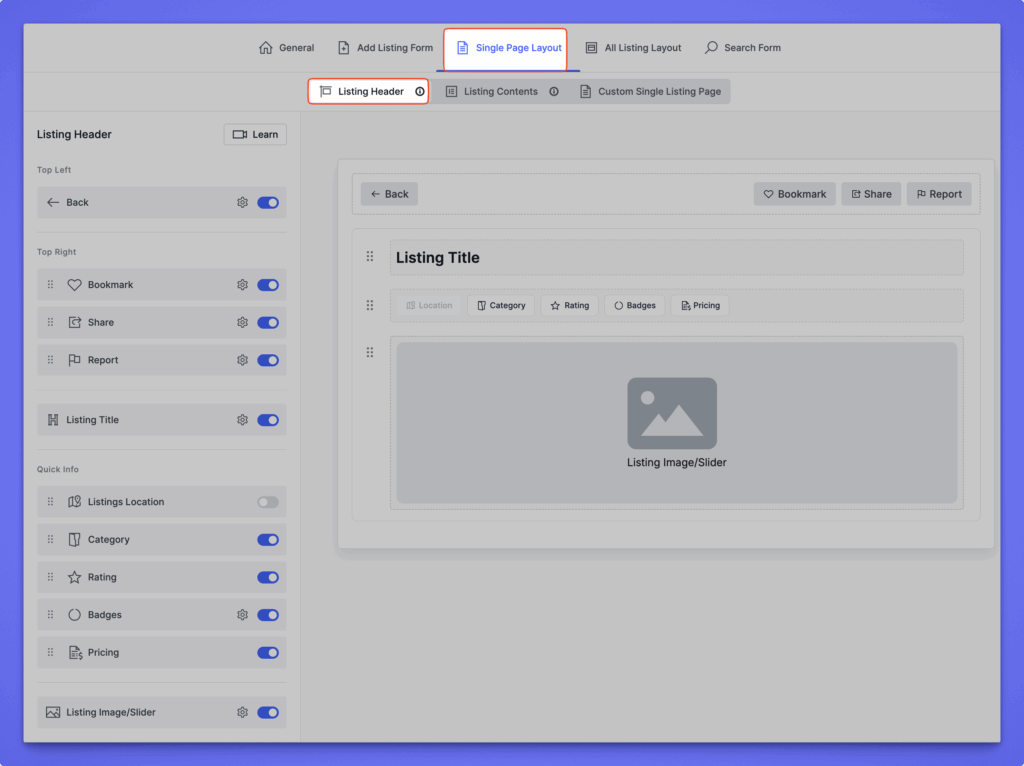
Left panel #
Displays all available header elements you can toggle on or off.
These include:
- Back – adds a back navigation button.
- Bookmark, Share, Report – user actions shown at the top right.
- Listing Title – main title of the listing.
- Listings Location, Category, Rating, Badges, Pricing – display quick listing info.
- Listing Image/Slider – main image area of the listing.
You can also:
- Reorder elements by dragging them up or down.
- Toggle visibility using the switch beside each item.
- Adjust settings via the gear icon next to individual elements.
Right preview panel #
Shows a live visual preview of how the selected header elements will appear on the front end. You can see items like the Back button, Bookmark, Share, and Report buttons at the top, followed by the Listing Title, quick info tags, and the Listing Image/Slider.
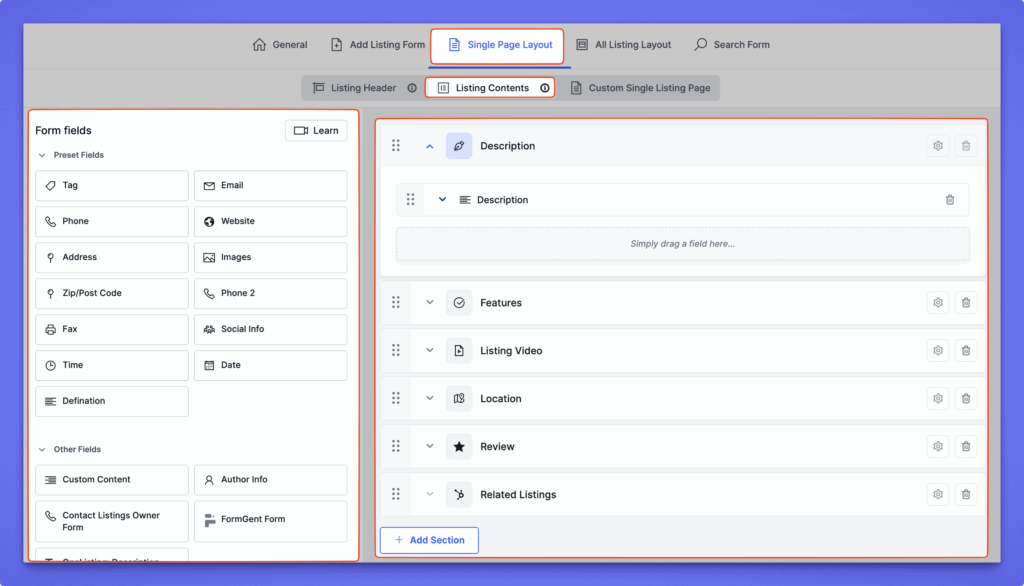
Listing Contents #
The Listing Contents tab controls the main body area of the single listing page — everything that appears below the header section. It lets you decide which content blocks (like description, features, video, reviews, or related listings) appear, their order, and how they’re structured.
Path: WP Admin → Directory Listings → Directory Builder → Select a Directory → Single Page Layout → Listing Contents
The screen is divided into two sections:
Left panel – Form Fields #
Contains all available content elements you can drag into the layout, including:
- Preset Fields: Tag, Email, Phone, Website, Address, Images, Zip/Post Code, Social Info, Date, Time, etc.
- Other Fields: Custom Content, Author Info, Contact Listing Owner Form, FormGent Form, and more.
Read FormGent Form detailed documentation here.
You can use these fields to display custom information, external forms, or special content sections within your listing page.
Right panel – Listing Sections #
Shows the visual layout of the listing content area. Common default sections include:
- Description
- Features
- Listing Video
- Location
- Review
- Related Listings
You can:
- Add new sections using + Add Section.
- Reorder sections via drag and drop.
- Delete a section using the trash icon.
- Configure each section with the settings (⚙️) icon.
- Drag fields from the left panel into any section on the right.
Example use #
If you want to show a custom contact form after the listing description:
- Drag the FormGent Form field from the left panel.
- Drop it into a new section below “Description.”
- Customize it using the settings icon.
Tips #
- You can create unique single page content structures for each directory type.
- Combine Directorist’s built-in fields with custom content for maximum flexibility.
- Always use Preview to check how your layout appears on the frontend before saving.
Custom Single Listing Page #
The Custom Single Listing Page option lets you design your own single listing layout using WordPress pages and shortcodes. This feature replaces the default Directorist layout and gives you complete control over the structure and design.
Path: WP Admin → Directory Listings → Directory Builder → Select a Directory → Single Page Layout → Custom Single Listing Page
When you enable this option, the default single listing layout is disabled. Instead, you can assign a WordPress page and insert Directorist shortcodes to build the layout manually
Enable Custom Single Listing Page #
Toggle this switch to activate the custom page option.
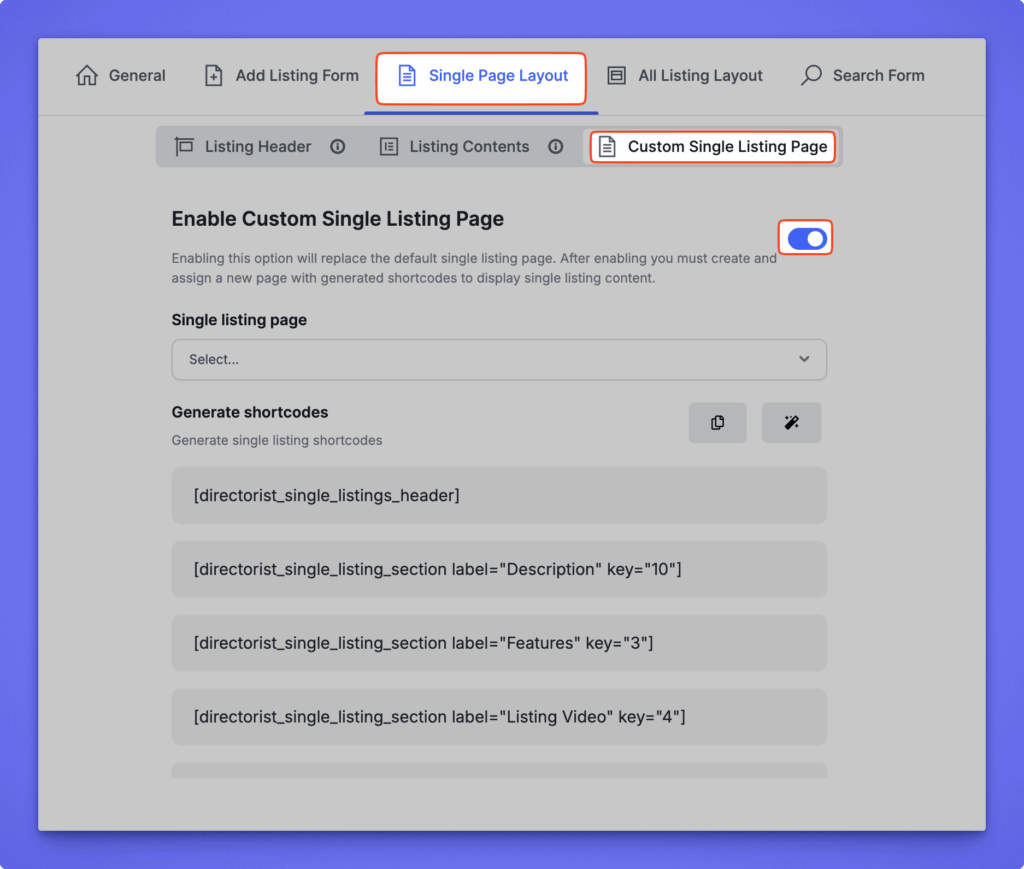
Once enabled:
- Single Listing Page:
Choose a WordPress page from the dropdown where your single listing content will appear. - Generate Shortcodes:
Directorist automatically provides shortcodes for all the sections you’ve added in the Listing Contents tab.- You can copy these shortcodes and paste them into your selected page to display each section individually. Each shortcode corresponds to a layout block, such as Header, Description, Features, Video, etc.
Note:
Once this option is enabled, Directorist no longer uses the default single listing layout. All display content will depend on the shortcodes you place on your selected page.


