The Event Booking option allows listing owners to sell or reserve tickets for events directly from their directory listings. This setup is ideal for industries like conferences, workshops, classes, community events, and any business that needs to manage ticket availability and booking limits.
Enable Booking #
Turn this on to activate booking for the event listing.
Booking Type #
Select Event as the booking type to display all event-specific fields.
Available Tickets #
Set the total number of tickets available for this event. This is the overall ticket capacity for the listing.
Display Available Tickets #
Enable this toggle to show the remaining number of tickets on the frontend event page.
- When enabled, users will see the live ticket count (e.g., “50 Tickets Available”).
Tickets Allowed Per Booking #
Define how many tickets a single user can book in one reservation.
For example, setting this to 5 means a user can book up to five tickets at once.

Refund System #
Turn on the refund system if you want to allow refund requests for booked services.
You can define:
- Refund policy description (example text is shown in the field).
- Refund days – how many days after payment a refund can be requested.
- Refund amount (%) – percentage of the booking amount that will be refunded.
- Add multiple refund rules if needed.
Users will see these rules during booking.

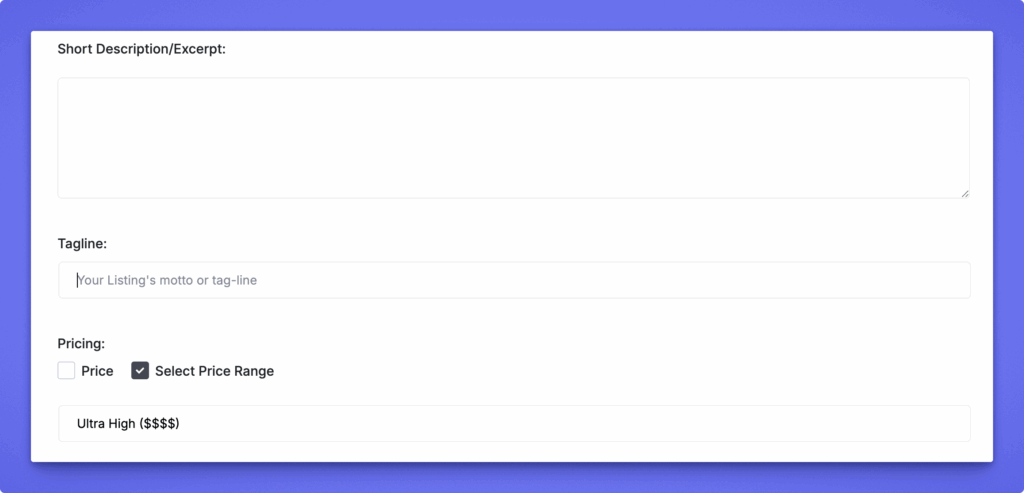
Additional Listing Fields #
Below the booking fields, you will find:
- Short Description/Excerpt – A brief summary of the service.
- Tagline – A short motto or catchphrase for the listing.
- Pricing – Set a single price or enable price range options.
These fields help customers understand the service better and compare listings.
How to Book an Event #
Users can book an event by selecting the number of tickets they want, reviewing the total cost, and clicking Book Ticket to complete the reservation.
- Enter Ticket Quantity
Choose how many tickets you want to book. The system will show the maximum number allowed per reservation. - Check Ticket Availability
If enabled, you’ll see how many tickets are still available for the event. - Book Ticket
Click Book Ticket to move forward to the confirmation or payment step and complete your reservation.

Review and confirm the booking
After clicking Request Booking, the user is taken to the Review & Confirm Booking page. They enter their personal details (name, email, phone), add optional notes, and review the booking summary showing the selected date, time, duration, and total cost.
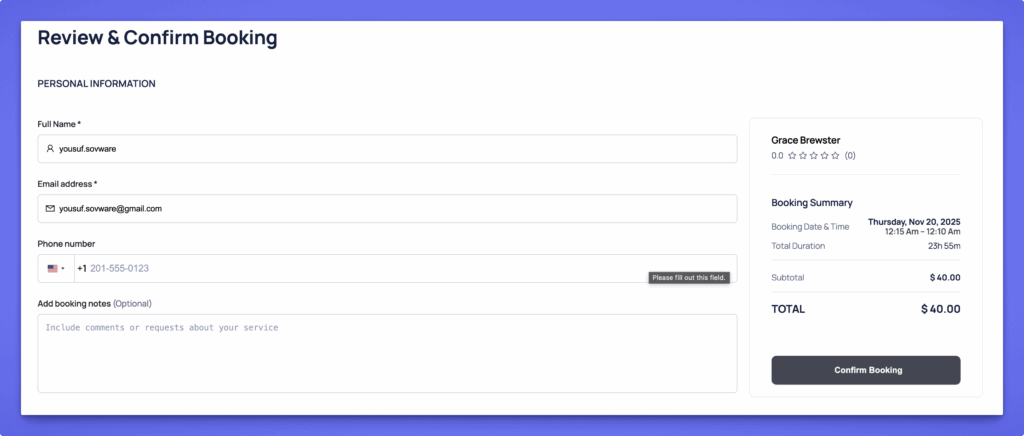
Submit the final confirmation
The user clicks Confirm Booking to complete the reservation. Based on your settings, the booking is either confirmed instantly or sent for manual approval.
Approval and status
- If Instant Booking is enabled, the booking is confirmed immediately.
- If not, the booking goes into a pending state until the listing owner or admin approves it from the dashboard.
How Listing Owners Manage Bookings #
Listing owners can manage every booking request from Dashboard → All Bookings. Bookings are organized into Approved, Pending, Cancelled, and Refund Request tabs, making it easy to navigate.
In the Pending tab, each booking card displays key information:
- Customer name and contact
- Booking date and time
- Request date
- Any booking notes
Listing owners can take quick actions using the buttons on the right:
- Approve Order to confirm the booking
- Reject to decline the request
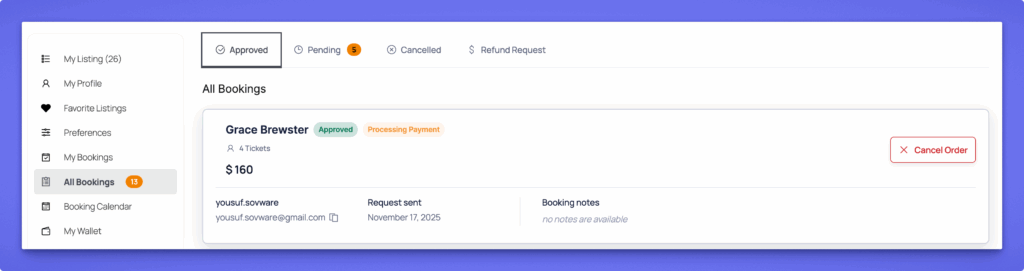
Once an action is taken, the booking automatically moves to the appropriate status tab, keeping everything organized and easy to track.


