 Up to 35% Off!

Directorist’s built-in search matches visitor queries against listing titles and descriptions. It works – but it only finds what it can literally read. A visitor searching “emergency pipe repair” won’t find your plumber listings unless those exact words appear somewhere in the text.
Directorist AI Search is a premium extension that changes how your results are found. It processes queries contextually, matching intent rather than just words, and works inside your existing search fields – whether you’re using the standard Directorist search or Universal Search across multiple directories.
This guide walks through everything you need to get it running.
Before You Start #
Two requirements to check before setup:
- Directorist account logged in. AI Search is a premium extension – it won’t function without you logging into your Directorist account.
- Your site must be on a live public domain. AI Search does not work on localhost,
.local,.test, or any private/development environment. Complete setup and testing on your live site.
Step 1: Activate the Extension #
Go to Your WordPress Dashboard > Directorist > Themes & Extensions and install + activate the AI search extension.
Or download the extension from your dashboard, upload it from Plugins > Add Plugin > Upload and once installed, activate it.
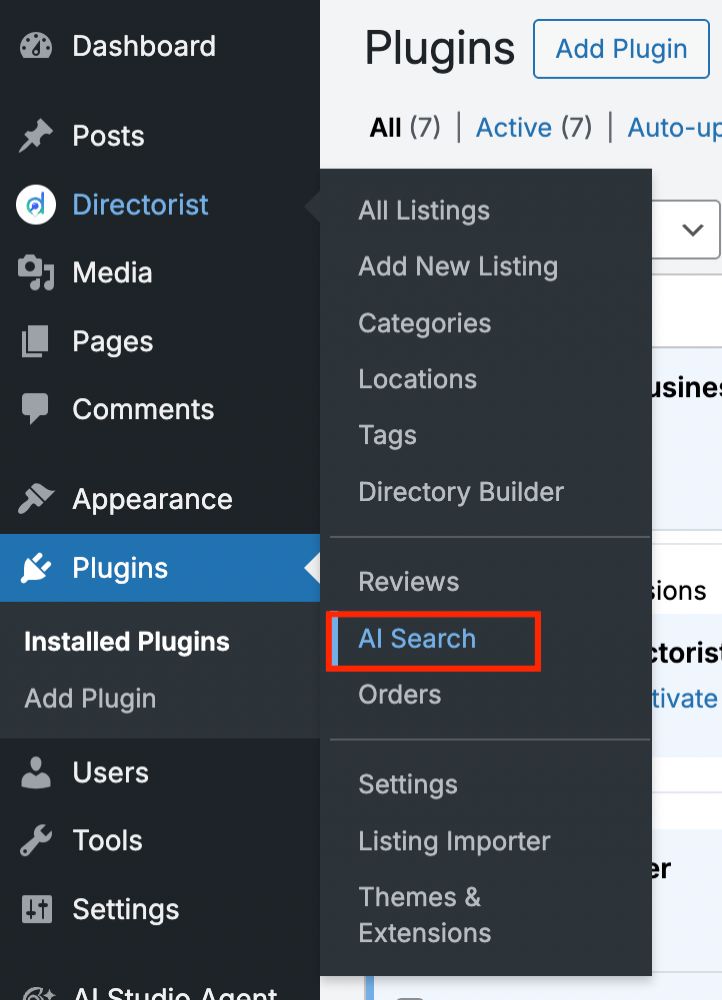
Once active, the Directorist menu will show an AI Search item. Click it to open the AI Search screen.
Step 2: Connect Your Directorist Account #
You’re not logged in to your Directorist account, you’ll see a login prompt:
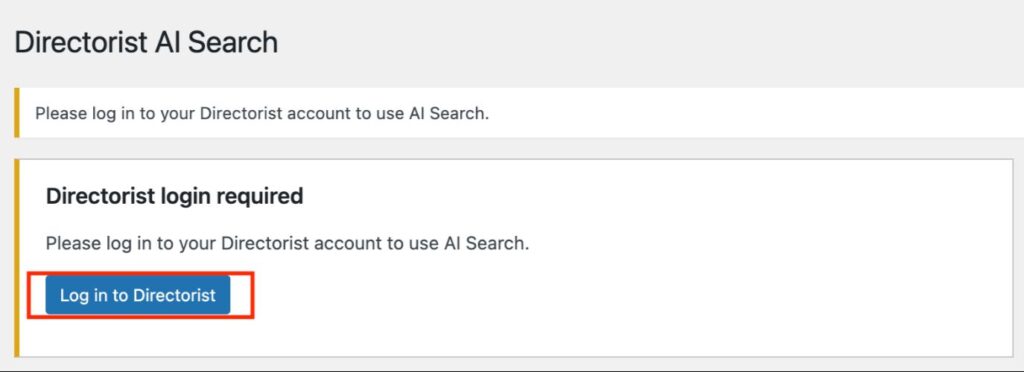
Log in to your Directorist Account.
This links your site to the Directorist backend. The extension provisions your site API key automatically once the connection is confirmed. You won’t need to manage API keys manually.
Step 3: Configure AI Search Settings #
Go to Directorist > Settings > Extensions > AI Search.
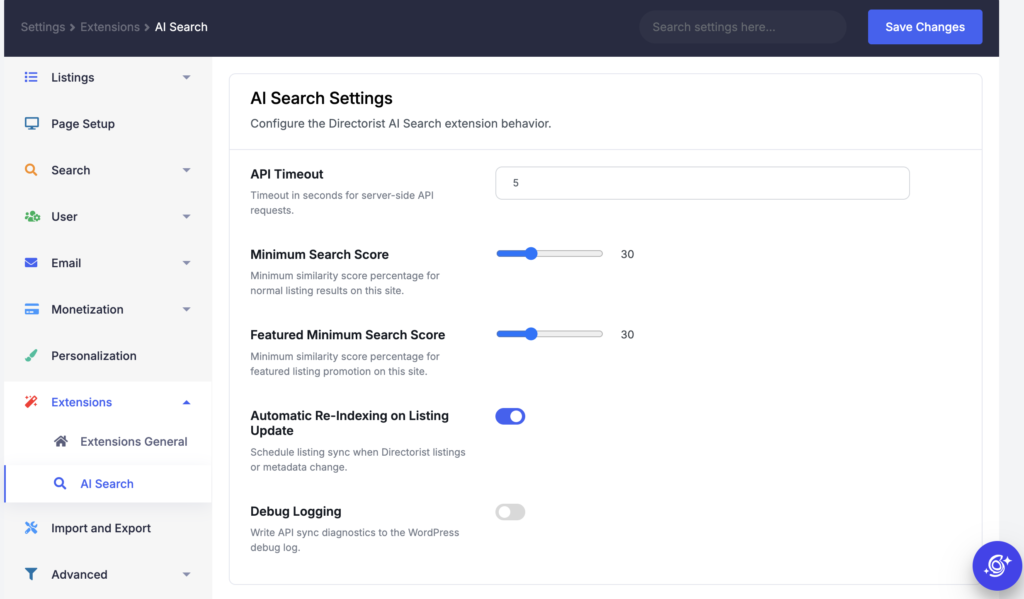
You’ll find four settings here. Review each one before you start indexing.
API Timeout
How long your server waits for the AI Search service to respond, in seconds. The default is 5. Leave this as-is unless searches are timing out.
Minimum Search Score
The relevance threshold for normal listings to appear in AI Search results. A value of 30 means a listing needs to be at least 30% relevant to a query before it shows up. You can adjust this after testing – raising it narrows results, lowering it broadens them.
Featured Minimum Search Score
The same type of threshold, but applied to featured listings. This is typically set lower than the Minimum Search Score so that featured listings get broader visibility in results – which is the purpose of featuring them.
Automatic Re-Indexing on Listing Update
When enabled, any change to a listing – its content, categories, location, tags, or custom fields – automatically schedules it for re-indexing. Keep this on. Without it, updated listings can fall out of sync with the AI Search index.
Debug Logging
Writes API diagnostics to the WordPress debug log. Leave this off unless you’re actively troubleshooting a problem.
Click Save Changes when done.
Step 4: Index Your Listings #
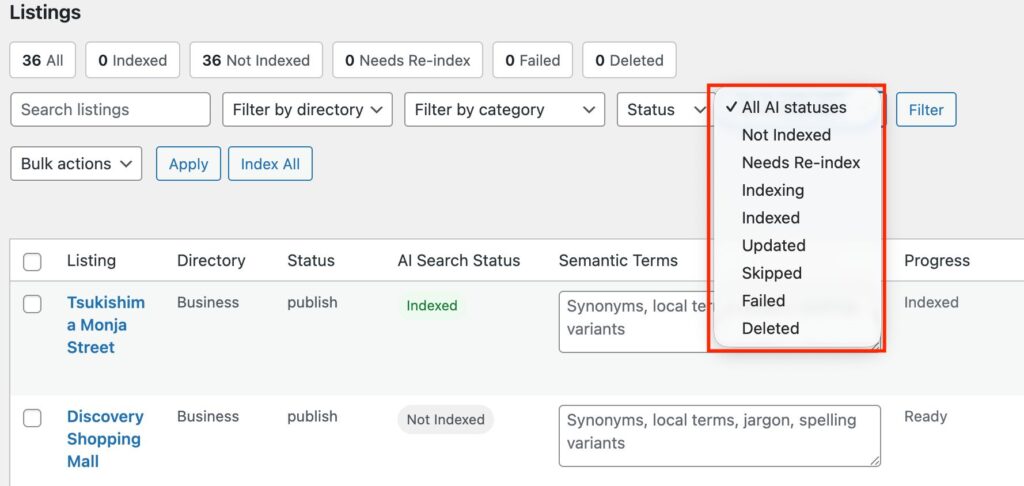
Go to Directorist > AI Search and open the Listings tab.

At the top of the screen, a status summary shows how many listings fall into each category: All, Indexed, Not Indexed, Needs Re-index, Failed, and Deleted.
On a fresh setup, all listings will show as Not Indexed. Listings that are not indexed will not appear in AI Search results.
Index all listings at once #

Click Index All to queue every listing for indexing in one action. This is the fastest way to get started.
Index selected listings #
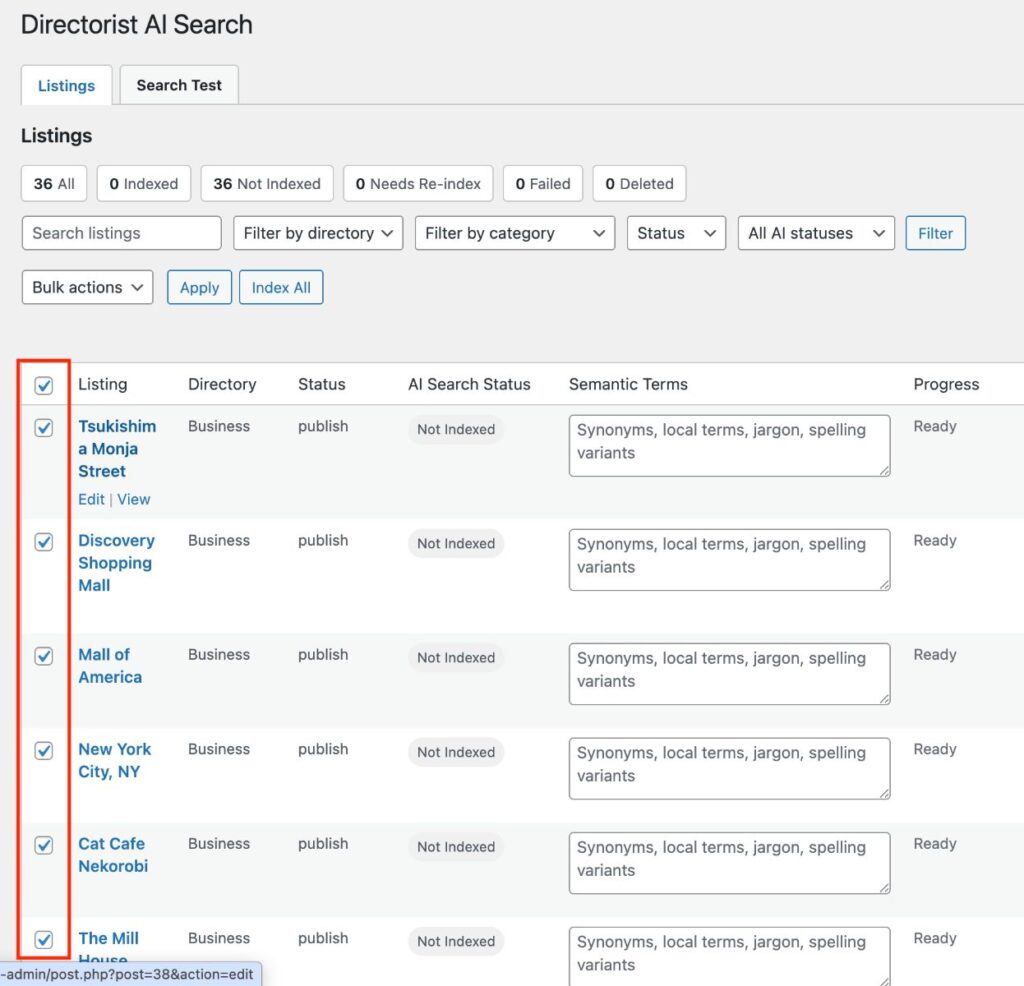
Check the boxes next to the listings you want to index, open the Bulk Actions dropdown, select Index, and click Apply.

Index a single listing #
Find the listing in the table and click the Index button in its Actions column.

Once indexed, each listing’s AI Search Status will update. The statuses you may see:
| Status | What it means |
|---|---|
| Not Indexed | Listing has not been sent to AI Search yet |
| Indexing | Currently being processed – wait and refresh |
| Indexed | Successfully indexed and searchable |
| Updated | Synced and updated by the AI Search service |
| Needs Re-index | Semantic terms changed after indexing – click Re-index |
| Skipped | The AI Search service skipped this listing – check the message shown |
| Failed | Indexing failed – check setup, enable Debug Logging if needed |
| Deleted | Index was removed – re-index if the listing should appear in results |
Step 5: Add Semantic Terms (Optional but Recommended) #
Each listing has a Semantic Terms field in the Listings tab. This is where you can add words and phrases that help AI Search understand how visitors might describe that listing – without changing anything visible on the public listing page.
Good semantic terms include synonyms, local phrases, abbreviations, industry terminology, and alternate spellings that your visitors are likely to search but that don’t already appear in the listing title or description.
Example: A listing titled “Green Leaf Dental Clinic” might have semantic terms like: dentist, dental care, teeth cleaning, emergency dentist, family dentist, oral health
To add semantic terms:
- Find the listing in the Listings tab
- Type your terms into the Semantic Terms field
- Click Save terms
The listing will be re-indexed with the new terms automatically.
Step 6: Test Your Search Results #
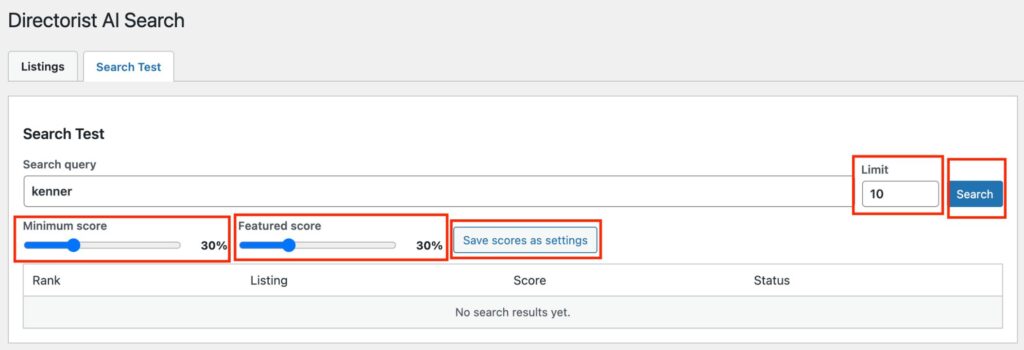
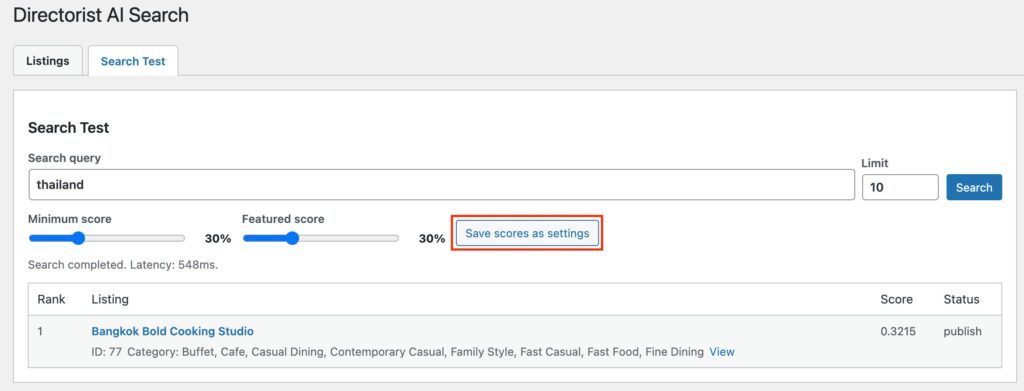
Before relying on AI Search in front of visitors, test it from the admin. Go to the Search Test tab within the AI Search screen.
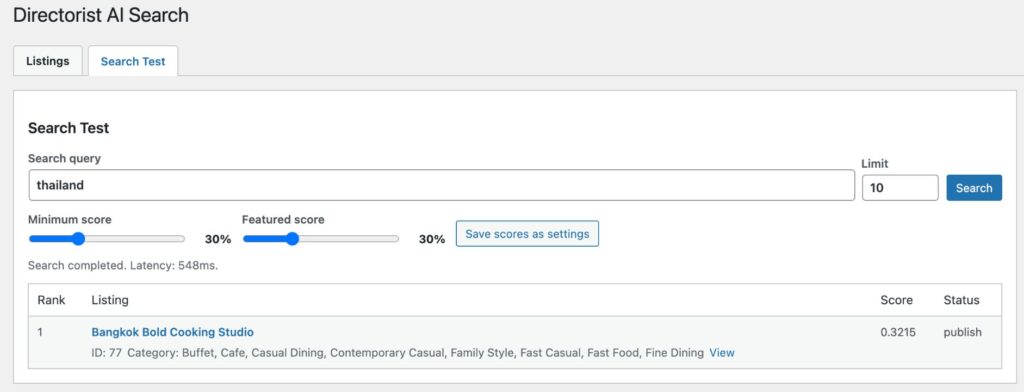
Enter a search query, set a result limit, and click Search.
Results show each matching listing’s rank, relevance score, and publish status. The screen also shows request latency, so you can see how quickly the AI service is responding.
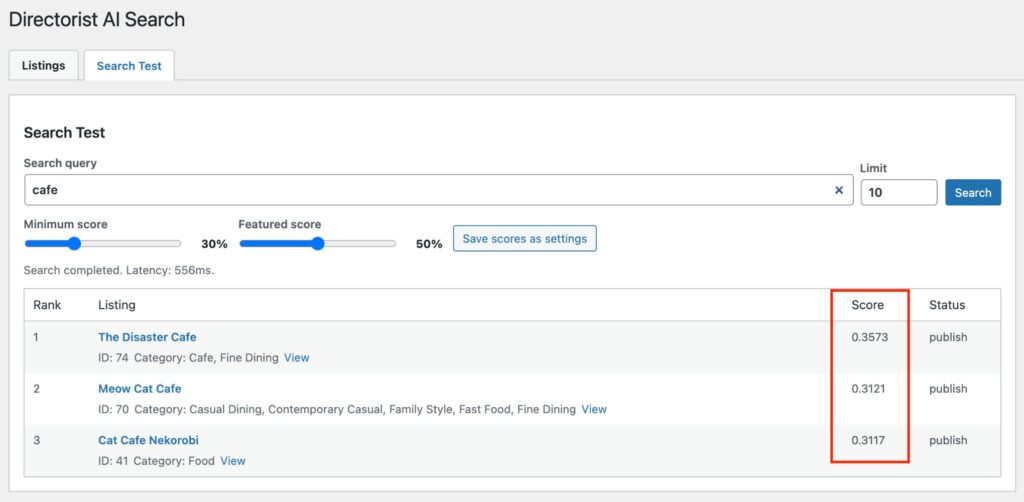
Reading the scores: A score of 0.3215 means the listing is approximately 32% relevant to the query. Any listing below your Minimum Search Score threshold won’t appear in results.
Adjusting thresholds in Search Test:
Use the Minimum score and Featured score sliders to test different thresholds against real queries. When you find settings that produce the right balance:
- Click Save scores as settings to apply them sitewide
What Visitors See #
On the frontend, AI Search attaches to the existing Directorist keyword search field. Visitors don’t interact with it differently – they use the same search bar they always have.
When a visitor types terms and hit search, the see improved results based on your configuration.
Keeping Your Index Current #
If Automatic Re-Indexing on Listing Update is enabled, the index stays current without manual work. Any listing that changes – content, metadata, category, location, or directory type – is automatically scheduled for re-indexing.
If you make bulk changes or add a large batch of new listings, use Index All from the Listings tab to ensure everything is up to date.


