

The integration of Directorist with WPML through Directorist WPML Integration consolidates both platforms in one place. It assists you in making your directory sites multilingual in a more convenient and efficient way by enabling the transition of your directory website from one language to another. Moreover, this extension creates an opportunity for you to connect with users from various regions around the world who speak different languages, all without the necessity of writing any code.
How To Start #
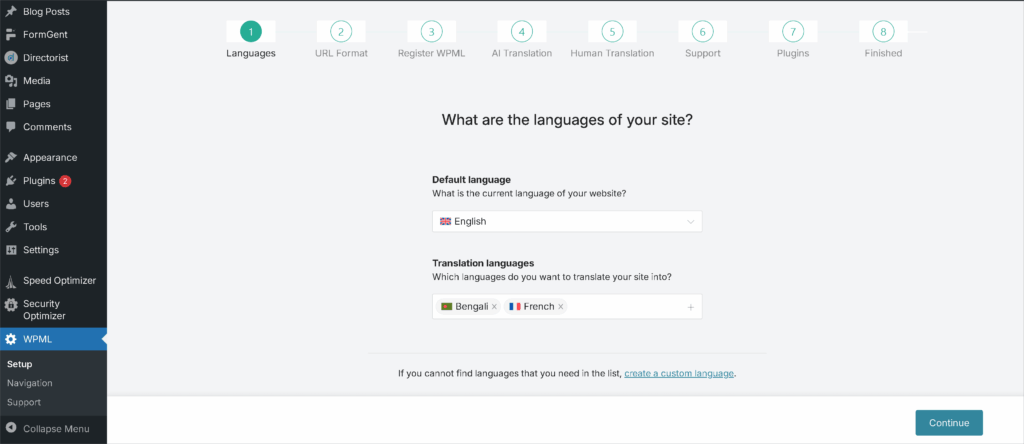
- Install WPML & Activate with your license key.
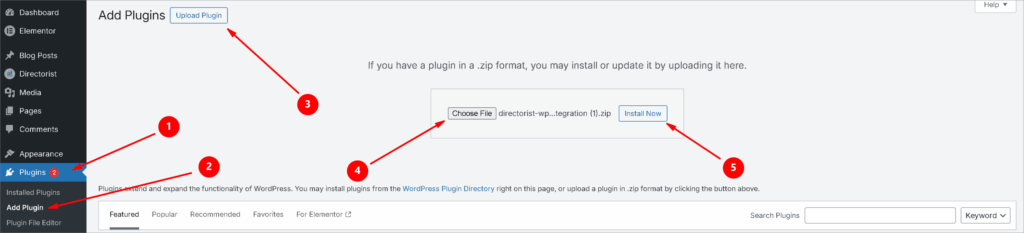
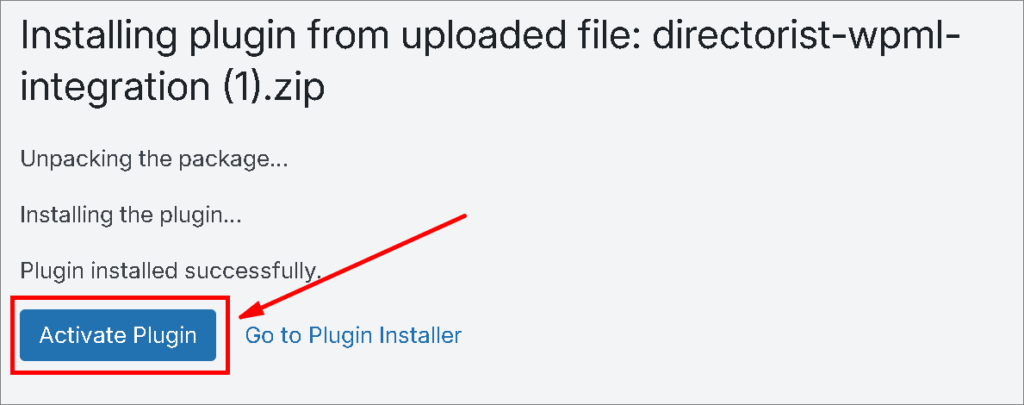
- Install the “Directorist WPML Integration” extension and Activate It.
Note: Use the language selector to determines which content to display. You can choose items in a specific language or in all languages. Sometimes finding specific strings seems hard. In that case, select “All Languages” option to find all the strings of all languages.

Directory Type Translation #
Step 1: Create a translation to a different language. WP Dashboard → Directorist → Directory Builder → Click On Translation Icon (3) → Click (+) icon to create translate option for specific language.
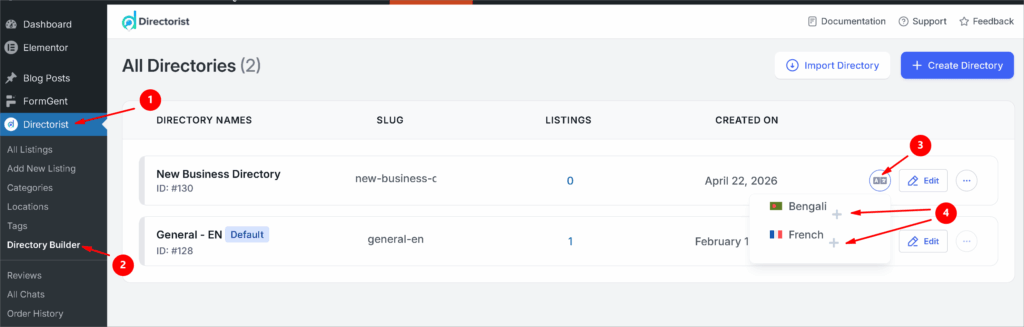
Upon clicking on the (+) button, a new directory will create for that specific language. Now click the edit icon as shown on.
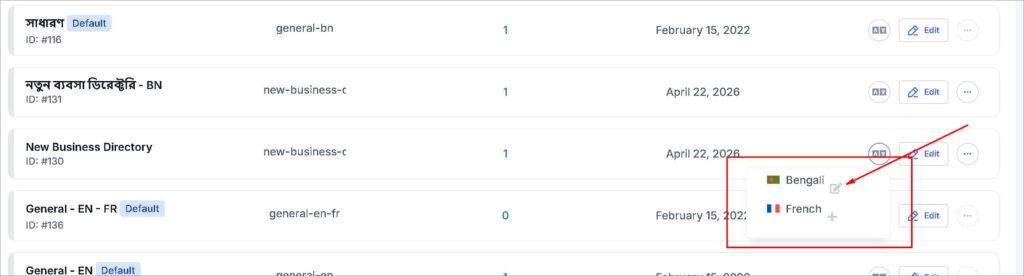
Step 2: Translate the strings of the directory type according to your preference. Click on “Update” to save all the changes.
Listings Translation #
Step 1: Go to Directorist → All Listings.
Step 2: Click the “+” icon to add a new translation and create a new translated listing of the original listing.
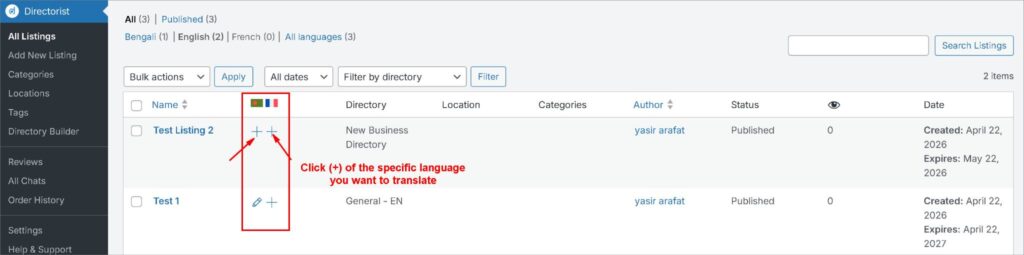
Step 3: Translate the listings strings by manually or automatically (required paid credit of WPML) and then click on “Save and Complete.”
String Translation #
Step 1: Go to WPML → String translation.
Step 2: Select “directorist” from Select strings within the domain option. This will filter out all the other text-domain strings and show only the Directorist text-domain to the list. Click the (+) icon on language specific icon to translate and save the translation.
Directorist Pages Translation #
Step 1: Go to the Directorist → Settings → Page Setup page.
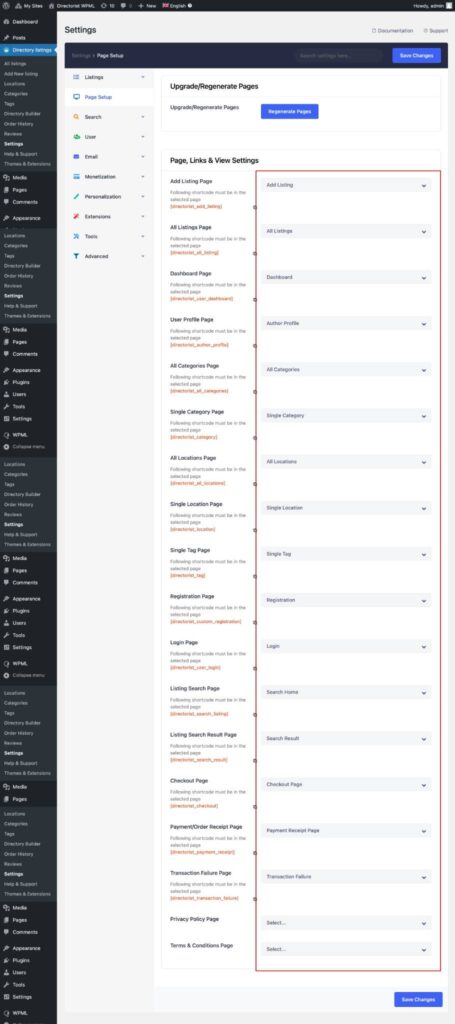
Step 2: Keep that page as a reference then go to the Pages page from another tab of your browser.
Step 3: Now find those selected pages shown on the settings panel and then add the translation to them by clicking on the (+) plus icon.
Step 4: Translate the strings from the translation page and then save & Complete.
Translate Blog Post #
Step 1: Go to the WP Dashboard → Blog Posts → All Posts
Step 2: Choose your specific blog for translate and click (+)
Step 3: Translate the contents and then save & Complete.
Translate Category #
Step 1: Navigate to Directorist → Categories → Click “Edit” the category you want to translate
Step 2: Scroll down. Choose the directory for showing the specific category. Next move to the “Language” option. Click “add” to translate.
Step 3: A new page will open to translate the category on that specific language. Fill up all the required fields and don’t forget to on click “Add New Category”
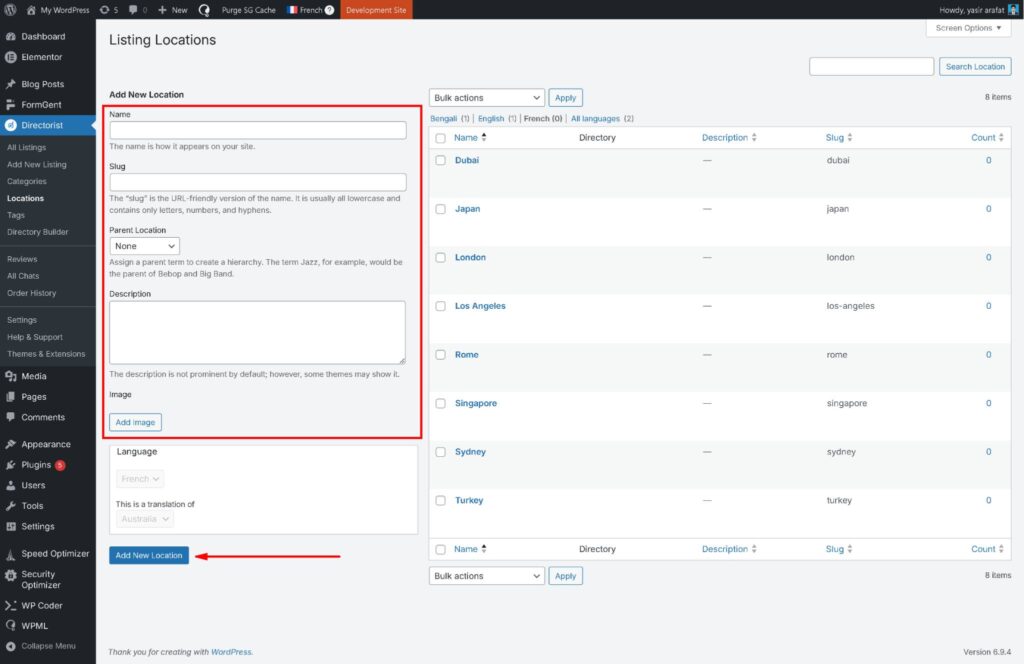
Translate Locations #
Step 1: Navigate to Directorist → Locations → Click “Edit” the Location you want to translate
Step 2: Scroll down. Choose the directory for showing the specific location. Next move to the “Language” option. Click “add” to translate.
Step 3: A new page will open to translate the Location. Fill up all the required fields and click “Add New Location”
Translate Tags #
Step 1: Navigate to Directorist → Tags → Click “Edit” the Tag you want to translate
Step 2: Scroll down. Choose the directory for showing the specific tags. Next move to the “Language” option. Click “add” to translate.
Step 3: A new page will open to translate the Tag. Fill up all the required fields and click “Add New Tag”


