
This guide covers the practical implementation of the Directorist Pricing Plans extension. It walks you through creating pricing plans, configuring their features and behavior, displaying them on the frontend, and testing the complete listing submission workflow.
Prerequisites: Before proceeding, make sure you have completed the extension activation, migration process, and payment gateway configuration covered in this guide.
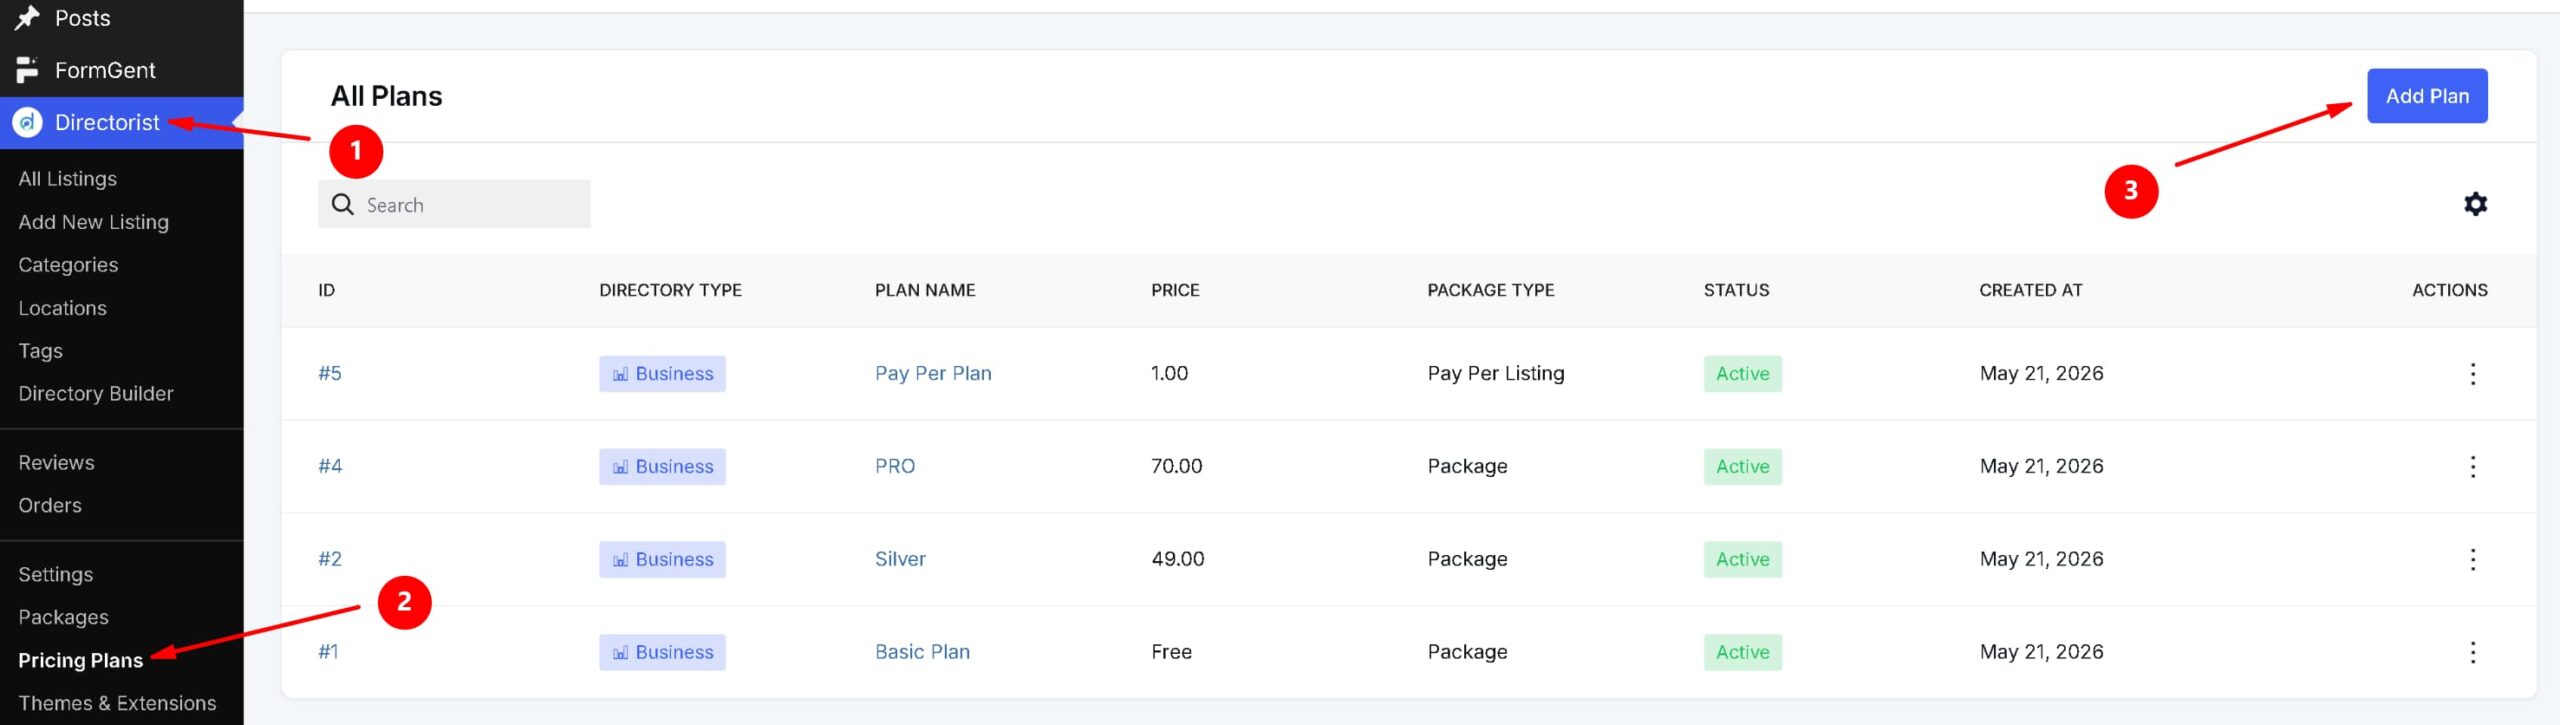
Pricing Plans Menu #
All pricing-related configurations are managed from a single location in your WordPress dashboard.
Go to Directorist → Pricing Plans.
This is your central hub for creating, editing, and managing all pricing packages. From here you can create unlimited plans, customize features, control pricing behavior, and define how users interact with each package.
If you imported demo data, you may already see some pre-built plans available. Otherwise, you can create everything from scratch based on your business needs.
Creating a New Pricing Plan #
Step 1 — Open the Plan Creator
Go to WordPress Dashboard → Directorist → Pricing Plans, then click Add New. A pop-up window will appear titled “Add Plan.”
Step 2 — Enter the Basic Details
In the pop-up, fill in the following:
- Plan Title — Enter a name for the plan (e.g., Platinum Plan).
- Directory Type — Select the directory this plan applies to (e.g., Restaurant).
- Plan Type — Choose either Package or Pay Per Listing.
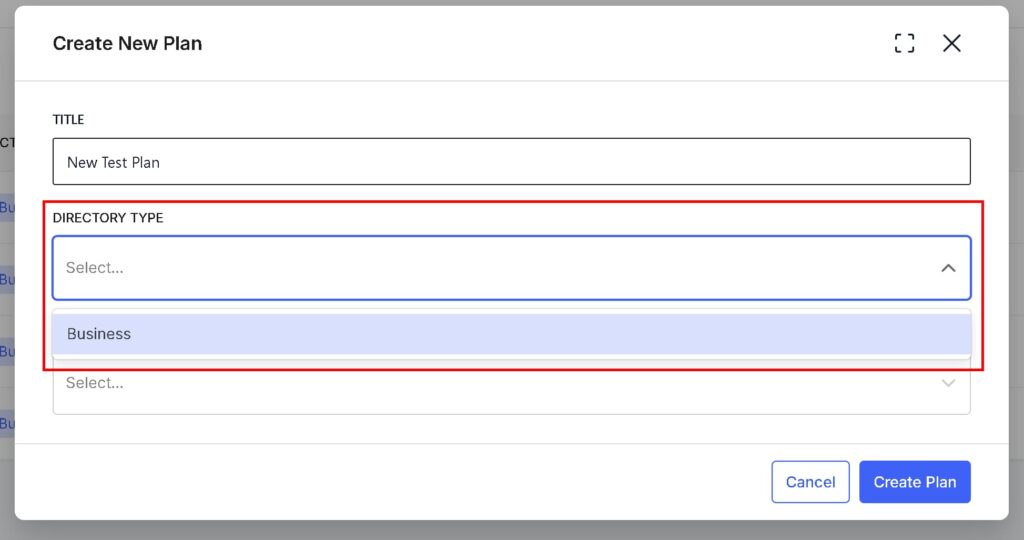
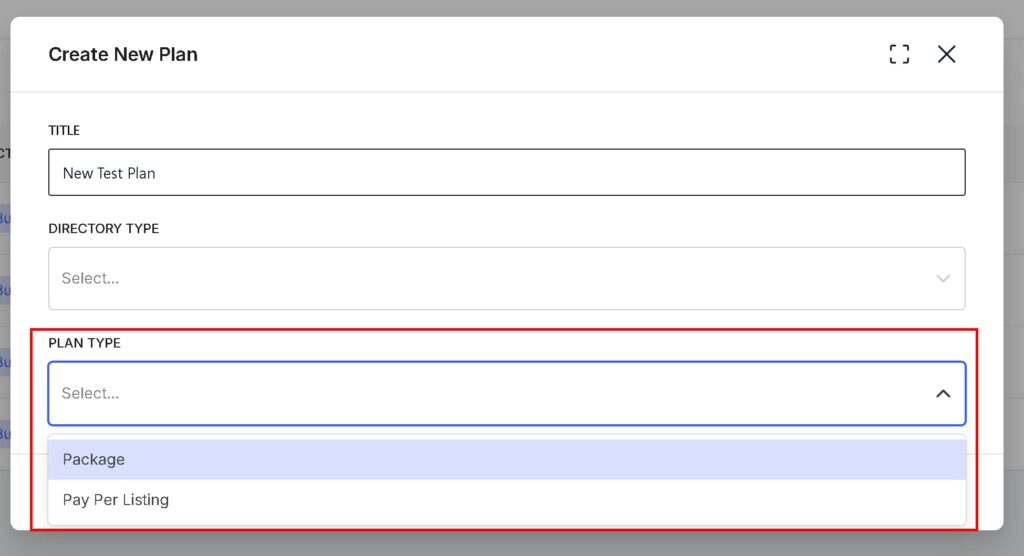

Once done, click Create Plan.
Step 3 — Configure the Plan
After clicking Create Plan, you will be taken to the plan editor. The editor is divided into three tabs:
- General Info
- Feature Configuration
- Plan Settings
Each tab is covered in detail in the sections below.
General Info Tab #
The General Info tab is where you define the core details of the plan — its name, pricing, limits, and subscription behavior.
Basic Information #
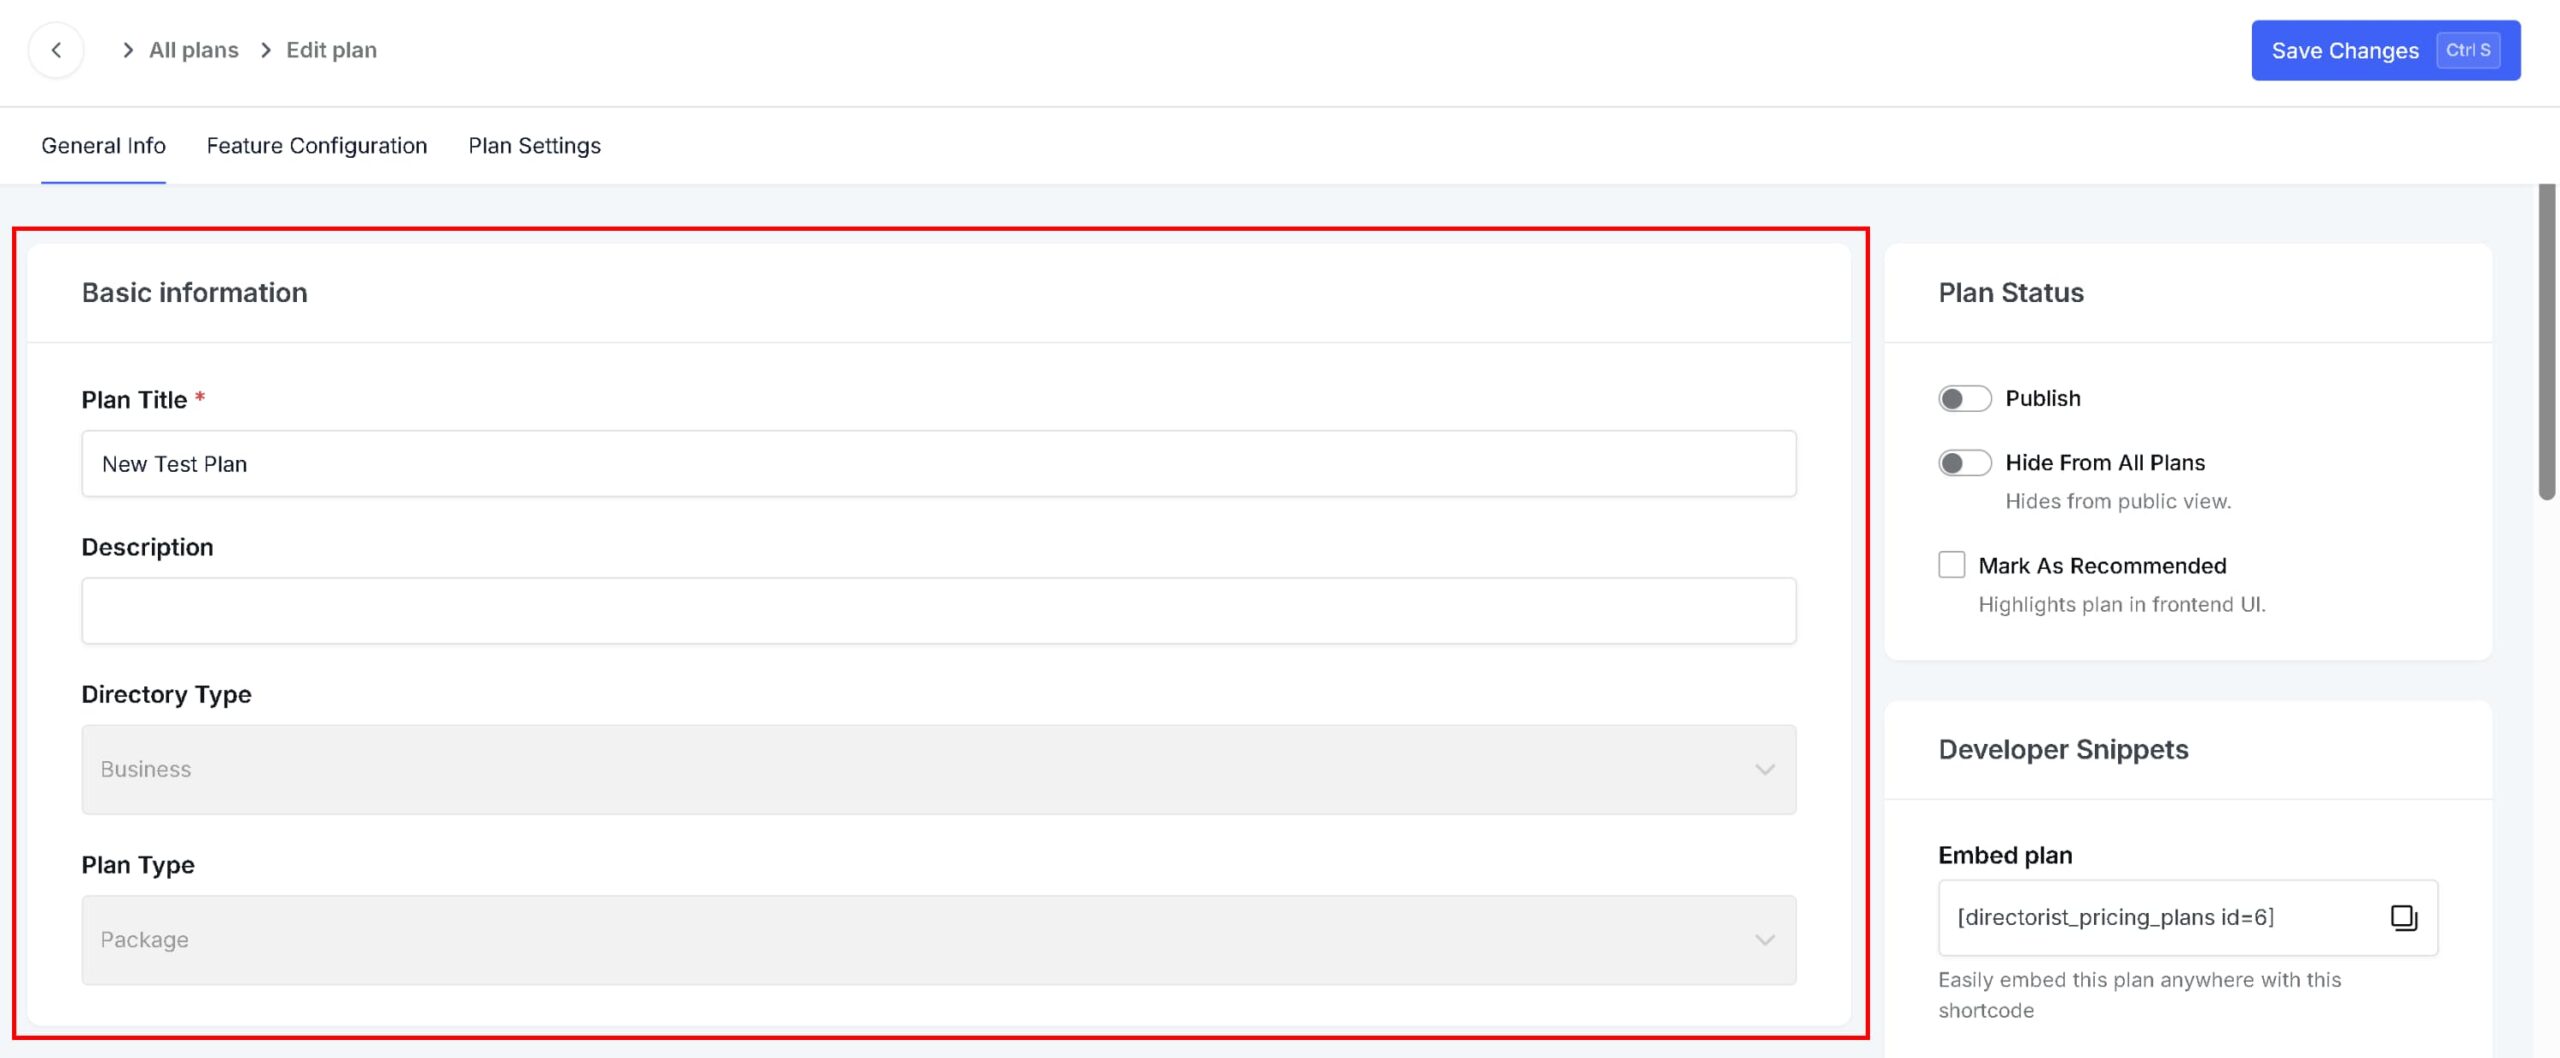
- Plan Name — The name you entered during creation is pre-filled here. You can update it at any time.
- Description — Add a short description explaining what is included in the plan (e.g., “50 Regular + 10 Featured listings”).
- Directory Type and Plan Type — These are locked based on your selections during plan creation and cannot be changed here.
Listing Limits #
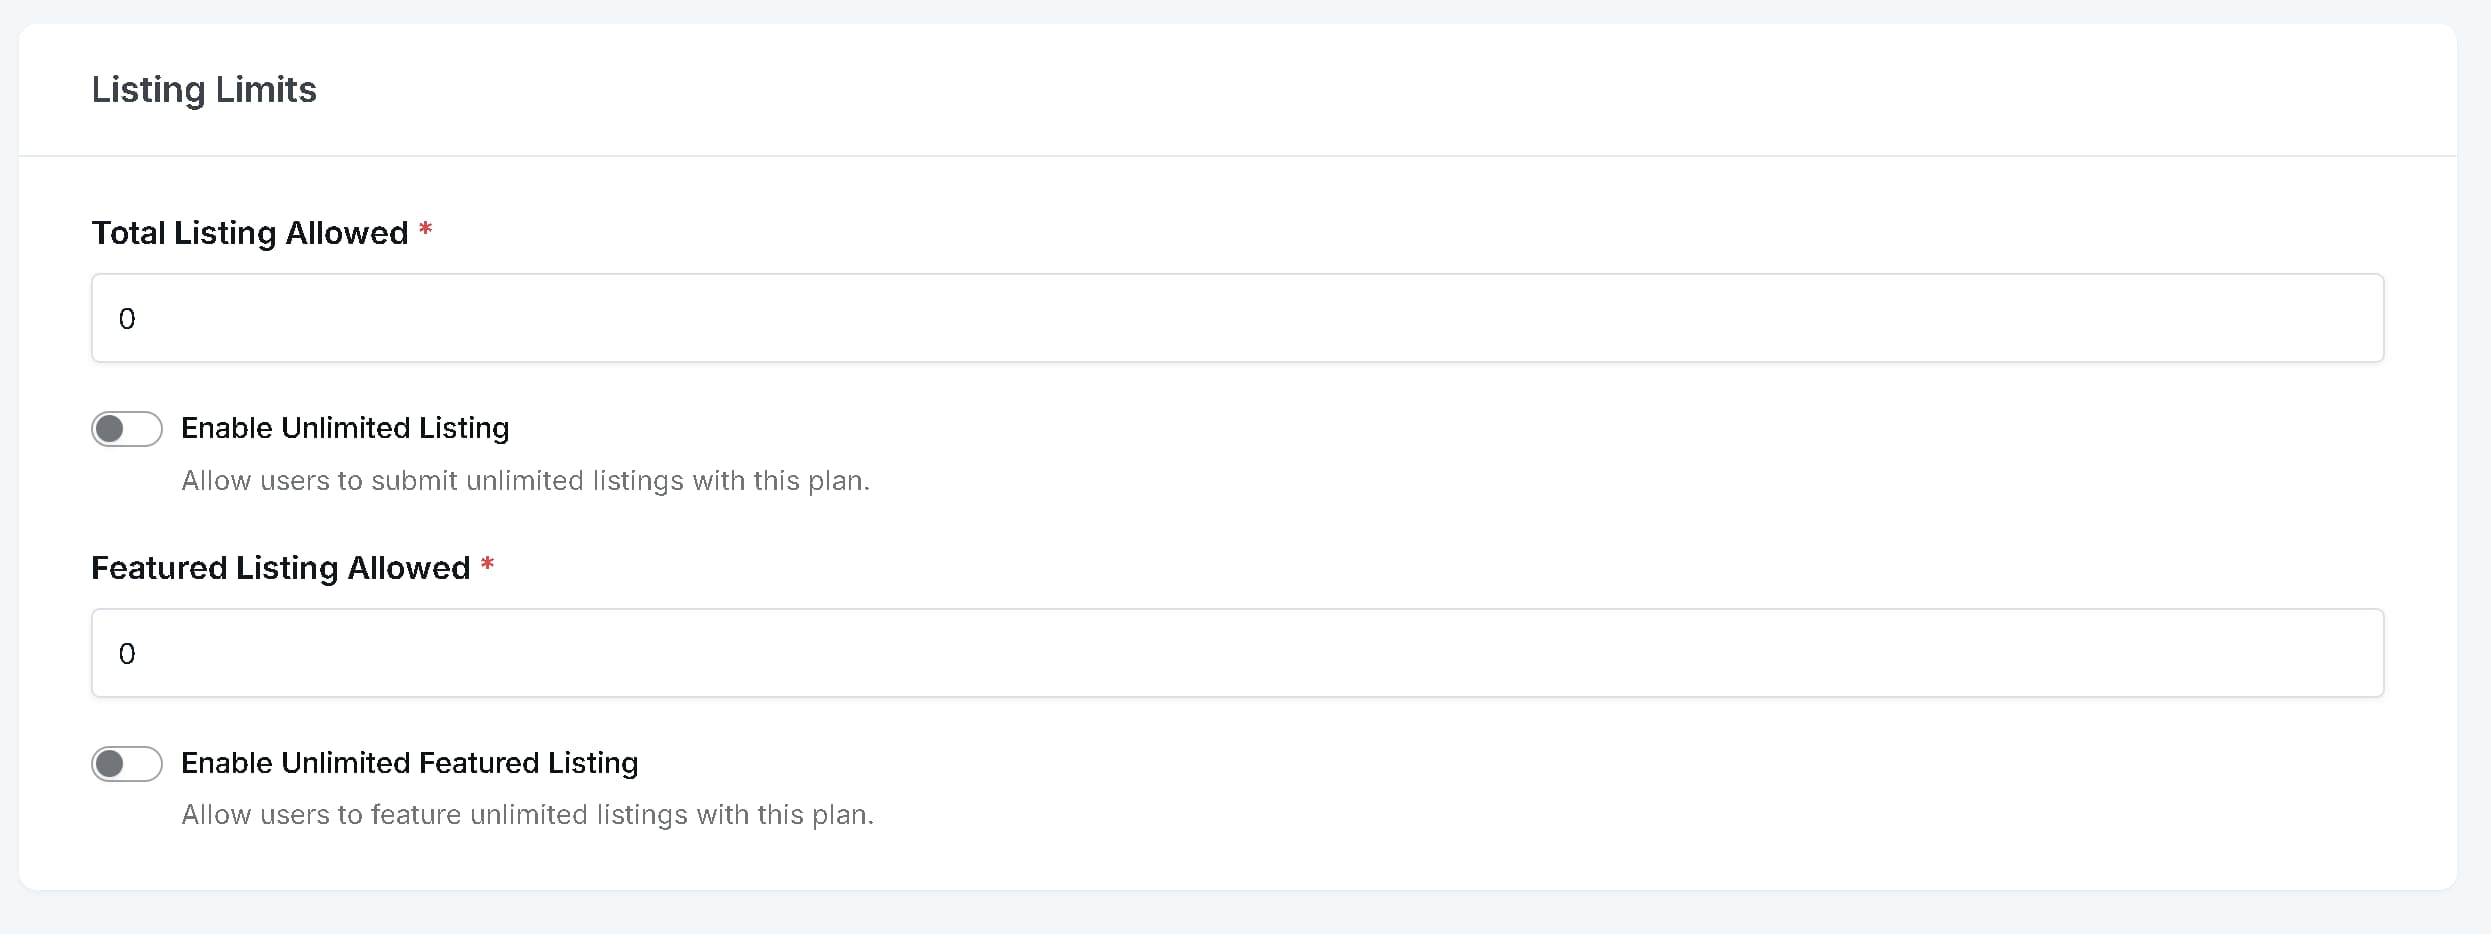
- Total Listings Allowed — Set the maximum number of listings a user can submit under this plan (e.g., 50).
- Featured Listings Allowed — Set how many of those listings can be featured (e.g., 10).
Both fields include an Enable Unlimited Listings toggle if you want to allow unrestricted submissions.
Pricing Configuration #
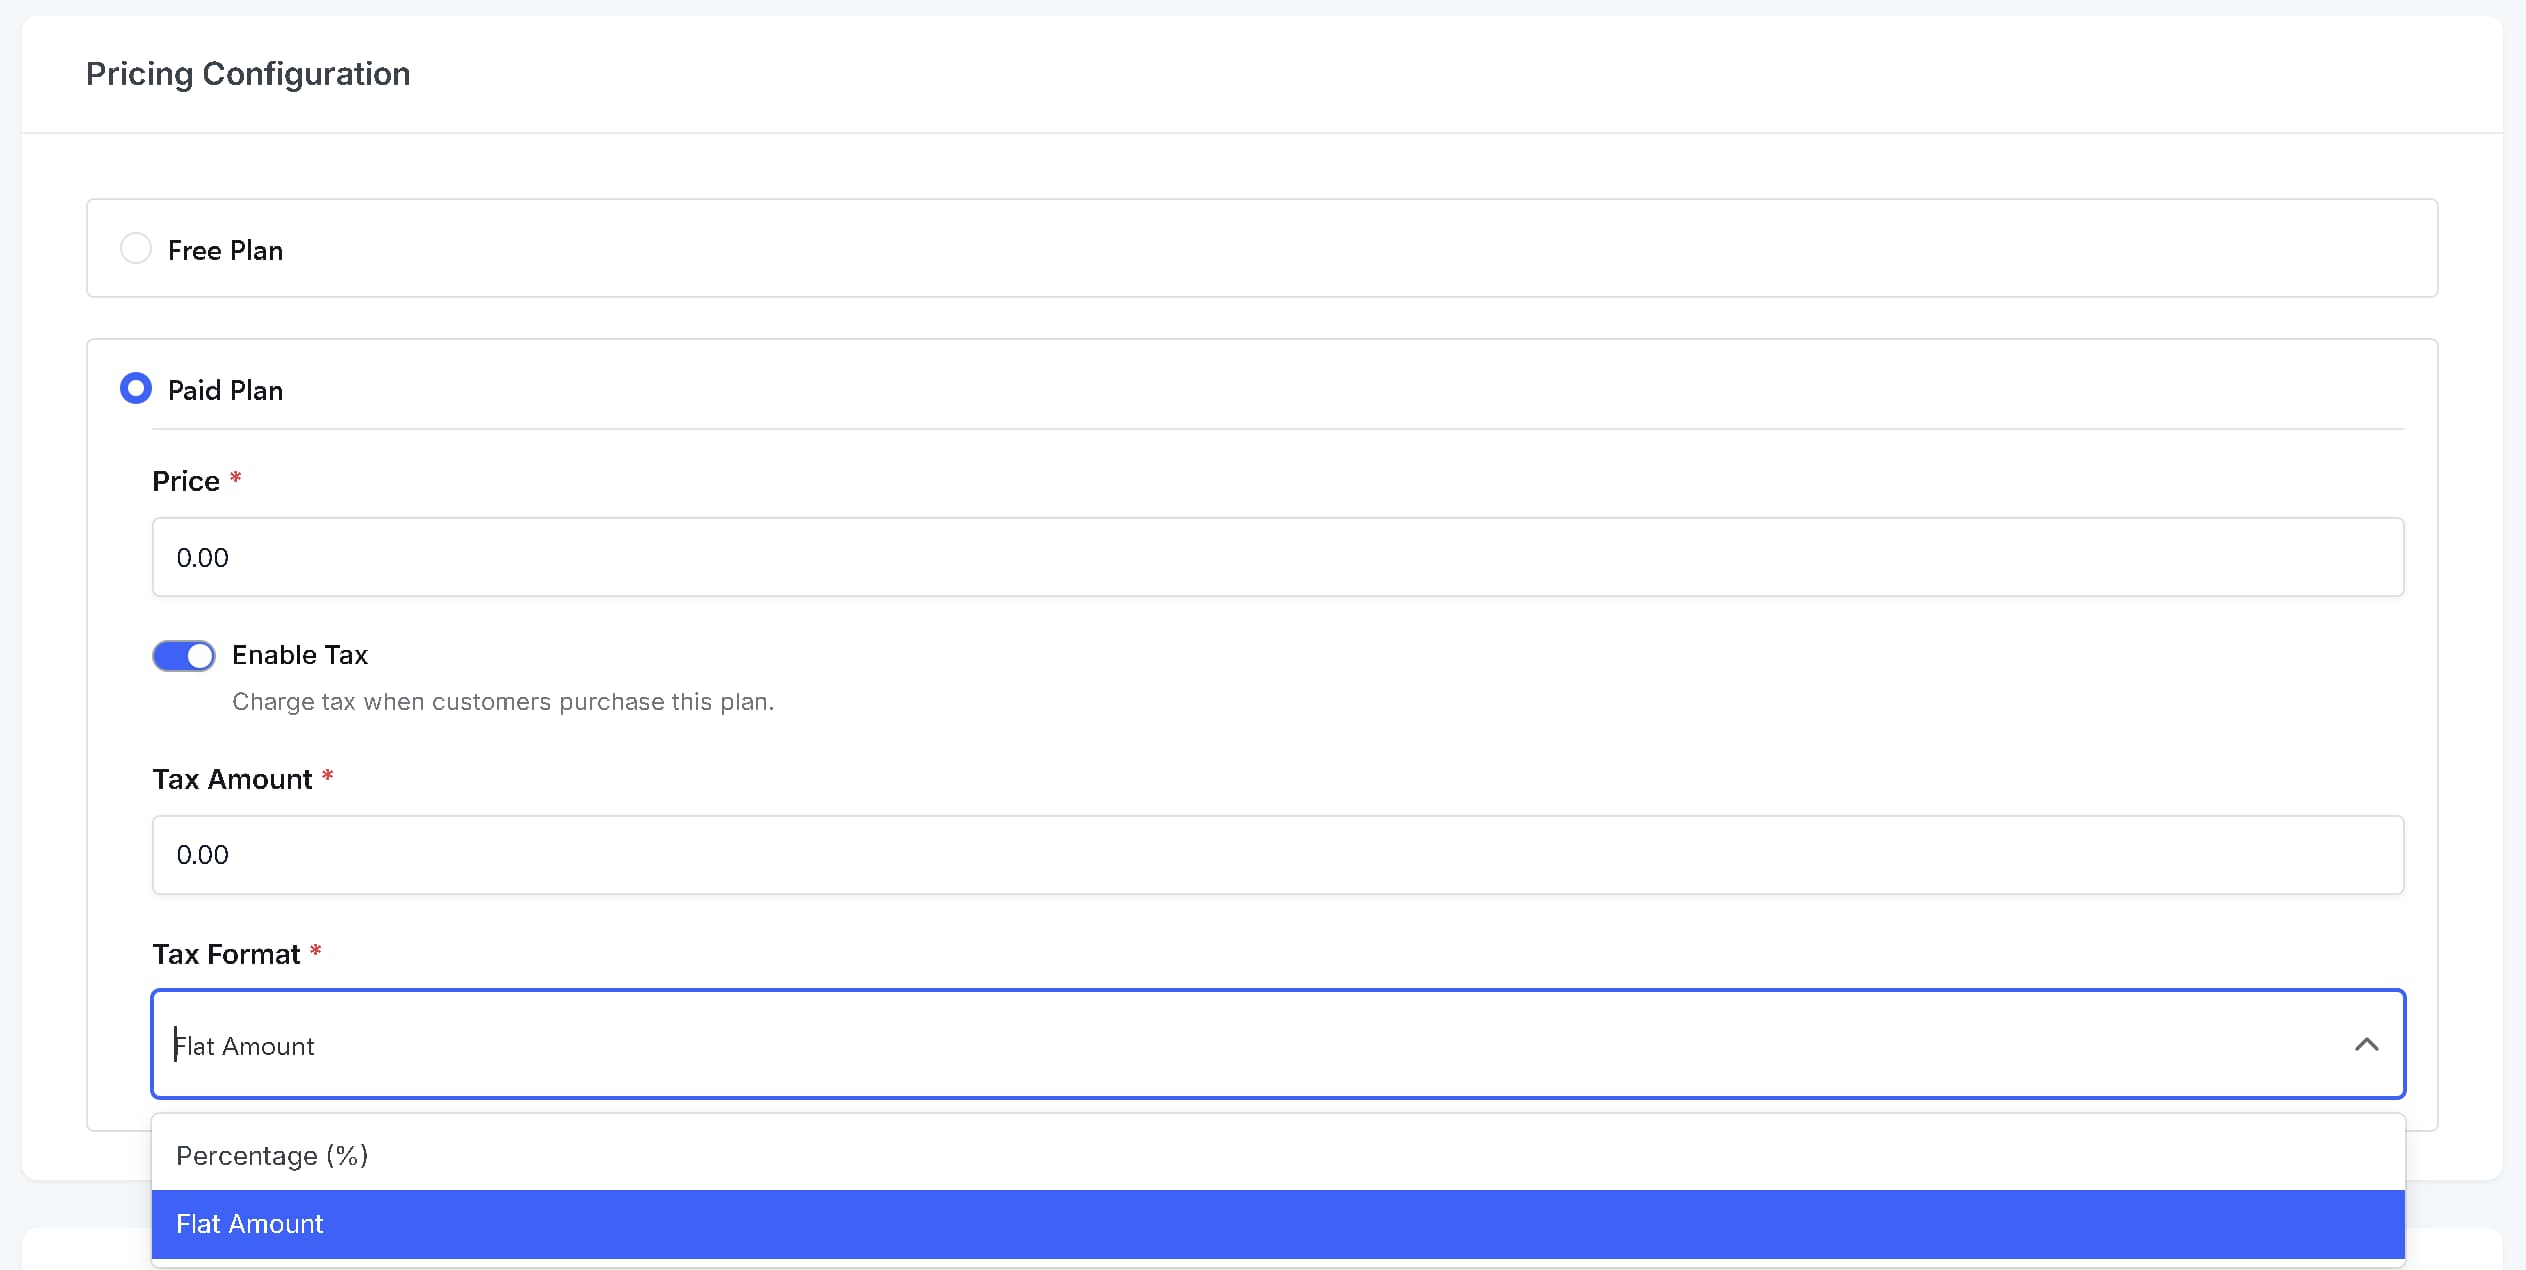
Choose between a Free Plan or a Paid Plan.
If you select Paid Plan, enter the plan price (e.g., 19.99).
You can also enable Tax to apply a tax on top of the plan price. When enabled, two additional fields will appear:
- Tax Amount — The value of the tax.
- Tax Format — Choose whether the tax is applied as a percentage or a fixed amount.
Duration & Subscription Settings #
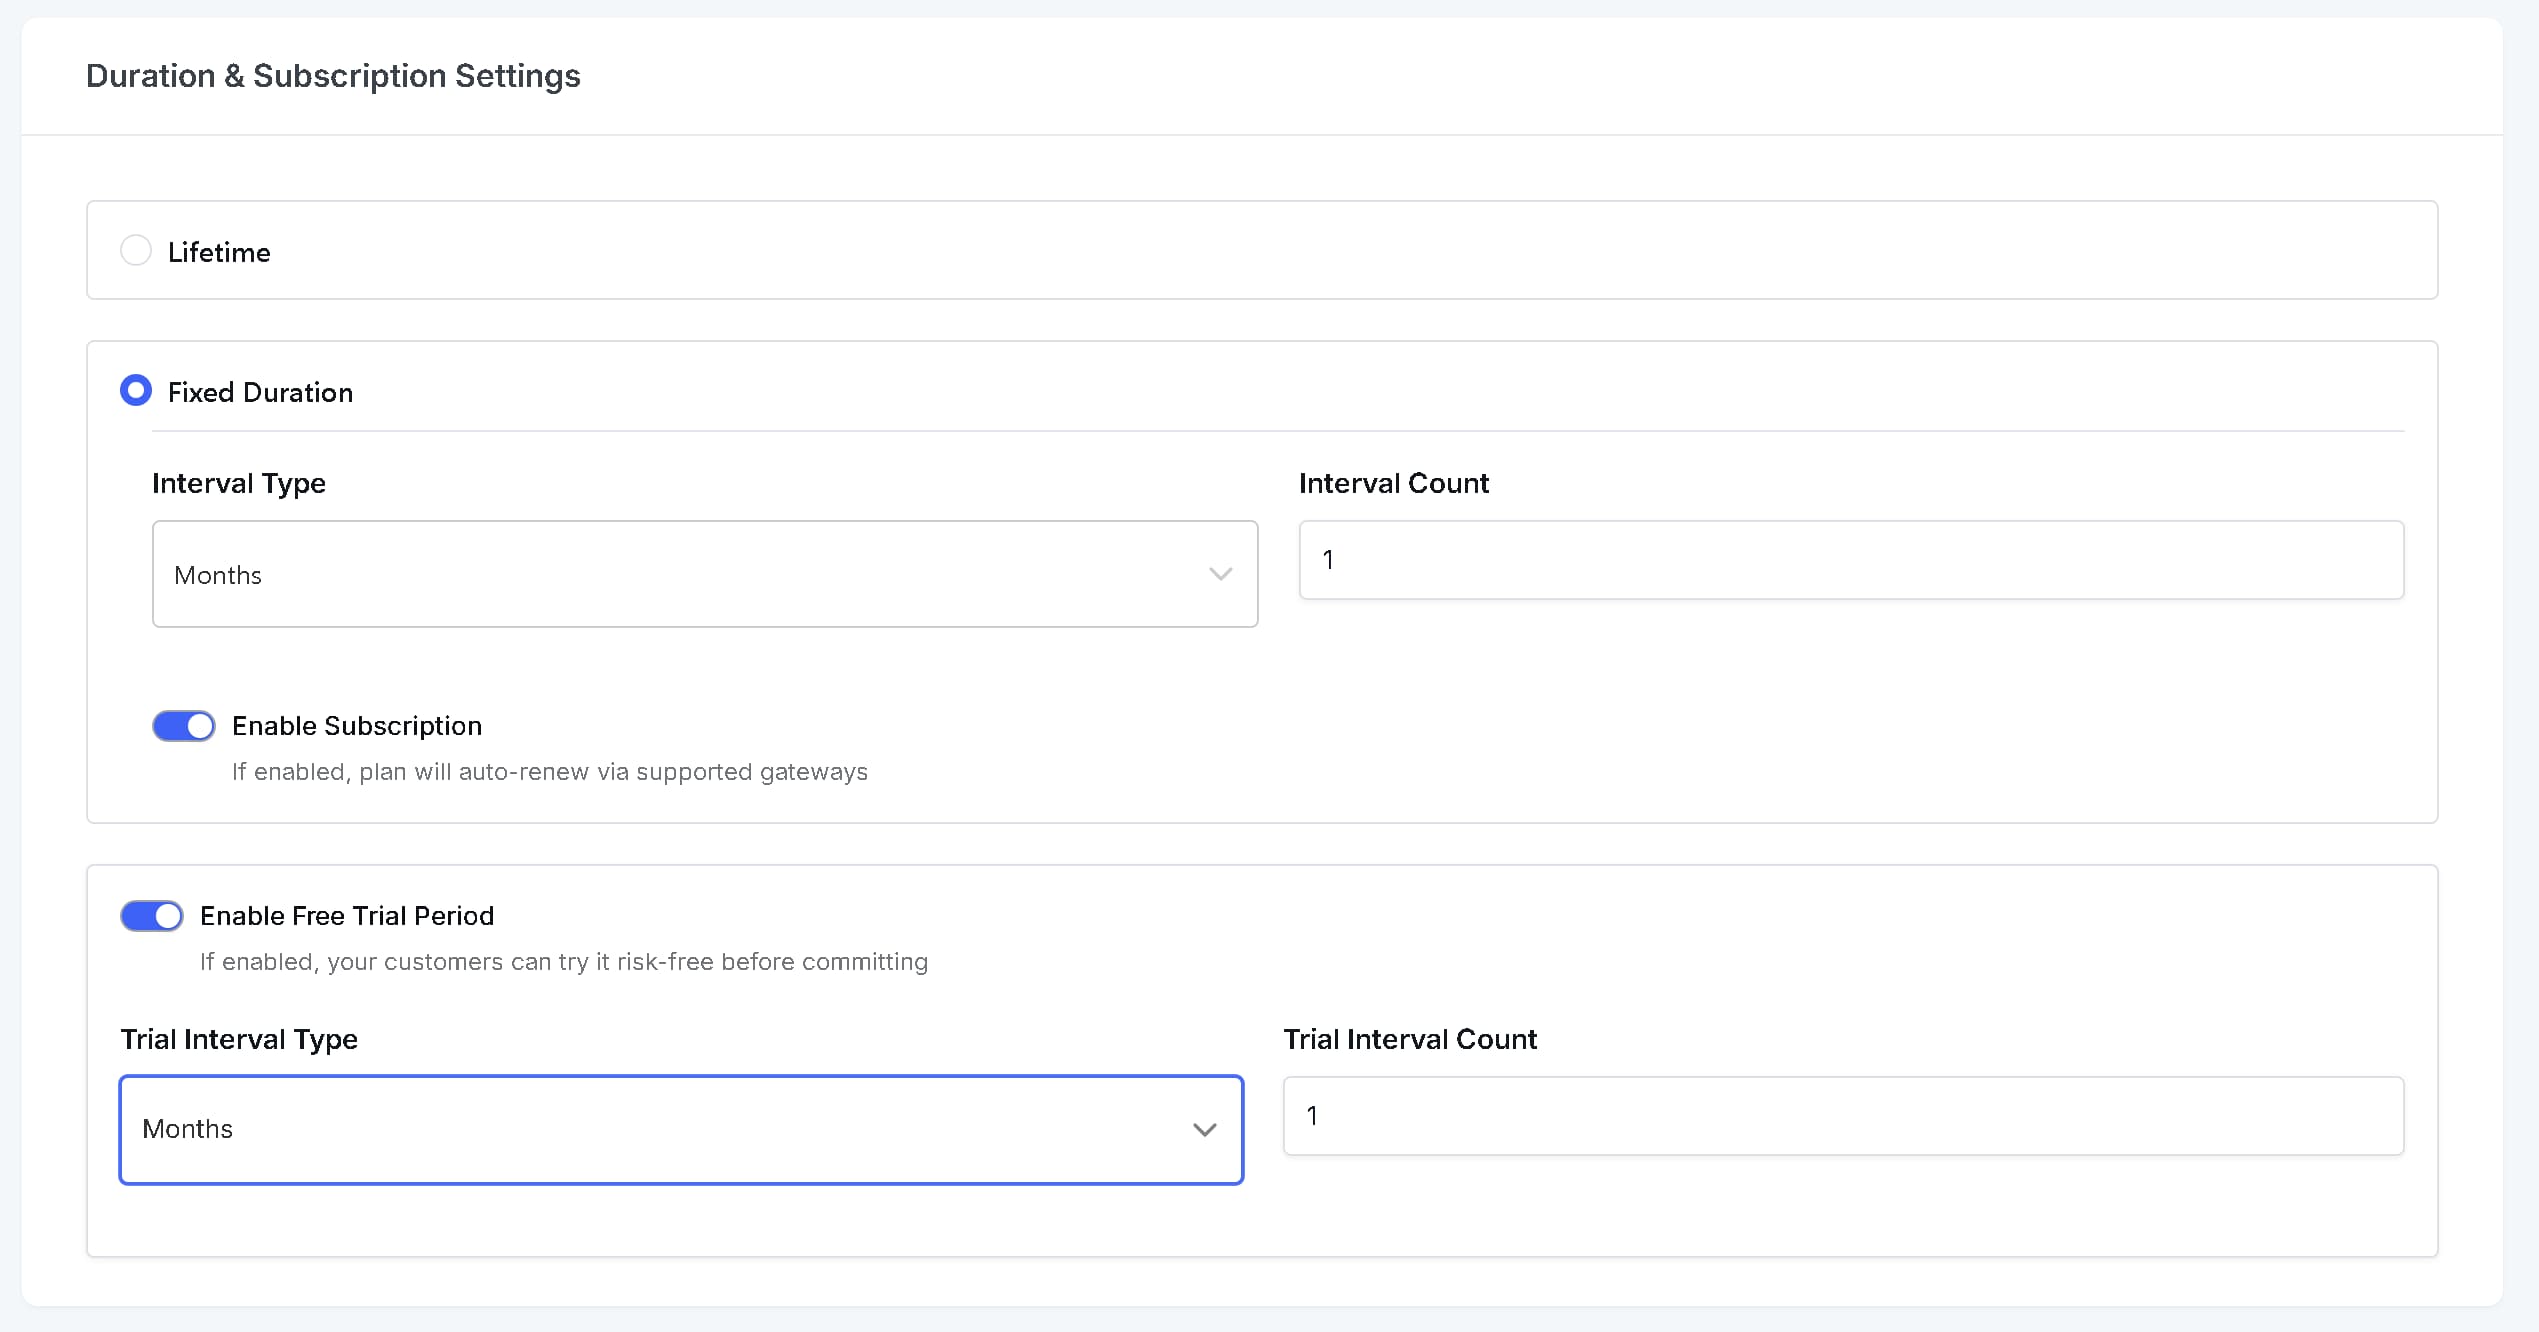
Choose between Lifetime or Fixed Duration for the plan.
If you select Fixed Duration, set the plan length in days, weeks, months, or years (e.g., 1 year).
You can then enable Subscription to allow recurring billing for this plan.
Optionally, enable Free Trial to offer a trial period before billing begins. Set the trial duration in days, weeks, months, or years (e.g., 3 days).
Sidebar Panels #

On the right-hand side of the editor, you will find the following panels:
Plan Status
- Publish — Toggle ON to make the plan live and visible to users.
- Hide From All Plans — Keep this OFF so the plan appears in your pricing table.
- Mark as Recommended — Enable this to highlight the plan as the recommended option for users.
Developer Snippets This panel automatically generates shortcodes and PHP snippets specific to this plan, which can be used for custom integrations.
App Configuration Connect your App Store or Play Store product IDs along with their pricing for mobile app integrations.
Once you have filled in all the details, click Save Changes.
Feature Configuration Tab #
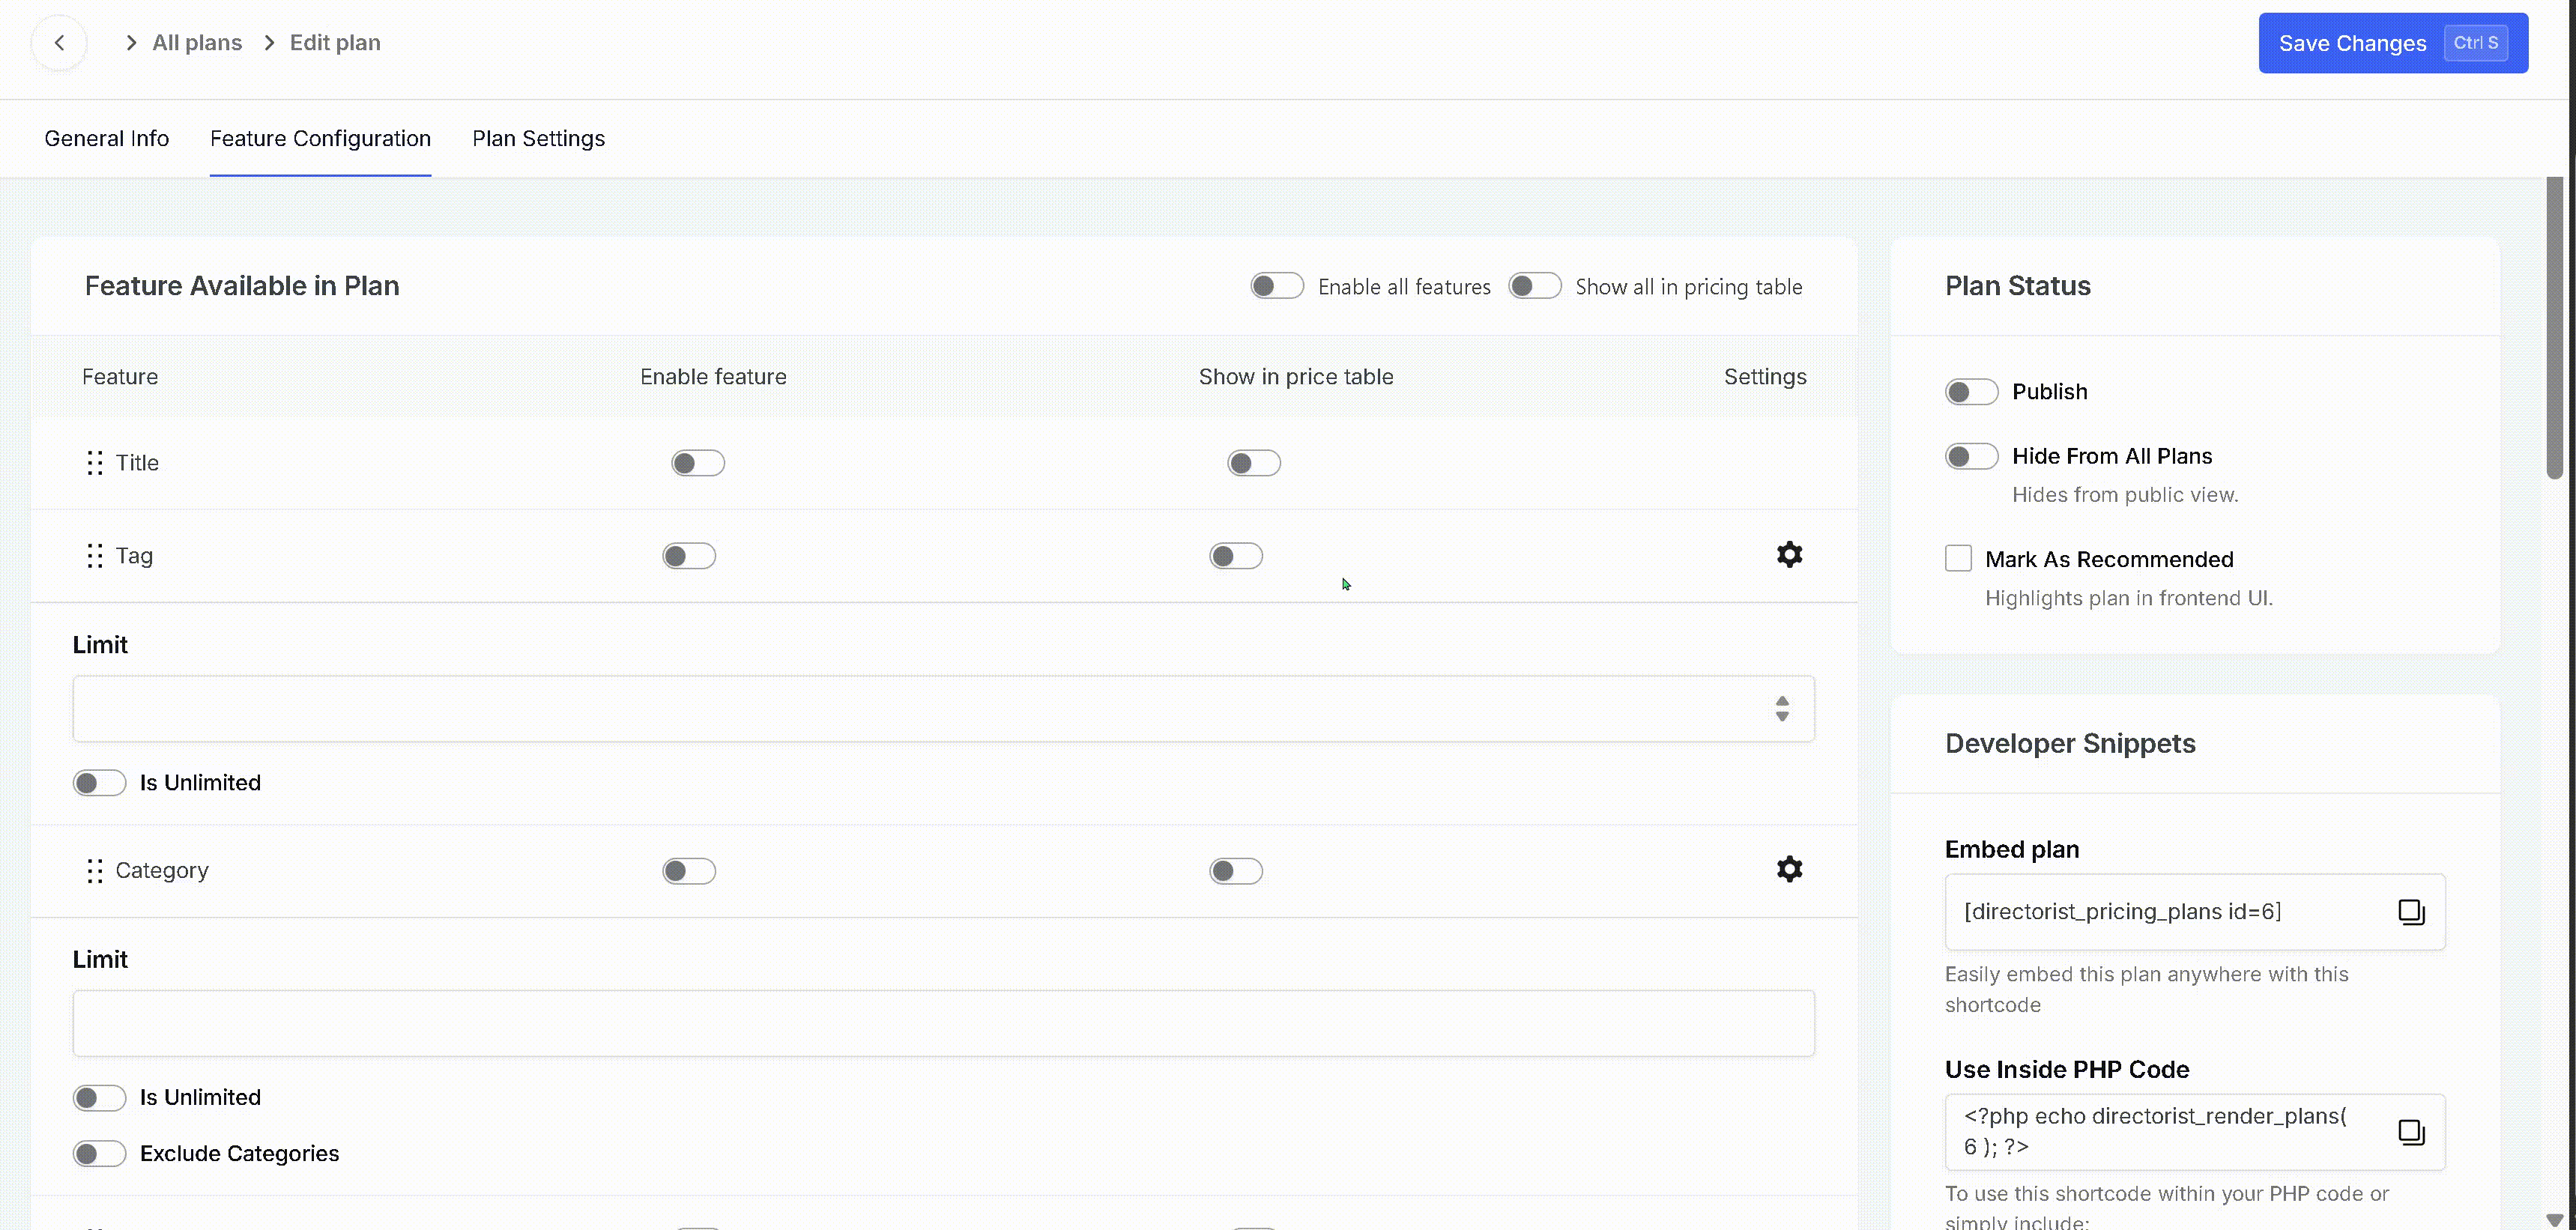
The Feature Configuration tab lets you control exactly which listing features are available under this plan.
Step 1 — Enable or Disable Features
Toggle individual features on or off based on what the plan includes. Available features include Maps, Videos, Contact, Reviews, Categories, Images, Social Links, Location, and more.
Step 2 — Set Feature Limits
For features that support limits (such as images or categories), set the maximum number allowed per listing.
Step 3 — Reorder Features
Drag and drop features to change the order in which they appear. You can also choose which features are shown in the public pricing comparison table, keeping it clean and easy for users to understand.
Once you have configured all features, click Save Changes.
Plan Settings Tab #
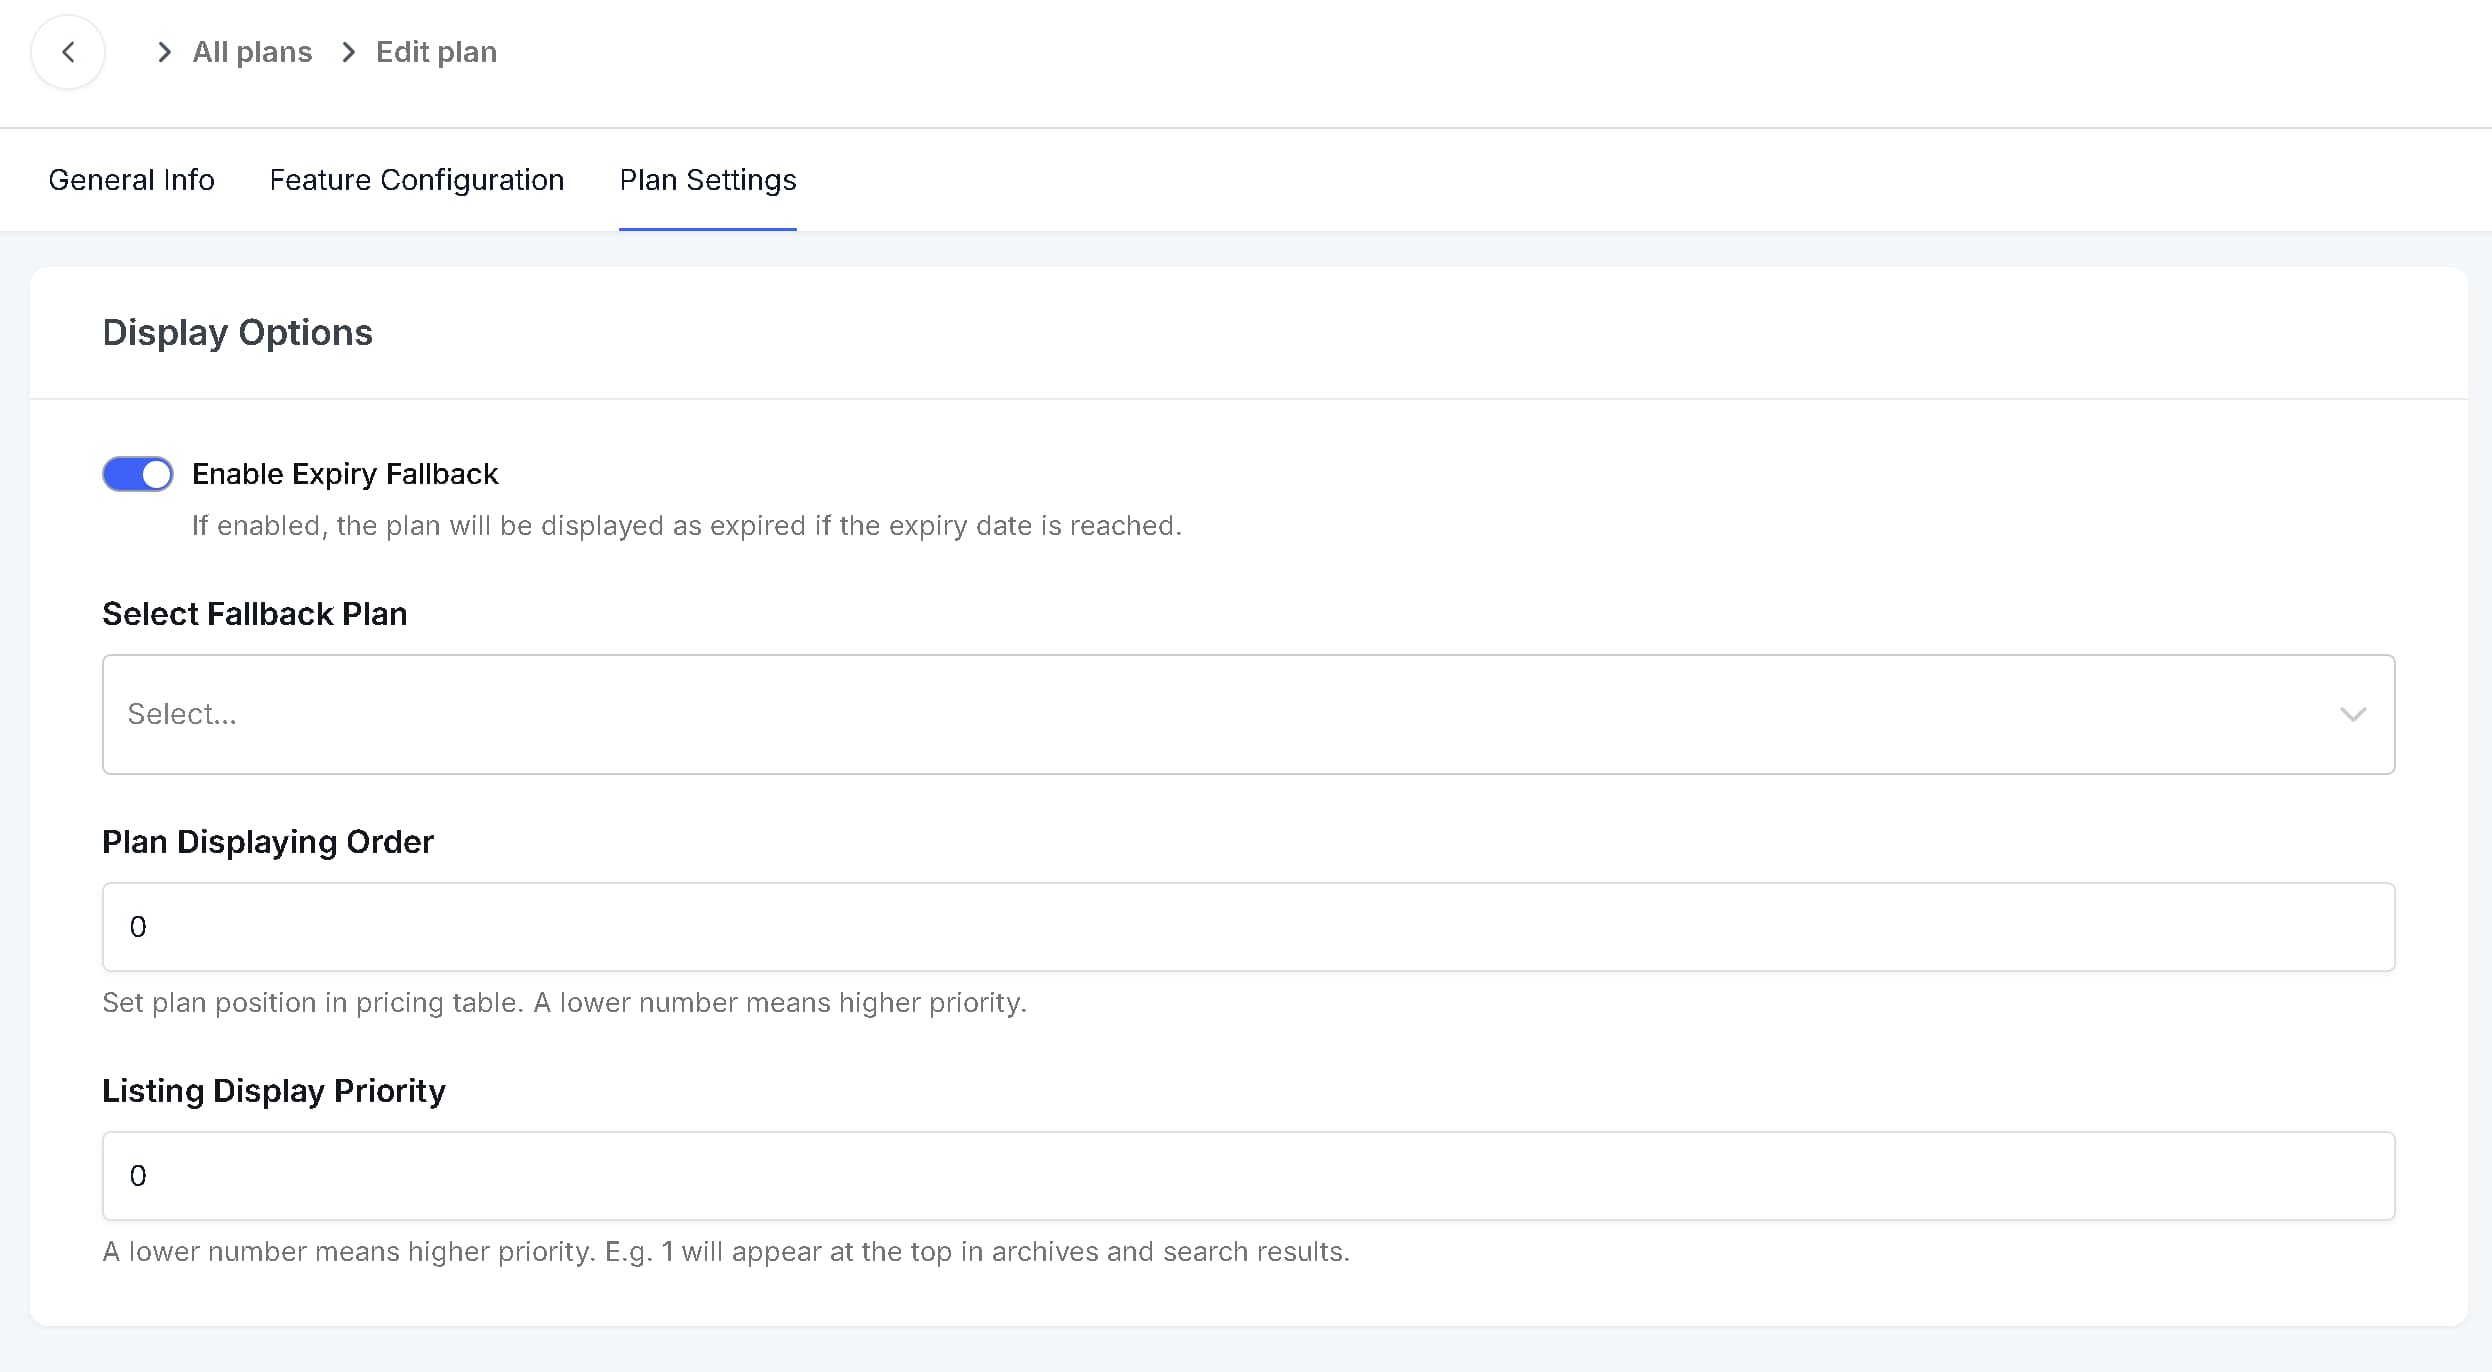
The Plan Settings tab defines how the plan behaves on your site.
Expiry Fallback
Enable Expiry Fallback to automatically move users to another plan when their current plan expires. Use the Select Fallback Plan dropdown to choose the replacement plan. Only free plans can be set as Expiry Fallback. Thus a free plan needs to be available to use this feature.
Plan Displaying Order
Control how prominently listings under this plan appear in search and archive results. Lower values give higher priority — for example, if a listing belongs to a plan whose listing display priority is 0 will appear first.
Listing Display Priority
Control how prominently listings under this plan appear in search and archive results. Lower values give higher priority — for example, listings with a value of 0 will appear first.
Once you are done, click Save Changes.
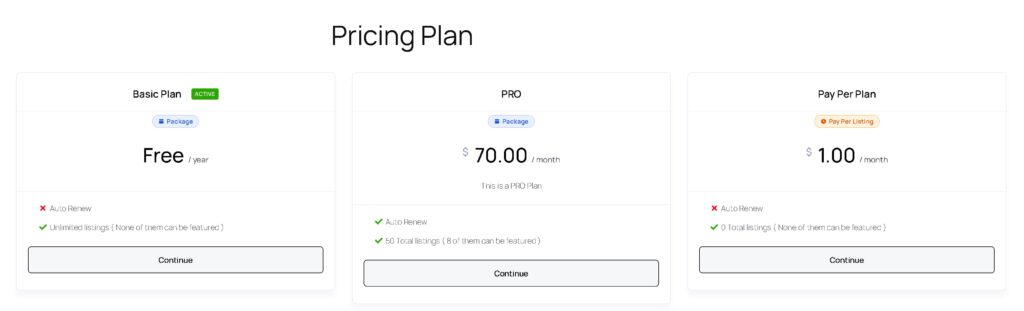
Displaying Pricing Plans on the Frontend #
After creating your plans, you need to display them on a page so users can browse and select a plan before submitting a listing.
Step 1 — Copy the Shortcode
Directorist automatically provides a pricing plans shortcode when the extension is activated:
[directorist_pricing_plans]Step 2 — Create a New Page
Go to WordPress Dashboard → Pages → Add New Page.
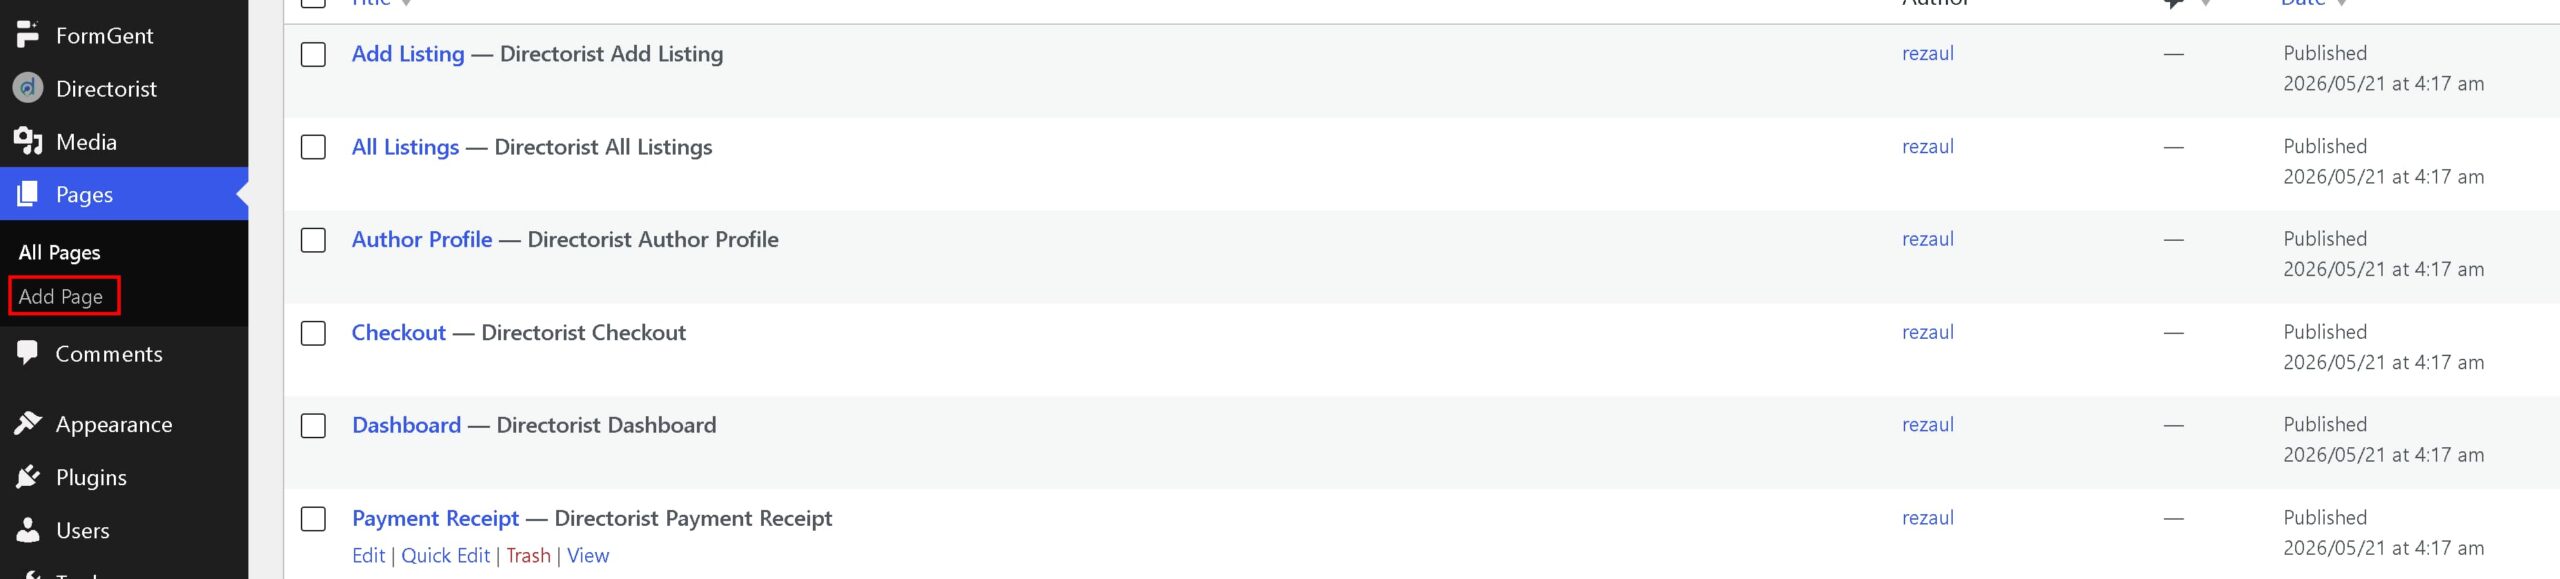
Set the page title (e.g., “Select Your Plan”), add a Shortcode block, and paste the shortcode inside it. Then publish the page.
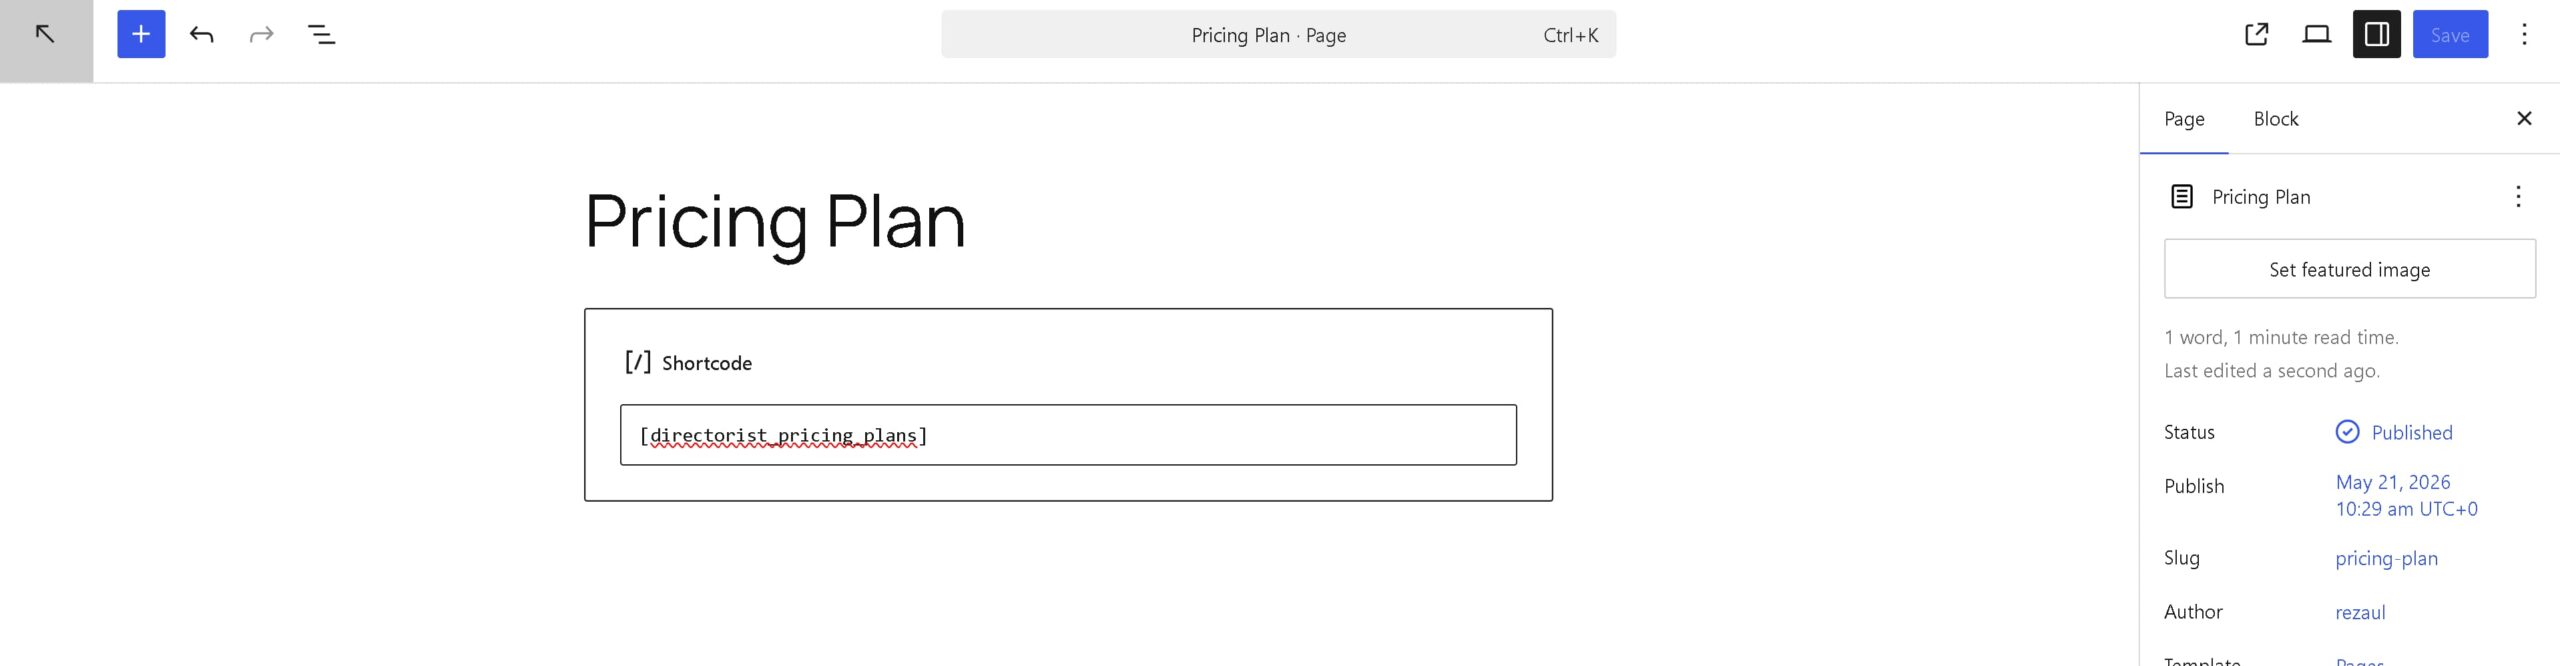
After publishing, open the page in the frontend to confirm all your plans are displayed correctly.
Step 3 — Assign the Page in Directorist Settings
Go to Directorist → Settings → Page Setup → Pricing Plans Page.
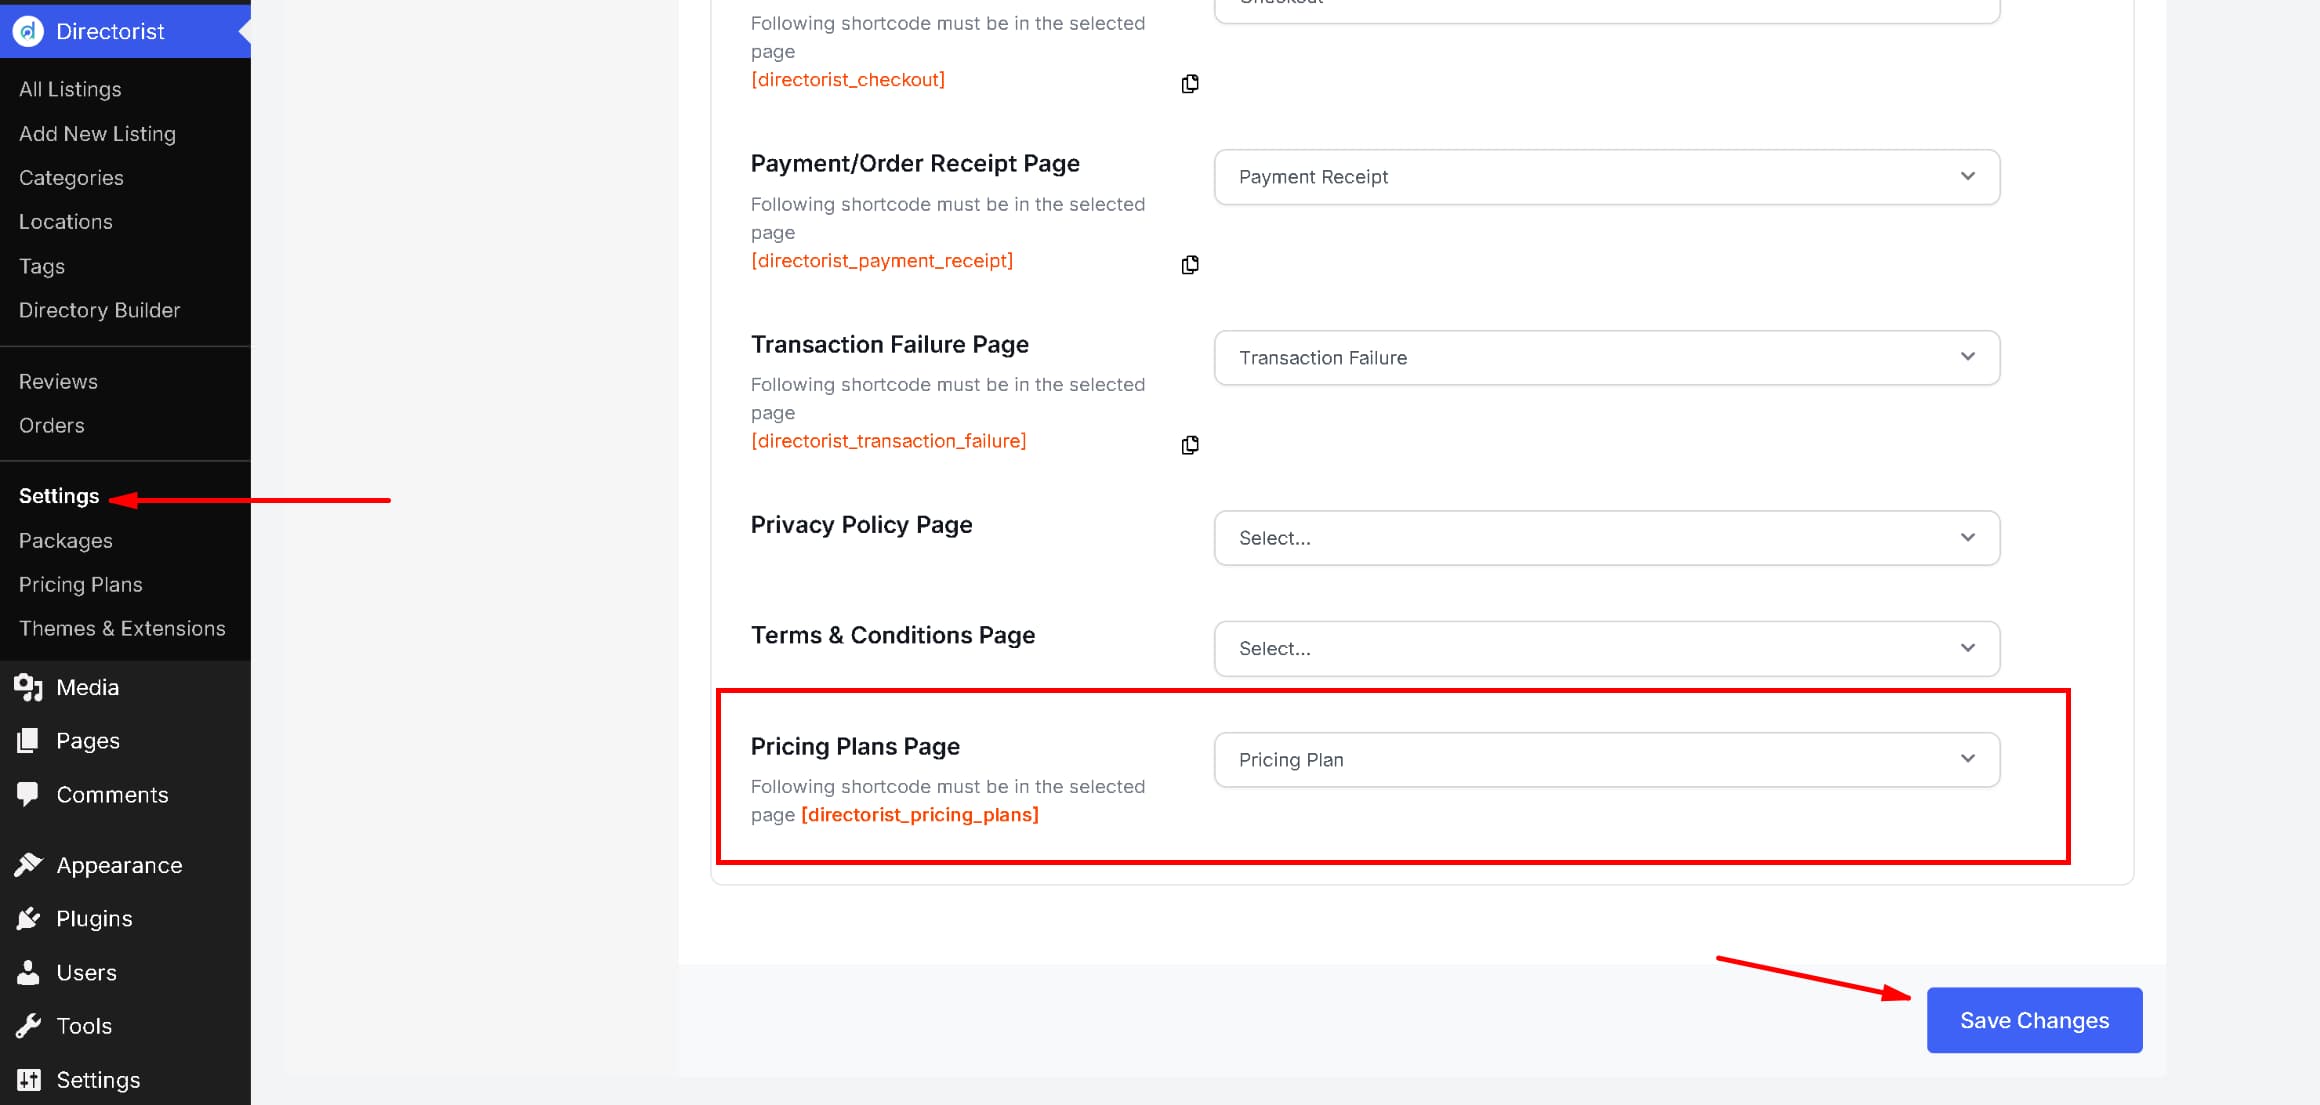
Select the page you just created from the dropdown, then click Save Changes.
Also verify that the Checkout Page, Order Receipt Page, and Payment Failure Page are correctly assigned. These are usually configured automatically, but it is a good practice to confirm before going live.
Listing Submission Workflow #
Before testing the submission process, make sure the Listing Type field is added to your Add Listing form.
Step 1 — Add the Listing Type Field
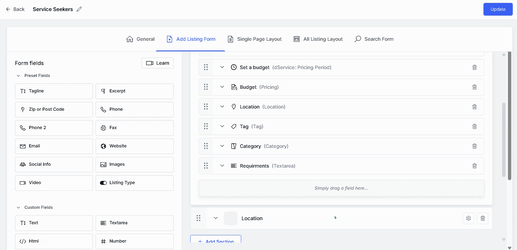
Go to Directorist → Directory Builder and open your directory by clicking Edit.
Inside the Add Listing Form section, locate the “Listing Type” field from the left panel and drag it to your preferred position on the form layout. Click Update to save.
Step 2 — Submit a Listing as a User
On the frontend, click Add Listing and select your directory (e.g., Restaurant).
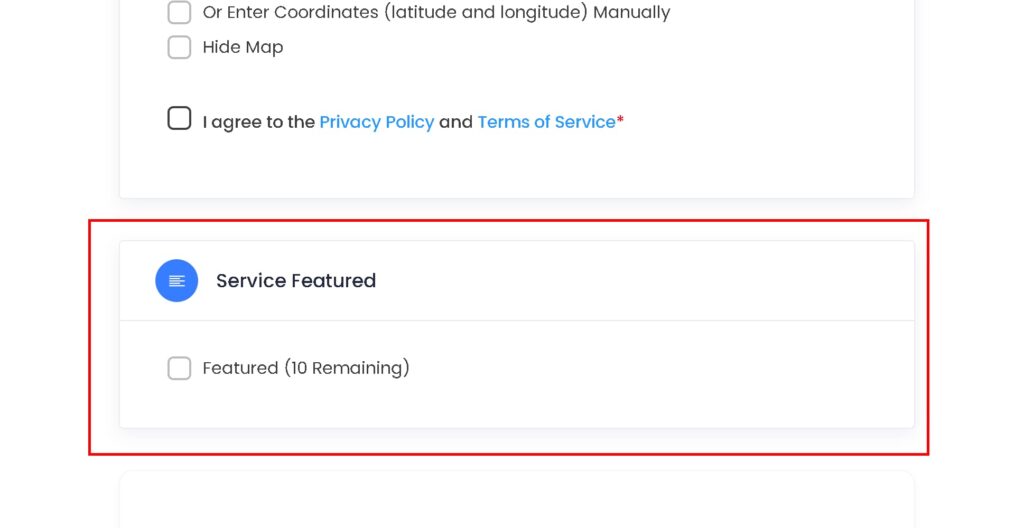
Select a pricing plan and click Continue to open the listing form. On the form, you will see the listing type selector and the remaining quota details for the selected plan.
Step 3 — Complete and Submit the Form
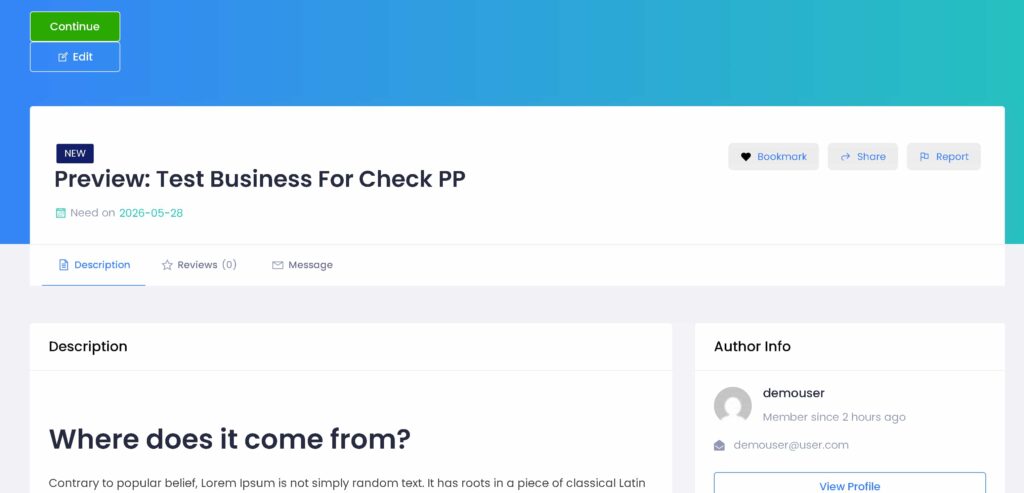
Select a listing type and fill out the form. When done, click Save & Preview to review your submission. Make any edits if needed.
Step 4 — Proceed to Checkout
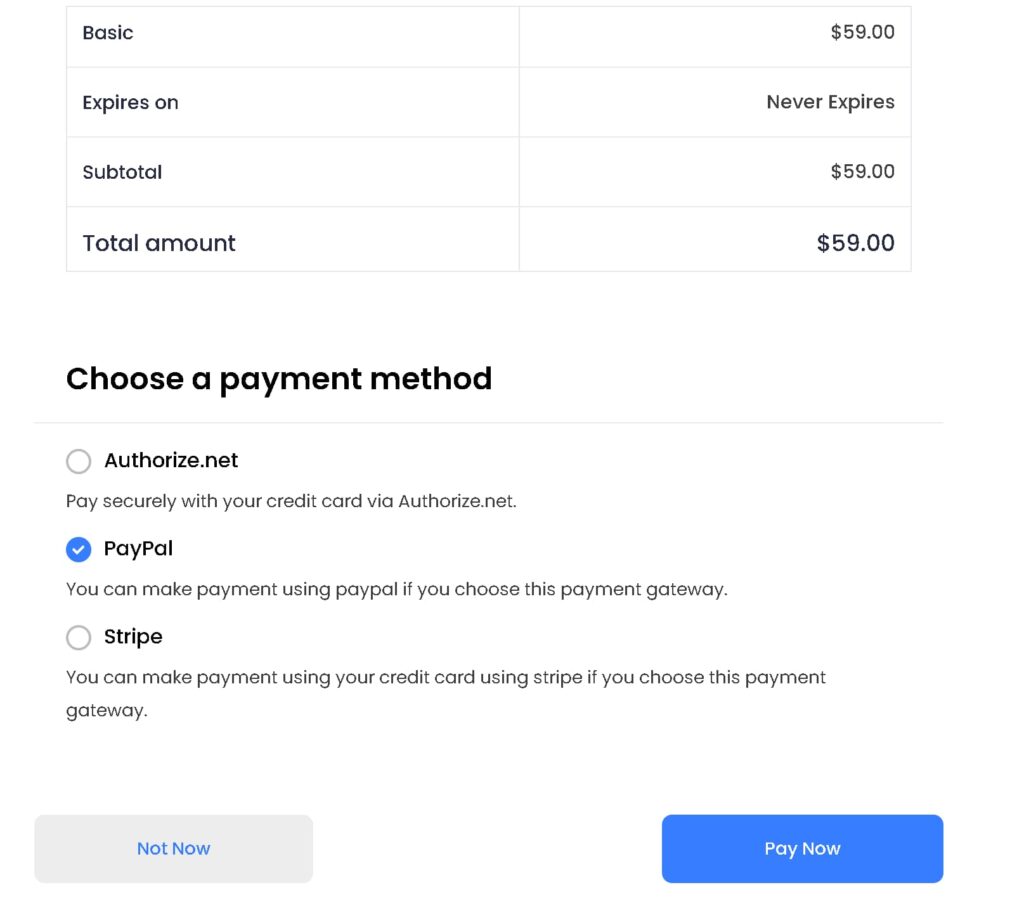
Click Continue to Publish. You will be taken to the checkout page, where the selected plan and payment details are displayed. Complete the payment using your preferred method.
Step 5 — Publish the Listing
After a successful order, go to Directorist → All Listings and locate the new submission. Before publishing, check Order History in the Directorist dashboard to review the order status, plan details, and subscription information. Update the order status if needed, then publish the listing.
Step 6 — Verify on the User Dashboard
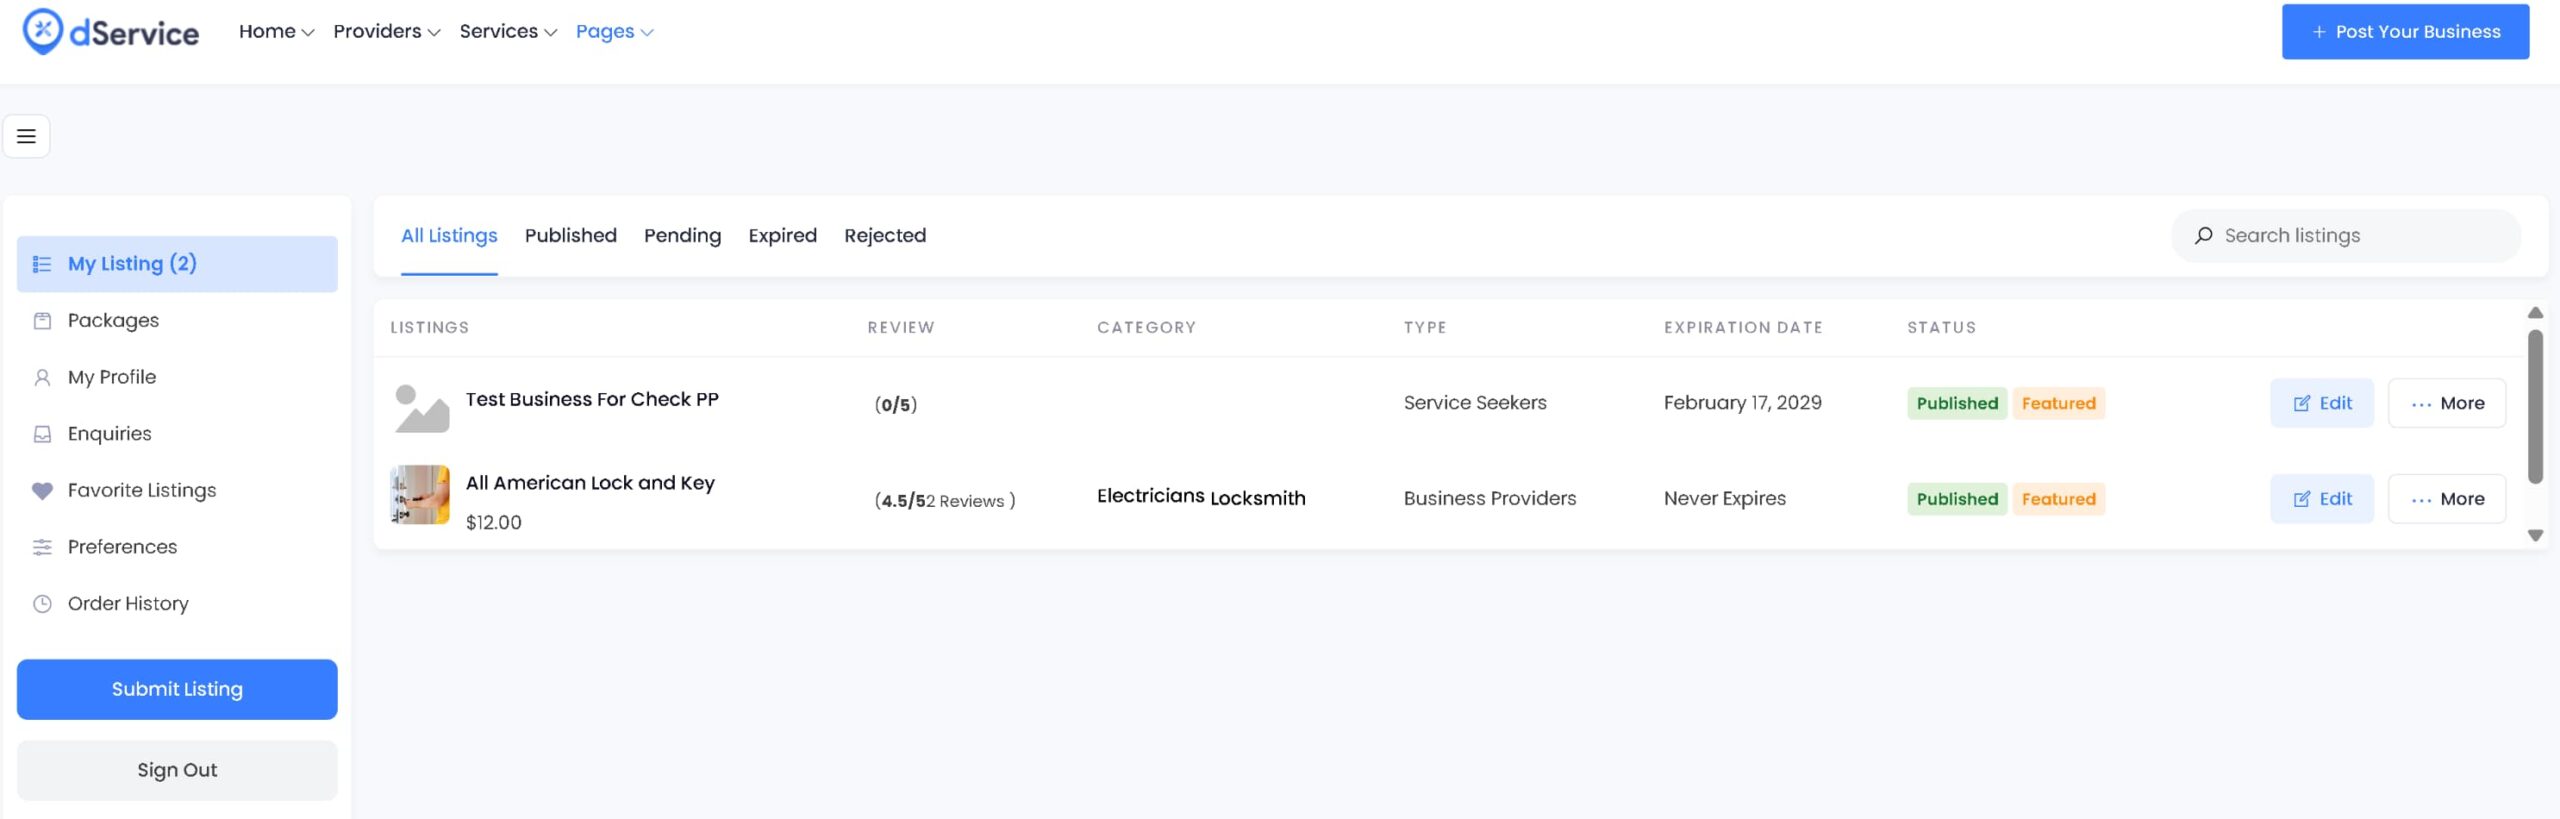
On the frontend, open the customer dashboard. Confirm that the listing is live and that the user’s active package is correctly displayed.
Plan Switching #
Each user can have only one active plan at a time. However, users can switch plans at any time from their dashboard.
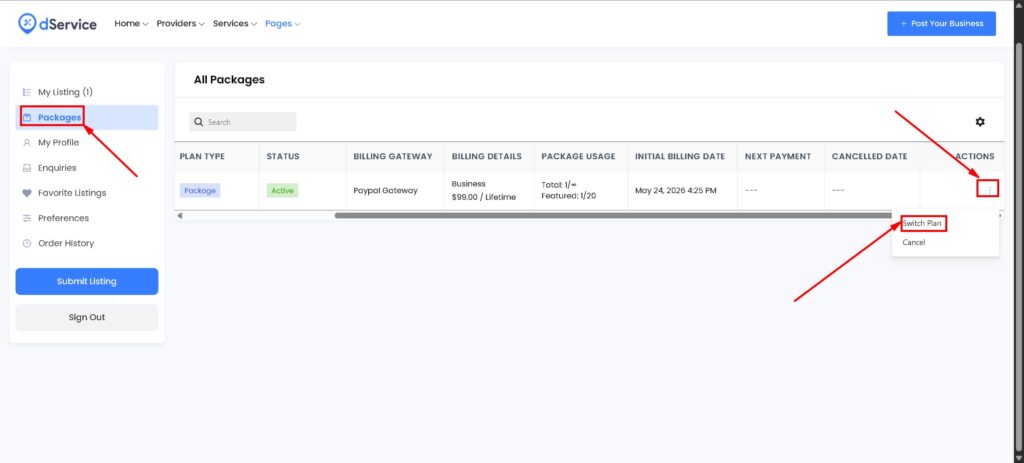
How a User Switches Plans
- The user logs in and goes to their dashboard.
- Navigate to Packages and open the Actions dropdown for the current plan.
- Select Switch Plan to change the plan immediately, or Cancel at Period End to end the current plan at its expiry date.
- In the Switch Plan pop-up, the user selects a new plan and clicks Switch Plan.
- The user is redirected to the payment page for the new plan. Click Pay Now to complete the switch.
Bank Transfer Orders (Manual Approval)
If the payment is made via bank transfer, the order requires manual approval by the admin.
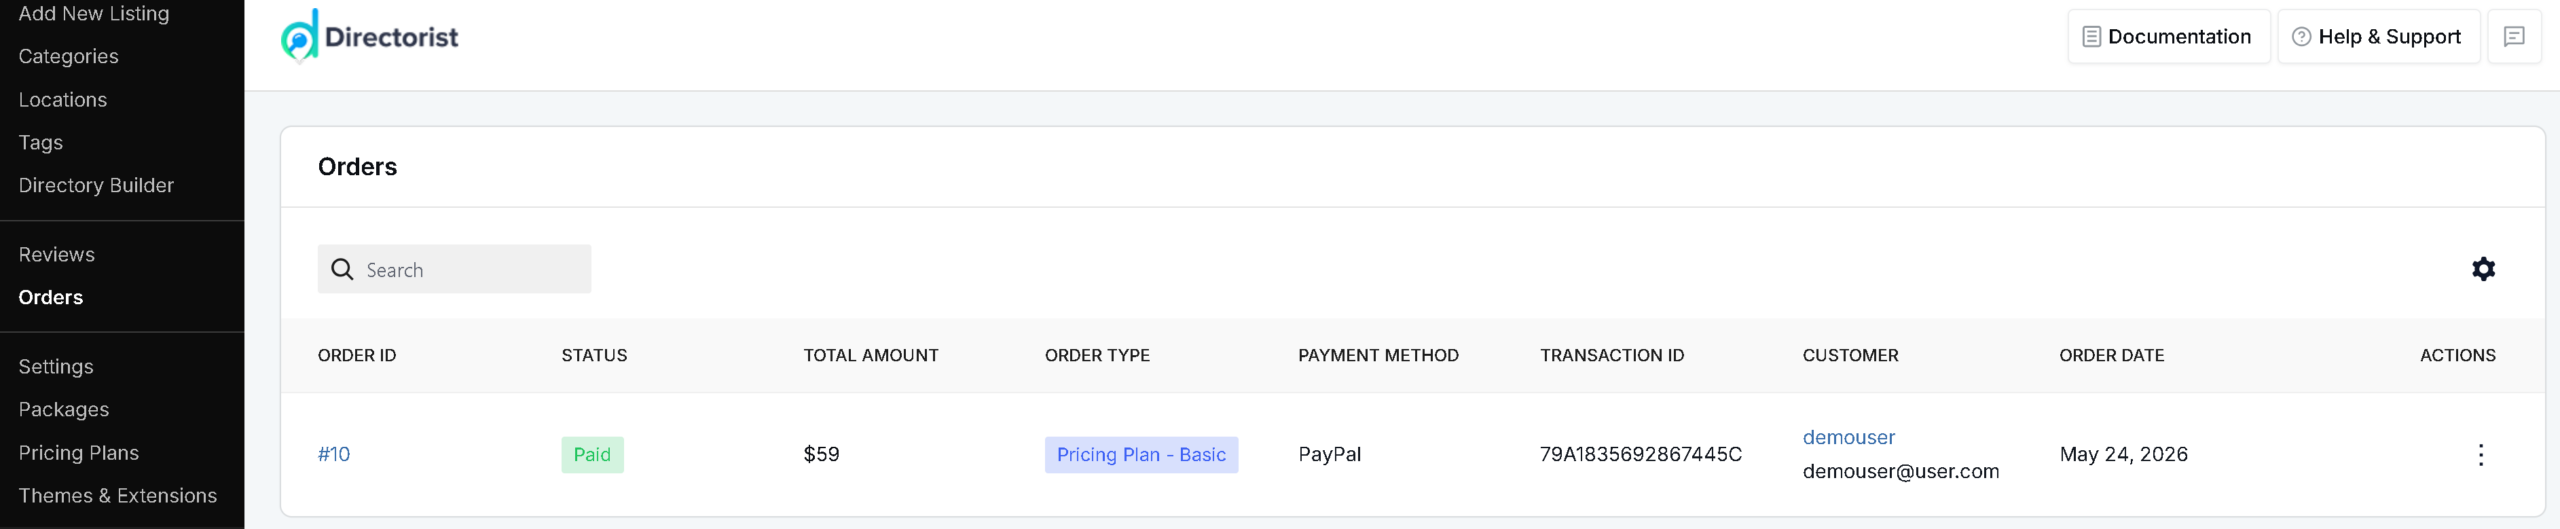
- Go to WordPress Dashboard → Directorist → Orders.
- Find the relevant order and change its status from Pending to Paid.
- Click Save Order.
The user can then return to Packages to verify the updated order and plan status.
Refund Management #
Directorist includes a built-in manual refund system that allows you to issue full or partial refunds for any order.
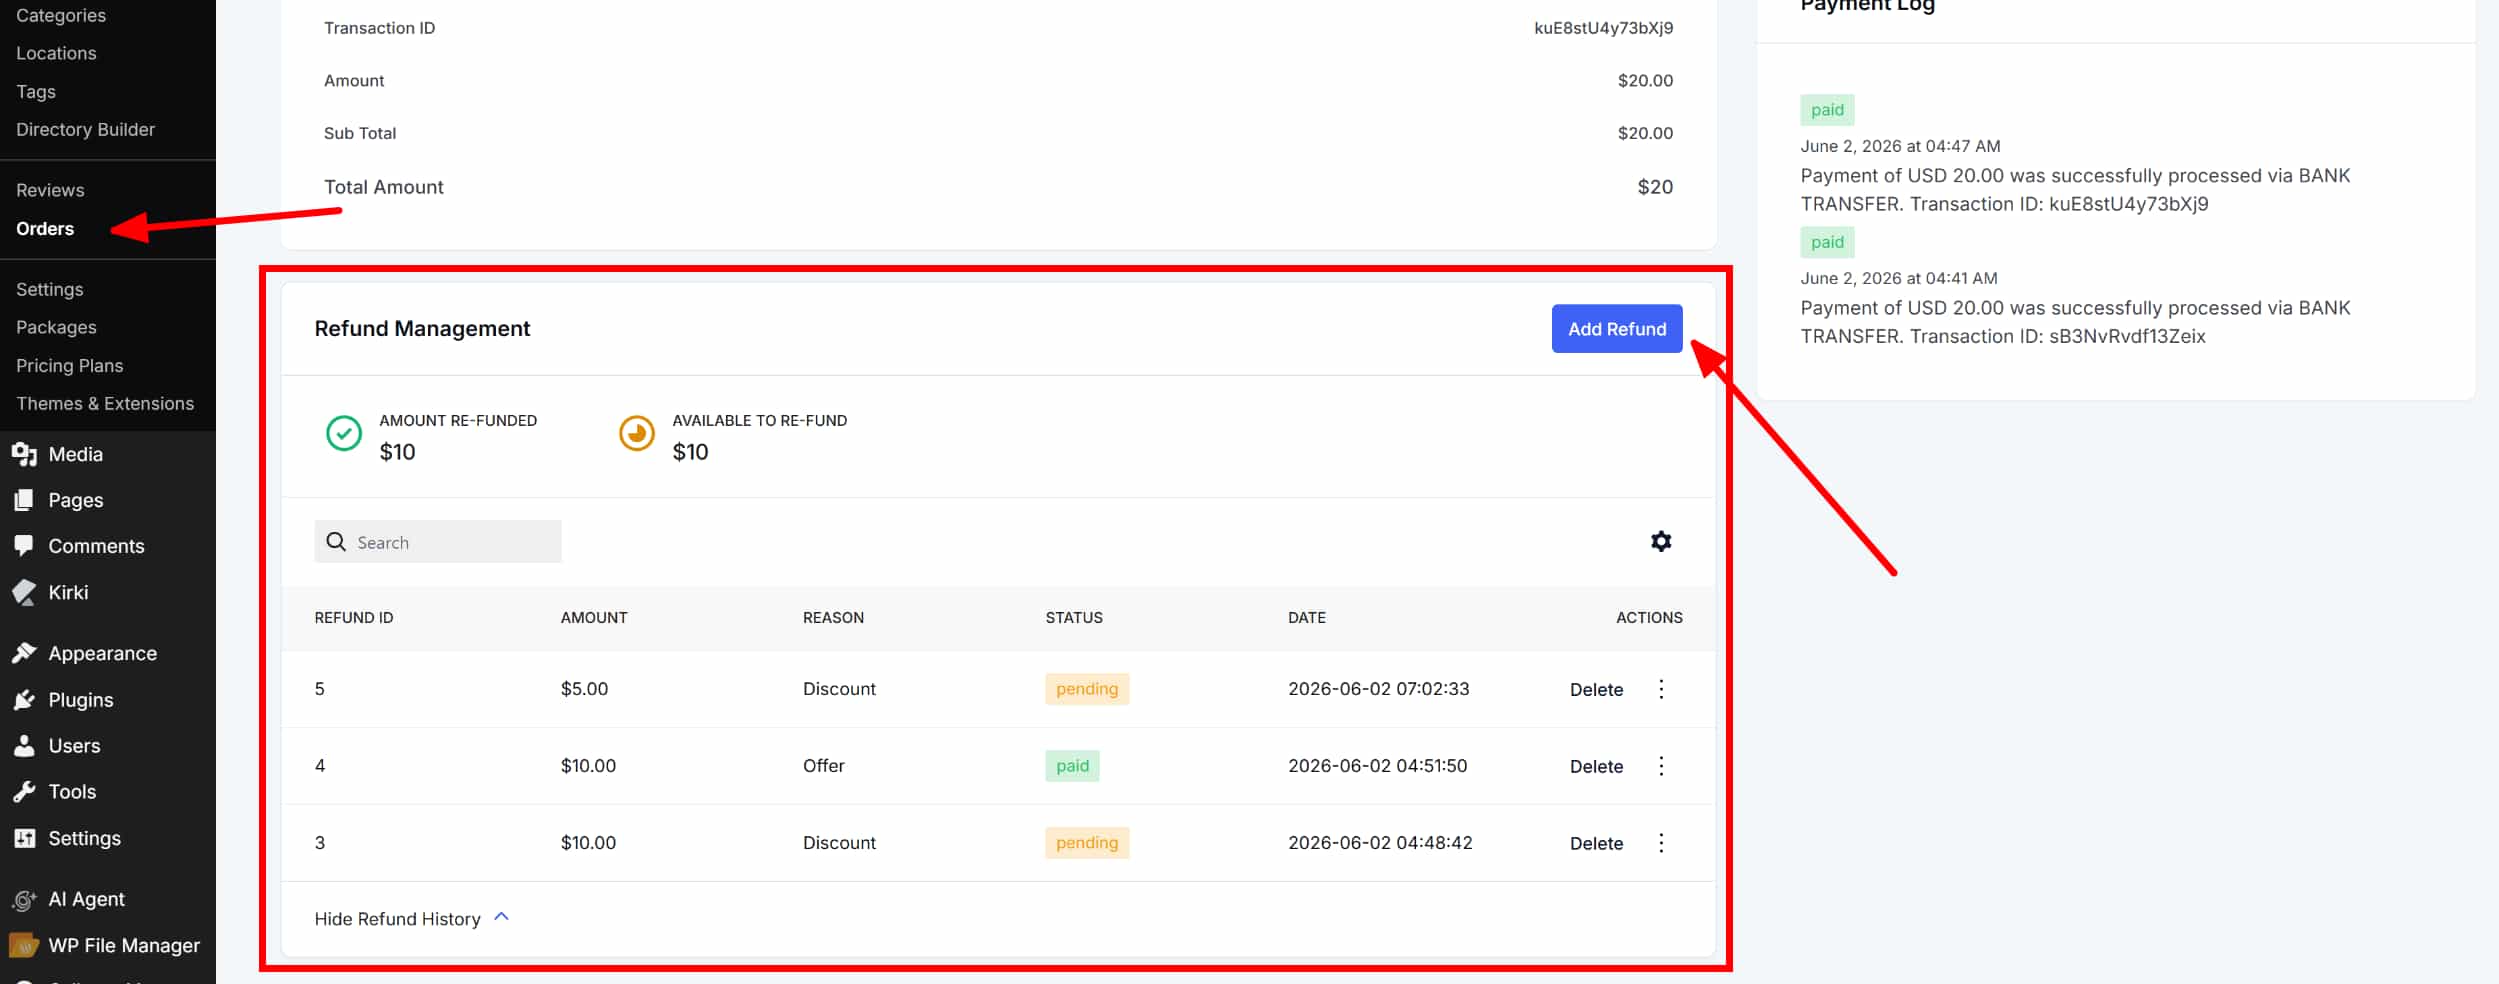
Step 1 — Open the Order
Go to WordPress Dashboard → Directorist → Orders and open the order you want to refund.
Step 2 — Add a Refund
Switch to the Refund Management tab and click Add Refund. A pop-up window will appear.
Step 3 — Enter Refund Details
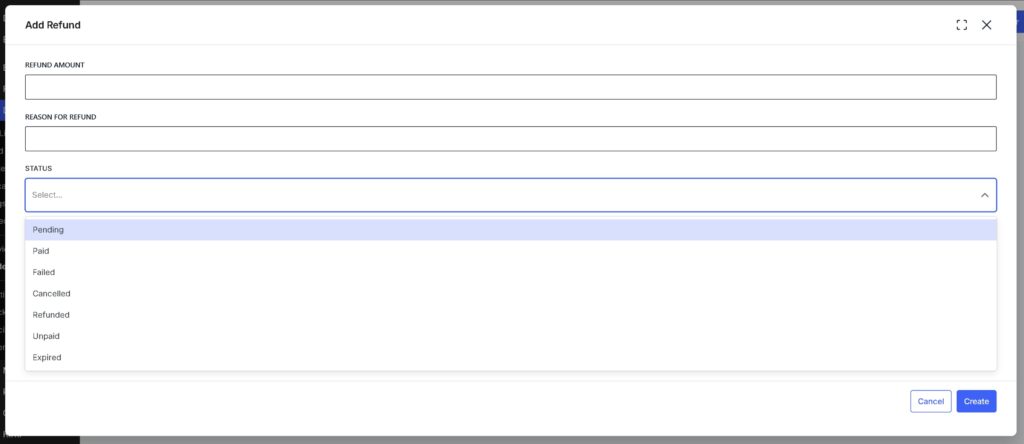
In the pop-up, enter the following:
- Refund Amount — The amount to refund. This can be the full order total or a partial amount.
- Reason for Refund — A brief explanation for the refund.
- Status — Set the status to Paid to confirm the refund.
Click Save to process the refund.
Refund Behavior
- Full Refund — The plan is canceled immediately.
- Partial Refund — The plan may continue or be terminated after the final refund, depending on the site owner’s policy.
Note that currently only offline/manual refunds are supported — meaning you process the actual money return through your payment provider separately, and record it here for tracking purposes. A full refund cancels the plan immediately. A partial refund leaves the plan active until you decide otherwise.
Best Practices #
Keep pricing tiers simple. Start with clear, distinct tiers such as Free, Basic, and Premium so users can easily understand the value of each plan.
Avoid feature overload. Too many options within a single plan can confuse users and slow down their decision. Focus on the most relevant features for each tier.
Test before launching. Always run through the full ordering, checkout, and listing submission workflow in a test environment before making your site live.
For additional help, contact the Directorist support team via the official support channels.


