 Up to 35% Off!

Users & accounts #
The Users & accounts section controls the registration and login forms, the user dashboard, and the public author directory. It has four tabs: Registration, Login, Dashboard, and Authors.
Path: WP Admin → Directorist → Settings → Users & accounts
1. Registration #
The Registration tab controls the fields on the front-end sign-up form, what legal agreements users must accept, and where they are sent after registering.
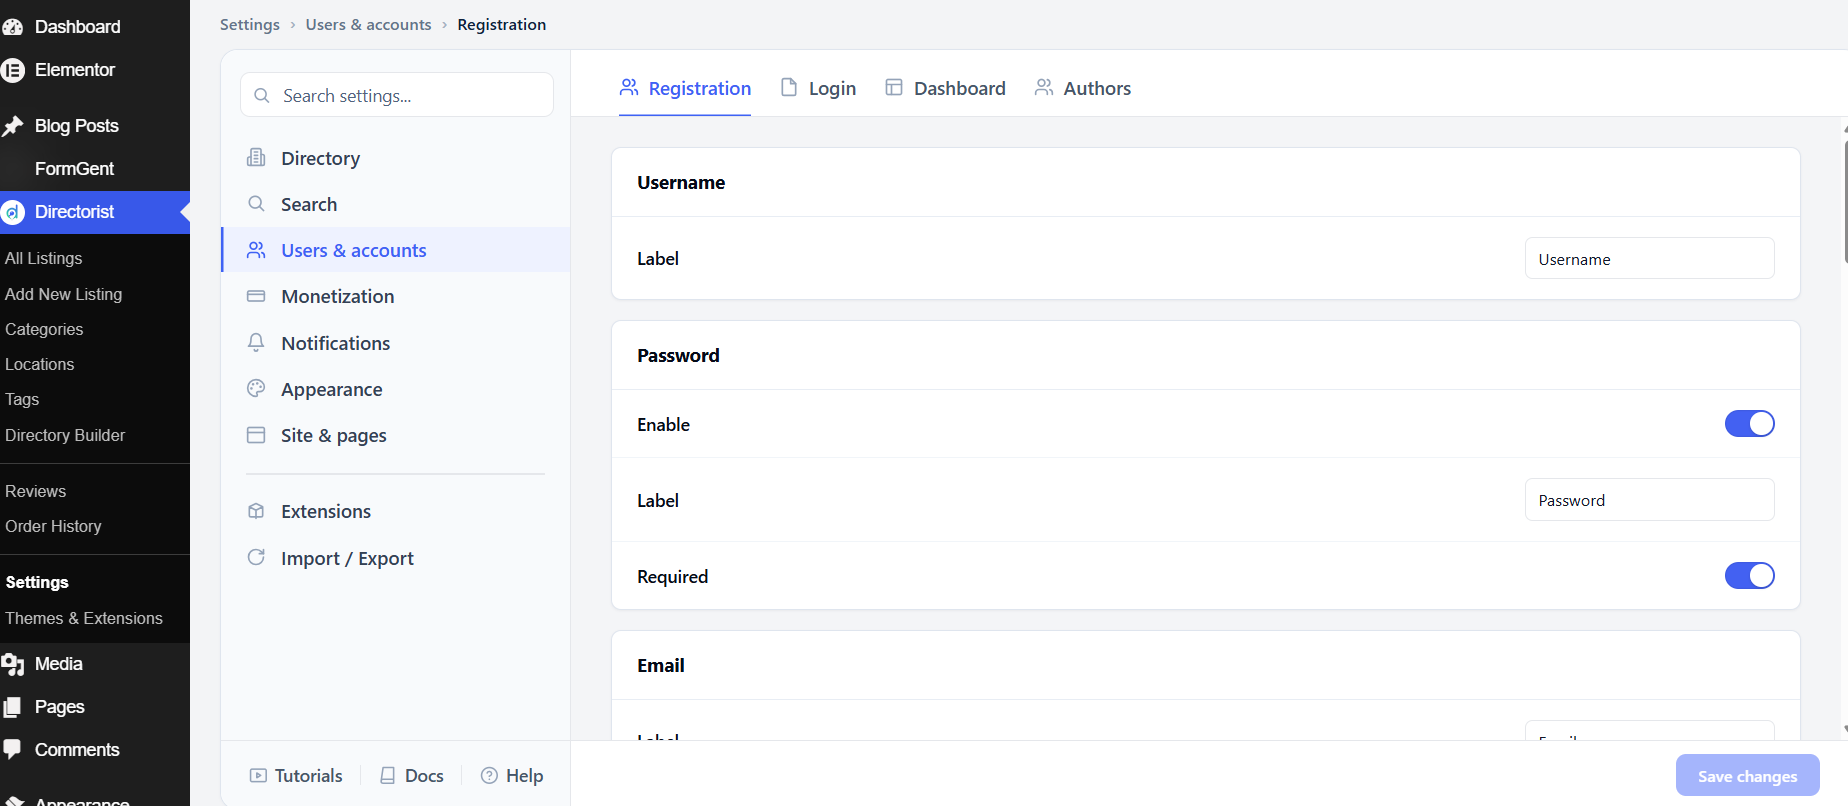
Registration form fields
The registration form always includes an Email field — this cannot be disabled. The Username and Password fields are enabled by default. Optional fields — Website, First Name, Last Name, and About/Bio — are all disabled by default.
For each field, you can toggle it on or off, change its label, and (for some fields) set whether it is required. Only enable the fields you actually need. A shorter form reduces drop-off and makes registration feel lighter.
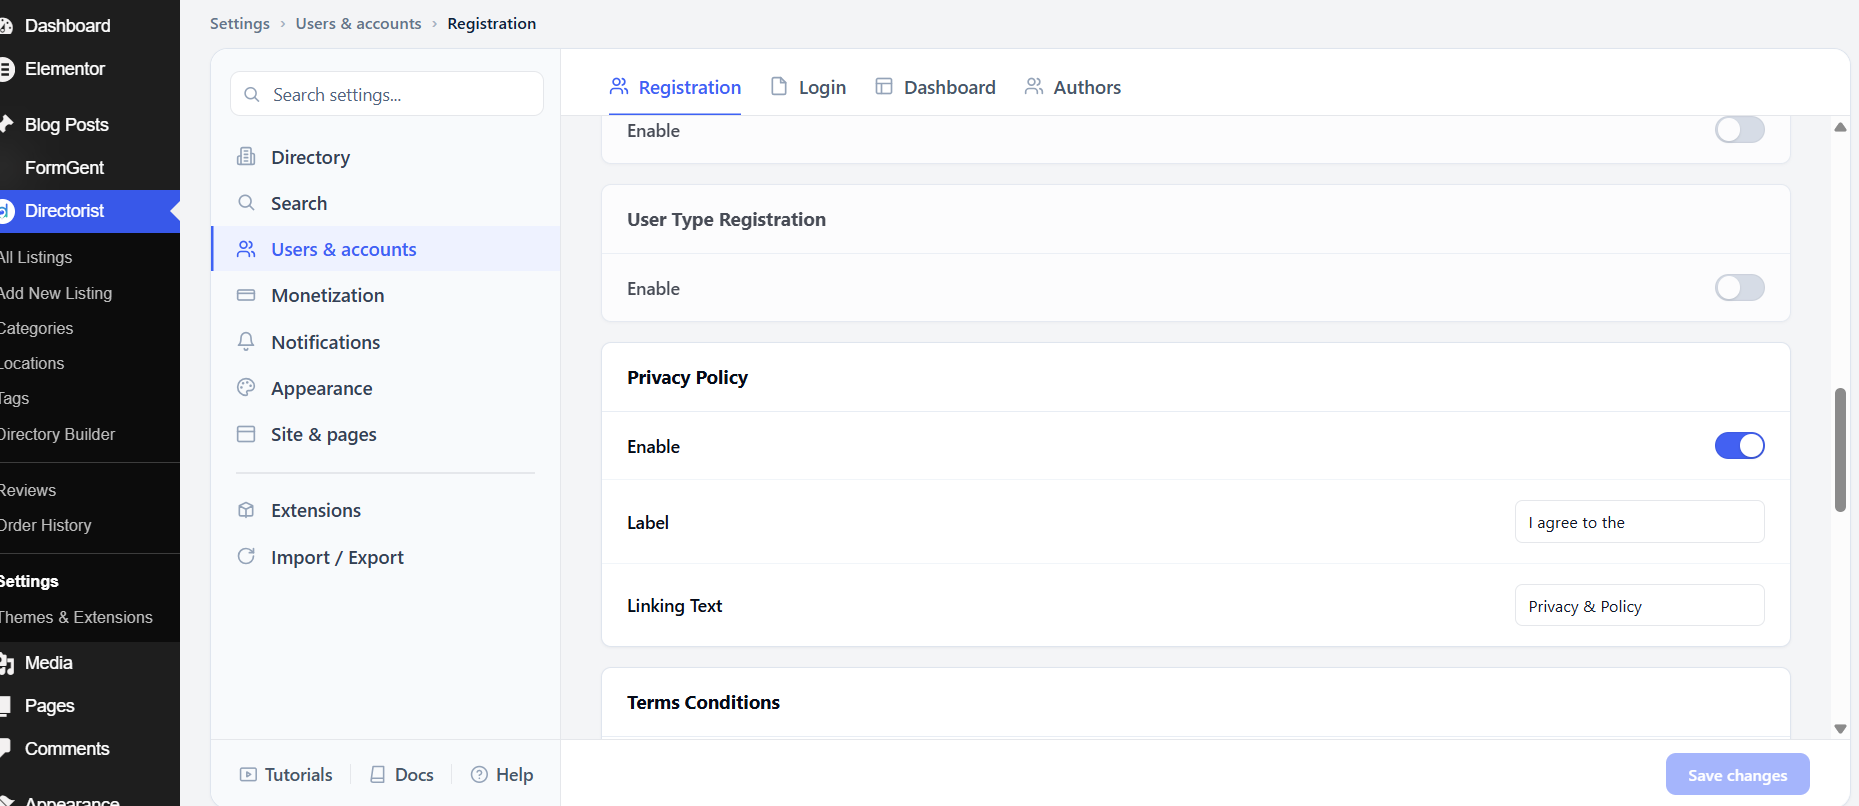
User Type Registration
Enable under this section lets registrants choose a user type during sign-up — for example, whether they are a business owner or a regular visitor. This is off by default. Enable it if your directory needs to distinguish between different kinds of users from the moment they register.
Privacy Policy and Terms & Conditions
Both of these checkboxes are shown on the registration form by default. They require users to acknowledge your policies before they can create an account.
For each one, you can set the Label (the text before the link — defaults are I agree to the and I agree with all) and the Linking Text (the clickable link text — defaults are Privacy & Policy and terms & conditions). Make sure the linked pages are set up in the Site & pages section.
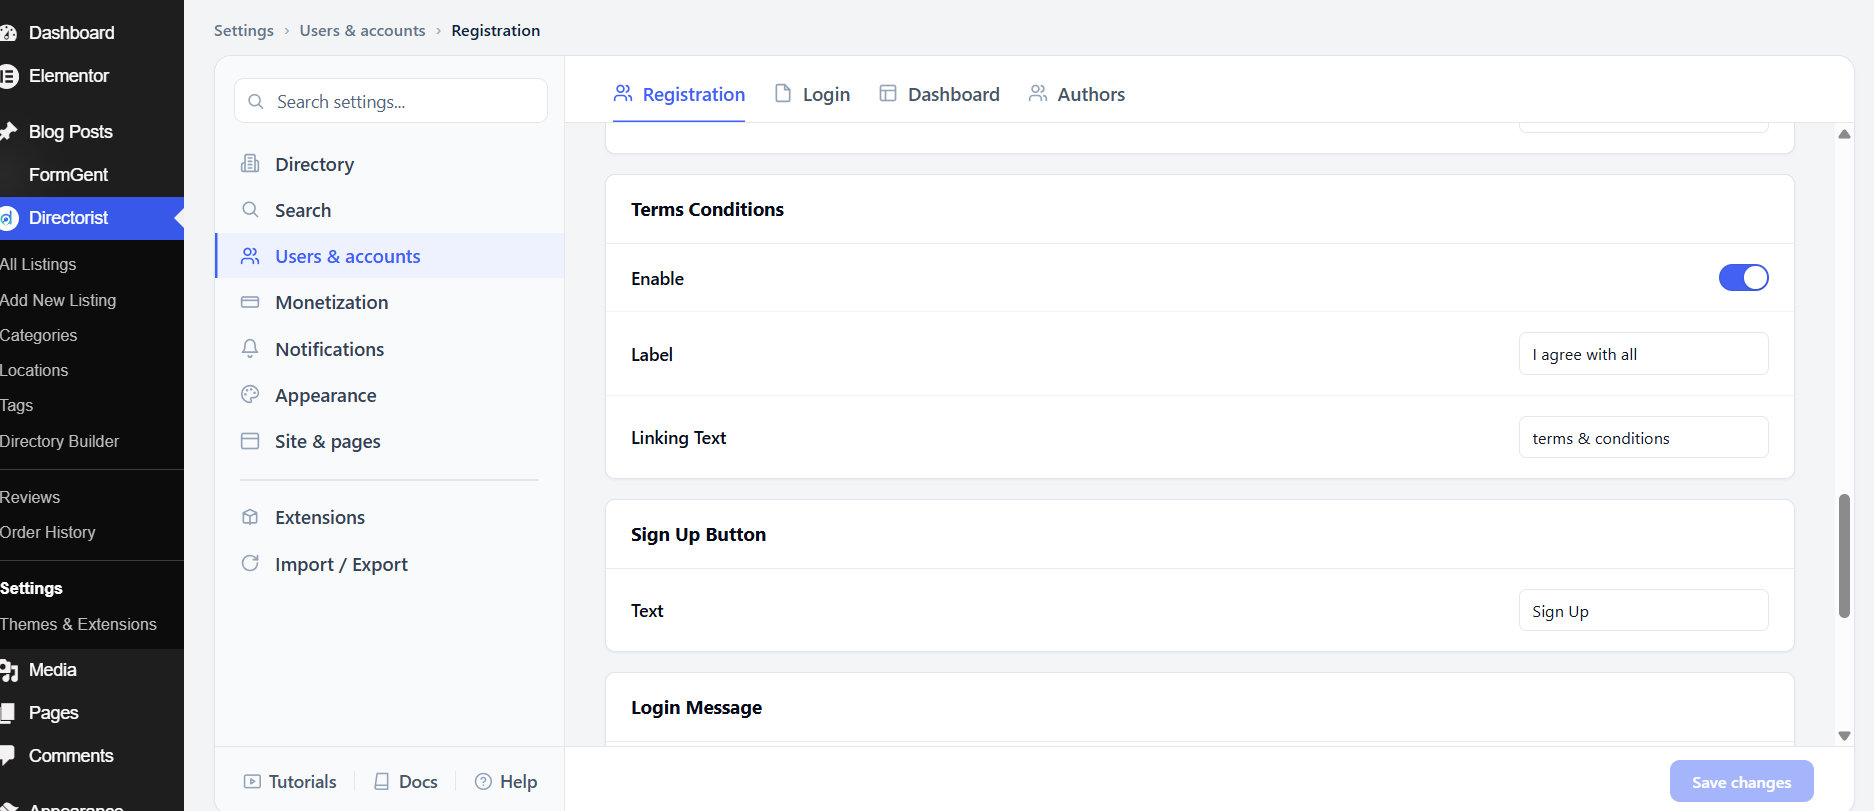
Sign Up Button
Text is the label on the registration submit button. The default is Sign Up. Change it to match your brand voice if needed.
Login Message
This is the prompt shown on the registration form for visitors who already have an account. It typically reads something like “Already have an account? Log in here.” Turn it off if you don’t want this prompt to appear. You can customize both the message Text and the Linking Text for the login link.
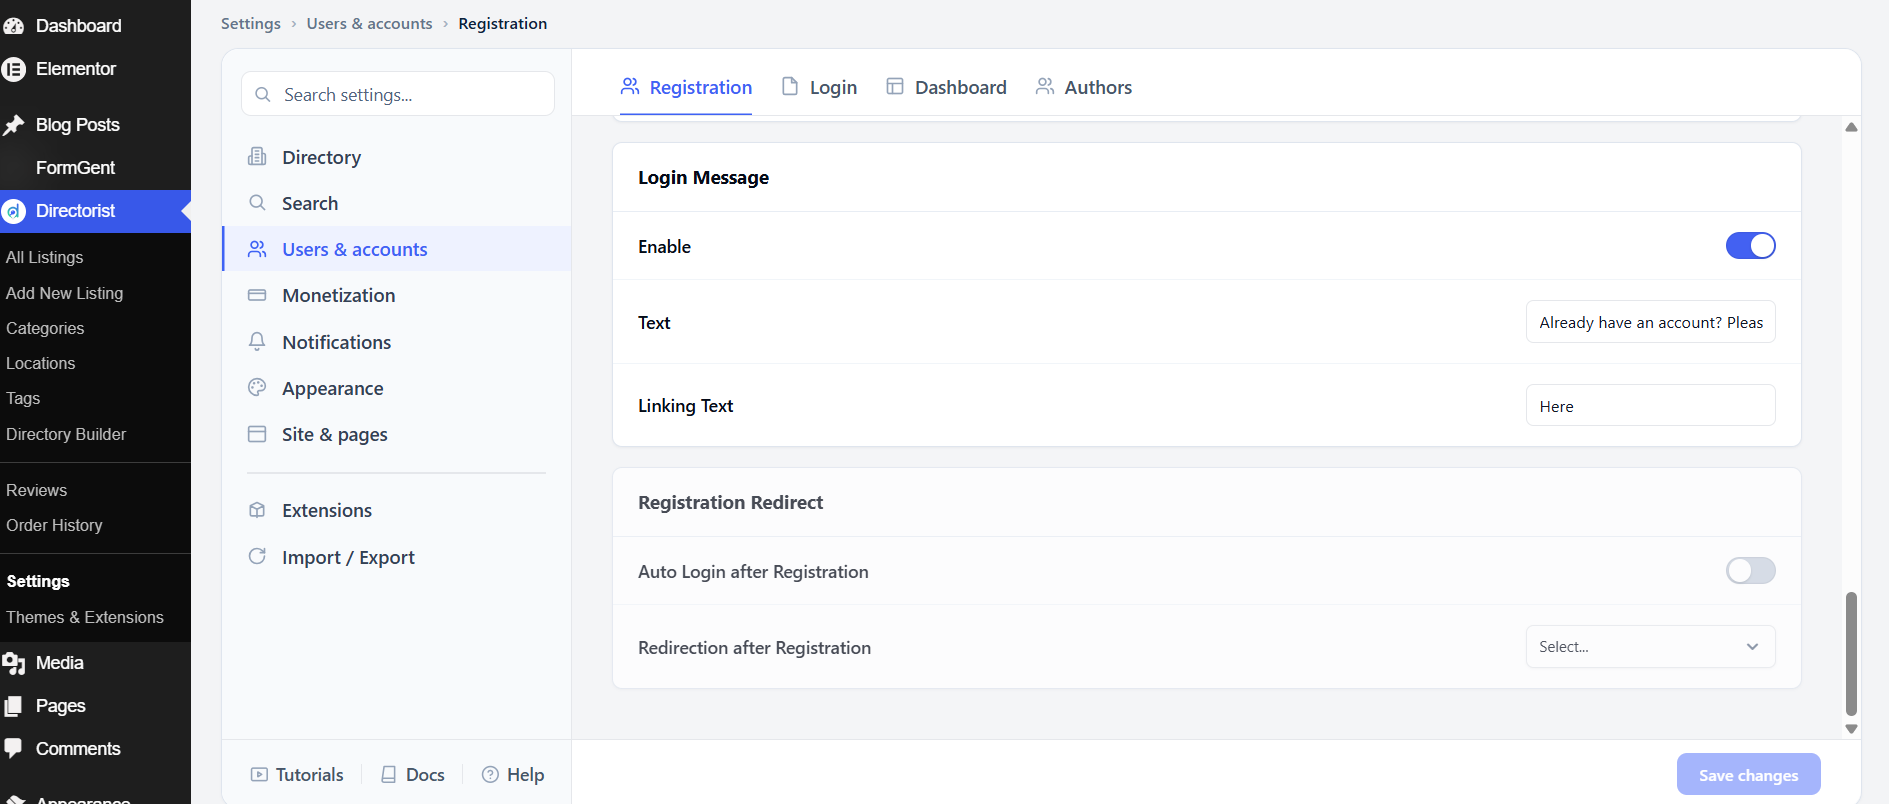
Registration Redirect
Auto Login after Registration logs the user in immediately after they register, skipping the extra login step. This is off by default. Turn it on to create a smoother onboarding experience.
Redirection after Registration sets the page users are sent to after registering. By default no page is selected, which means users stay on the registration page or are sent to the WordPress default. Choose a page — such as the Dashboard or a welcome page — to direct new users somewhere useful.
After adjusting these settings, click Save changes.
2. Login #
The Login tab controls the fields and behavior of the front-end login form, including password recovery.
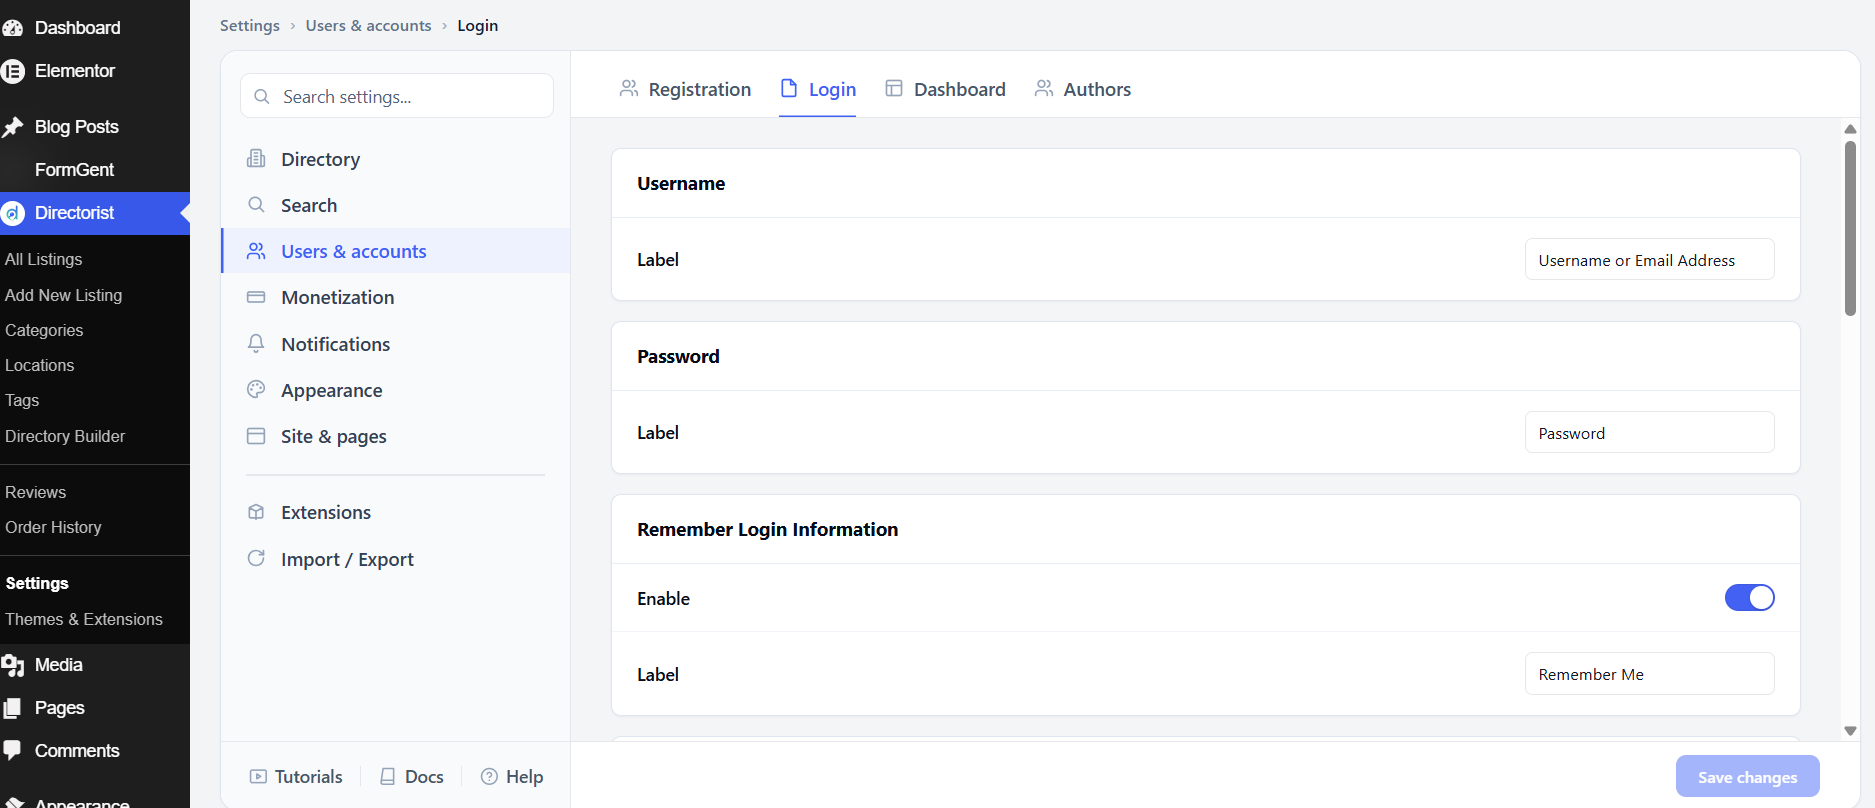
Username and Password
Label under Username sets the label on the username/email field. The default is Username or Email Address. Label under Password sets the label on the password field. The default is Password.
Remember Login Information
Enable shows a “Remember me” checkbox on the login form. This is on by default. When checked, the user’s session persists after they close their browser. The Label field controls what the checkbox says; the default is Remember Me.
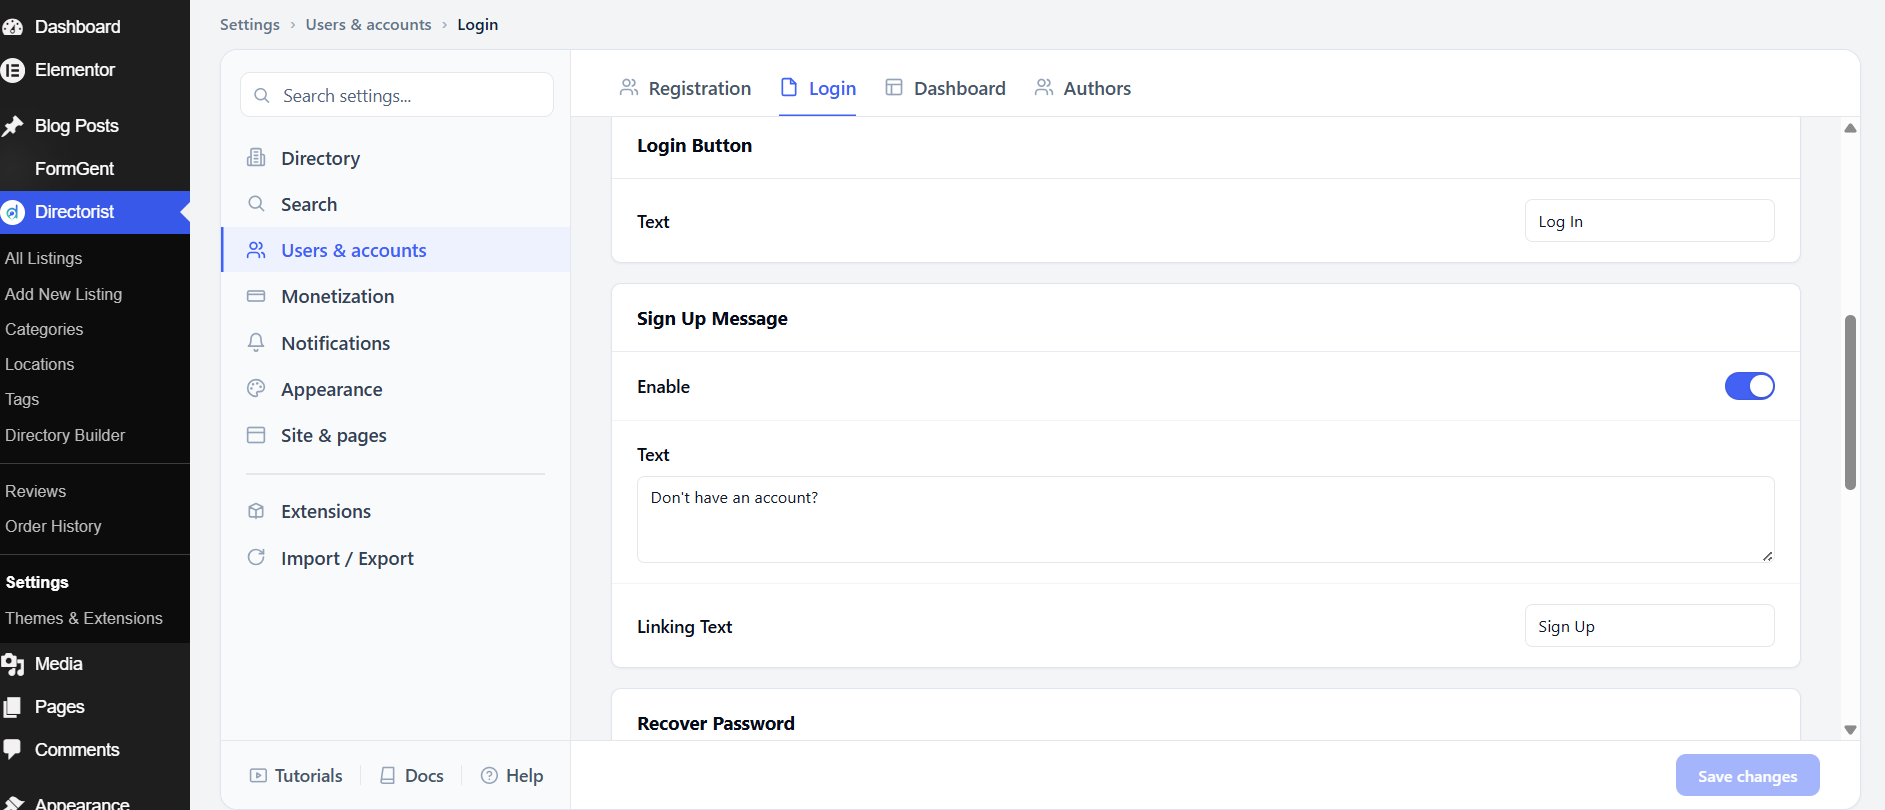
Login Button
Text is the label on the login submit button. The default is Log In.
Sign Up Message
This is the prompt shown on the login form for visitors who don’t have an account yet — the reverse of the Login Message on the registration form. Turn it off if you don’t want to show a sign-up prompt on the login page. The default message text is Don’t have an account? and the link text is Sign Up.
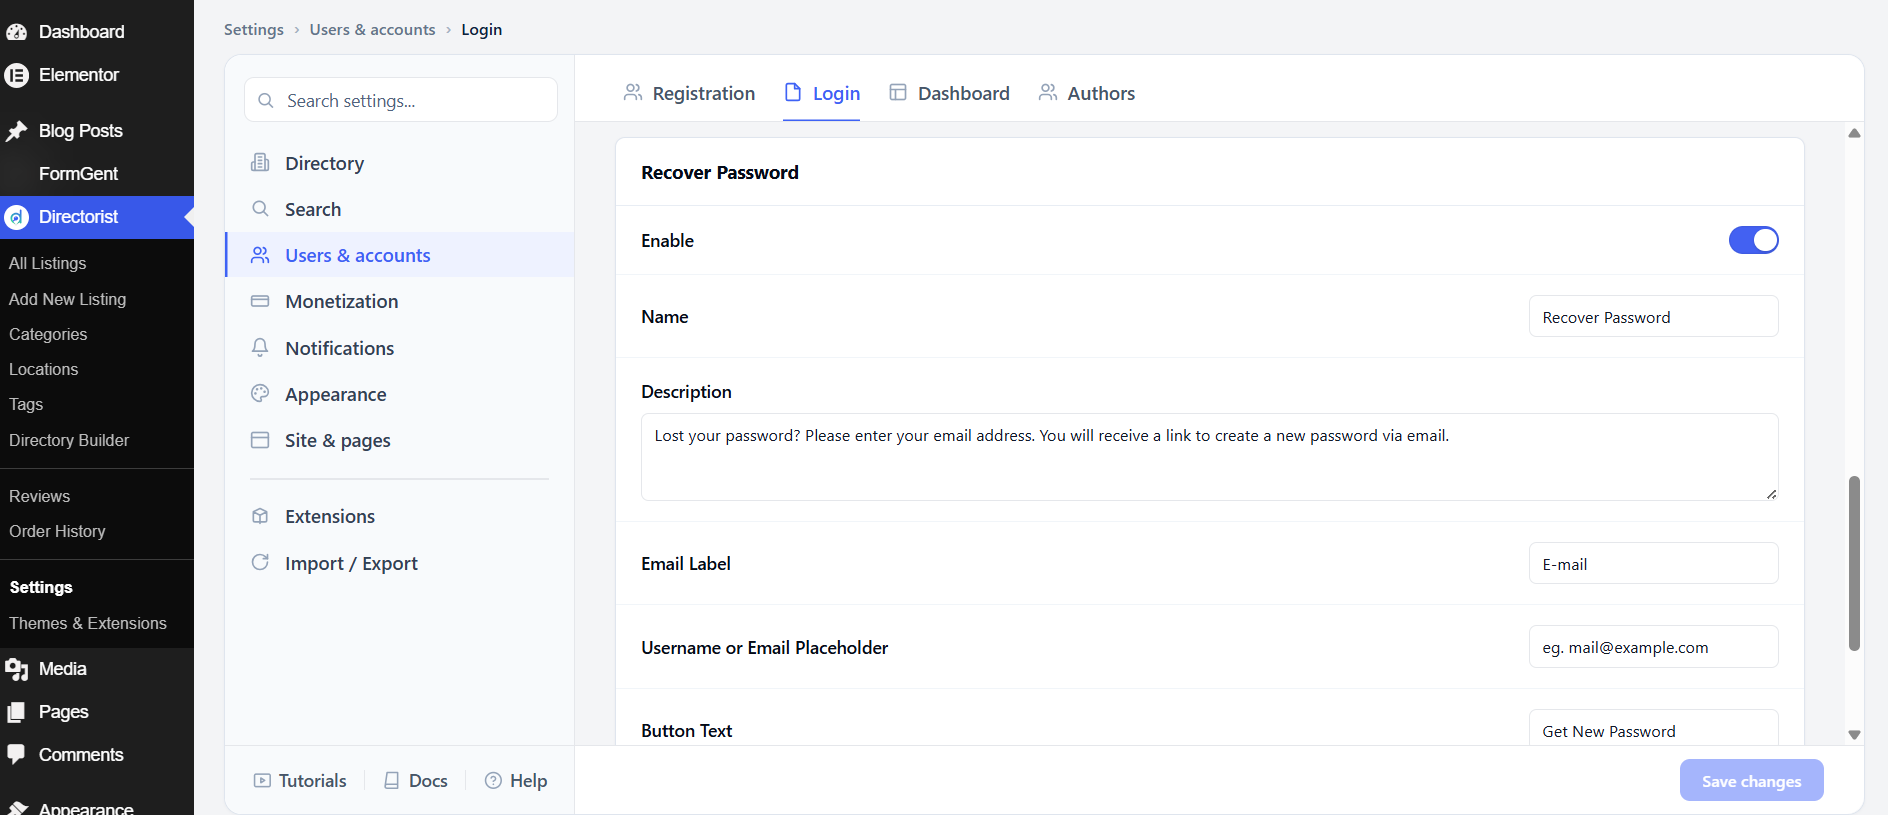
Recover Password
Enable shows a password recovery section below the login form. This is on by default. It lets users request a reset link sent to their email address.
Within this section, you can customize the section Name (default: Recover Password), the Description (the instruction text shown to the user), the Email Label (the label on the email field, default: E-mail), the Username or Email Placeholder (the placeholder inside the field), and the Button Text (the label on the submit button, default: Get New Password).
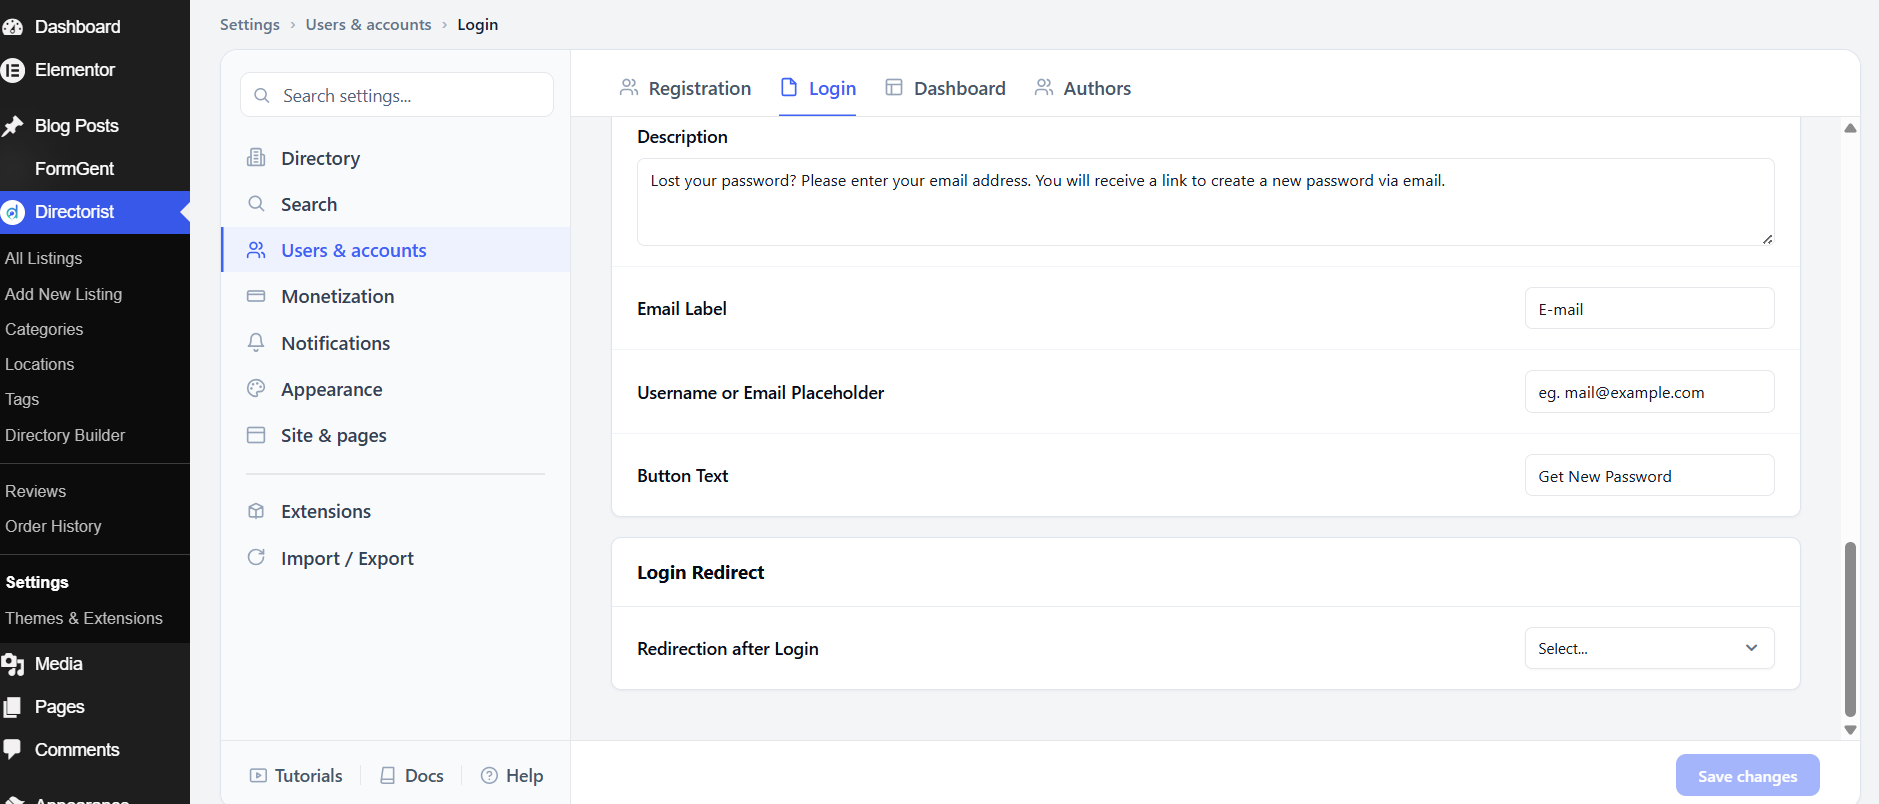
Login Redirect
Redirection after Login sets the page users are sent to after a successful login. By default no page is selected. Set this to the Dashboard or another destination to give users a clear landing point after signing in.
After adjusting these settings, click Save changes.
3. Dashboard #
The Dashboard tab controls which tabs appear on the user’s front-end dashboard and how the listings table within it behaves.
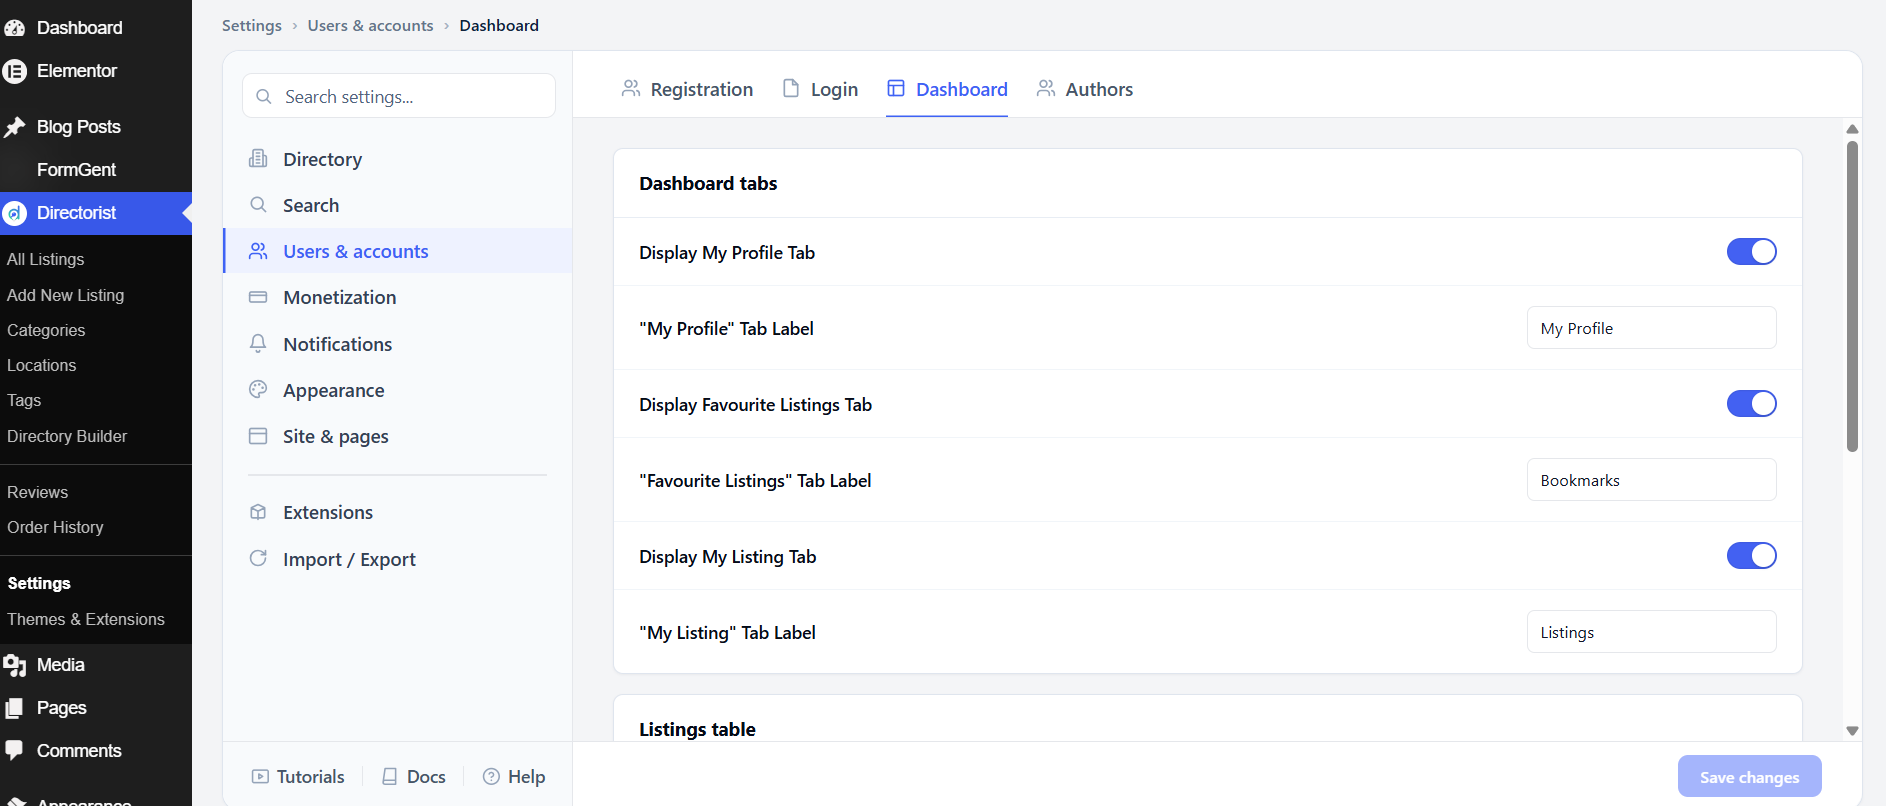
Dashboard tabs
The user dashboard has three tabs by default. Each can be toggled on or off and renamed.
Display My Profile Tab shows the profile editing tab on the dashboard. This is on by default. The label defaults to My Profile.
Display Favourite Listings Tab shows the tab where users can see listings they have bookmarked. This is on by default. The label defaults to Bookmarks.
Display My Listing Tab shows the tab where users see and manage their own listings. This is on by default. The label defaults to Listings.
Rename any tab to match your directory’s language or audience. Turn off any tab that isn’t relevant — for example, turn off Favourite Listings if your directory doesn’t have a bookmarking feature.
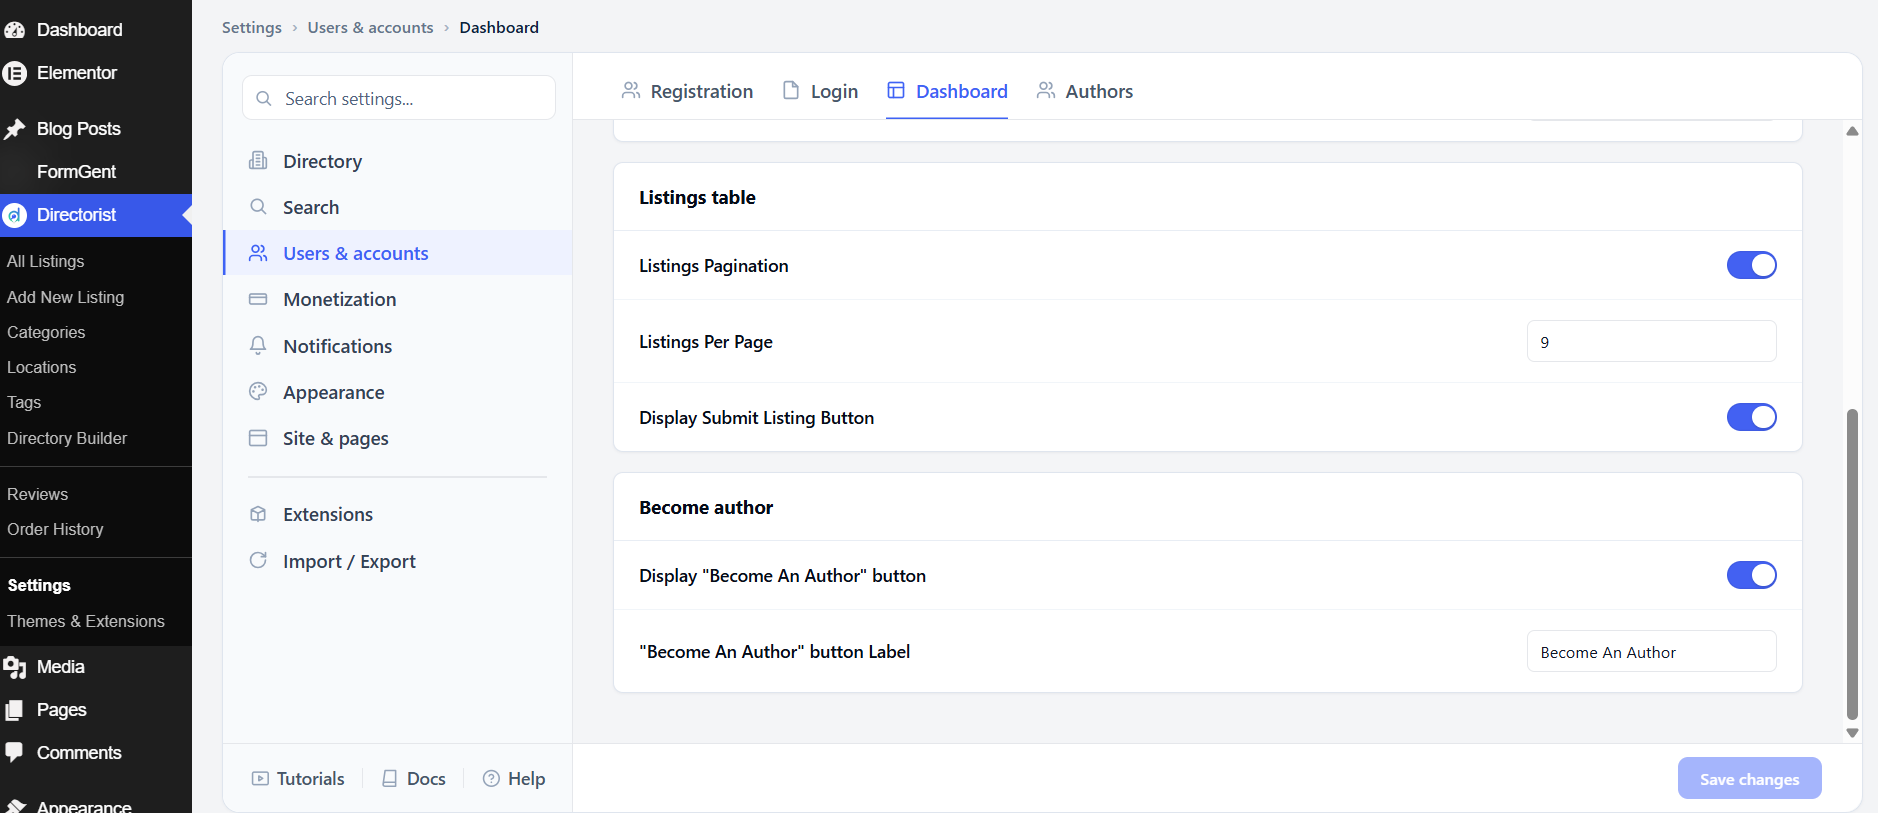
Listings table
Listings Pagination adds pagination to the listings table on the dashboard so it doesn’t show all listings at once. This is on by default.
Listings Per Page sets how many listings appear per page in that table. The default is 9.
Display Submit Listing Button shows a button on the dashboard for users to add a new listing. This is on by default. Keep it visible so users can easily add new content.
Become author
Display “Become An Author” button shows a button that lets regular users apply to become a listing author. This is on by default. The button label defaults to Become An Author. Turn it off if you manage author status manually or don’t use the author feature.
After adjusting these settings, click Save changes.
4. Authors #
The Authors tab controls the public author directory — the page that lists all authors on your site — and what information appears on each author card.
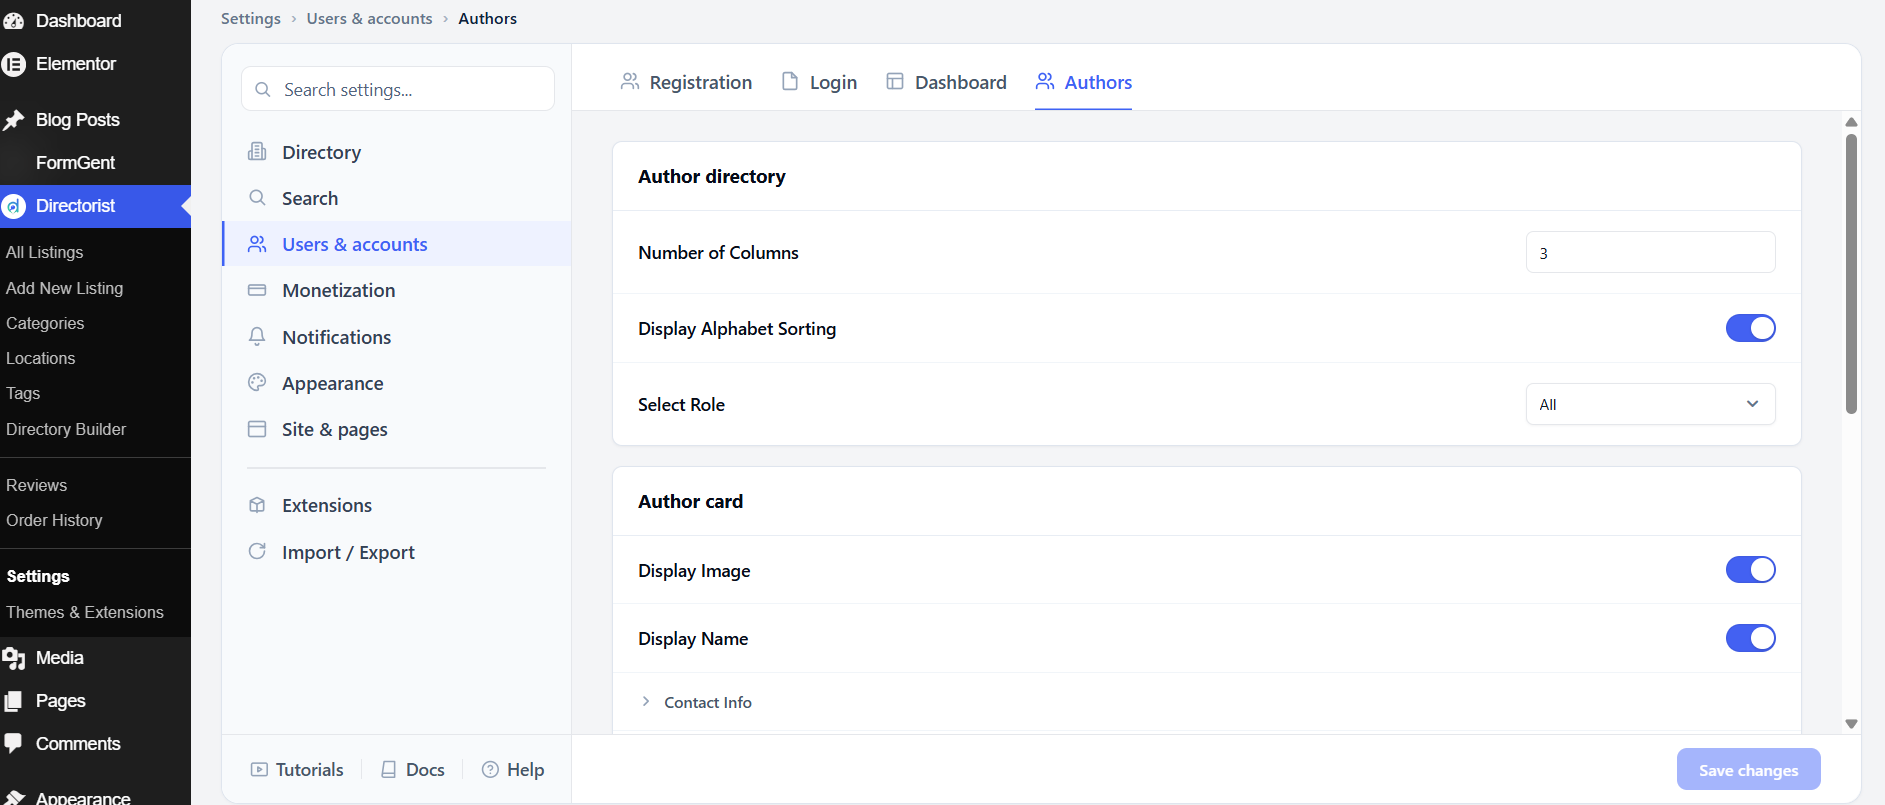
Author directory
Number of Columns sets how many author cards appear side by side in the directory grid. The default is 3.
Display Alphabet Sorting shows A–Z tabs above the author directory so visitors can jump to authors by the first letter of their name. This is on by default.
Select Role filters which WordPress user roles appear in the author directory. The default is All. Change this to a specific role — for example, Author or Contributor — if you only want certain users to appear publicly.
Author card
Each author card can show a combination of information. All items are on by default except Email.
Display Image shows the author’s avatar. Display Name shows their display name.
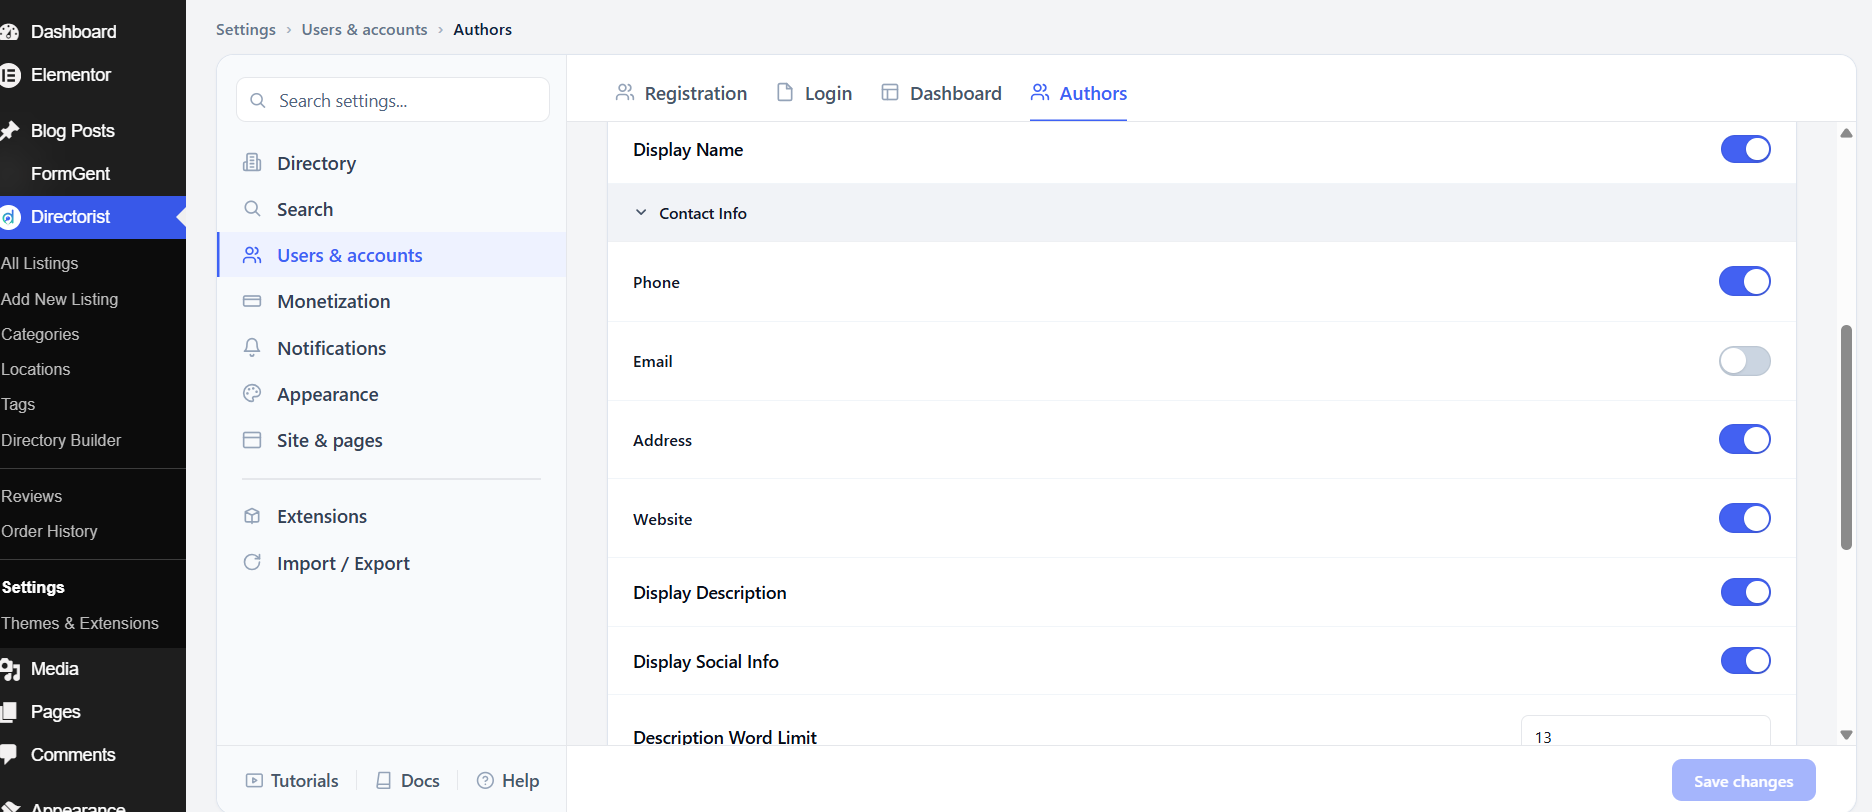
Under Contact Info, you can show or hide their Phone, Email, Address, and Website. Display Description shows their bio, trimmed to the number of words set in Description Word Limit (default: 13 words). Display Social Info shows their linked social media profiles.
Display All Listings Button adds a button on the card that links to all of the author’s listings. This is on by default. The button label is set by All Listings Button text, which defaults to View All Listings.
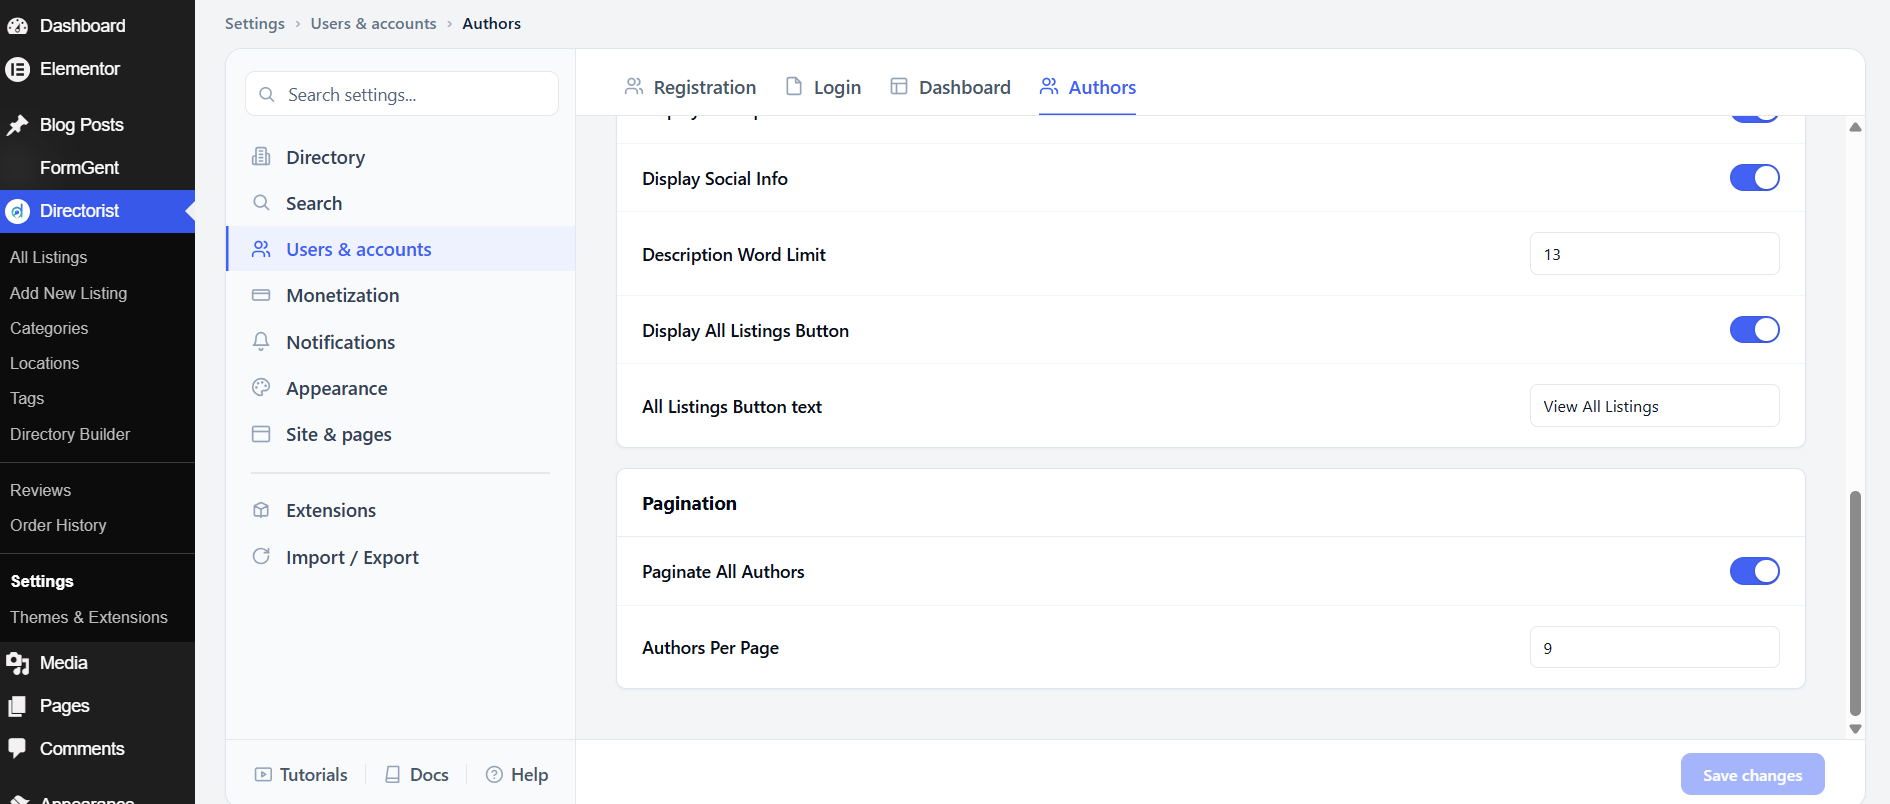
Pagination
Paginate All Authors adds pagination to the author directory. This is on by default. Authors Per Page controls how many cards appear per page; the default is 9.
After adjusting these settings, click Save changes.


