 Up to 35% Off!

The Settings panel is where you configure every aspect of your Directorist directory — from how listings look and behave to how users register, how payments are handled, and what emails go out.
Path: WP Admin → Directorist → Settings
The left sidebar groups settings into nine sections: Directory, Search, Users & accounts, Monetization, Notifications, Appearance, Site & pages, Extensions, and Import / Export. Each section has its own Save changes button at the bottom of the screen — changes in one section do not save automatically when you switch to another.
Directory #
The Directory section controls the core behavior of your listings — how they are structured, displayed, submitted, and reviewed. It has seven tabs: General, Listings page, Single listing, Submissions, Categories & locations, Map, and Reviews.
Path: WP Admin → Directorist → Settings → Directory
1. General #
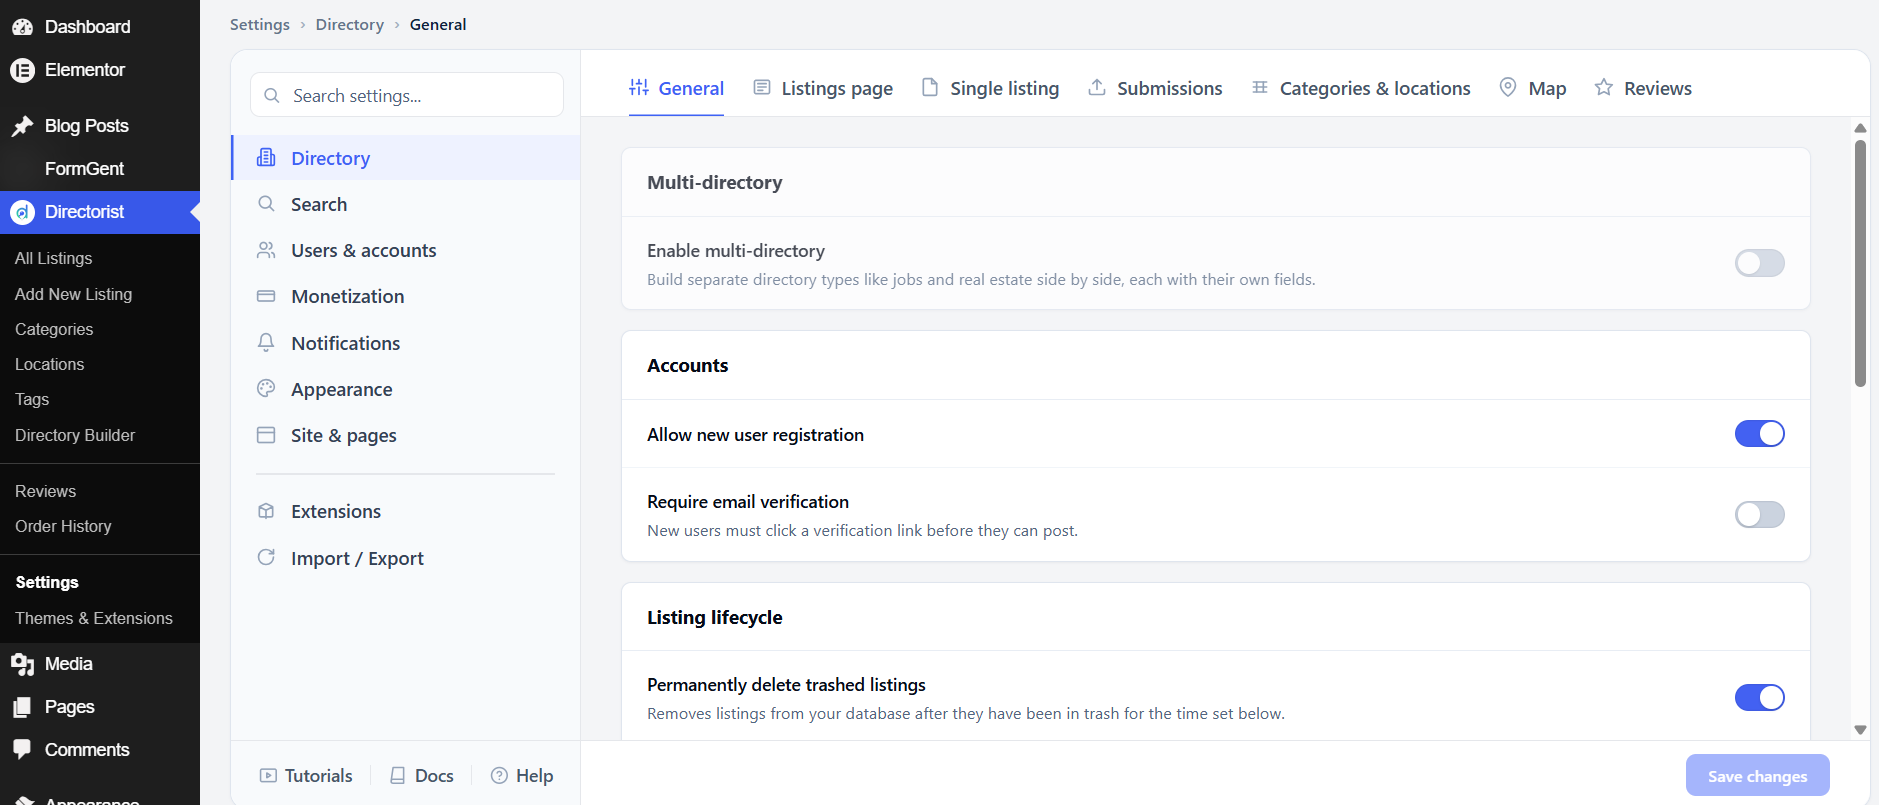
The General tab is where you set site-wide rules that affect all listings and users across your directory.
Multi-directory
Enable multi-directory lets you build separate directory types side by side on the same site — for example, a jobs directory and a real estate directory, each with their own custom fields and layouts. This is off by default. Leave it off unless you need more than one type of directory; enabling it adds complexity to your setup.
Accounts
Allow new user registration lets visitors create an account on your site directly from the directory. This is on by default. Turn it off if you want to control who can register — for example, if you only accept listings from pre-approved partners.
Require email verification adds an extra step: after someone registers, they must click a link in a verification email before their account is activated. This is off by default. Turn it on to reduce spam accounts and confirm that registrants own the email address they provided.
Listing lifecycle
Permanently delete trashed listings removes listings from your database permanently once they have been in the trash for a set time period. This is on by default. Keeping it on prevents your database from growing with old, unused content. Turn it off if you need to be able to restore deleted listings.

View tracking
By default, Directorist only counts views from logged-out visitors. These two settings adjust that behavior:
Count views from logged-in users adds admin and member visits to the view count. This is off by default. Keep it off for more accurate public engagement data; turn it on if you want the count to reflect all traffic including your own.
Real-time counts with cache plugins keeps view counts accurate when you use a caching plugin such as W3 Total Cache or LiteSpeed Cache. This is off by default. Turn it on if you notice view counts freezing or not updating when caching is active.
Archive pages
Use WordPress default archive turns off Directorist’s custom archive pages and falls back to WordPress built-in ones. This is off by default. Only turn it on if you have a specific theme or development need that requires it.
After adjusting these settings, click Save changes.
2. Listings page #
The Listings page tab controls how the all-listings archive page looks and behaves – its layout, how many listings appear, how users can filter and sort them, and how listing preview images are displayed.
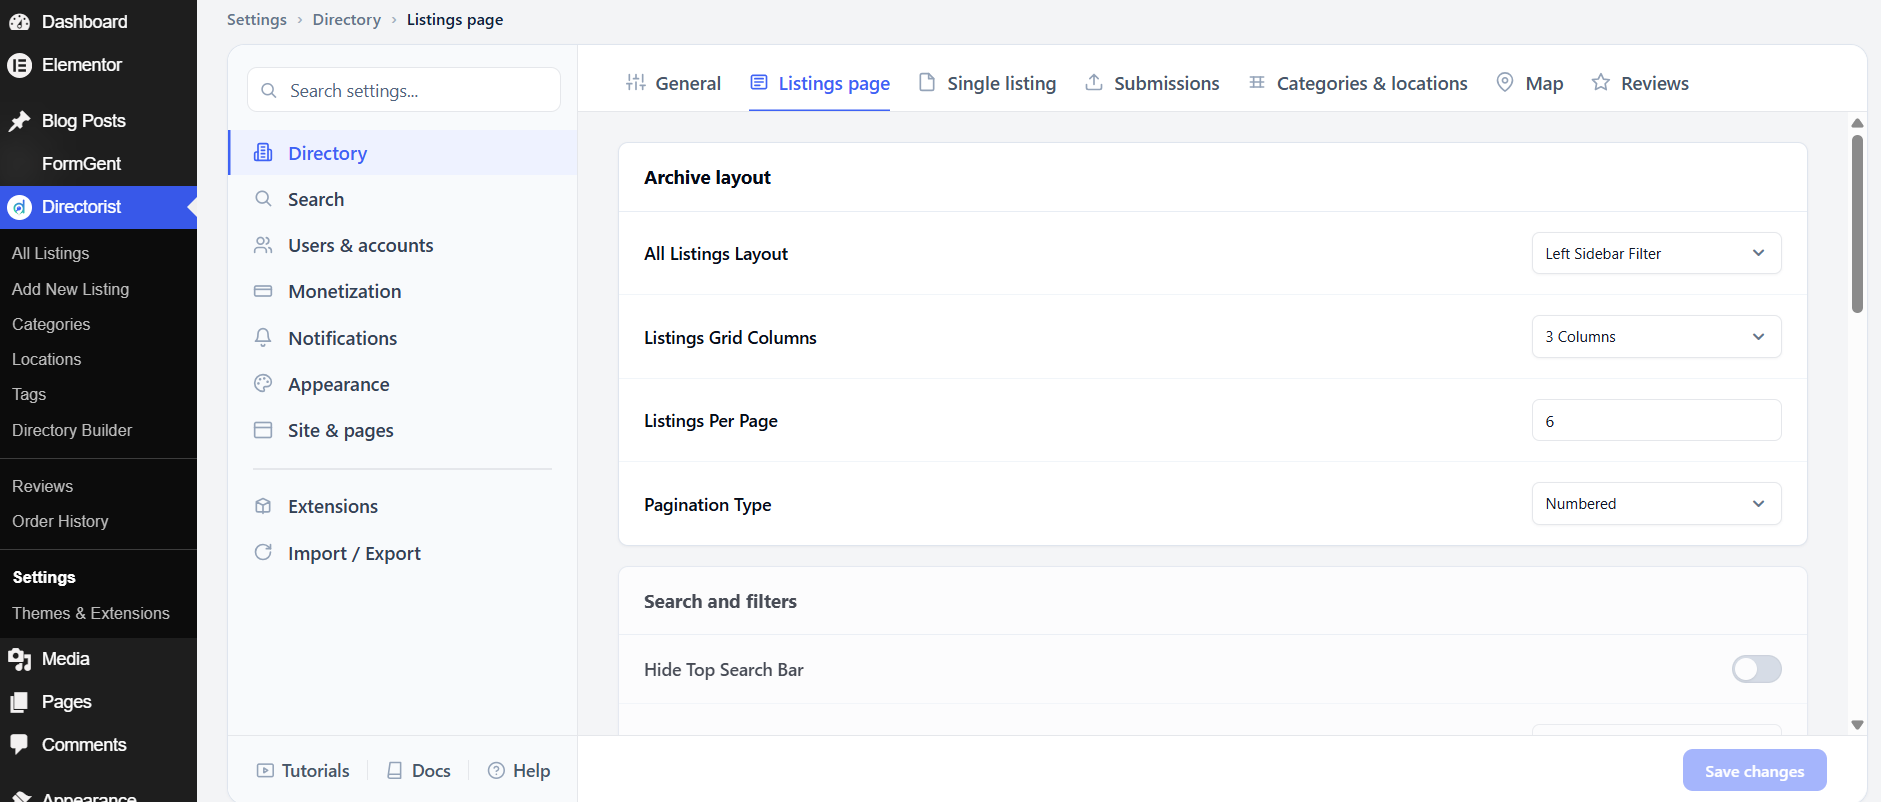
Archive layout
All Listings Layout sets the sidebar position on the listings page. The default is Left Sidebar Filter, which places filters in a left panel. Change this if your theme or design works better with a right sidebar or no sidebar.
Listings Grid Columns controls how many listing cards appear side by side in grid view. The default is 3 Columns. Reduce to 2 for a larger-card layout; increase to 4 or more for a denser, catalog-style grid.
Listings Per Page sets how many listings load before pagination kicks in. The default is 6. Higher numbers show more results at once but can slow down the page; lower numbers load faster but require more clicks to browse.
Pagination Type controls how users move between pages of results. The default is Numbered (page 1, 2, 3…). Switch to a different style if your design calls for it.
Search and filters
Hide Top Search Bar removes the search bar that appears above the listings grid. This is off by default. Turn it on if you want users to search only from a dedicated search page, or if your theme has its own search bar.
Filters Text is the label on the button that opens the filter panel. The default is Filters. Change it to match your directory’s language or audience.
Reset text is the label on the link that clears all active filters. The default is Clear All.
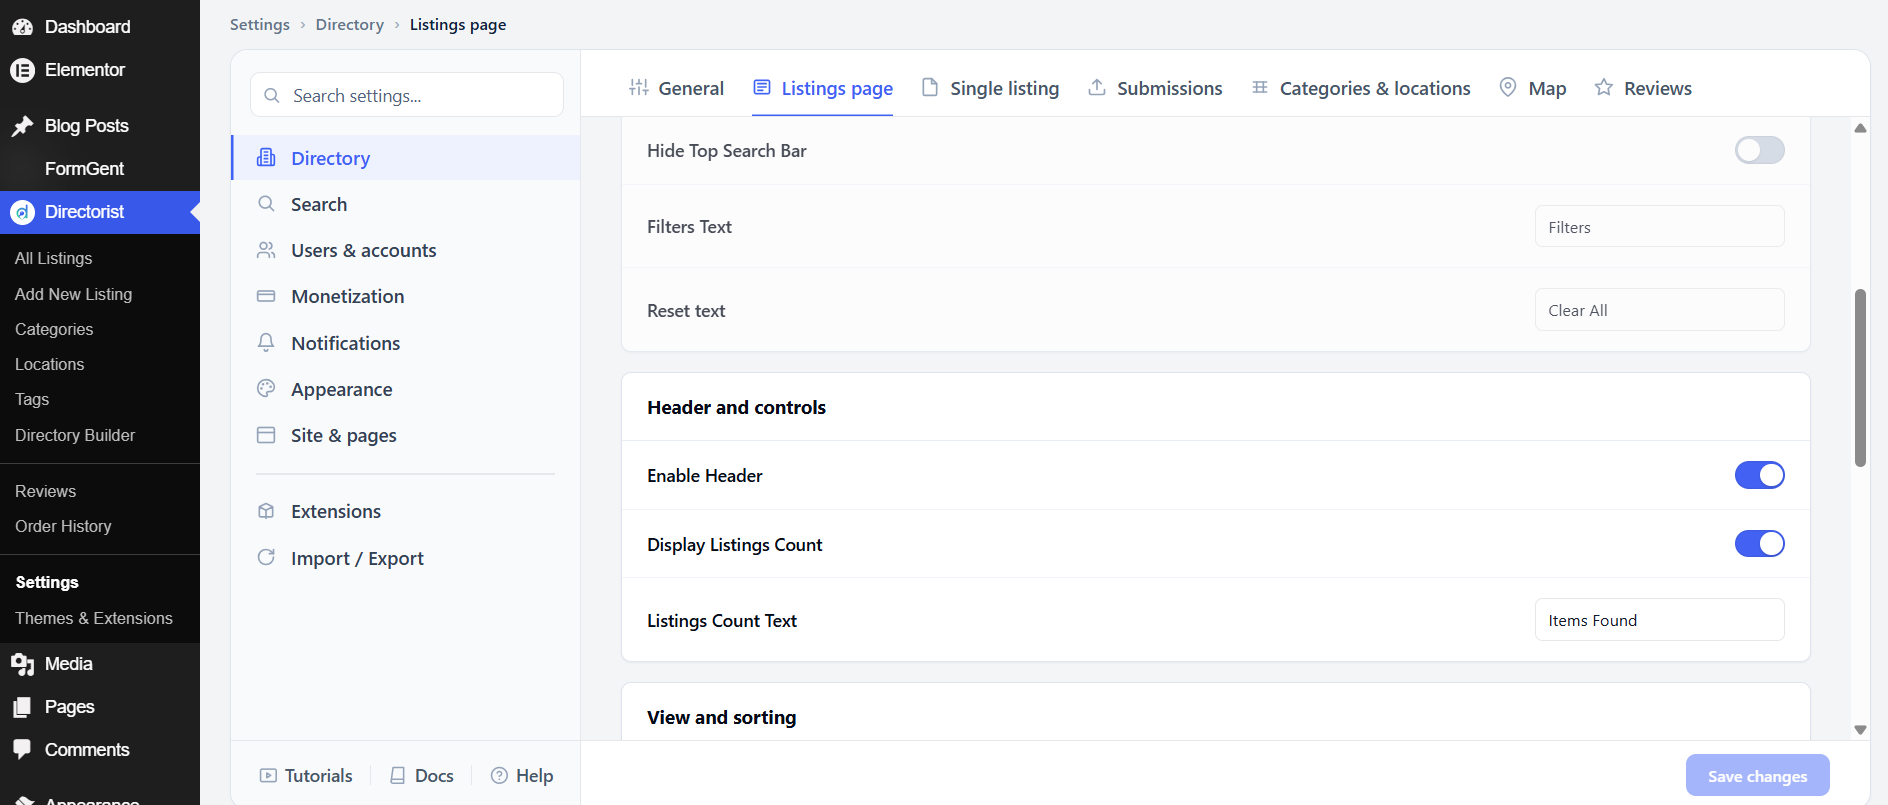
Header and controls
Enable Header shows the header row above the listings grid, which contains the view toggle and sort dropdown. This is on by default. Turn it off for a cleaner, minimal layout.
Display Listings Count shows visitors how many results match their current view, for example “24 Items Found.” This is on by default. It helps users understand the scope of your directory at a glance.
Listings Count Text is the label that appears after the number. The default is Items Found. Change it to match your content — for example, Businesses, Properties, or Jobs.
View and sorting
The View type toggles let you choose which view modes are available — Grid, List, and Map are all on by default. Turn off any view you don’t want visitors to access.
Default View sets which view loads first when someone arrives on the listings page. The default is Grid. If your directory is location-based, consider switching to Map as the default.
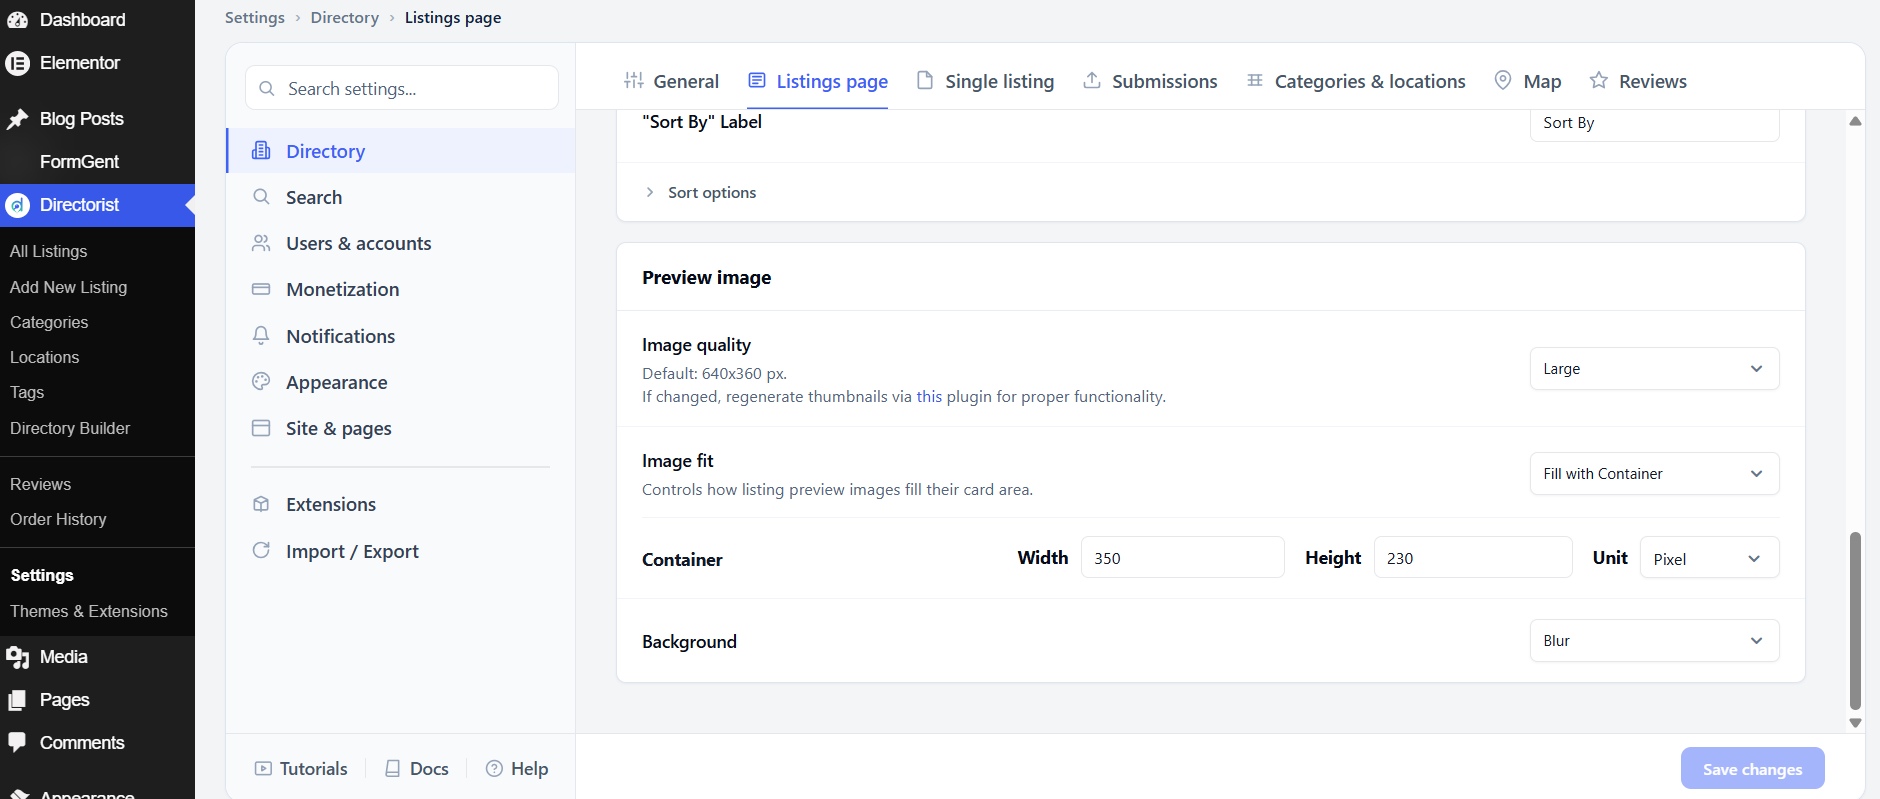
Enable Sorting Options shows a sort dropdown so users can reorder results. This is on by default. The “Sort By” Label controls what the dropdown is called; the default is Sort By.
The individual sort options below the label let you choose which sort methods are available. Turn off any that don’t apply to your content – for example, turn off Price sorting if your listings don’t have prices.
Preview image
Image quality sets the size of the listing card thumbnail. The default is Large (640×360 px). If you change this after listings are already uploaded, regenerate thumbnails using the linked plugin to update existing images.
Image fit controls how listing images fill their card area. Fill with Container (the default) crops and fills the space. Other options may add letterboxing or padding.
Container sets the width and height of the image area on each card. The default is 350 × 230 px.
Background fills any empty space if an image doesn’t fully cover the container. The default is Blur, which blurs the image edges to fill the space. Other options may show a solid color or leave it transparent.
After adjusting these settings, click Save changes.
3. Single listing #
The Single listing tab controls the detail page visitors see when they click on a listing — its template, visibility rules, URL structure, and image gallery.
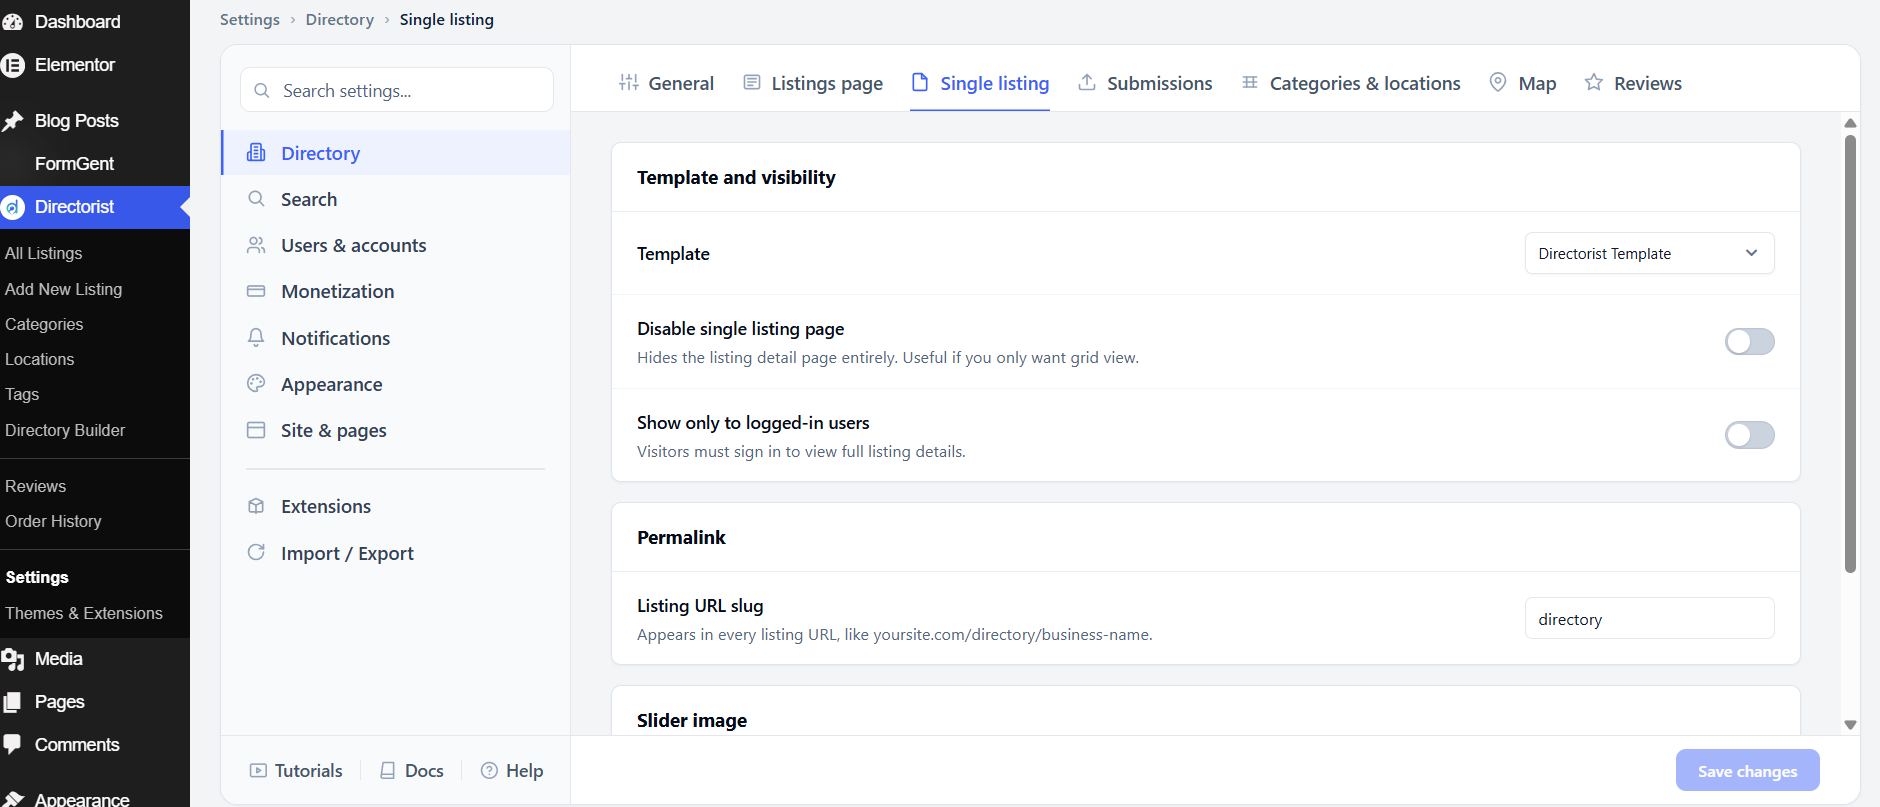
Template and visibility
Template sets the page template used for single listing pages. The default is Directorist Template, which uses the plugin’s own layout. Switch to a different option if your theme provides a compatible full-width or custom template.
Disable single listing page removes the detail page entirely, so clicking a listing card does nothing. This is off by default. Only enable it if you want a browse-only directory where visitors cannot view listing details.
Show only to logged-in users requires visitors to sign in before they can view full listing details. This is off by default. Use this to build a members-only directory or to gate detailed information behind registration.
Permalink
Listing URL slug is the segment that appears in every listing’s URL — for example, yoursite.com/directory/business-name. The default is directory. Change this to match your content type, such as listing, property, or job. After changing it, go to Settings → Permalinks in WordPress and click Save Changes to flush the rewrite rules.
Slider image
Show slider image displays a sliding image gallery at the top of each single listing page. This is on by default. Turn it off if you want listings to show a single static image instead. The Advanced section below it contains additional slider options you can expand to adjust.
After adjusting these settings, click Save changes.
4. Submissions #
The Submissions tab controls who can add listings and what happens after they submit — including whether guests can submit without an account and what confirmation message they see.
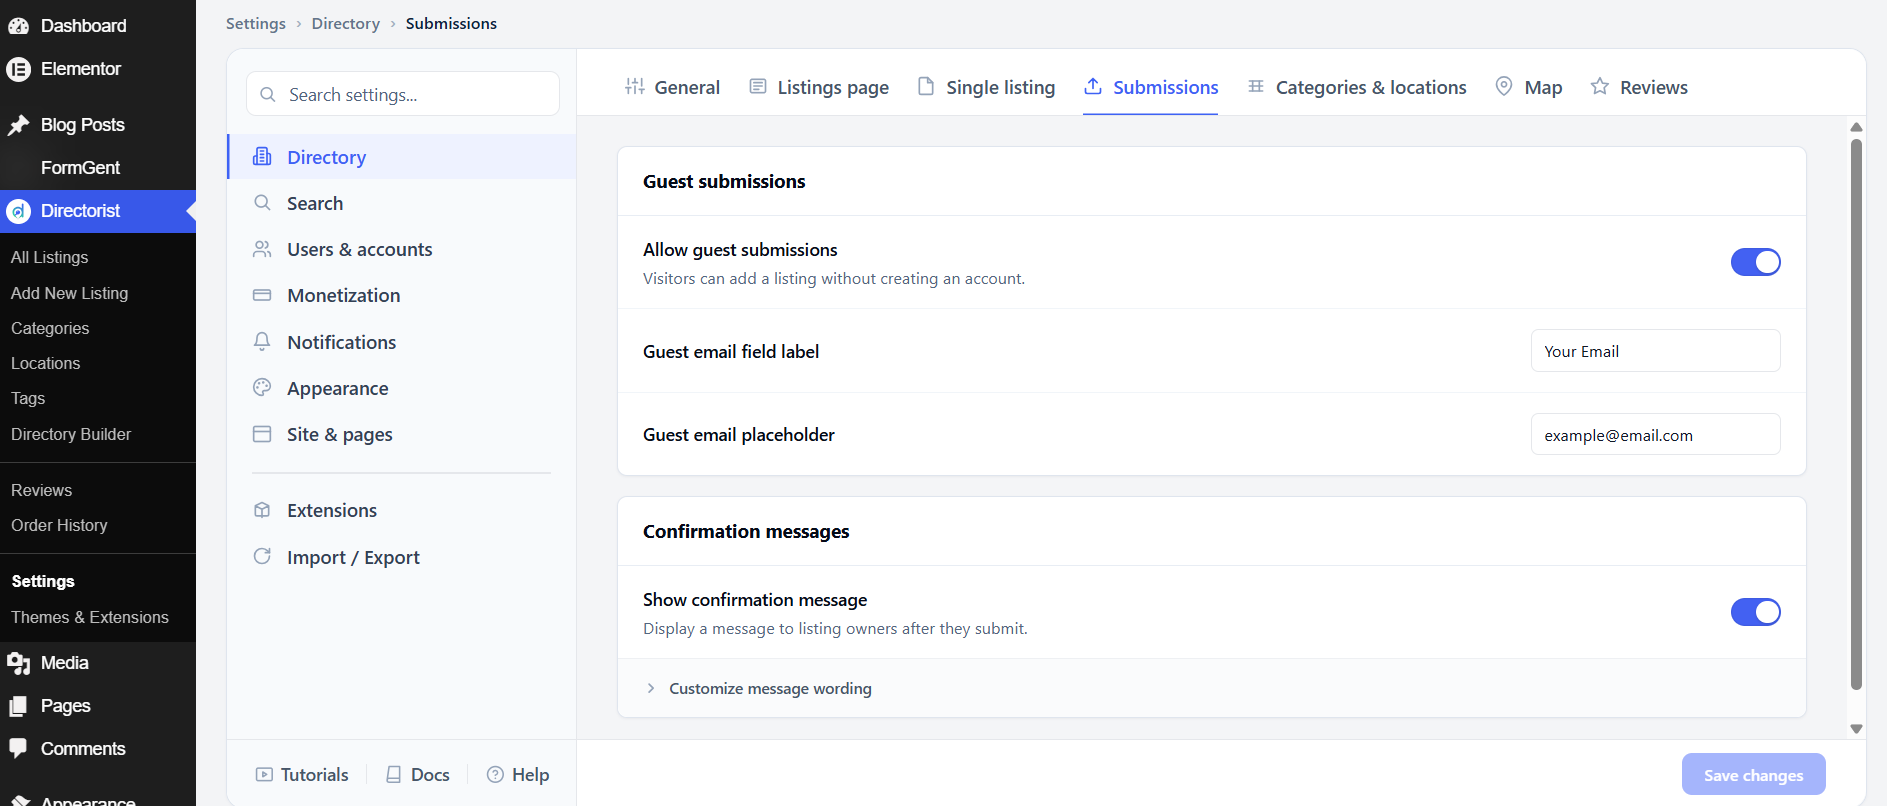
Guest submissions
Allow guest submissions lets visitors add a listing without creating an account first. This is on by default. It lowers the barrier to getting listings added, but removes the ability to notify guests about their listing status unless they provide an email.
Guest email field label is the label shown above the email field on the guest submission form. The default is Your Email.
Guest email placeholder is the sample text inside the email field. The default is [email protected].
Confirmation messages
Show confirmation message displays a message to listing submitters after they hit submit. This is on by default. The message tells them what to expect next — for example, that their listing is pending review.
Customize message wording is an expandable section where you can edit the actual text of the confirmation message. Expand it to change the default wording to something that matches your directory’s review process or tone.
After adjusting these settings, click Save changes.
5. Categories & locations #
This tab controls how the category archive page and location archive page are displayed — their layout, sort order, and whether empty categories or locations are hidden.
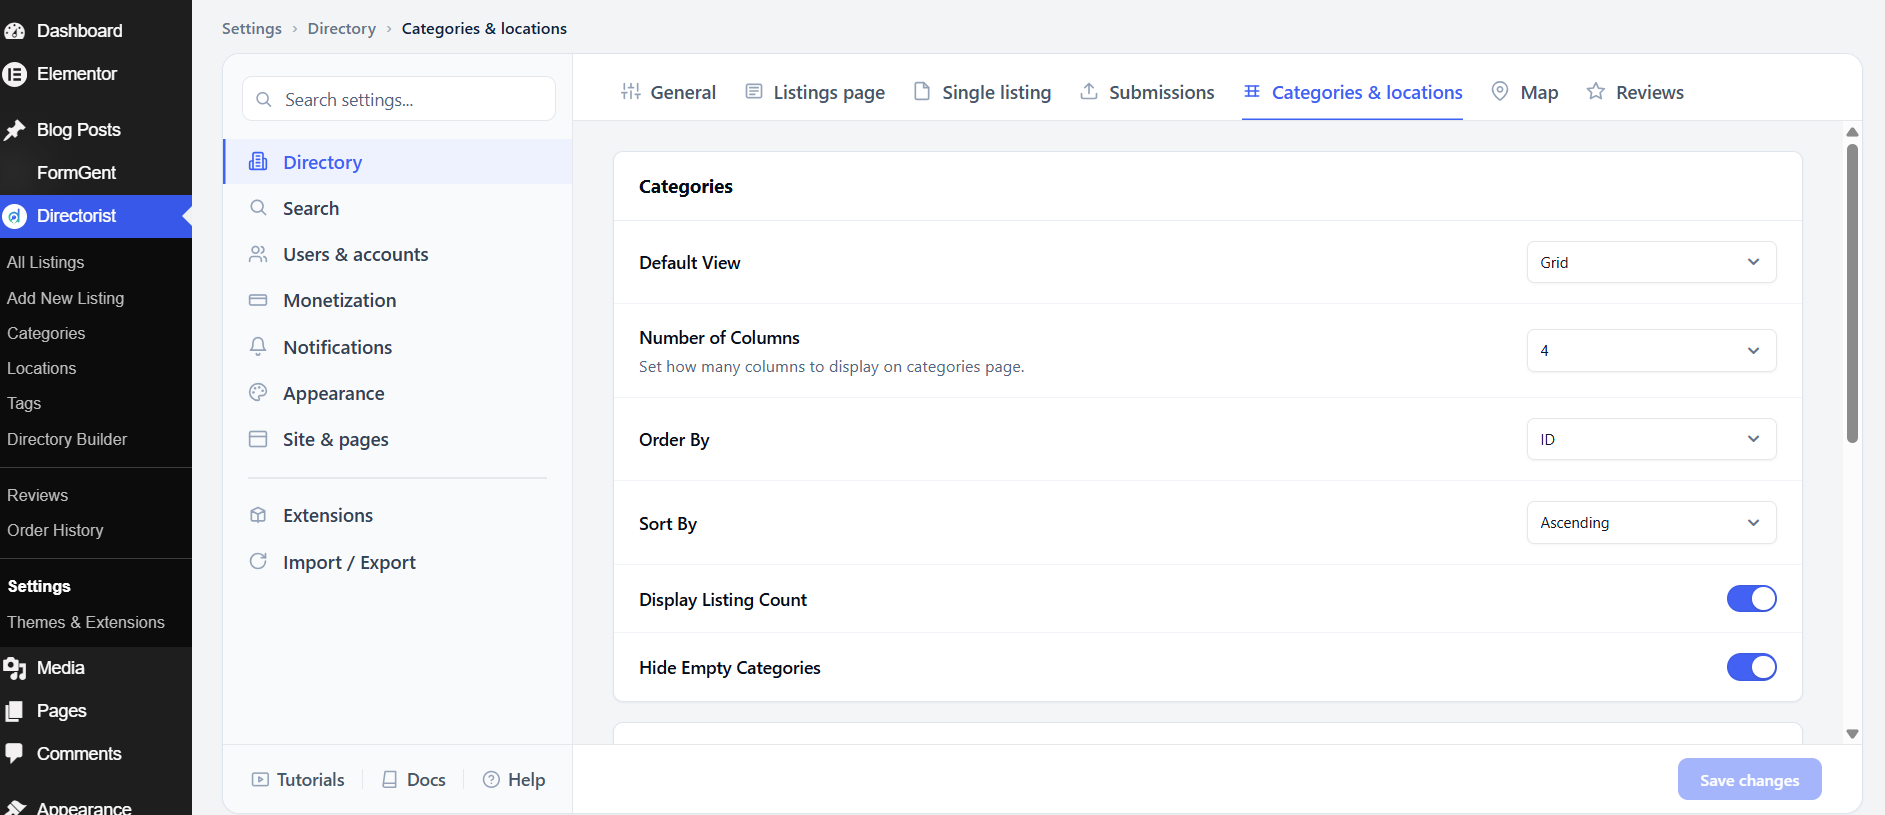
Categories
Default View sets the layout of the all-categories page. The default is Grid, which shows category cards in columns. Switch to List for a text-based vertical layout.
Number of Columns controls how many category cards appear side by side in grid view. The default is 4.
Order By sets which field is used to sort categories. The default is ID (the order they were created). Change to Name to sort alphabetically, or Count to sort by number of listings.
Sort By sets the sort direction. The default is Ascending. Switch to Descending to reverse the order.
Display Listing Count shows how many listings are in each category. This is on by default. Turn it off if you prefer a cleaner look without counts.
Hide Empty Categories hides categories that have no published listings. This is on by default. Keep it on to avoid showing visitors empty categories that lead to a blank page.
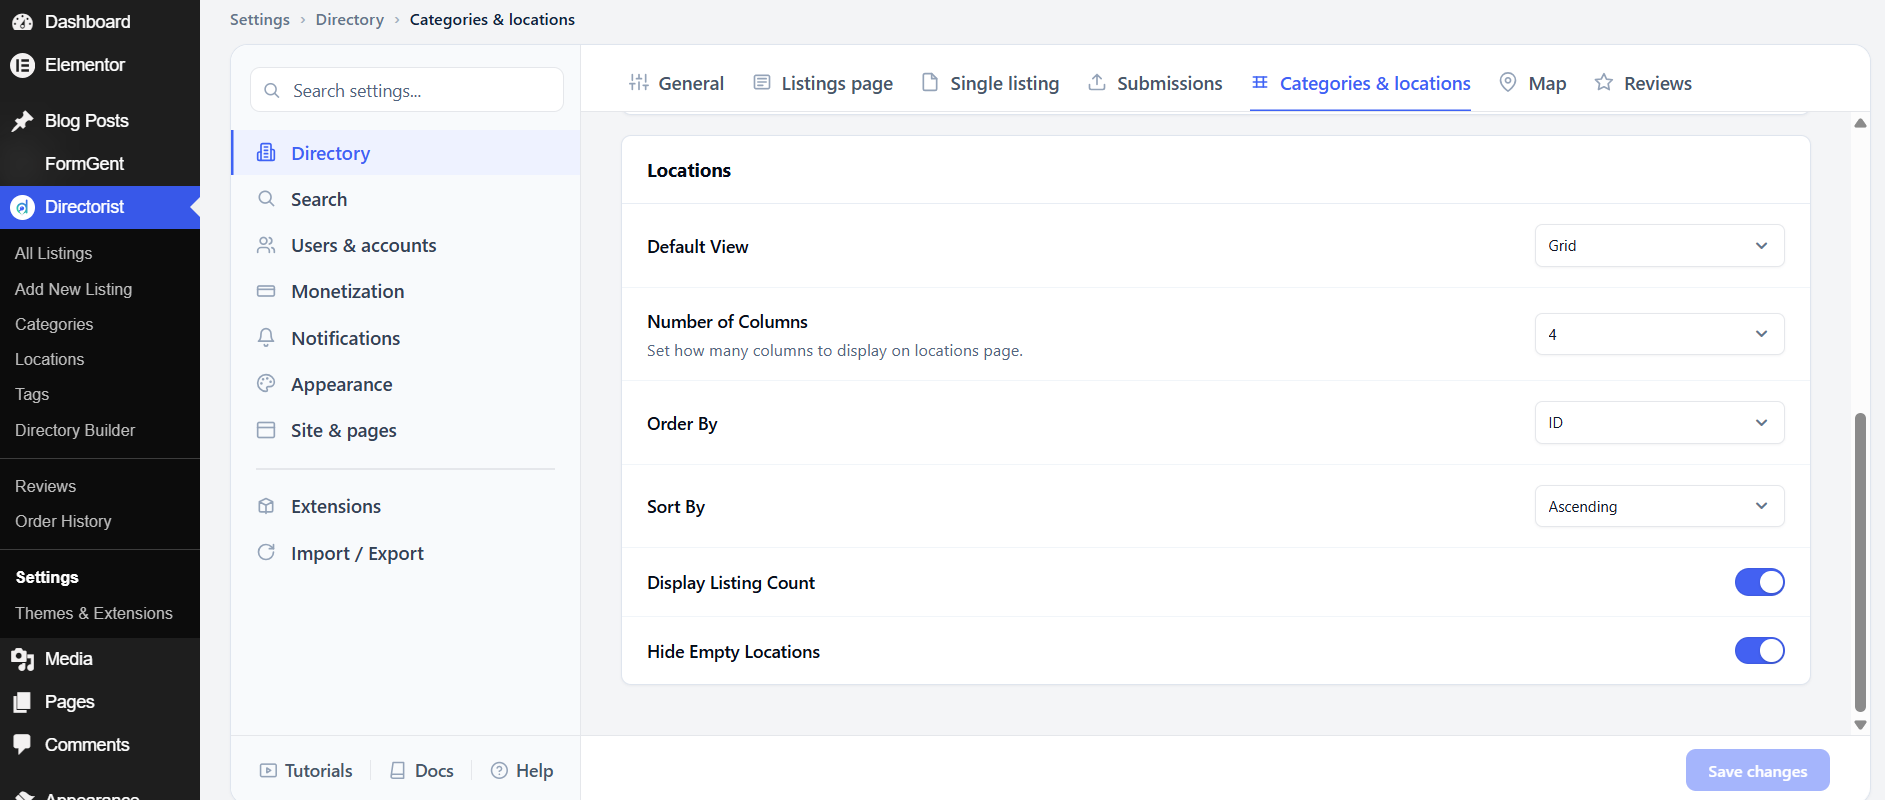
Locations
The Locations block has the same set of controls as Categories, applied to the all-locations page. The defaults — Grid view, 4 columns, sorted by ID ascending, with listing count visible, and empty locations hidden — are the same.
After adjusting these settings, click Save changes.
6. Map #
The Map tab controls which mapping service Directorist uses, where the map defaults when no address is set, zoom levels, and what appears in the popup when a visitor clicks a map pin.
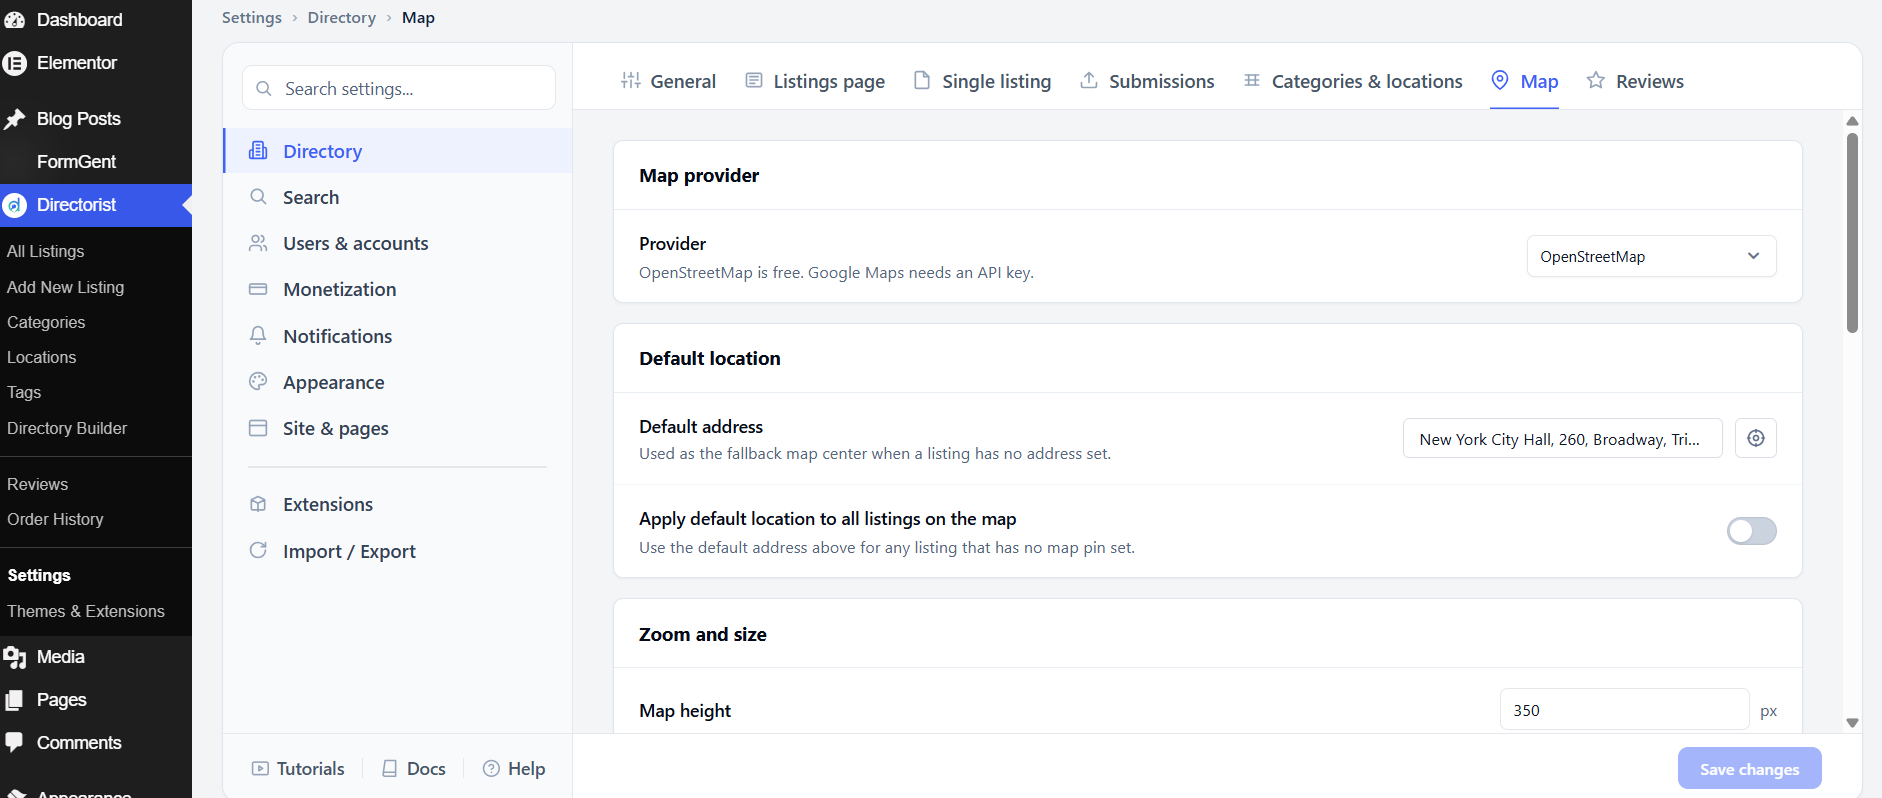
Map provider
Provider sets the mapping service. OpenStreetMap is free and requires no setup — it is the default. Google Maps provides a more familiar experience but requires a Google Maps API key. To use Google Maps, select it and paste your API key into the field that appears.
Default location
Default address is the fallback map center when a listing has no address set. The default is New York City Hall, 260, Broadway. Change this to a location that makes sense for your directory — for example, your country’s capital or your city.
Apply default location to all listings on the map pins every address-less listing to the default location on the map view. This is off by default. Only enable it if you want all listings to appear on the map even when they have no address, understanding that they will all appear at the same point.

Zoom and size
Map height sets the height of the map in pixels. The default is 350 px. Increase it for a more prominent map; decrease it to save vertical space.
Zoom on single listing controls how close the map is zoomed on a single listing’s detail page. The scale runs from 0 (fully zoomed out, showing the whole world) to 22 (closest, showing individual buildings). The default is 12, which shows a neighborhood level.
Zoom on map view controls the starting zoom level on the all-listings map view. The default is also 12. You may want a lower number here to show a wider area when many listings are spread out geographically.
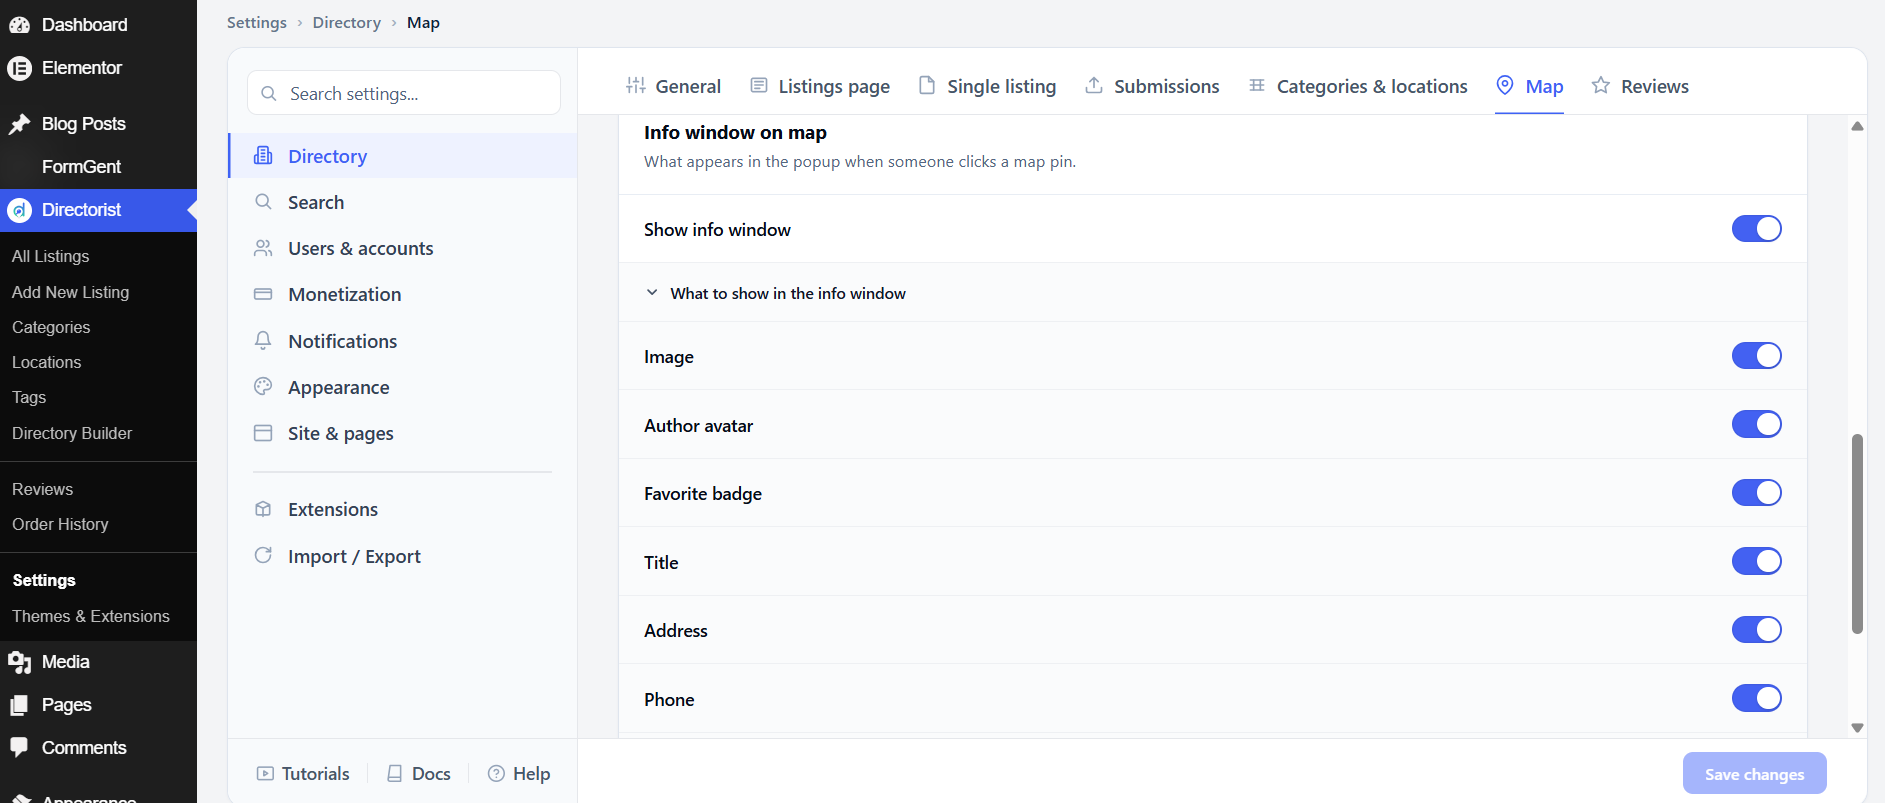
Info window on map
The info window is the popup that appears when a visitor clicks a map pin. Each item below can be toggled on or off. All are on by default.
The popup can show the listing Image, the Author avatar, a Favorite badge, the Title, the Address, the Phone number, the Price, the Rating, and a Get directions link. Turn off any fields that are not relevant to your listings — for example, turn off Price if your listings don’t have prices, or turn off Phone if phone numbers aren’t collected.
After adjusting these settings, click Save changes.
7. Reviews #
The Reviews tab controls who can leave reviews on listings and how new reviews are handled before they appear publicly.
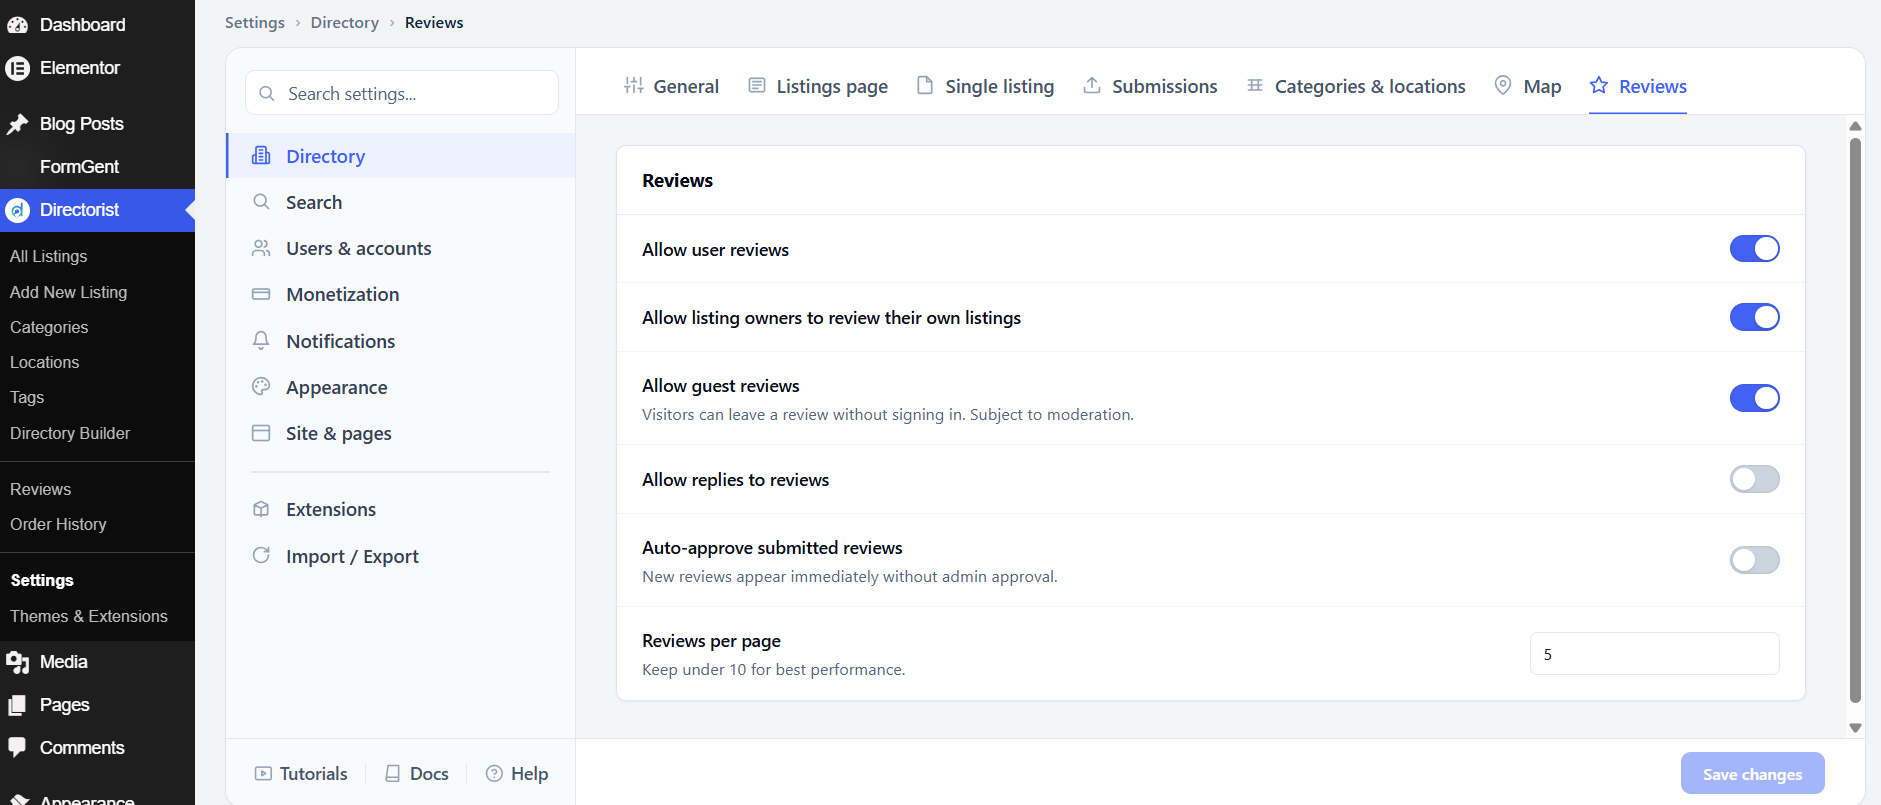
Allow user reviews is the master switch for the review system. This is on by default. Turn it off to disable reviews entirely across your directory.
Allow listing owners to review their own listings permits owners to leave a star rating and comment on their own listing. This is on by default. Consider turning it off to prevent self-promotional reviews from inflating scores.
Allow guest reviews lets visitors leave reviews without signing in. This is on by default. Guest reviews are subject to moderation. Turn this off if you want to require an account before someone can review.
Allow replies to reviews lets listing owners or admins post a reply beneath a review. This is off by default. Turn it on if you want owners to be able to respond to feedback publicly.
Auto-approve submitted reviews makes new reviews appear immediately without admin approval. This is off by default. Keep it off if you want to review content before it goes live; turn it on for a higher-volume directory where manual review isn’t practical.
Reviews per page sets how many reviews load at once on a listing page. The default is 5. Keep this number low — under 10 — for the best performance.
After adjusting these settings, click Save changes.


