

Directorist Notifications Pro adds native browser push notifications to your directory website, so admins and listing owners can get instant alerts when events like a new listing submission, an order, a payment, or a review happen — without a third-party service like OneSignal or PushAlert. This doc walks through enabling web push, choosing which events send notifications, customizing what they say, and checking delivery in the Notification Log.
Prerequisites #
Web push notifications only work over HTTPS (localhost is fine for development). Each browser and device needs its own notification permission — enabling notifications in one browser does not carry over to another browser or device.
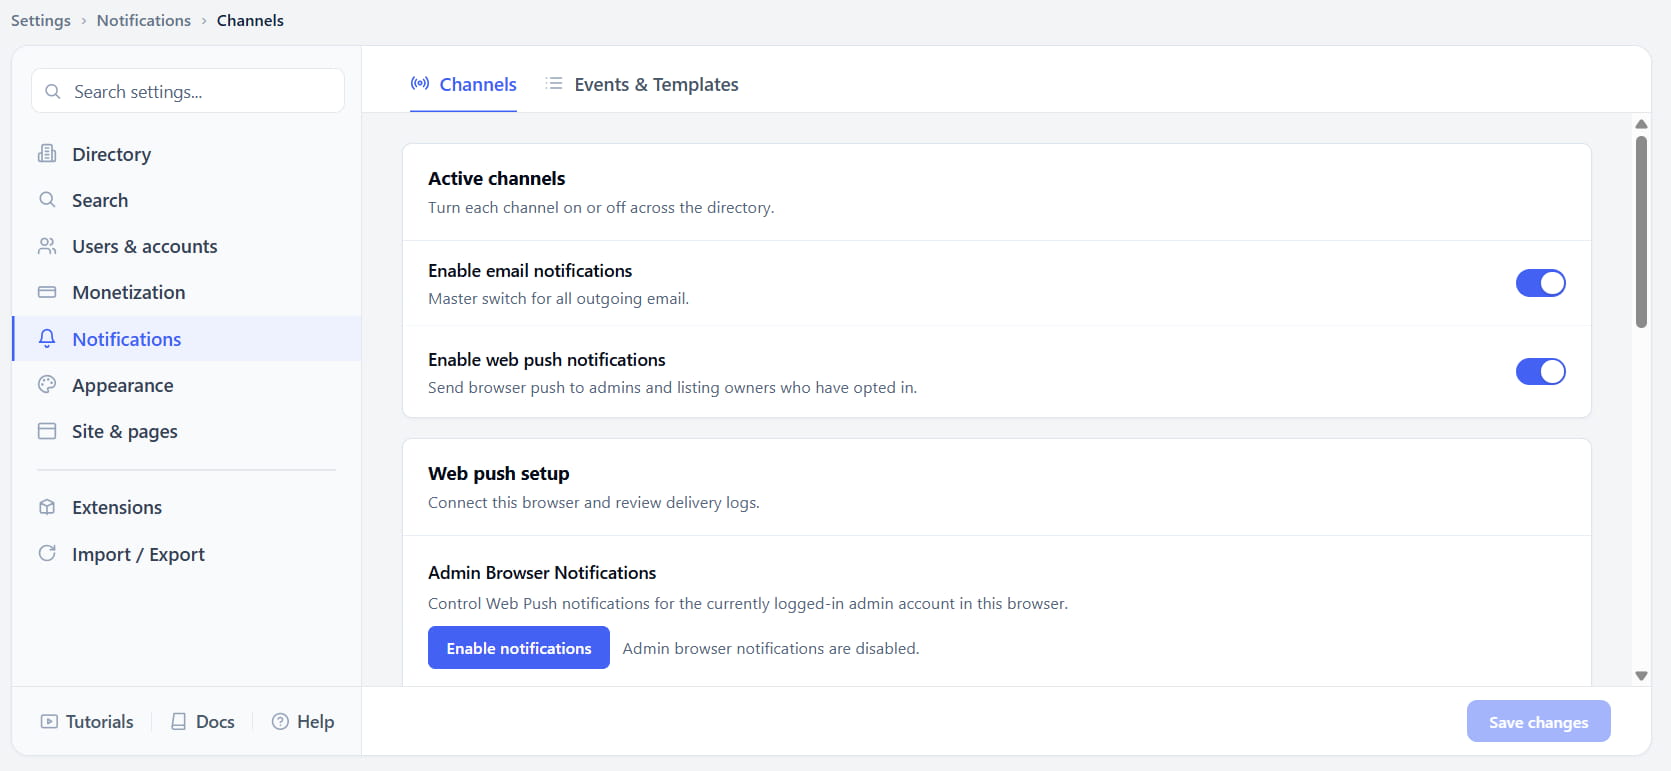
Before admins or listing owners can receive anything, Enable web push notifications must be turned on for the whole directory.
Path: WP Admin → Directorist → Settings → Notifications → Channels
- Go to Settings → Notifications → Channels.
- Under Active channels, turn on Enable web push notifications.
- Click Save changes.
# For Admins: Enabling and Managing Browser Notifications #
Step 1 – Enable browser notifications for your account #
- Go to Settings → Notifications → Channels.
- Under Web push setup → Admin Browser Notifications, click Enable notifications.
- When the browser asks for permission, click Allow.
Once allowed, the button changes to Disable notifications and the label next to it confirms Admin browser notifications are enabled. You’ll need to repeat this step in every browser or device you want to receive notifications on.
Step 2 – Choose which events send a notification #
- Go to Settings → Notifications → Events & Templates.
- Find the event you want to control under Admin notifications or Listing owner notifications — for example New listing submitted, Order completed, Payment received, Listing contact form, or Listing review.
- Use the Web Push toggle next to the event to turn it on or off. The Email toggle next to it controls the email channel independently, so you can enable one without the other.
- Click Save changes.
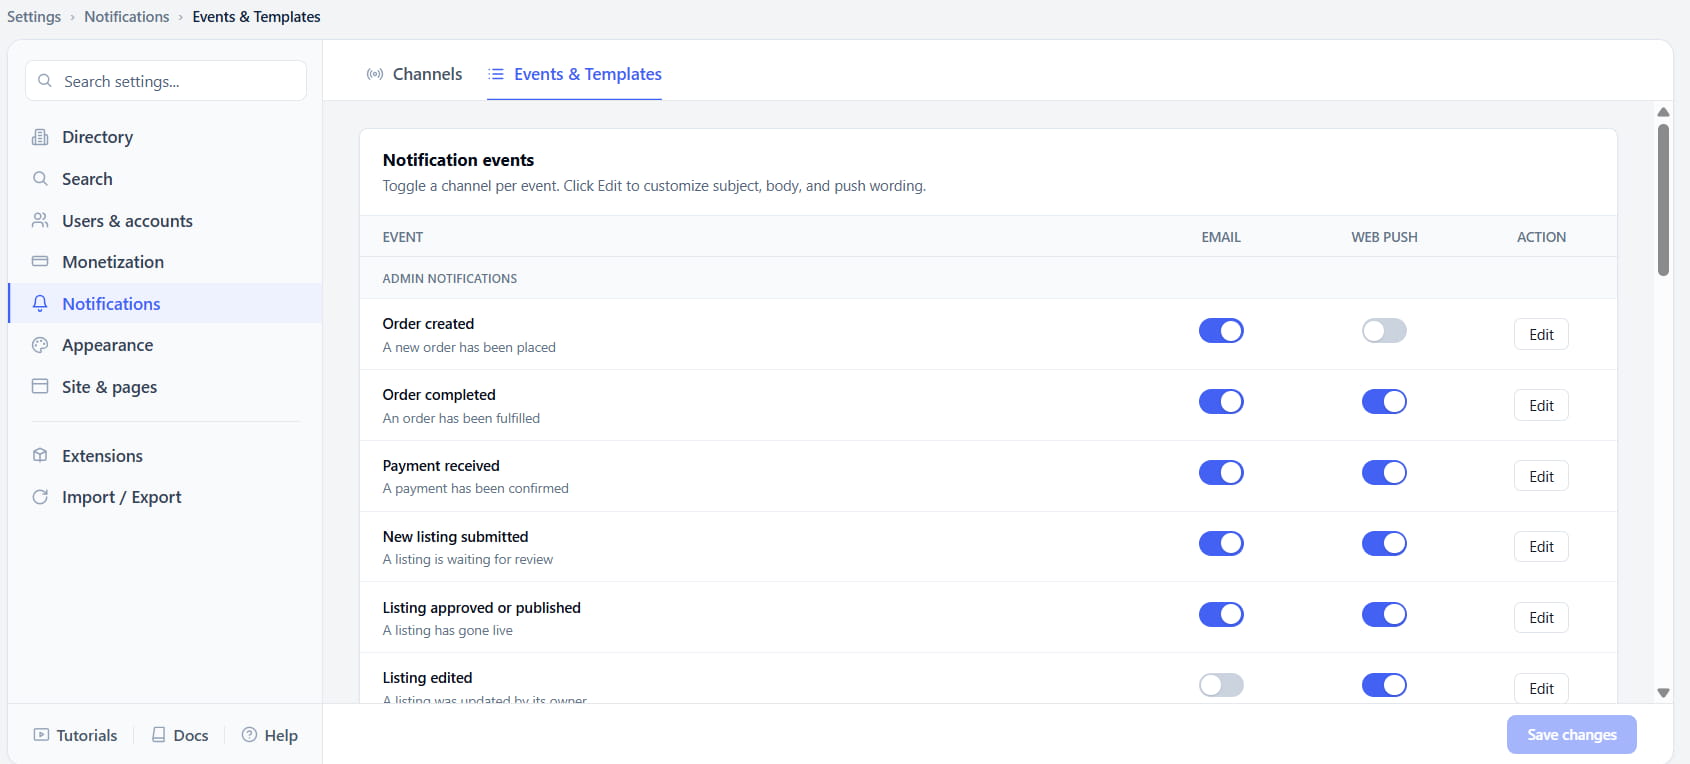
Admin notifications go to every logged-in admin who has enabled browser notifications. Listing owner notifications go only to the owner of the listing the event happened on.
Step 3 – Customize the notification title and message #
- On the Events & Templates tab, click Edit next to the event you want to change.
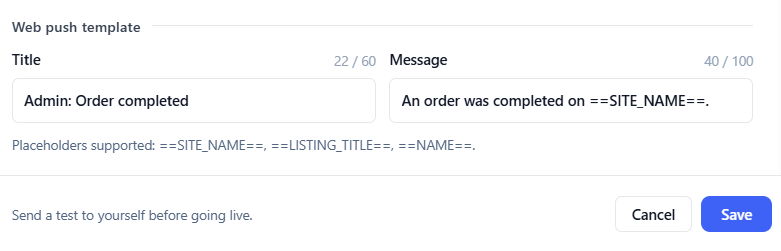
- Scroll to the Web push template section at the bottom of the edit panel.
- Edit the Title and Message fields. Both have a character limit shown next to the field (for example, 60 characters for Title, 100 for Message).
- Use the supported placeholders in your title or message: ==SITE_NAME==, ==LISTING_TITLE==, and ==NAME==.
- Click Send a test to yourself to preview the notification before it goes live.
- Click Save.
# For Listing Owners: Opting Into Browser Notifications #
Step 1 – Respond to the notification popup #
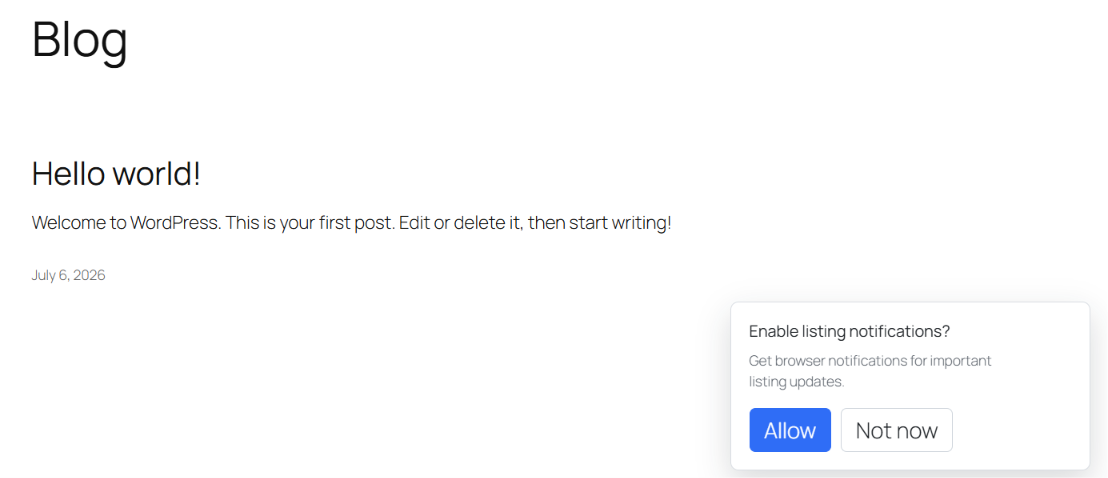
After logging in, a listing owner sees a popup asking Enable listing notifications? with Allow and Not now buttons.
- Click Allow to opt in.
- When the browser asks for permission, click Allow again.
If they click Not now instead, notifications stay off and the popup will not appear again on that browser.
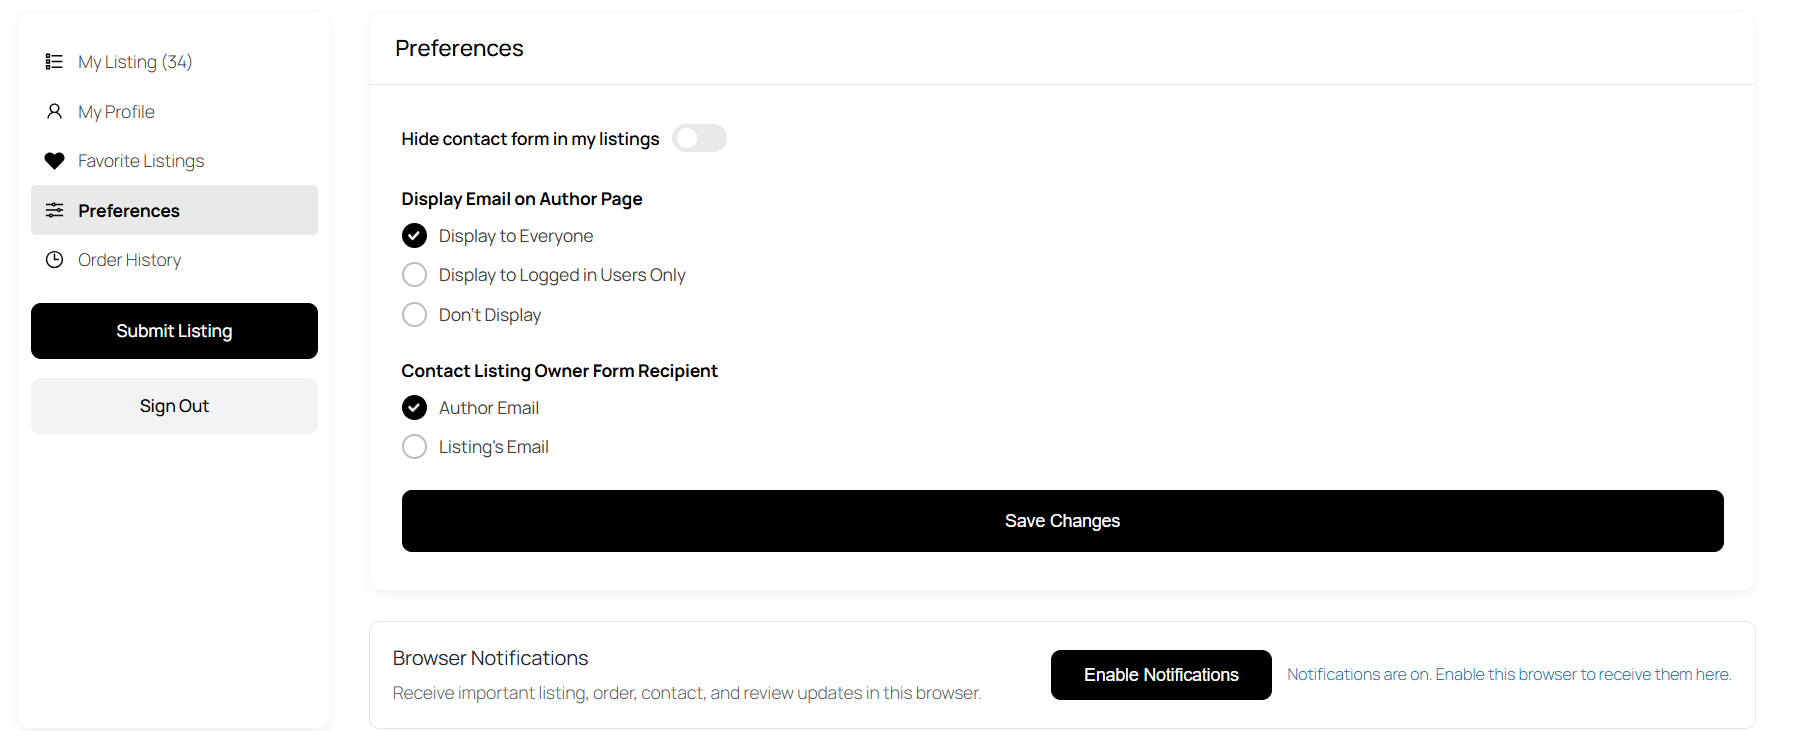
Step 2 – Enable notifications later from Preferences #
A listing owner who dismissed the popup can still turn notifications on afterward.
- Go to Dashboard → Preferences.
- Under Browser Notifications, click Enable Notifications.
- When the browser asks for permission, click Allow.
The button changes to Disable Notifications, and the text next to it confirms notifications are on in that browser.
# Viewing Notification Delivery (Notification Log) #
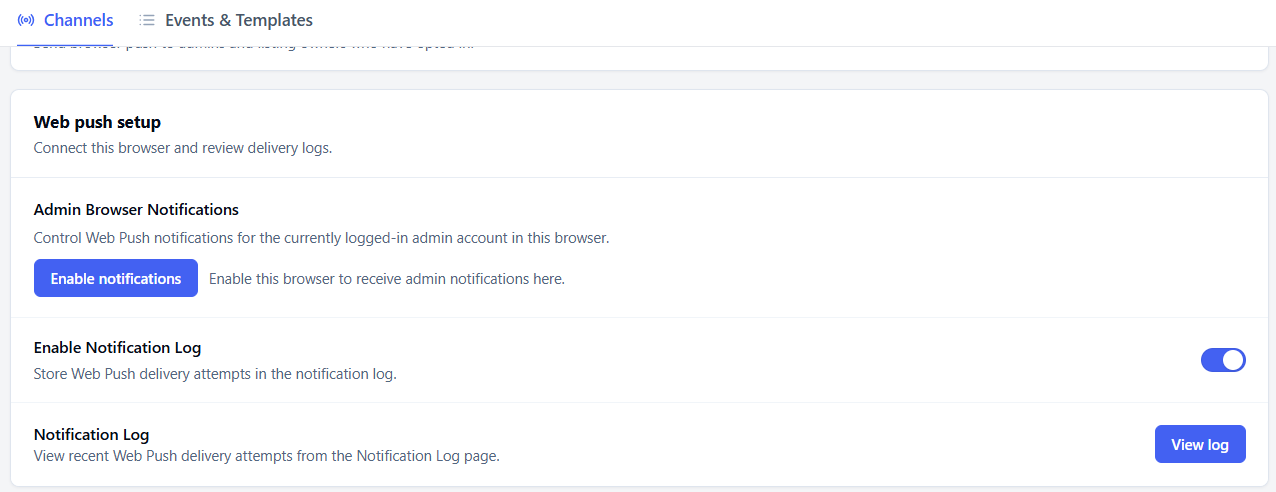
Step 1 – Enable the log #
- Go to Settings → Notifications → Channels.
- Toggle on Enable Notification Log.
A View log button appears next to it once the log is on.
Step 2 – Review delivery attempts #
- Click View log.
- Review the table of recent web push delivery attempts, showing Date, Event, Recipient, Type (Admin or Owner), Channel, Status (Sent, Skipped, or Failed), Title, Message, and Failure Reason where applicable.
- Click Delete All Logs to clear the log if needed.
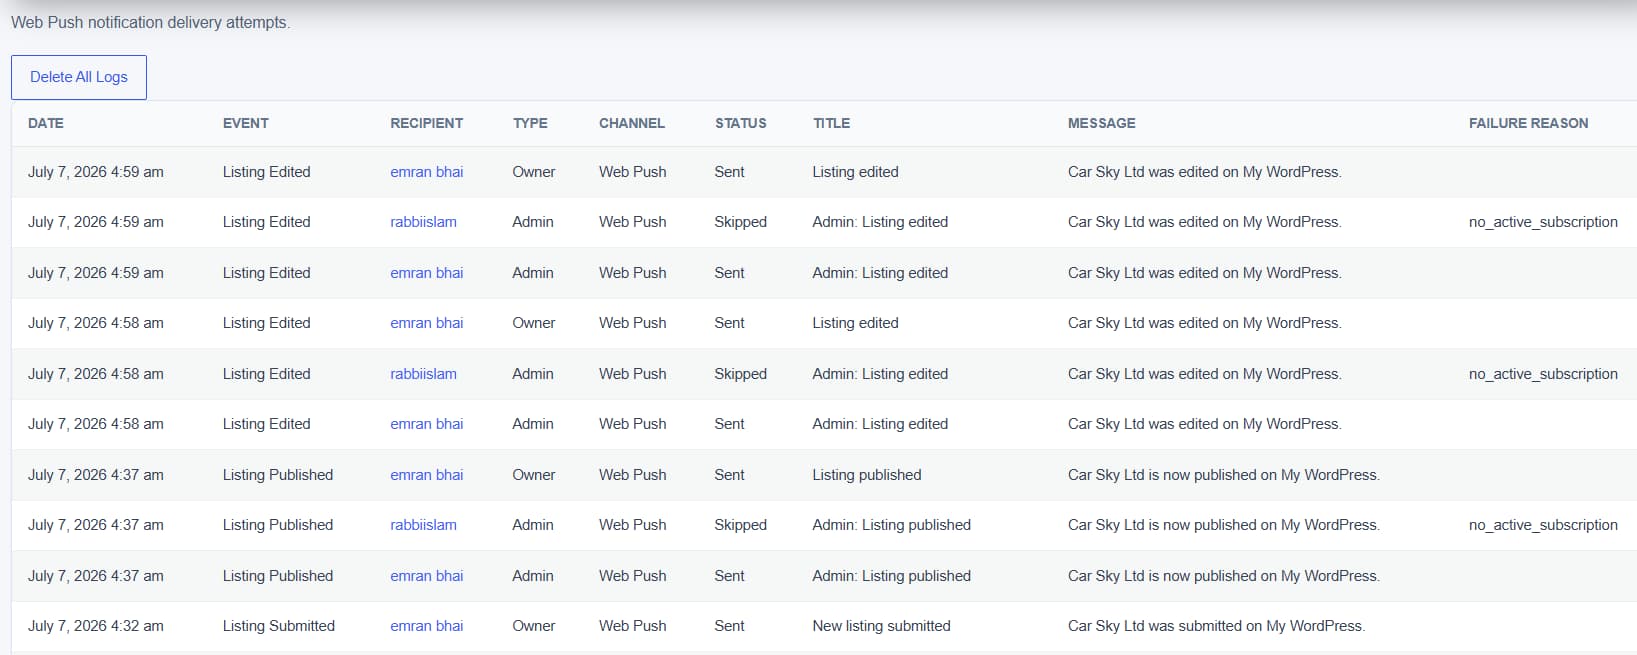
A common failure reason is no_active_subscription, which means that the recipient has not enabled browser notifications in the browser being tested.
When Notifications Won’t Be Delivered #
A notification can fail or be skipped for reasons outside the plugin’s control. Check the following if a recipient isn’t getting alerts:
- The browser does not support Web Push.
- The website is not using HTTPS, except localhost development.
- The user is logged out.
- The user has not allowed browser notifications.
- The user clicked Not now and did not enable notifications later.
- The user disabled notifications from Preferences.
- Browser notification permission is blocked.
- The operating system blocks browser notifications.
- Do Not Disturb or Focus mode hides notifications.
- The event is disabled in settings.
- The recipient has no active browser subscription.
- The user enabled notifications in one browser but is testing in another browser.
- The user enabled notifications on one device but is testing on another device.
- The listing owner cannot be found for that listing event.
- The browser subscription expired.
- The server cannot reach the browser push service.
Supported Browsers #
Web push notifications work on:
- Chrome (desktop and Android)
- Edge (desktop and Android)
- Firefox (desktop)
- Safari (macOS)
- iOS/iPadOS 16.4+ Home Screen web apps.
Important: iPhone/iPad Web Push works for Home Screen web apps. It does not work exactly like a normal desktop browser tab.


