

The Directorist Announcement extension lets you send a message to all users on your directory, or to a specific list of users. The announcement appears in the recipient’s dashboard, and can optionally also be sent to their email address.
Prerequisites #
The Directorist Announcement extension must be installed and active before you can send an announcement.
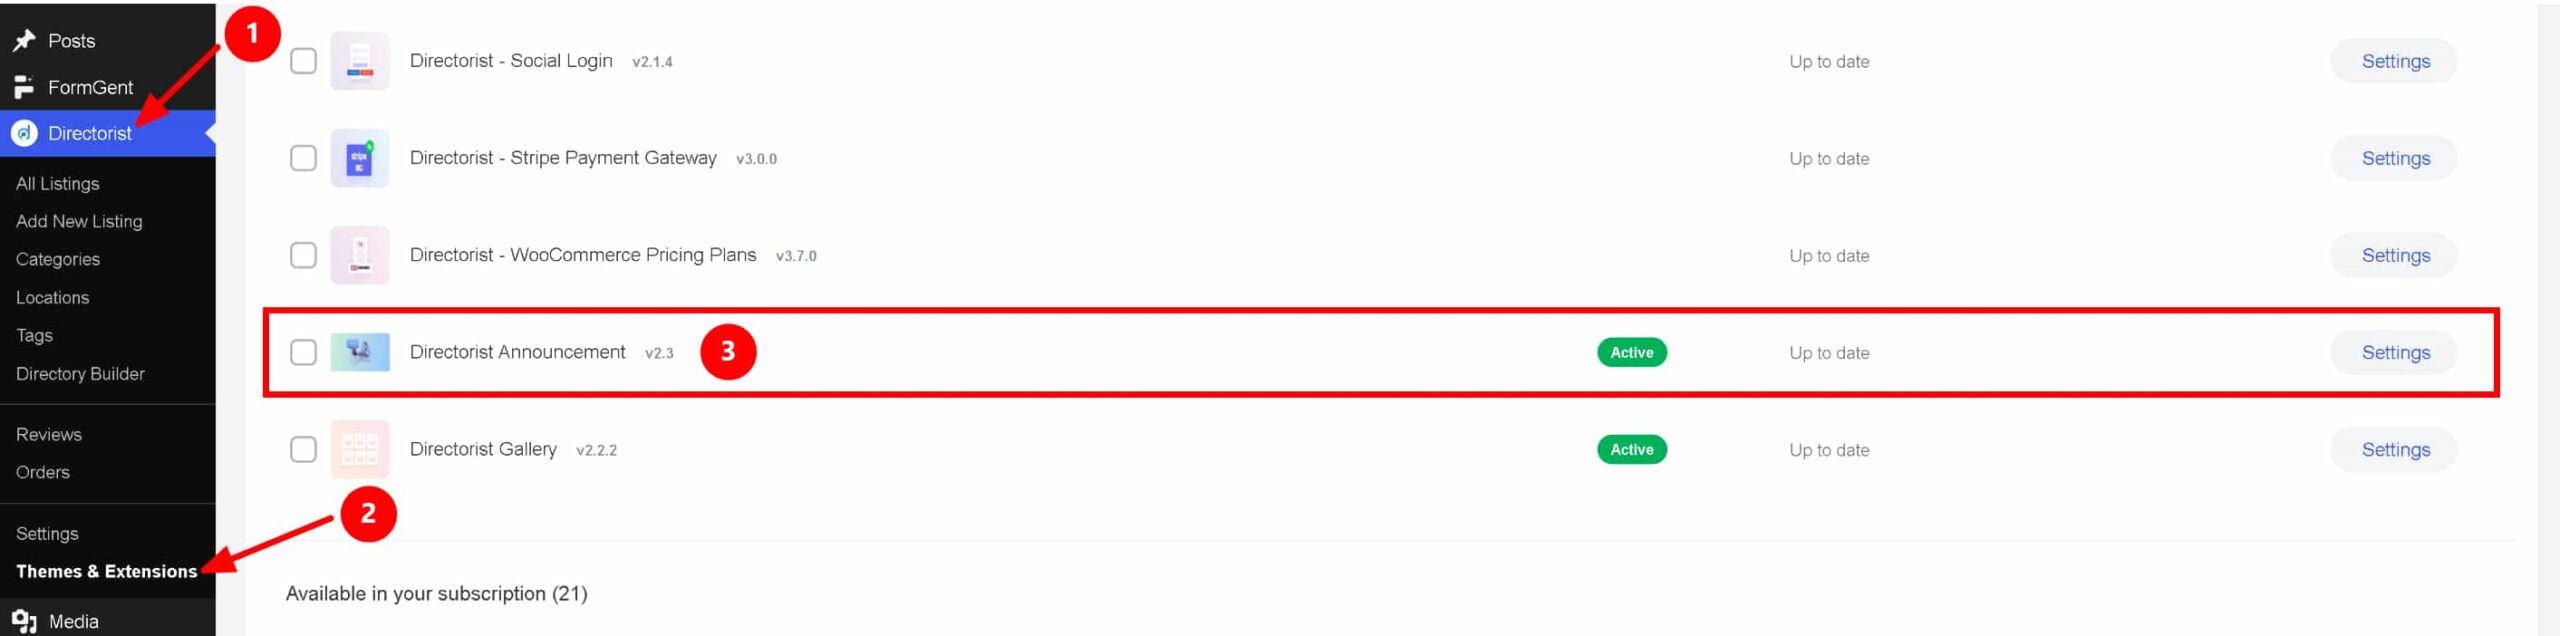
Path: WP Admin → Directorist → Themes & Extensions
- Go to Directorist → Themes & Extensions.
- Find Directorist Announcement in the list.
- If it isn’t active yet, activate it from this screen. Once active, it shows an Active status next to its name, along with a Settings link.
For Admins: Sending an Announcement #
Step 1 – Open the Announcement settings #
- Go to Directorist → Settings.
- Click the Extensions tab.
- Click the Announcement sub-tab.
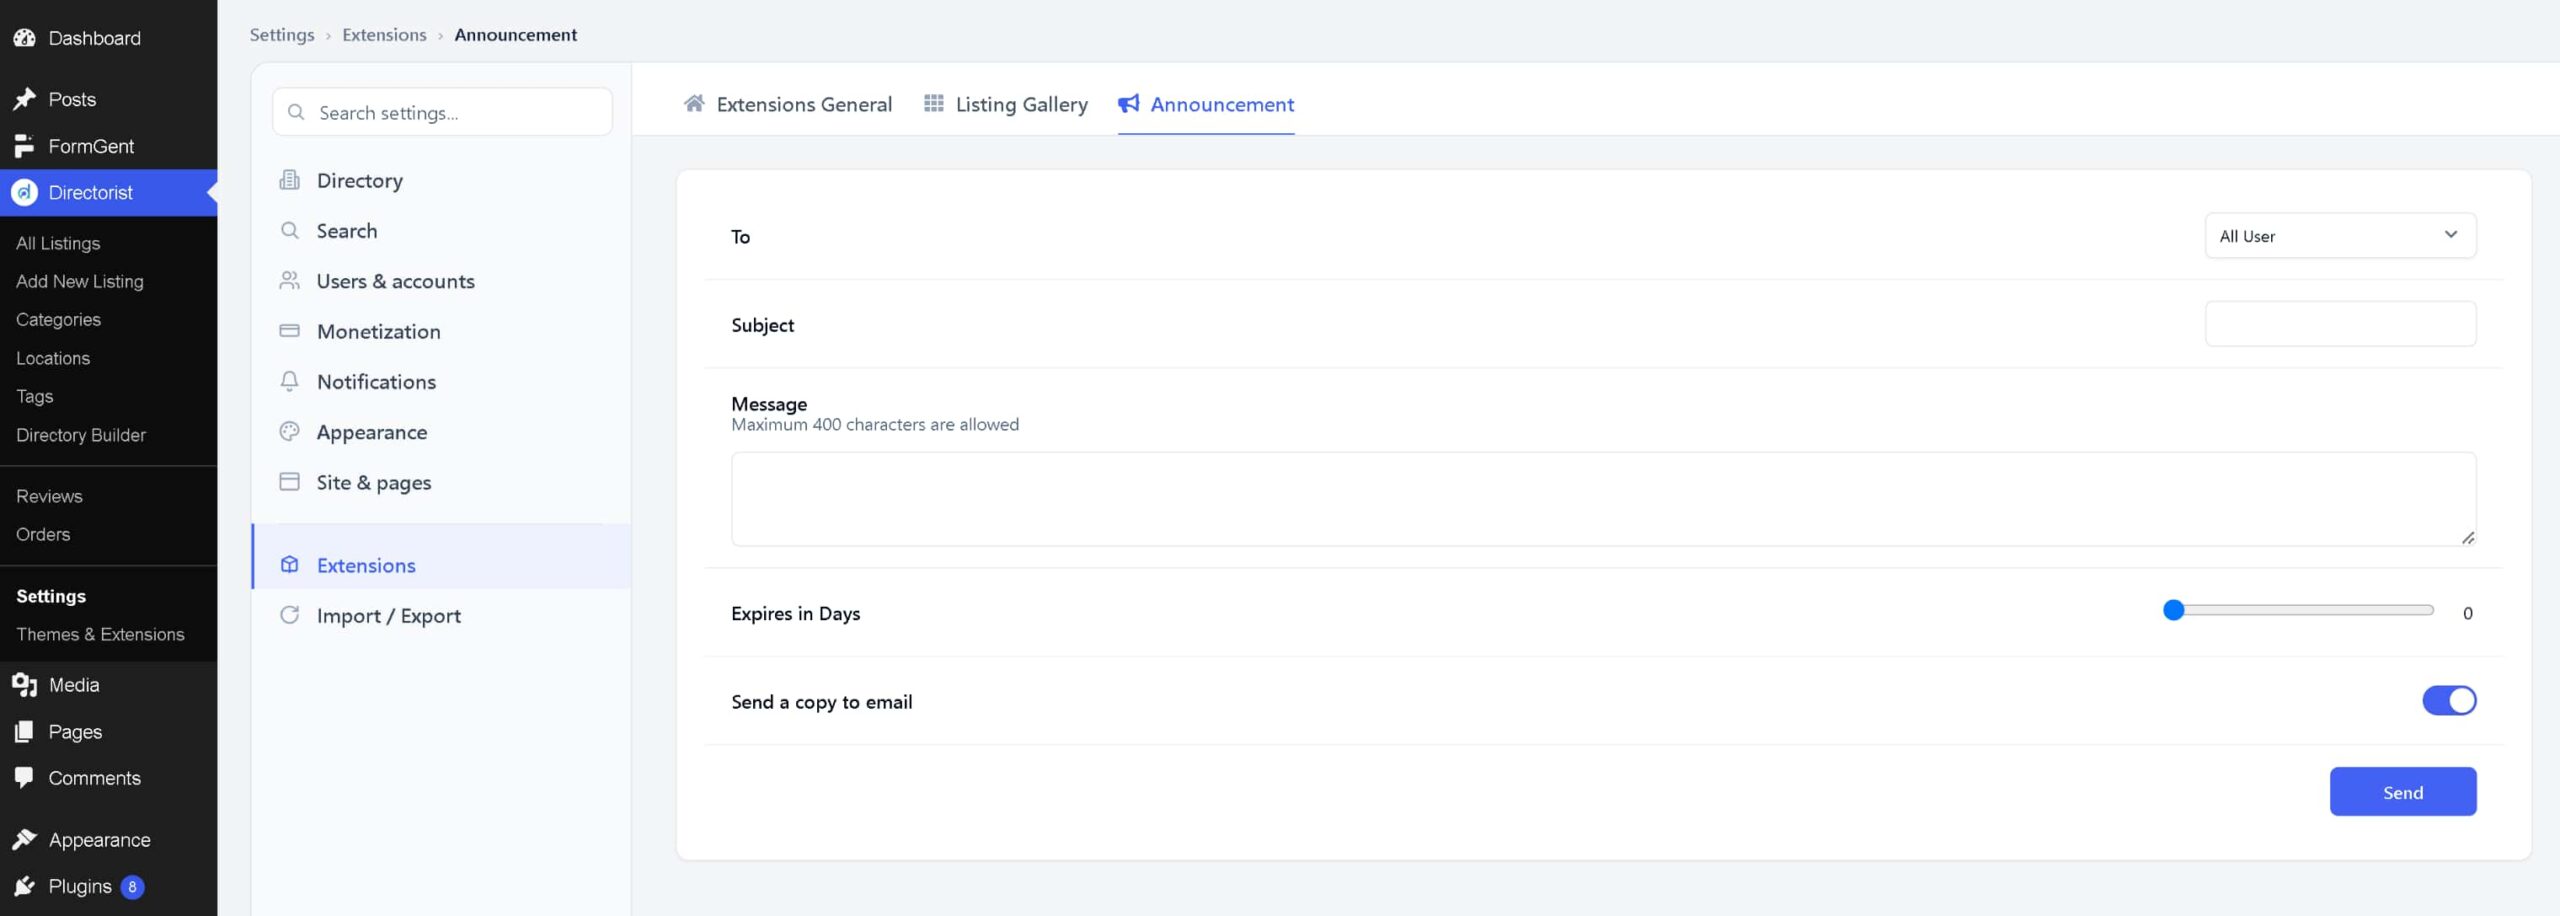
Path: WP Admin → Directorist → Settings → Extensions → Announcement
Step 2 – Choose who receives it #
- Set To to All User to send the announcement to every user, or to Selected User to choose specific recipients.
- If you chose Selected User, check the names you want to send to under Recipients.
Step 3 – Write the announcement #
- Enter a headline in Subject.
- Enter the announcement text in Message. Maximum 400 characters are allowed.
Step 4 – Set how long it stays visible #
- Drag the Expires in Days slider to set how many days the announcement stays visible in recipients’ dashboards. Leaving it at 0 keeps the announcement visible for a full year.
Step 5 – Choose whether to also send it by email #
- Leave Send a copy to email turned on to also email the announcement to each recipient, in addition to showing it in their dashboard. Turn it off to only show it in the dashboard.
Step 6 – Send the announcement #
- Click Send.
Only administrators can send announcements.
For Listing Owners: Viewing an Announcement #
Once an admin sends an announcement, it appears in the recipient’s dashboard.
Step 1 – Open the Announcements tab #
- Go to your dashboard.
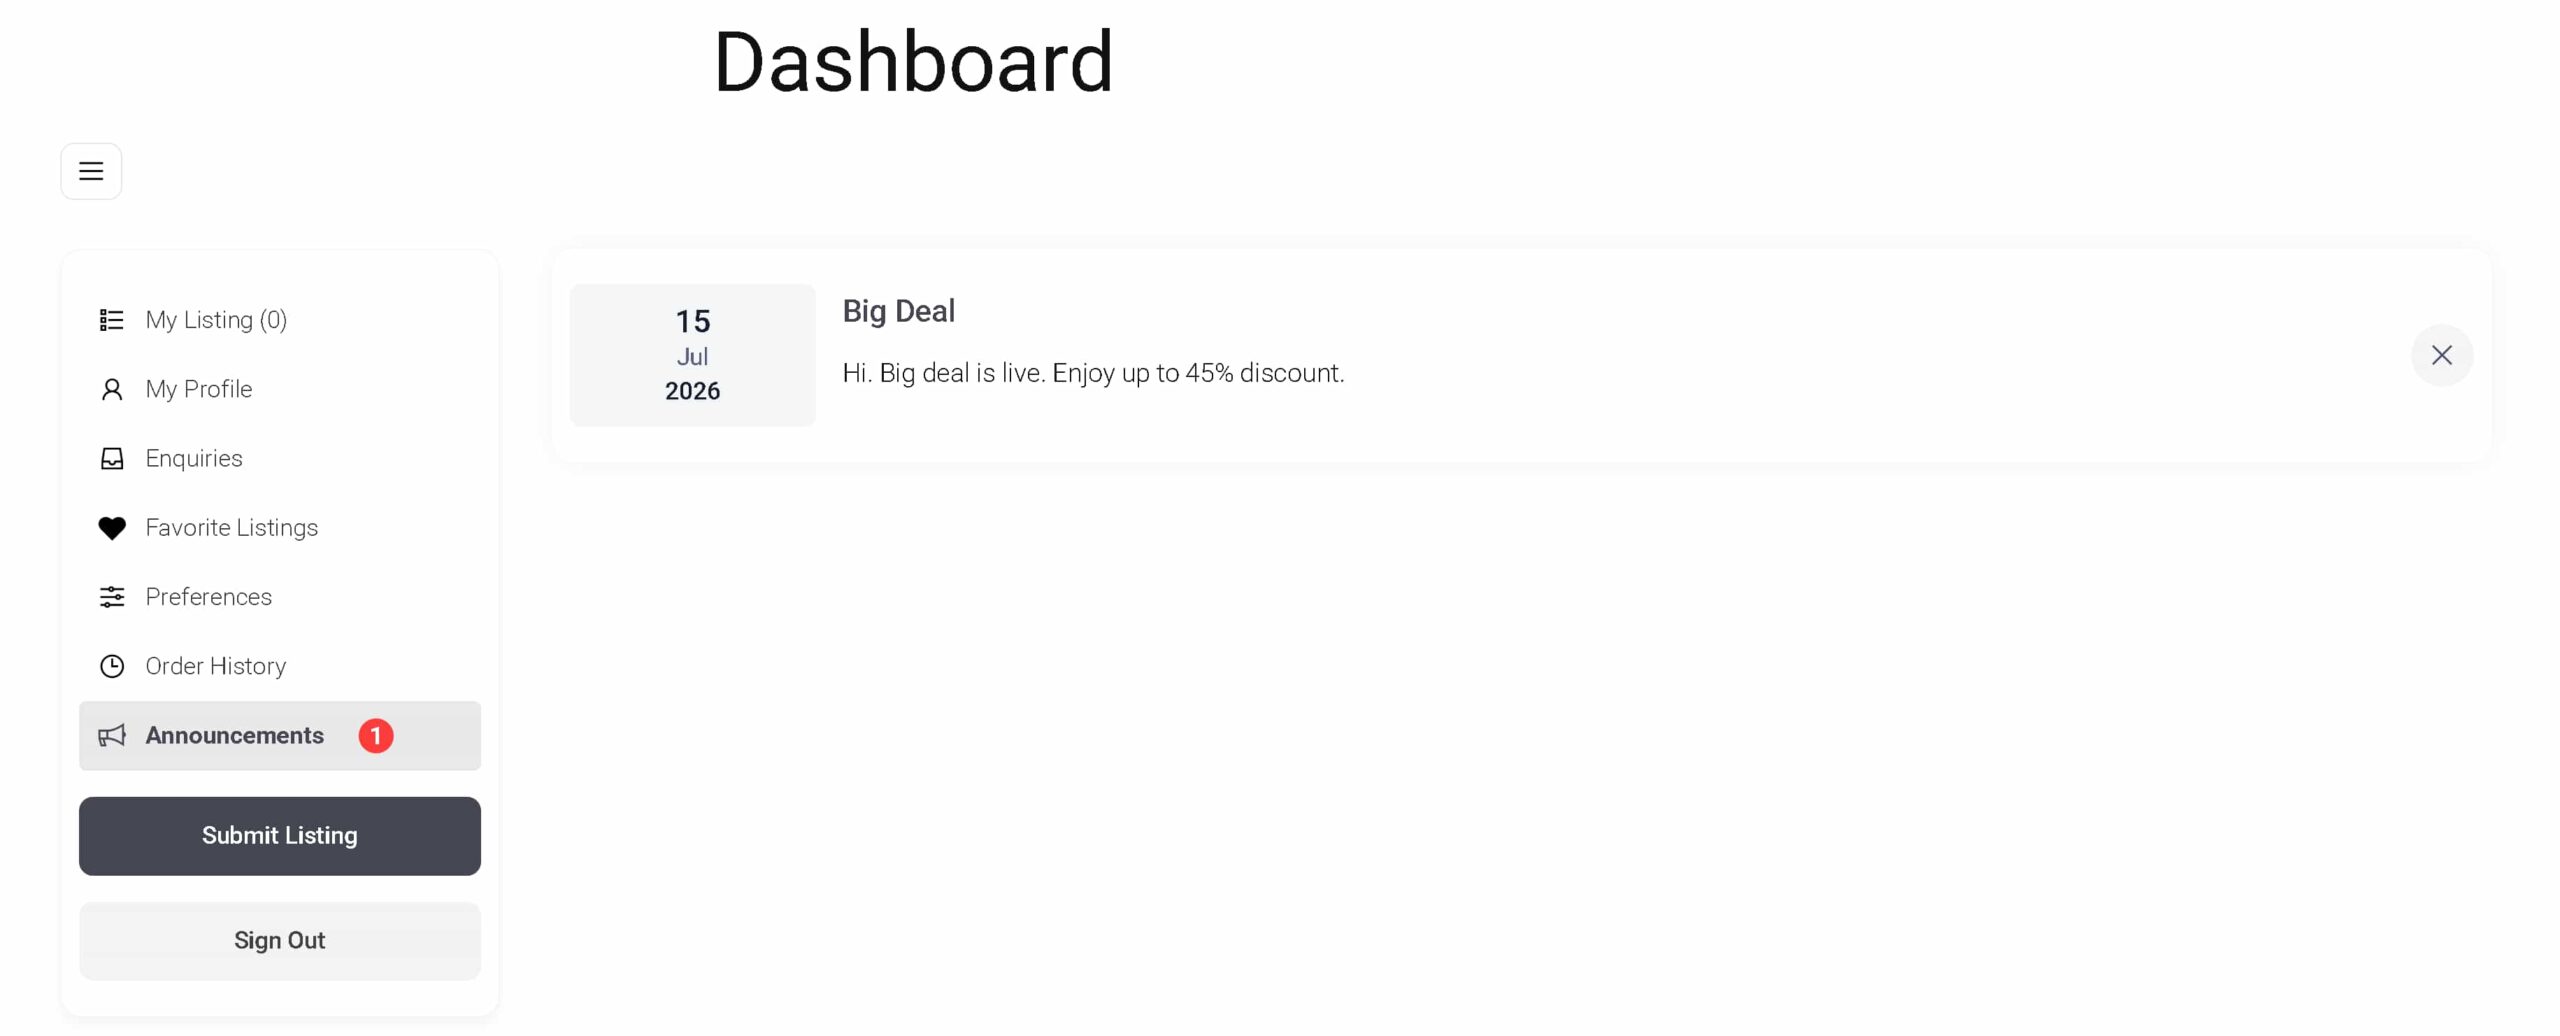
- Click Announcements in the left menu. A red counter next to Announcements shows how many announcements you haven’t seen yet.
Step 2 – Read the announcement #
- Each announcement shows its date, a title, and the message.
Step 3 – Dismiss the announcement #
- Click the X on an announcement to close it.
Closing an announcement only removes it from that user’s own view. It does not affect what other recipients see.


