
When a listing submission doesn’t meet your directory’s standards, you can reject it and send the listing owner a clear reason – directly from the WordPress admin. The listing owner sees the rejection in their dashboard, understands what needs to be fixed, and can edit and resubmit without contacting you separately.
Prerequisites #
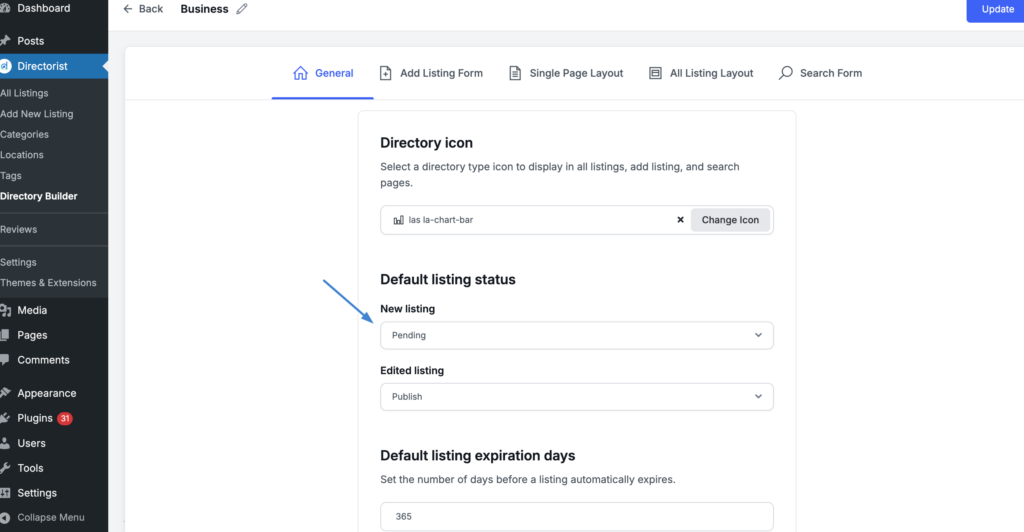
For the rejection flow to work, new listing submissions must be set to Pending status (rather than auto-publishing). You can confirm or change this in your directory settings.
To check your default listing status:
- Go to Directorist → Directory Builder in your WordPress admin.
- Click the directory you want to configure.
- Open the General tab.
- Under Default listing status, find the New listing dropdown.
- Make sure it is set to Pending.
- Click Update.
With this in place, every new submission will wait for your review before going live.
For Admins: Rejecting a Listing #
Step 1 – Find the pending submission #
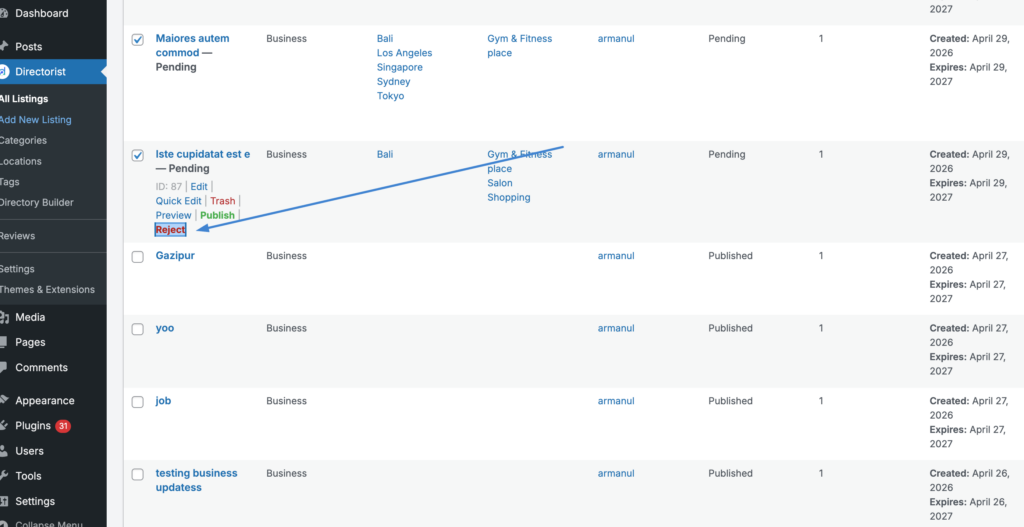
- Go to Directorist → All Listings in your WordPress admin.
- Click the Pending filter tab at the top of the listings table to see submissions awaiting review.
Step 2 – Open the rejection panel #
- Hover over the listing you want to reject.
- A row of action links will appear below the listing title: Edit, Quick Edit, Trash, Preview, Publish, and Reject.
- Click Reject.
Step 3 – Choose a reason and confirm #
A Reject listing panel will open. It shows the listing name and the email address of the submitter.
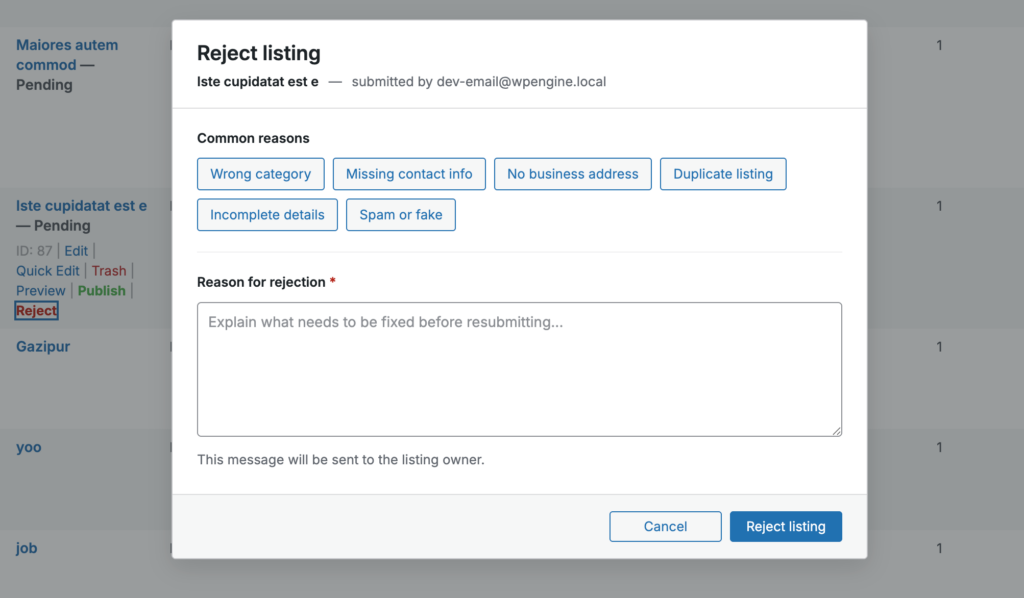
You have two options for providing a reason:
- Common reasons – Click any of the preset reason tags to populate the text field automatically. Available presets are: Wrong category, Missing contact info, No business address, Duplicate listing, Incomplete details, and Spam or fake. You can click a preset to use it as-is, or edit the text afterward.
- Custom reason – Type directly into the Reason for rejection field to write your own message. This text will be sent to the listing owner.
A note below the text field confirms: This message will be sent to the listing owner.
- Once you’ve entered a reason, click Reject listing to confirm. Click Cancel to close without rejecting.
The listing status will change to Rejected and the listing owner will receive an email notification with the reason you entered.
Viewing Rejected Listings (Admin) #
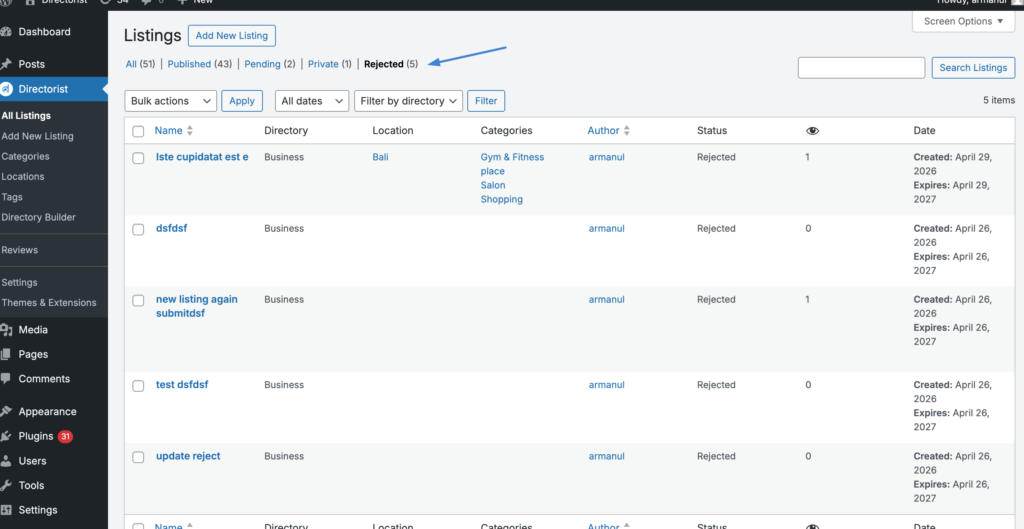
After rejecting a listing, you can find all rejected submissions by clicking the Rejected filter tab in Directorist → All Listings. The count next to the tab label shows how many rejected listings are currently on record.
Each rejected listing shows its name, directory, location, categories, author, and status in the listings table.
For Listing Owners: Understanding a Rejection #
When a listing you submitted is rejected, you will receive an email notification with the reason provided by the admin.
You can also view the rejection status and reason directly in your frontend dashboard.
Viewing rejection details #
- Log in to your account and open your listing dashboard.
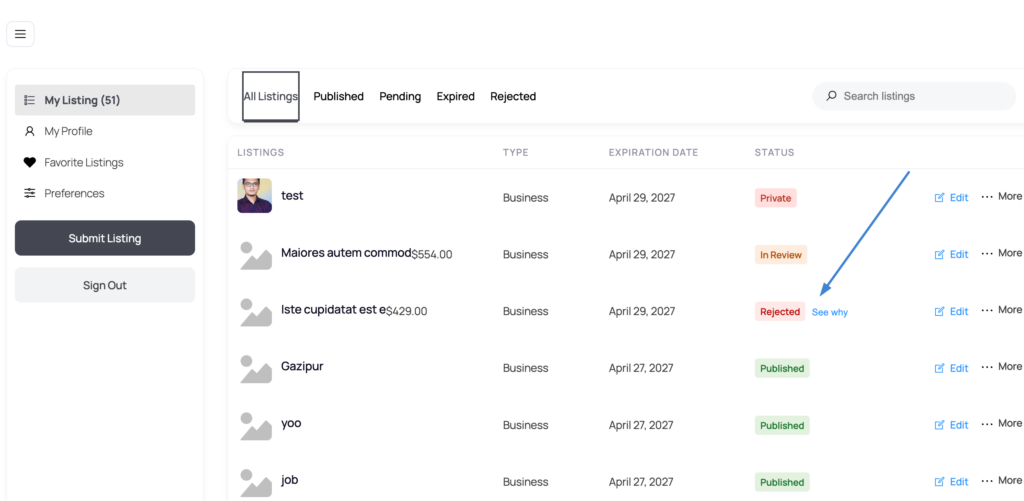
- Your listings are shown with a Status badge next to each one. A rejected listing will show a red Rejected badge.
- Next to the Rejected badge, you will see a See why link. Click it to view the reason the admin entered when rejecting the listing.
The dashboard tabs at the top –All Listings, Published, Pending, Expired, and Rejected let you filter your listings by status. Click Rejected to see only your rejected submissions.
Editing and resubmitting #
To fix and resubmit a rejected listing:
- Click Edit next to the rejected listing.
- Make the changes indicated in the rejection reason.
- Save the listing. It will return to Pending status and re-enter the admin review queue.
You do not need to create a new listing submission. Editing the existing one is enough to trigger a fresh review.


