
What is FormGent Integration? #
FormGent integration in Directorist allows you to place fully customizable forms directly inside your listing pages. Instead of using a fixed contact form, you can design your own form and control what information users submit.
This turns your listings into structured data collection points, not just static pages.
Why It Matters for Directorist Users #
Most directory sites rely on basic contact forms. These forms often miss important details, which leads to back-and-forth communication.
With FormGent:
- You collect exactly the information you need
- Listing owners receive more useful, structured responses
- Visitors complete clear, guided input instead of writing random messages
- You improve the overall quality of inquiries
This directly helps reduce friction and improves conversion from visitors to meaningful interactions.
Who Can Use This #
- Available for all Directorist users
- Works with the free version of FormGent
- No premium requirement to get started
You can use it with the Directorist core plugin without additional cost.
Key Use Cases #
1. Service Inquiry with Custom Inputs #
Instead of a simple contact form, you can ask users specific questions like budget, requirements, or timeline. This helps listing owners receive more qualified inquiries.
2. Quote Requests #
Visitors can submit detailed requests directly from a listing. For example, a service provider can collect project details before responding.
3. Booking or Pre-screening Forms #
You can ask users for essential information before confirming availability or scheduling.
4. Feedback or Application Collection #
Listing owners can collect applications, surveys, or feedback without relying on external tools.
Step-by-Step Setup Guide #
Step 1: Go to Directory Builder #
From your WordPress dashboard:
- Navigate to Directorist → Directory Builder
Step 2: Open Single Listing Layout #
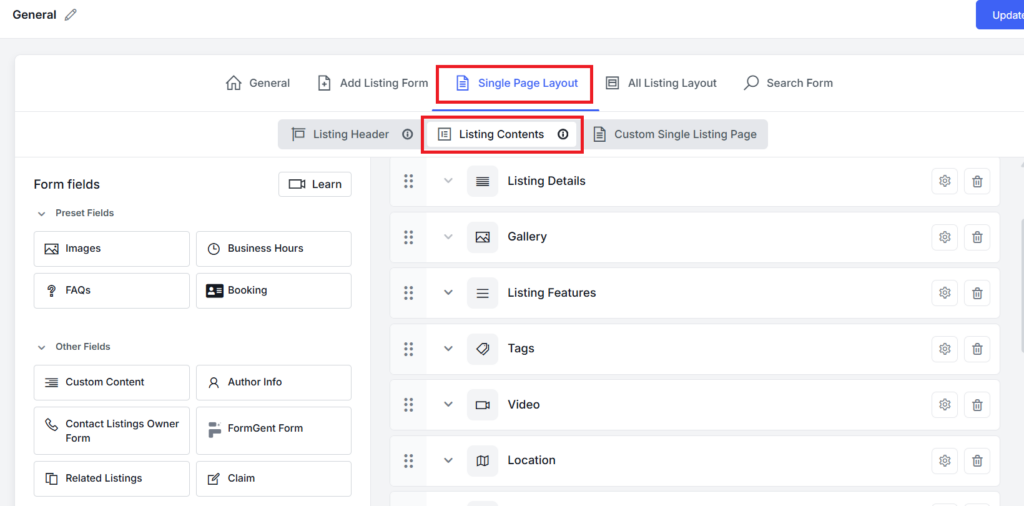
- Click on Single Page Layout
- Then select Listing Contents
Step 3: Add FormGent Field to a Section #
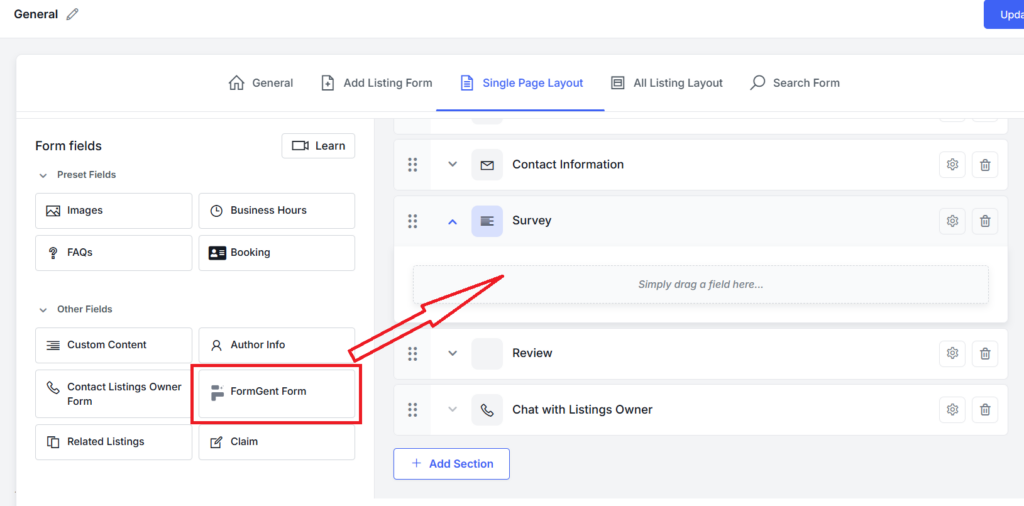
- Create or select a section where you want the form to appear
- Drag the FormGent Form field into that section
If FormGent is not installed:
- You will see a prompt to install it
- The system will automatically install the free plugin from the WordPress repository
This removes the need for manual setup.
Step 4: Select Your Form #
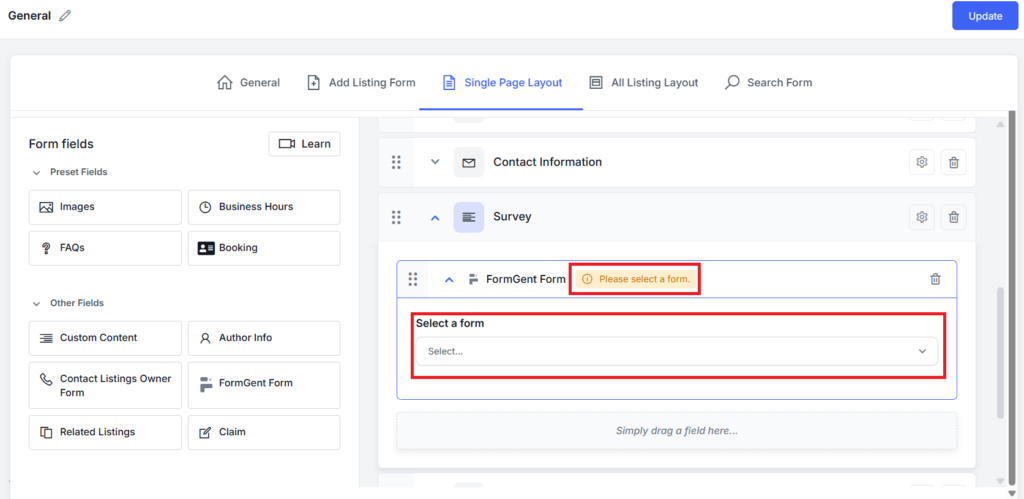
- Click on the FormGent field settings
- Choose your desired form from the dropdown
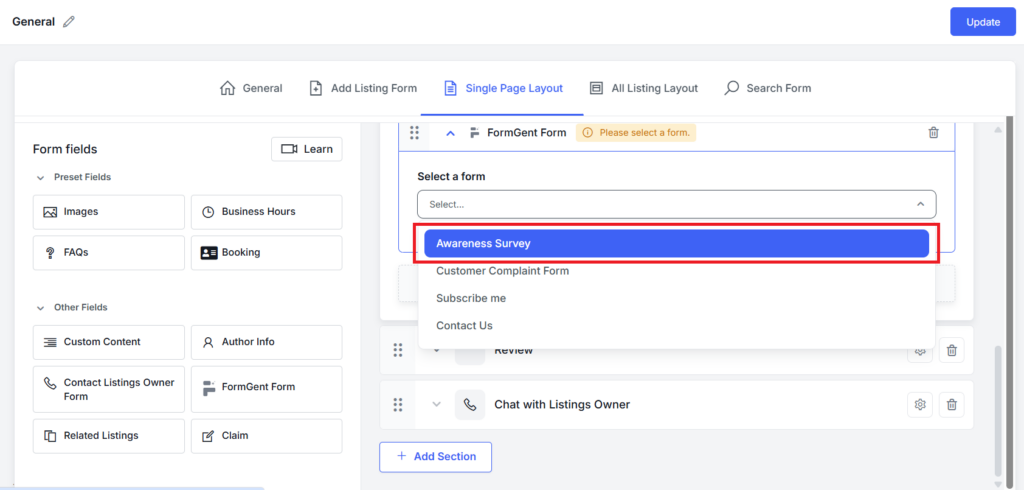
Make sure you have already created a form inside FormGent.
Step 5: Save Changes #
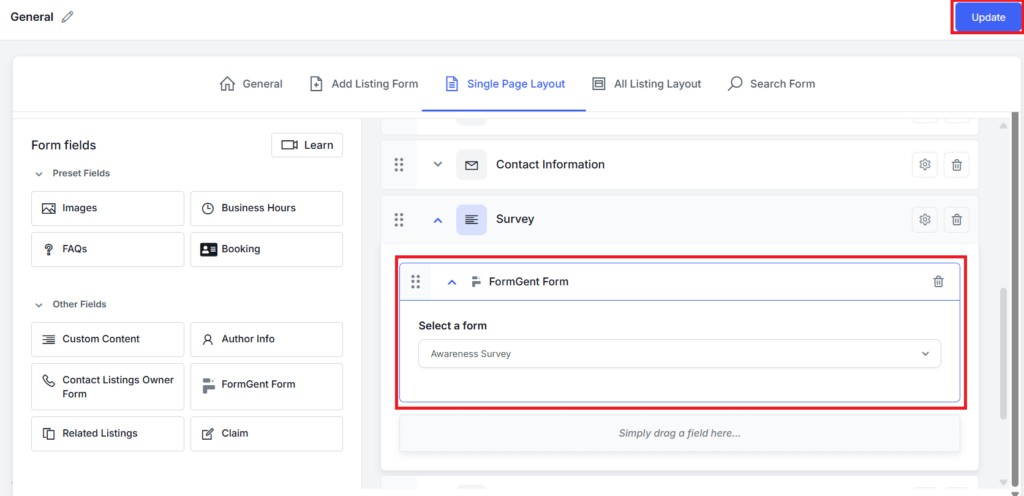
- Click Update to save your layout
Once saved:
- The form will appear inside your single listing page
- Visitors can now submit responses directly from the list
You are not limited to one form or use case. You can place as many forms as you need inside one listing in different sections depending on your directory type.
How It Works for Listing Owners #
Once you add a FormGent form to your listing layout, it becomes part of the live listing page. Listing owners can receive and manage responses directly from their dashboard.
Viewing the Form on Listing Page #
- Open any listing from the front end of your website
- Make sure the listing belongs to the directory where you added the FormGent form
- Make sure that the listing is published, not expired. Listing owners can see their expired listing but that will not be visible to end users.
Inside the Listing Content, the form will appear in the section where you placed it.
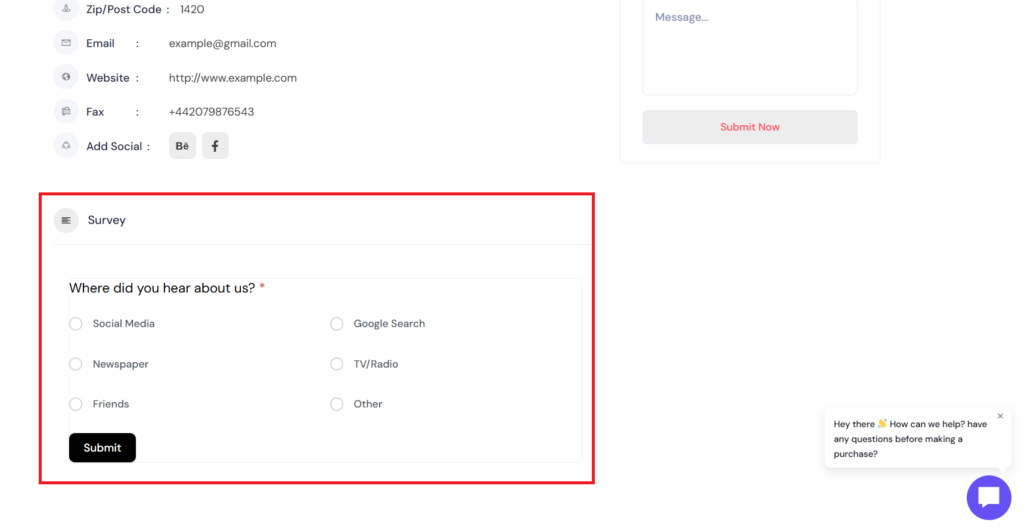
You can:
- Fill out the form as a visitor
- Submit a test response to check how it works
After submission:
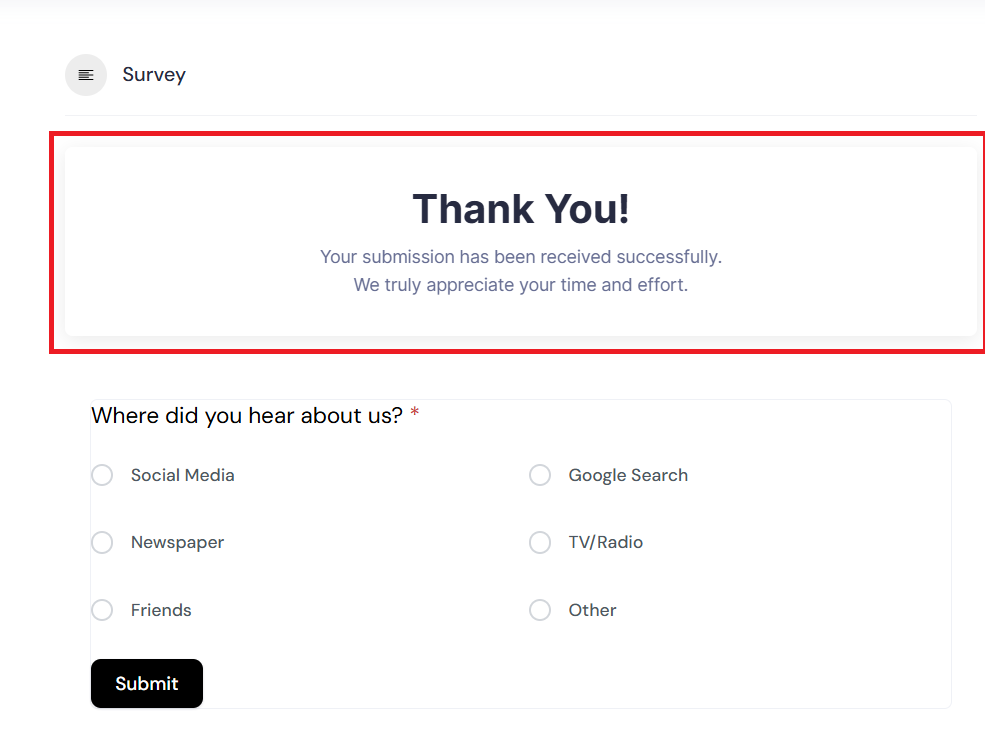
- A success message will appear on the screen
- This message comes from your FormGent confirmation settings
If you have configured:
- A custom message → it will be shown
- A redirect → users will be redirected to that page
Everything follows your FormGent form configuration.
Accessing Form Submissions (Listing Owner Dashboard) #
Listing owners can view and manage responses from their dashboard.
Step 1: Go to My Listings #
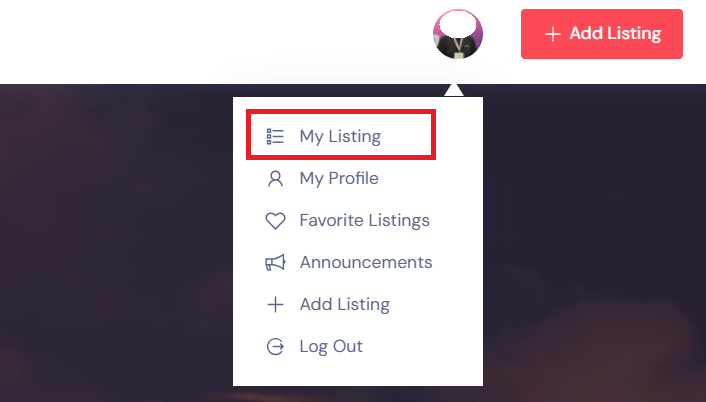
- Click on your Account Avatar
- Select My Listings
You will see a list of all your listings.
Step 2: Open Enquiries #
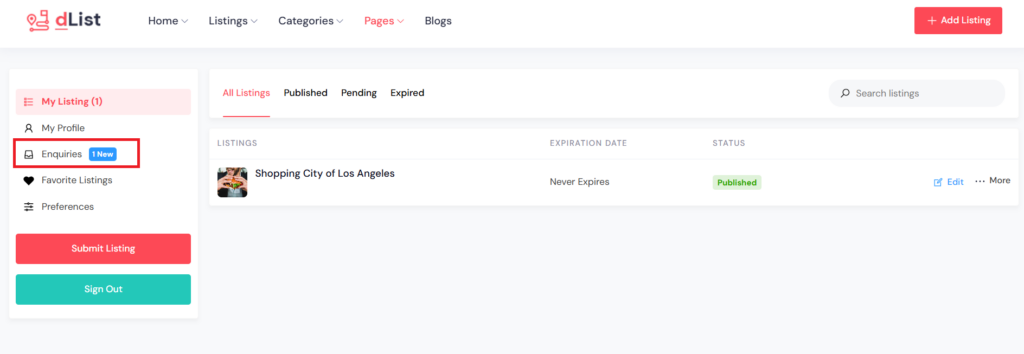
- On the left side of each listing, click Enquiries
- You will see a number in parentheses
This number shows how many responses are new or unread.
Step 3: Understand the Dashboard Overview #

Inside Enquiries, you will see a summary:
- Total enquiries
- New (unread) enquiries
- This week’s enquiries
- Resolved enquiries
This helps listing owners quickly understand activity and response status.
Step 4: View Individual Responses #
- Each submission is listed below
- Click View to open a response
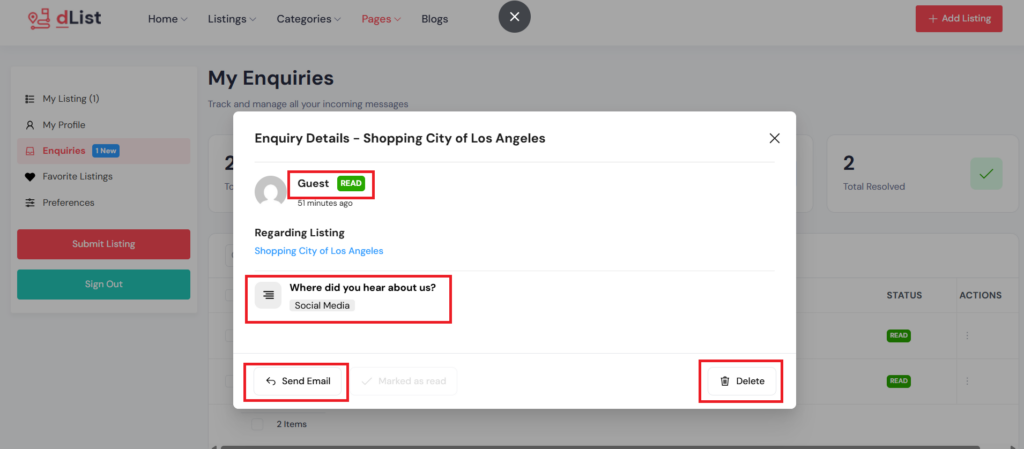
A popup window will appear showing:
- All submitted form data
- User inputs in structured format
Step 5: Manage Responses #
From the response view, listing owners can:
- Delete the submission
- Send an email to the respondent
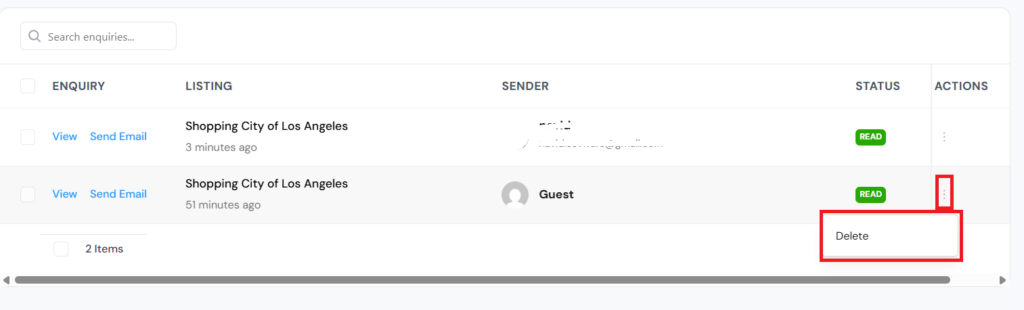
There is also a quick action menu on the right side where:
- You can directly delete a response
Step 6: Response Status #
- Once a response is viewed, it is marked as resolved
This helps keep the dashboard clean and makes it easy to track which enquiries still need attention.
This workflow ensures that:
- Visitors can easily submit structured information
- Listing owners can manage everything from one place
- No external tools or inbox management is required
It keeps communication organized and directly tied to each listing.
How Directory Owners Access Form Submissions #
In addition to listing owners, directory owners have full access to all form submissions from the FormGent backend. This gives a broader view of user activity and overall performance.
Access All Form Entries #
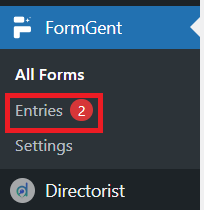
From your WordPress dashboard:
- Go to FormGent → Entries
Here you will find all form submissions (entries) across your website.
You can:
- View all responses in one place
- Filter entries by specific forms
- Manage and review submitted data
Best Way to View Specific Form Data #
For more focused insights:
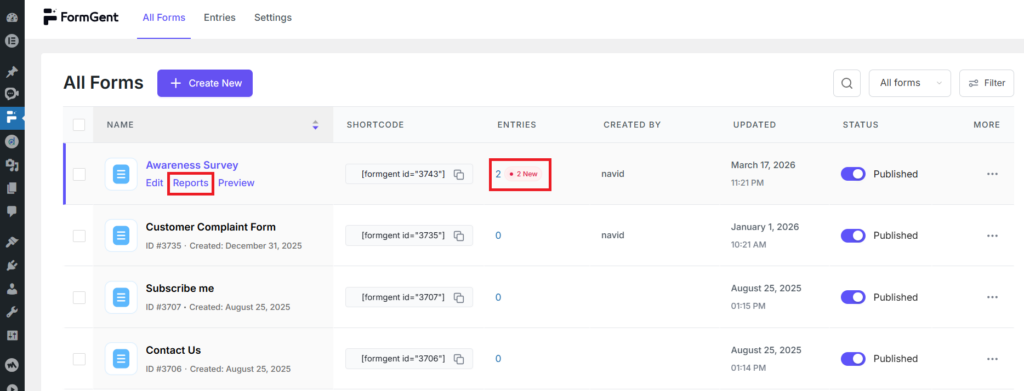
- Go to FormGent → All Forms
- Find the form you added to your listing
- Hover over the form name
- Click on Reports
This gives you a more structured and useful view of your data.
Understanding the Report Section #
Inside the report, you will see two tabs:
1. Summary #
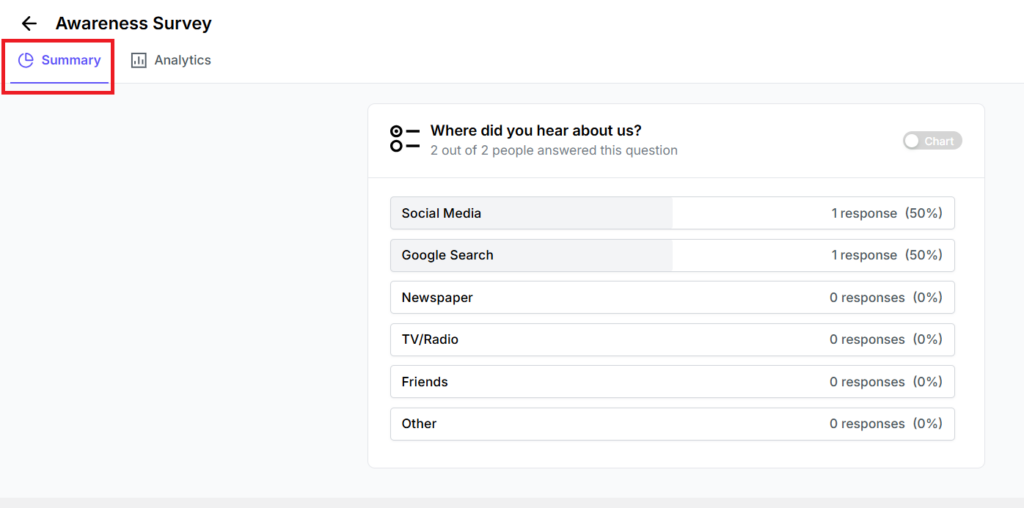
This section shows an overview of all responses.
- You can review answers to each question
- Click the Chart option beside a field to generate a visual representation
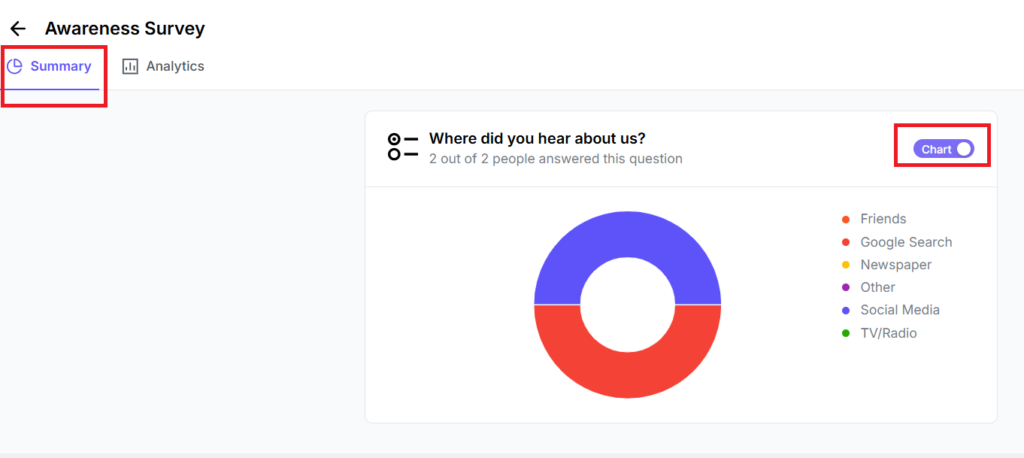
Note:
- Charts depend on the field type
- Structured inputs (like dropdowns, radio buttons, etc.) produce better visual summaries
This helps you quickly understand trends in user responses.
2. Analytics #
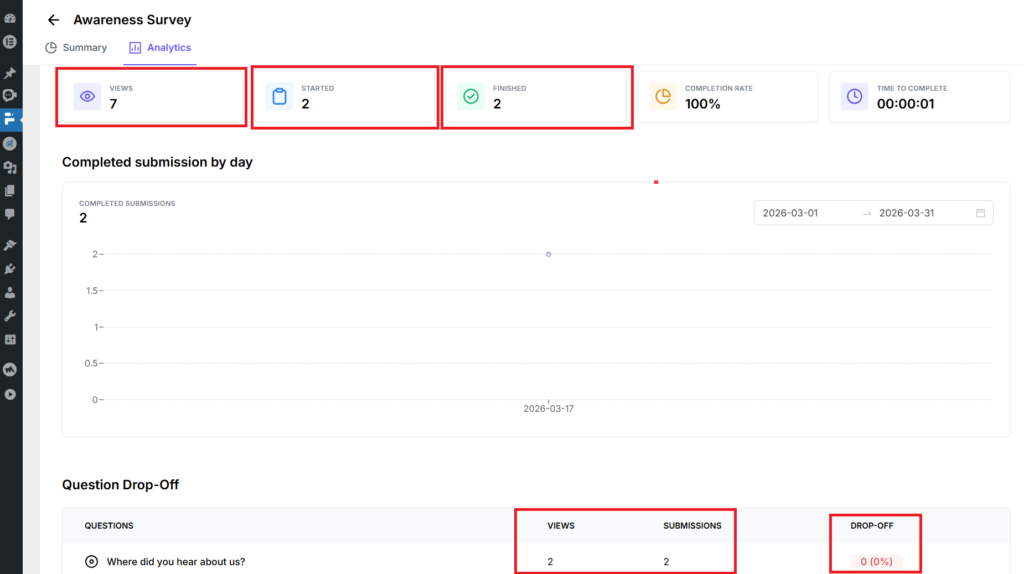
This section provides performance insights for your form:
- Total form views
- Number of starts
- Completed submissions
- Completion rate
- Average completion time
You will also see:
- Drop-off rates for each question
This shows where users are leaving the form, helping you identify friction points and improve form design.
Directory owners get a complete overview of all collected data, while listing owners manage their own enquiries.
This separation ensures:
- Better control over data
- Clear ownership of responses
- Actionable insights at both listing and platform level
For deeper understanding of form behavior and reporting, refer to the FormGent documentation.


