 Up to 35% Off!

Overview #
The integration of Directorist with Mailchimp offers a reliable and user-friendly solution, seamlessly connecting the two platforms. This software enables the effortless sending of bulk emails while maintaining list hygiene. The data tools provided by Mailchimp simplify tracking of subscriber interactions, allowing campaign monitoring including open and click rates. Notably, Mailchimp facilitates the quick creation and distribution of surveys or questionnaires to large groups. Additionally, it offers the capability to subscribe visitors to Mailchimp through the ‘signup and contact listing owner form.’
Prerequisites #
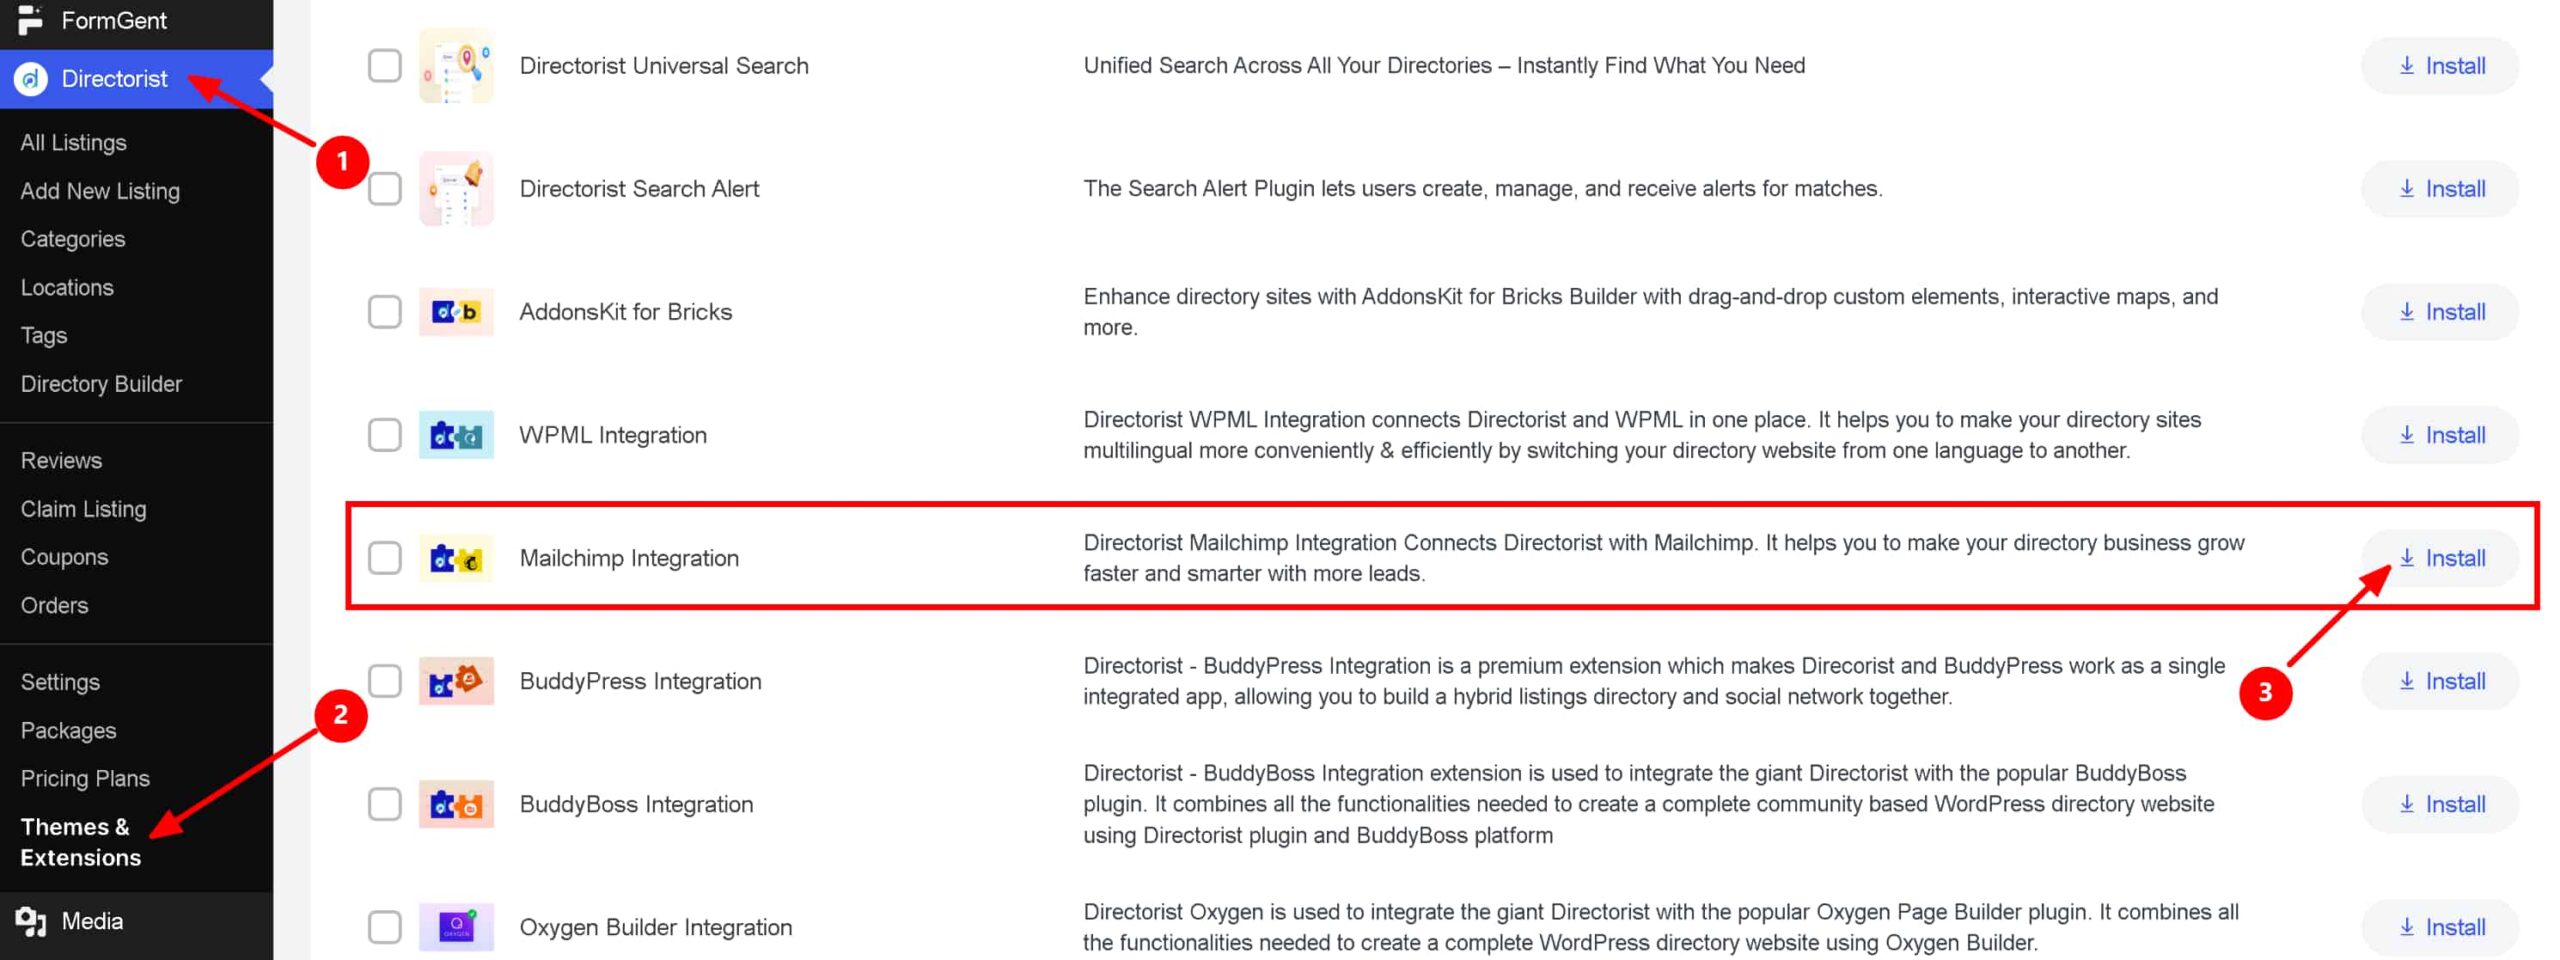
Firstly, Navigate to this Directorist > Themes & Extensions > Sign in And install “MailChimp Integration” and activate the plugin.
You need an existing Mailchimp account with at least one Audience (list) already created, since you’ll be connecting Directorist to a specific audience in Step 1.
Step 1 – Connect Your Mailchimp Account #
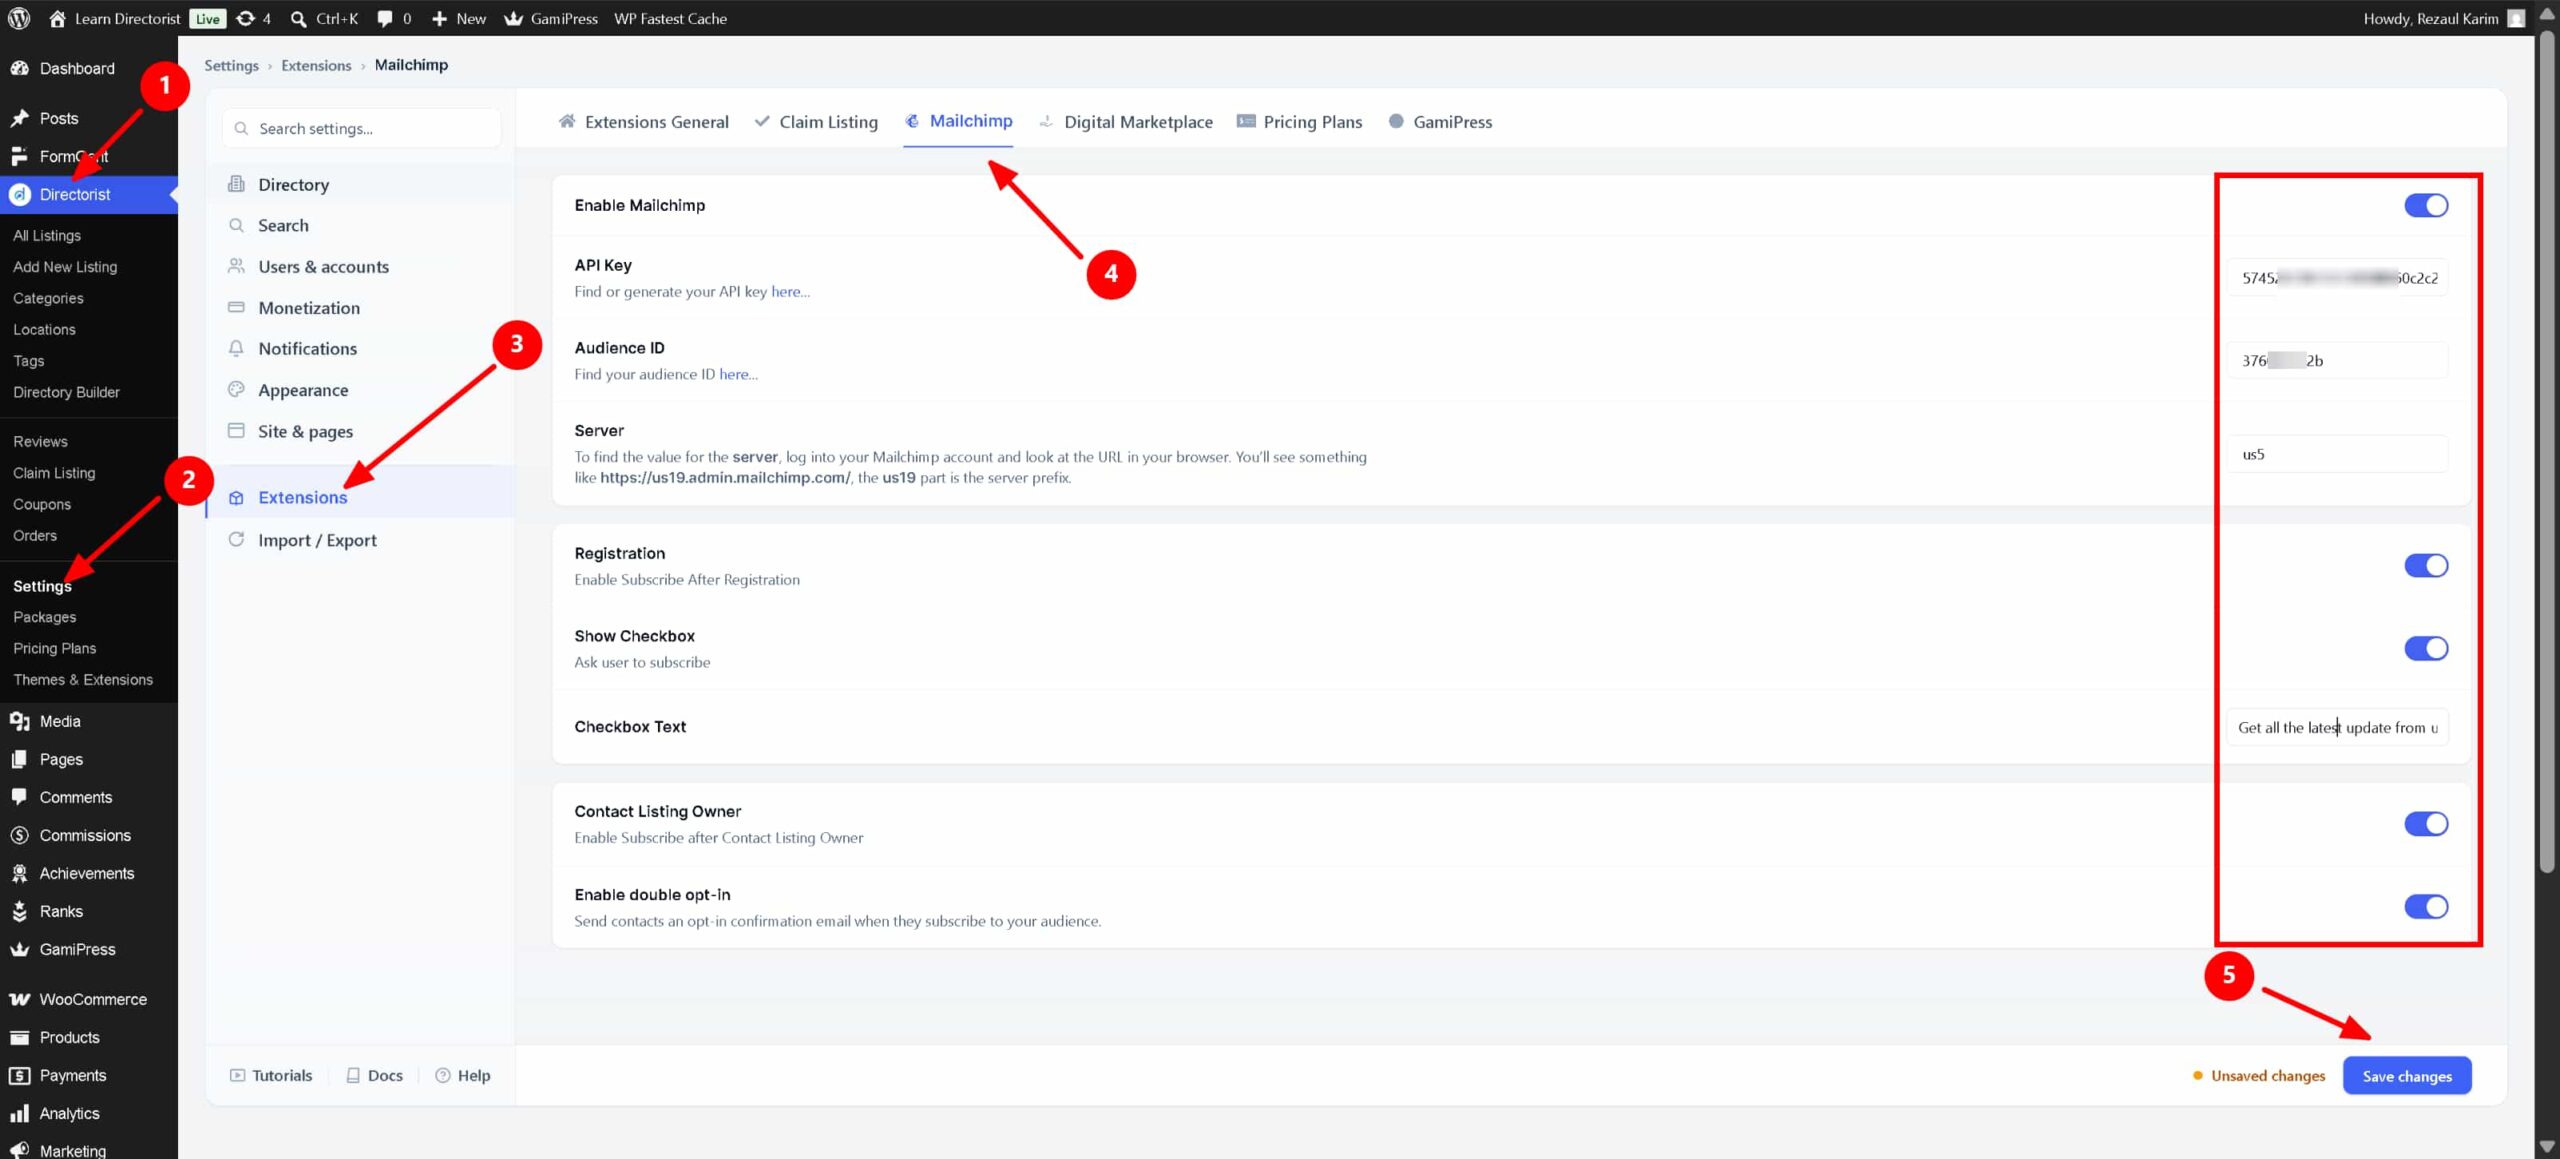
Path: WP Admin → Directorist → Directorist Settings → Extension Settings → Mailchimp
- Set Enable Mailchimp to Yes.
- Enter your API Key. You can find or generate this from your Mailchimp account under API keys. Collect your API Key from this link.
- Enter your Audience ID. You can find this in your Mailchimp audience settings. Collect your Audience ID from this link.
- Enter your Server. This is the short code in your Mailchimp admin URL, for example the “us19” in
https://us19.admin.mailchimp.com/. - Click Save.
Step 2 – Subscribe Users After Registration (Optional) #
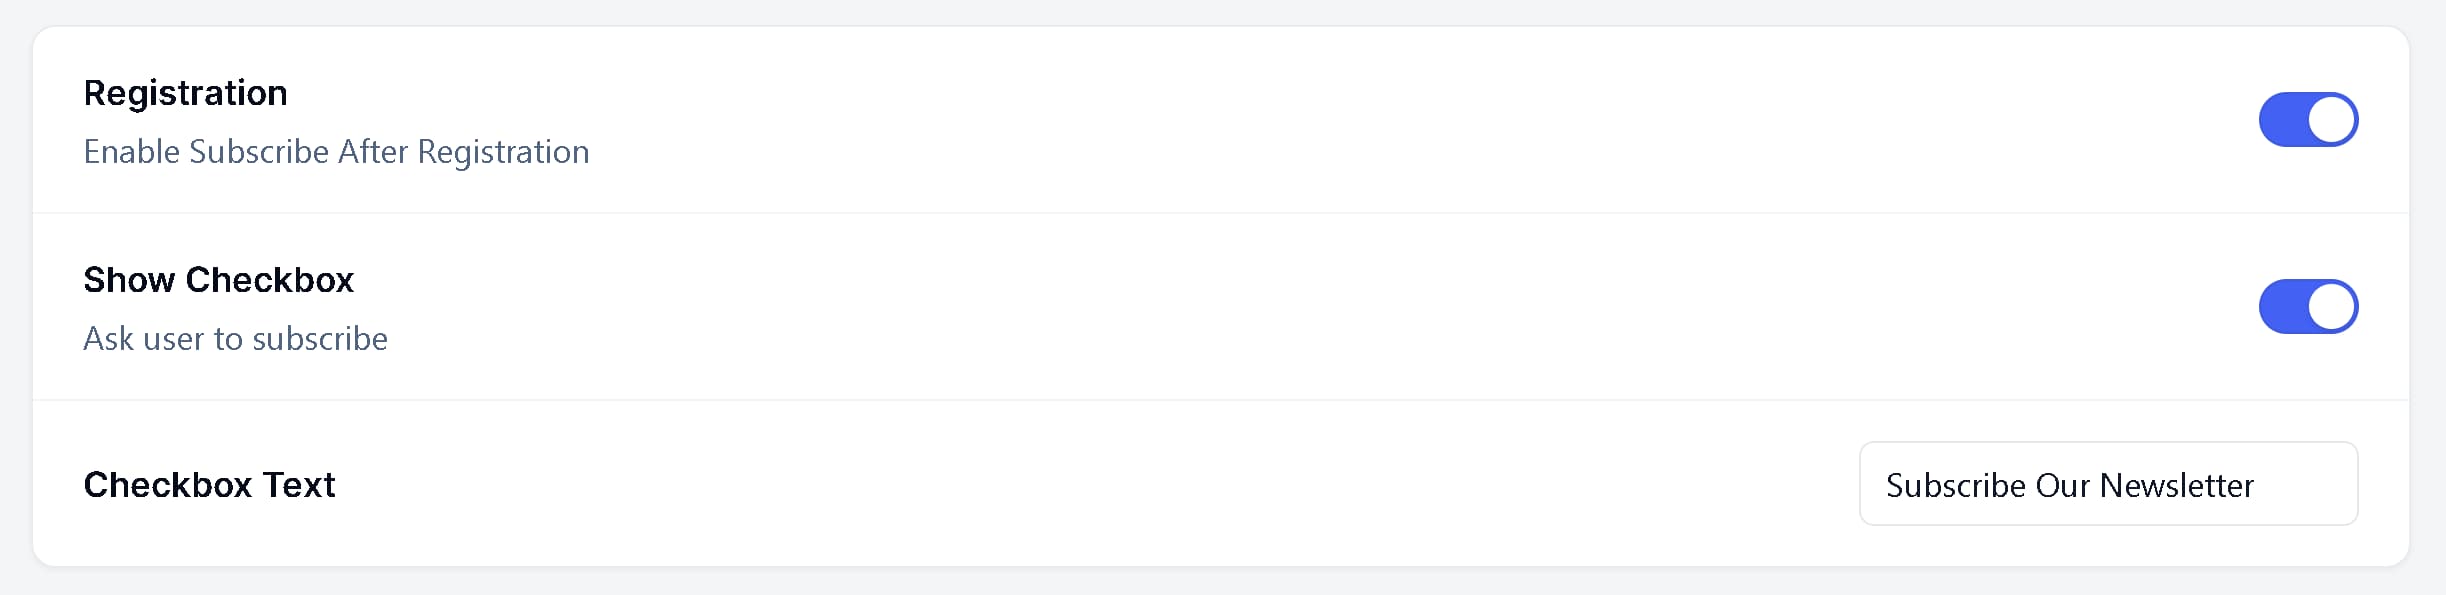
Still on the Mailchimp tab, under the Registration section:
- Set Registration to Yes to turn on subscribing new users to your Mailchimp audience when they register.
- (Optional) Set Show Checkbox to Yes if you want to ask the user for consent instead of subscribing everyone automatically. This adds a checkbox above the submit button on the registration form.
- If Show Checkbox is on, set the Checkbox Text shown next to it. This defaults to “Subscribe to our newsletter.”
- Click Save.
If Show Checkbox is off, every new registrant is subscribed automatically with no prompt. If it’s on, the checkbox appears pre-checked, so a user is subscribed unless they uncheck it themselves before submitting. Either way, users added through registration are subscribed immediately, without a Mailchimp double opt-in confirmation email.
Step 3 – Subscribe Contacts from the “Contact Owner” Form (Optional) #
Still on the Mailchimp tab, under the Contact Listing Owner section:
- Set Contact Listing Owner to Yes to subscribe anyone who submits a listing’s contact form to your Mailchimp audience.
- (Optional) Set Enable double opt-in to Yes if you want Mailchimp to send the contact a confirmation email before they’re fully subscribed, rather than subscribing them immediately.
- Click Save.

With this on, every visitor who fills out a listing’s contact form has their name and email added to your Mailchimp audience, using whichever opt-in behavior you set in step 2.
Collect Email From Mailchimp #
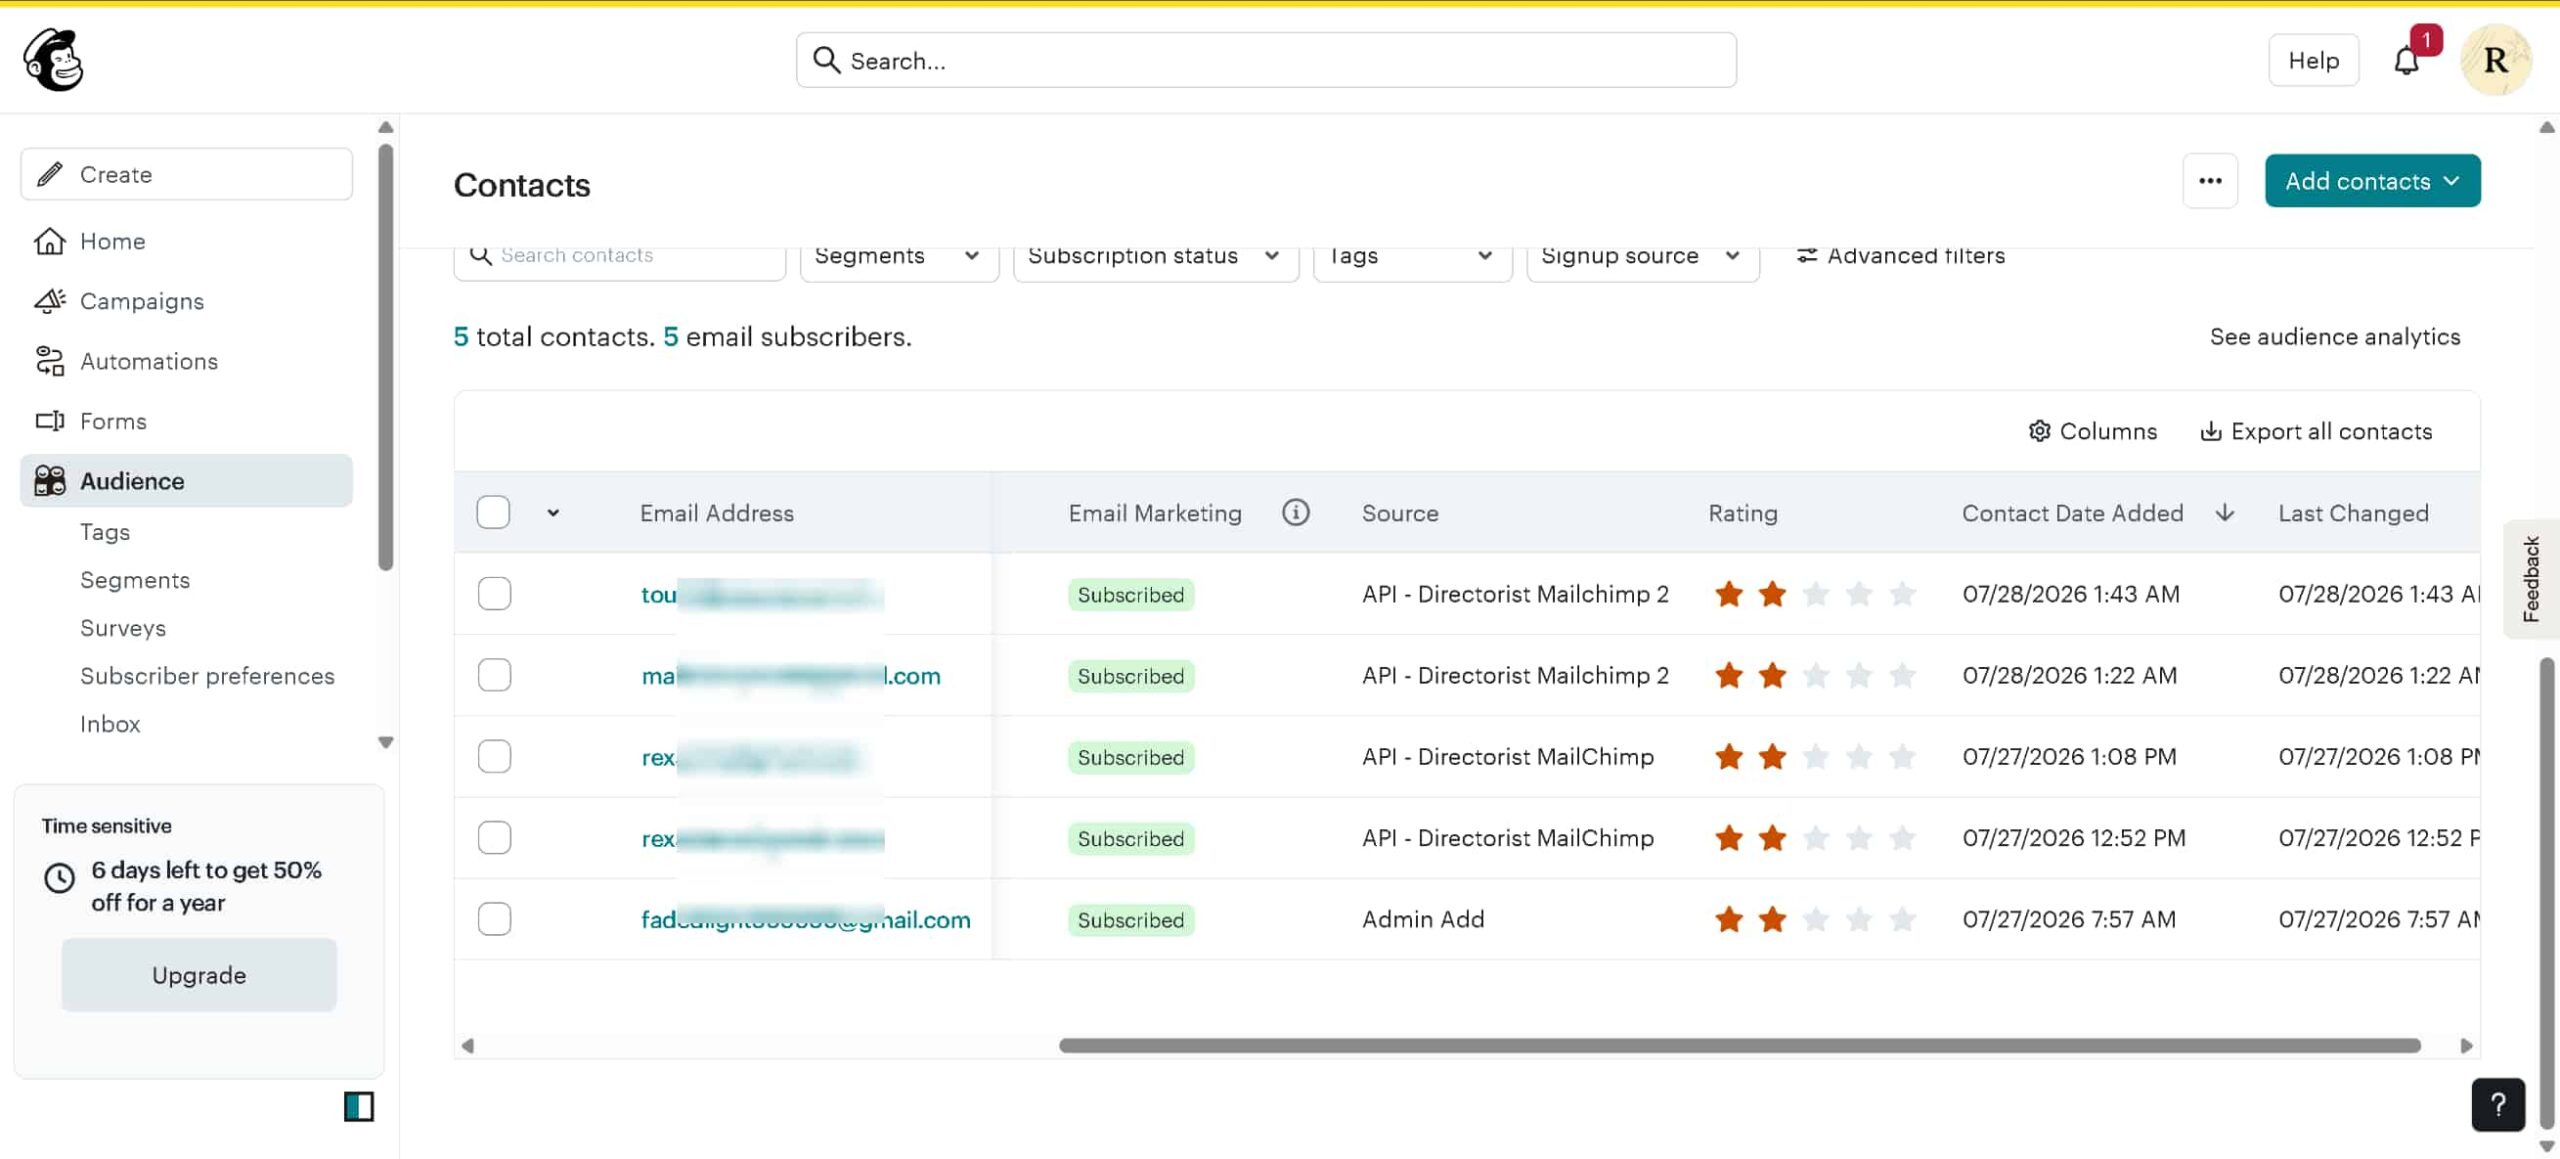
Once all the step up done, the integration will help you to collect emails when a listing owner signs up. You can check this from your mailchimp dashboard.
Avoiding Duplicate Subscribers #
Before adding anyone to your audience, either from registration or from the contact form, the extension first checks whether that email address is already a member of your Mailchimp audience. If it is, nothing changes for that person; if it isn’t, they’re added as a new member. This keeps repeat registrations or repeat contact-form submissions from creating duplicate or conflicting entries in Mailchimp.


